Wiki Home Computers page Add consoles with smart plug
Add consoles with smart plug
2023-12-13
console, smart, plug, power, sonoff
- If you want to control the device's power directly, you can use the Sonoff smart plug.
- We recommend using the Sonoff smart plug only to control the power of the TV where the console is connected. and do not use the smart plug directly to control the power of the consoles it won’t shut it down properly.
(How to connect the smart device with the console: wire->Sonoff->wire->socket->console NOT socket → wire -> Sonoff -> wire -> console. So you don't need to cut off your console wire. normally install the smart device under the pc desktop.)
Recommended hardware.
- Sonoff MiniR2 - Current in sale and supported. MiniR2 Setup here (Figure 1 right hardware)
- Sonoff BasicR2 - Currently in sale and supported. BasicR2 setup here (Figure 1 left hardware)
Old hardware.
- Sonoff Basic R3-Tested over wifi connection and worked. (out of stock) BasicR3 setup here
- Sonoff RFR3-Tested over a LAN connection and worked. (out of stock)
Figure 1
- Once the Sonoff device is connected with iCafeCloud server, it will auto scan and automatically create devices in CP as SONOFF_1000c81a75.
Figure 2
- You can customize the name of the SONOFF device for the "Name" column. However, the default name of the device will be displayed in the "Device" column. This ensures clarity in identifying the device while allowing users to assign a personalized name for easier management.(Figure 3)
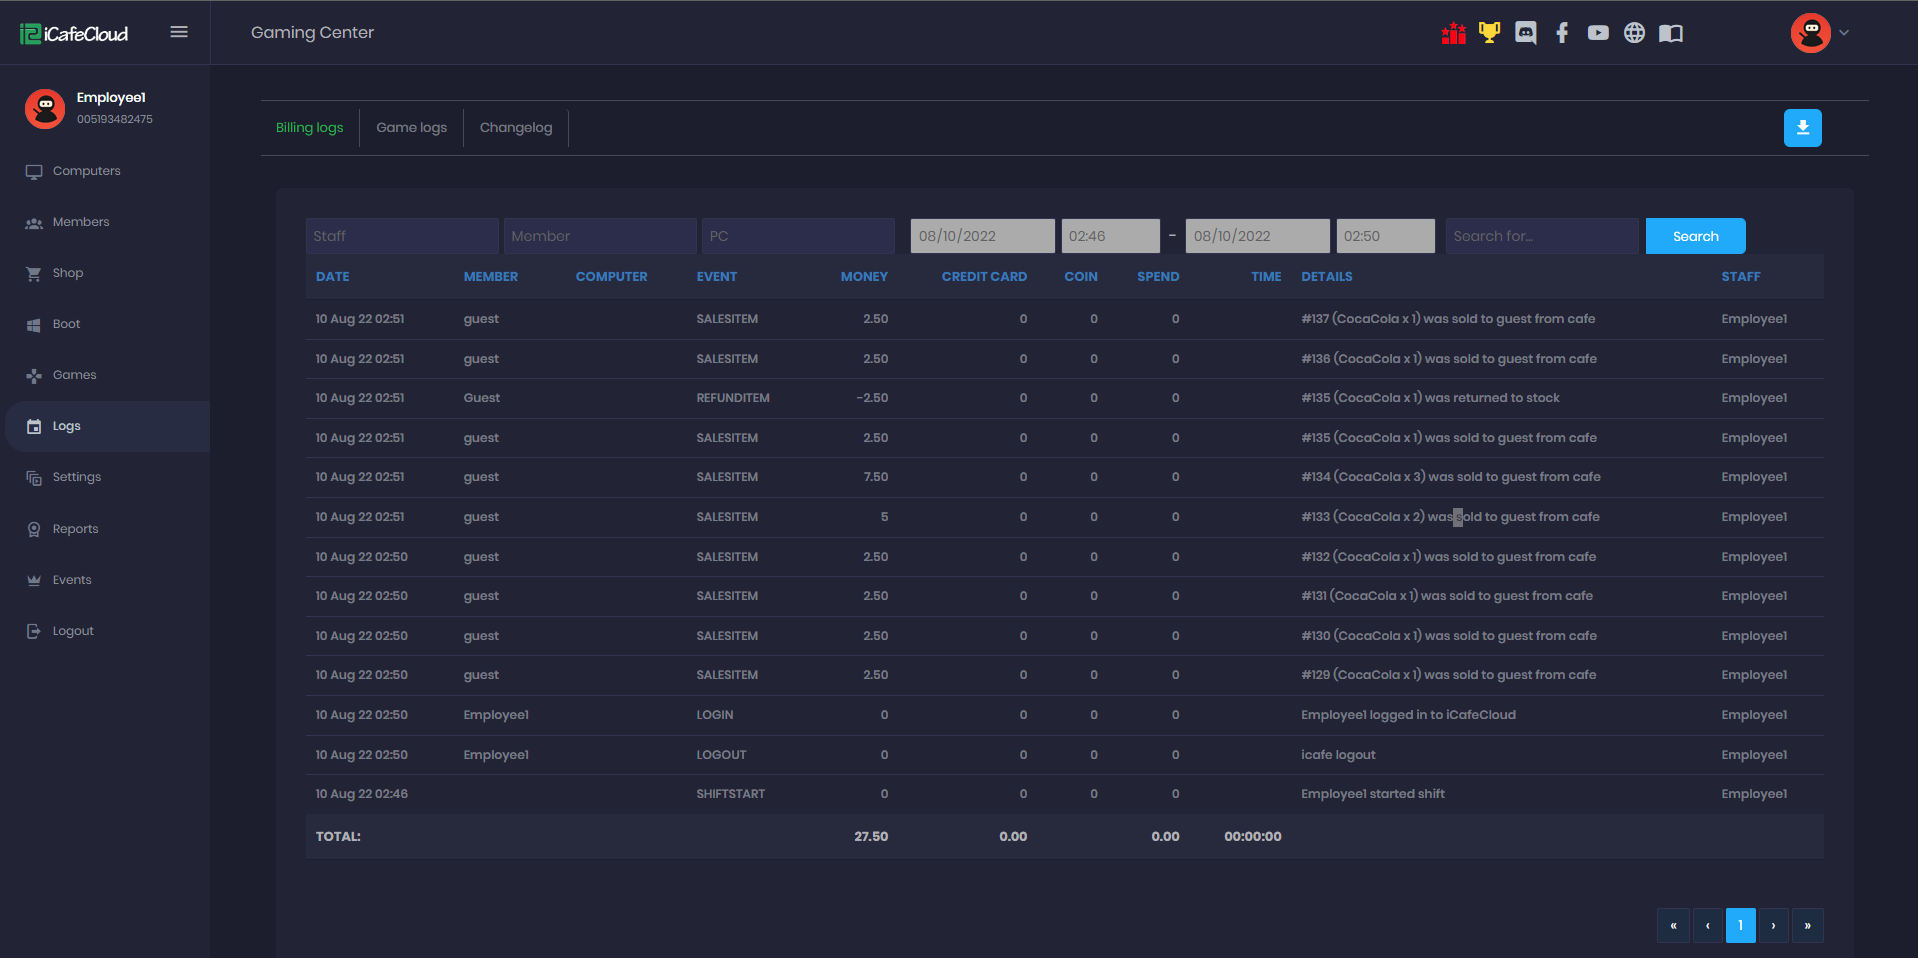
Figure 3
- When a session for a smart device starts, the device will power on automatically. When a user checks out, the device will turn off.(Figure 4)
Figure 4
- You can also manually control the power of Sonoff devices in CP (Figure 5).
Figure 5
- For actions involving SONOFF devices, you can refer to the Game logs for tracking and monitoring ( Figure 6)
Figure 6