2024-04-23
add, license, pool
The following explains how to add a license to an existing license pool, how the game licensing process works, and how licenses are locked or released based on their usage.
- Game pool licenses are categorized according to the game type (Figure 1)
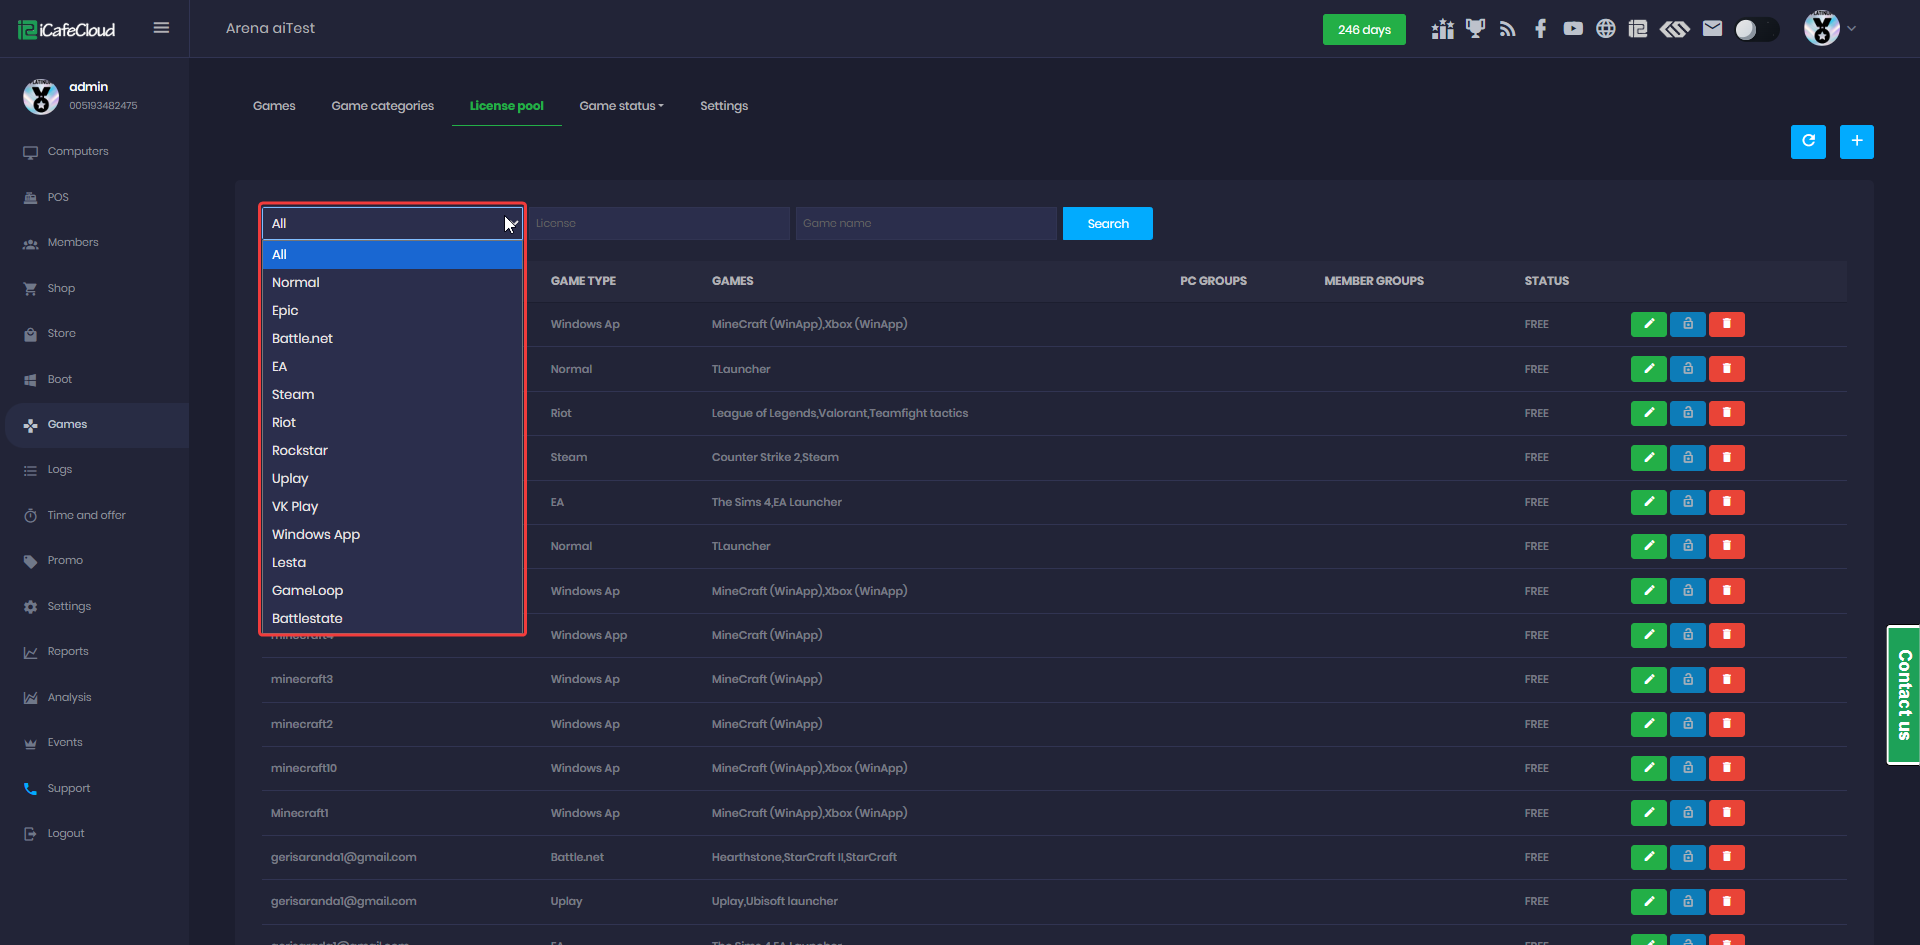
Figure 1
- Within the license pool, you can assign one license per account for each game type, and that license can be shared across multiple games of the same type.
- If you want to use the same account across multiple games within the same launcher, simply add the launcher directly as the Game Pool.
- The account will then be used for all games associated with that launcher, and the list of available games will be displayed in the tooltip. (Figure 2)
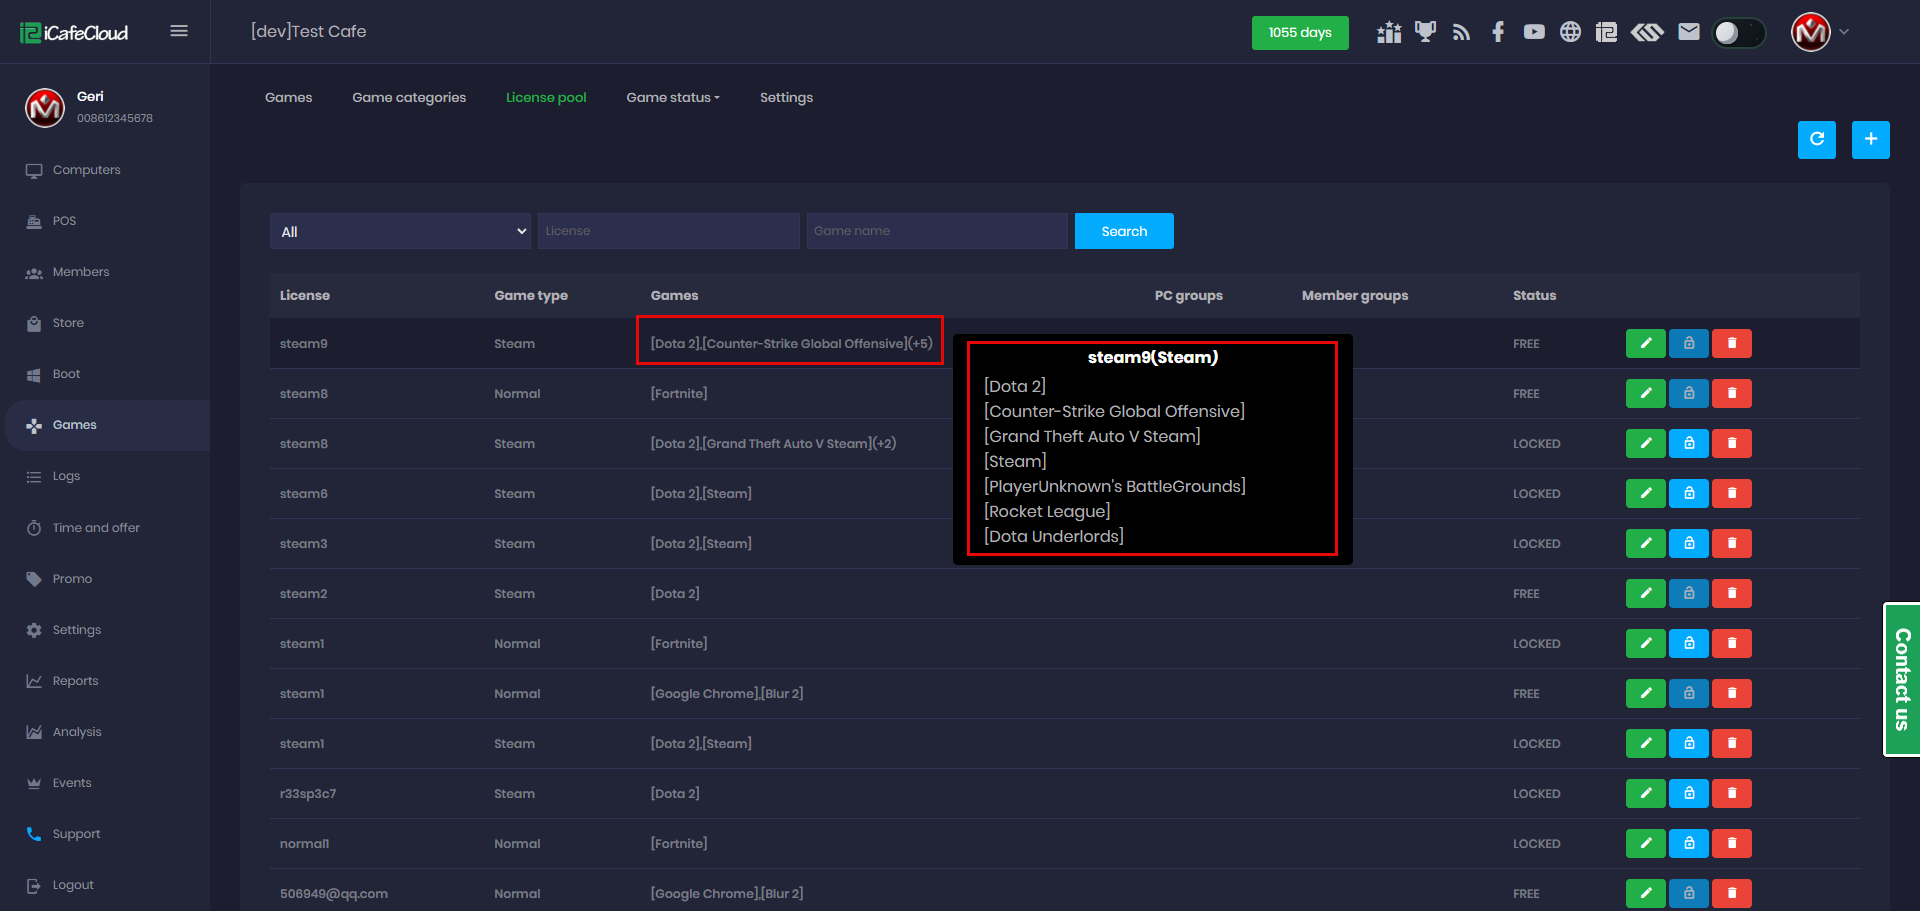
Figure 2
- If the same license is added again, the system will display an error message indicating that the account is duplicated, prompting you to verify and correct the duplicate entry (Figure 3).
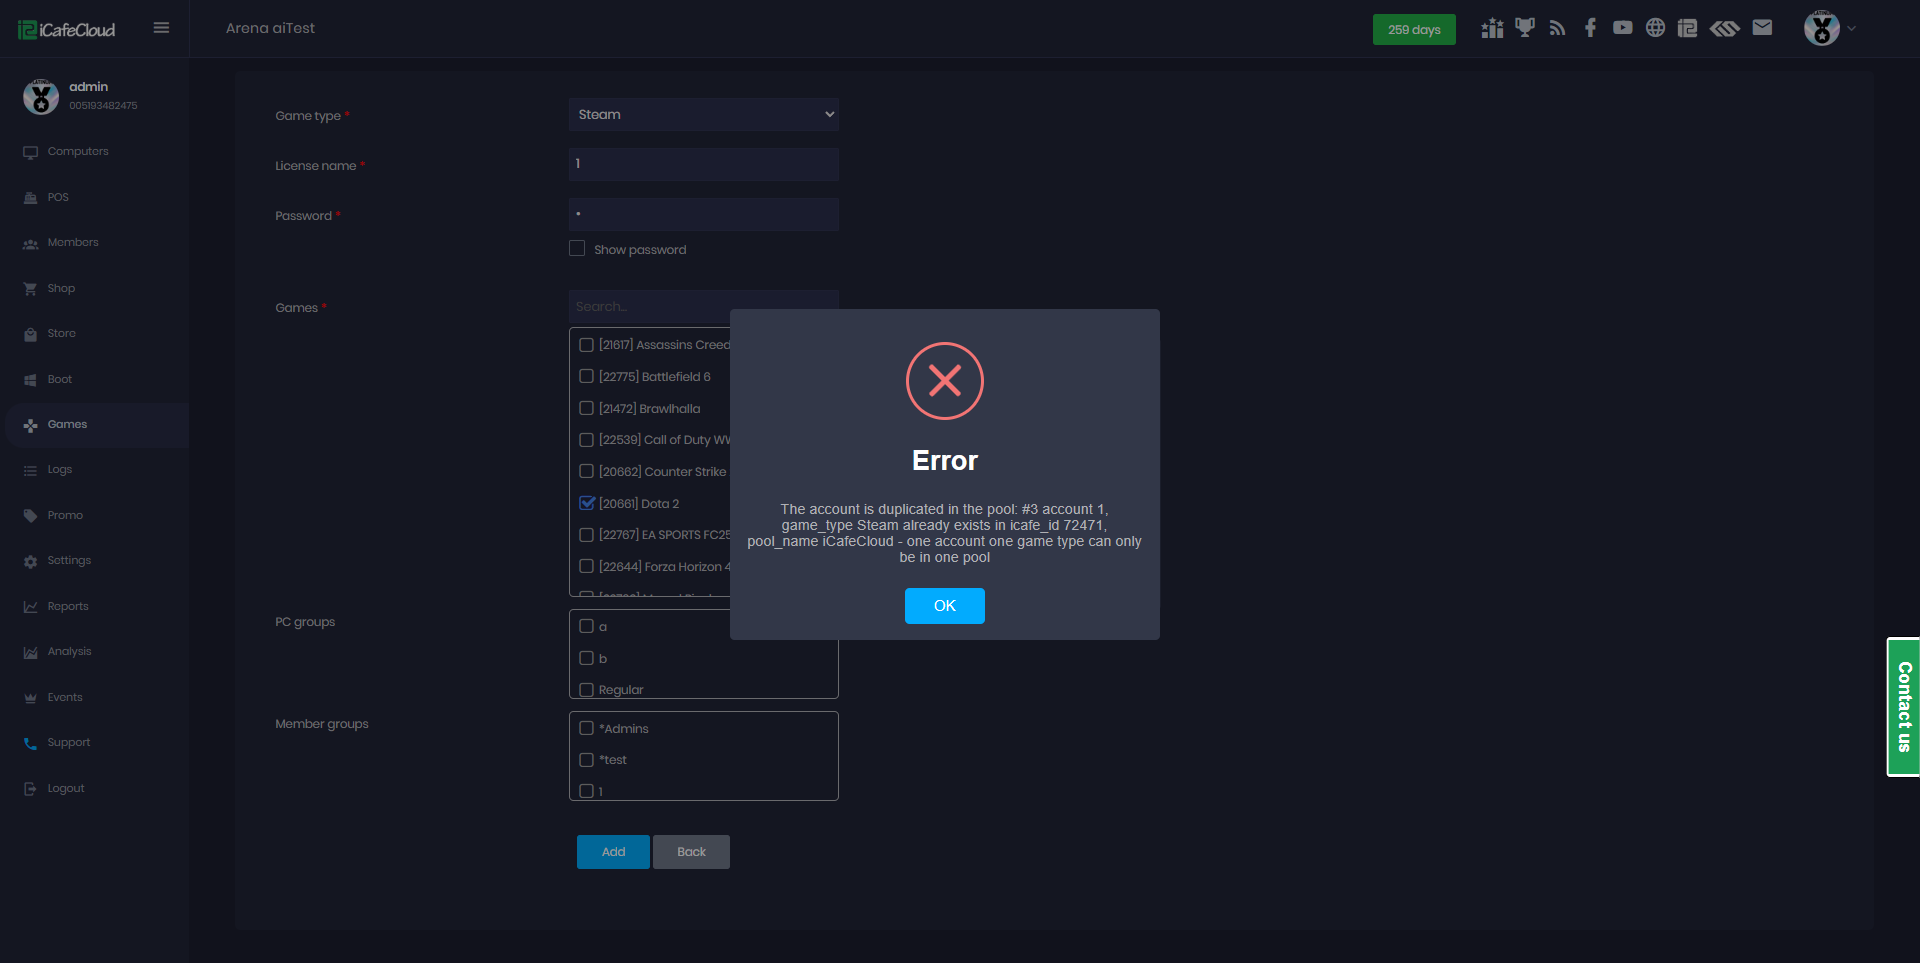
Figure 3
- For steam accounts you should also disable Steam guard.
- If you have multiple accounts, they will be sorted by the time they created (Figure 4)
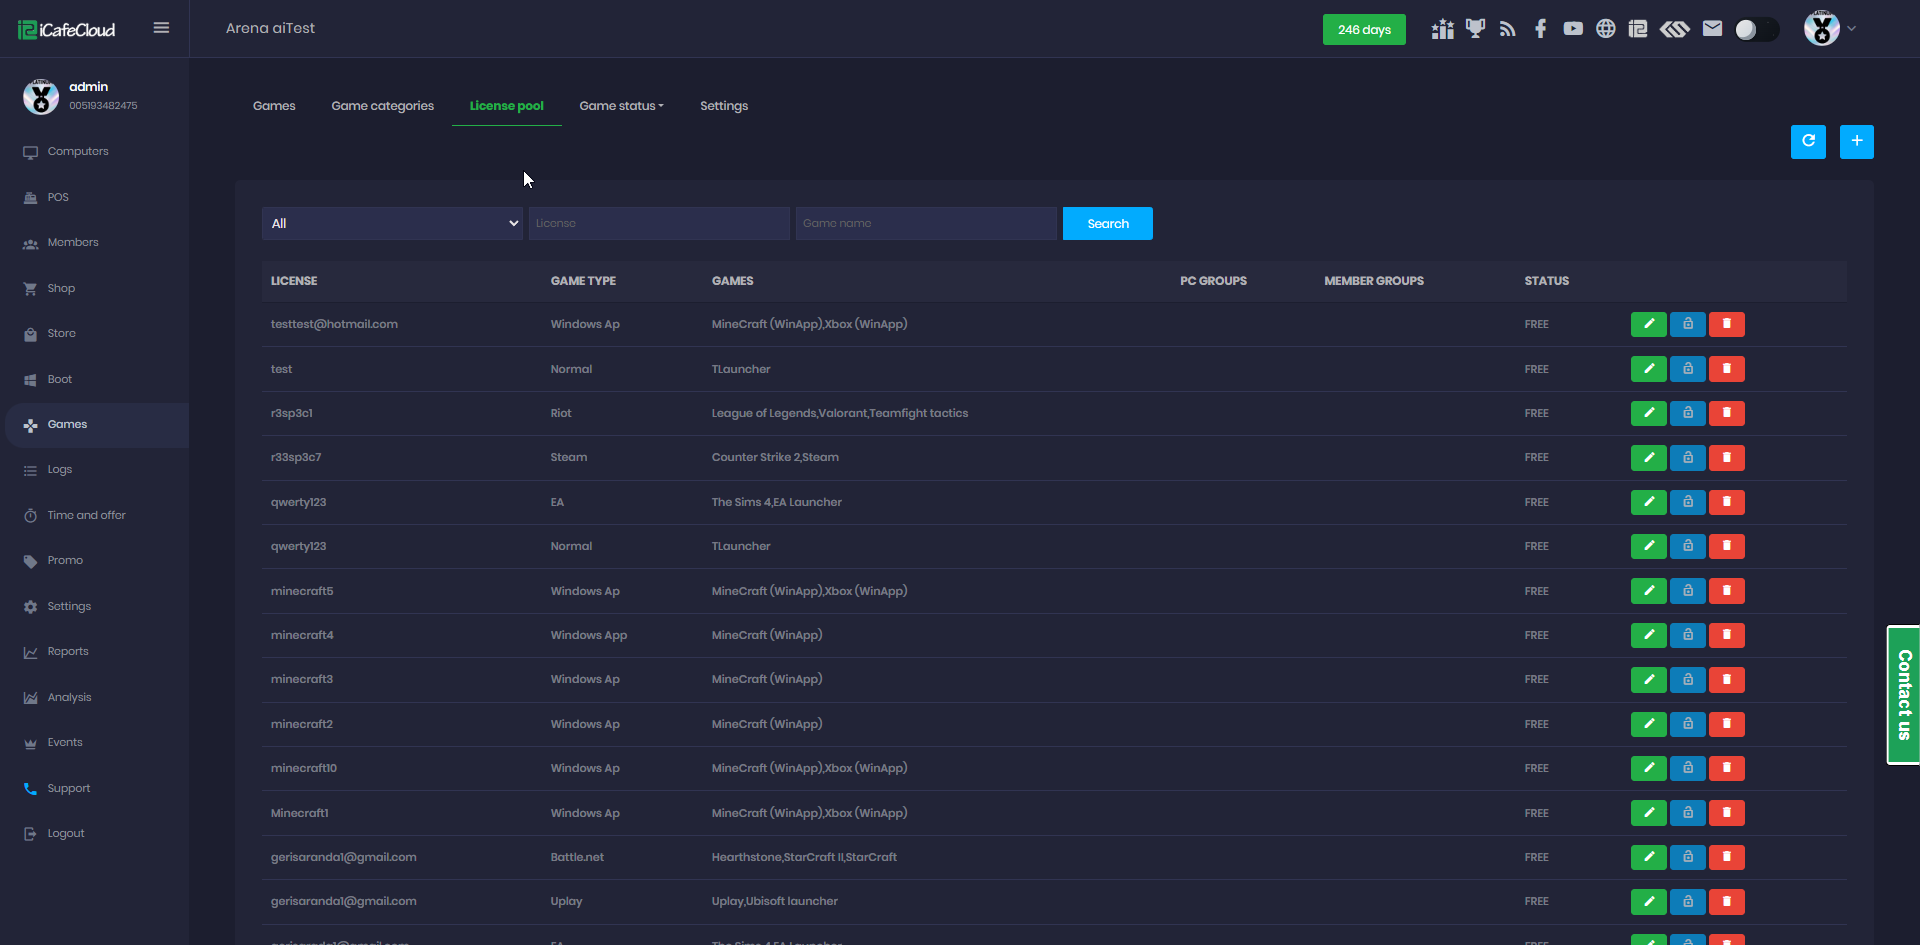
Figure 4
- You can search by license or game name, then click Search. (Figure 5)
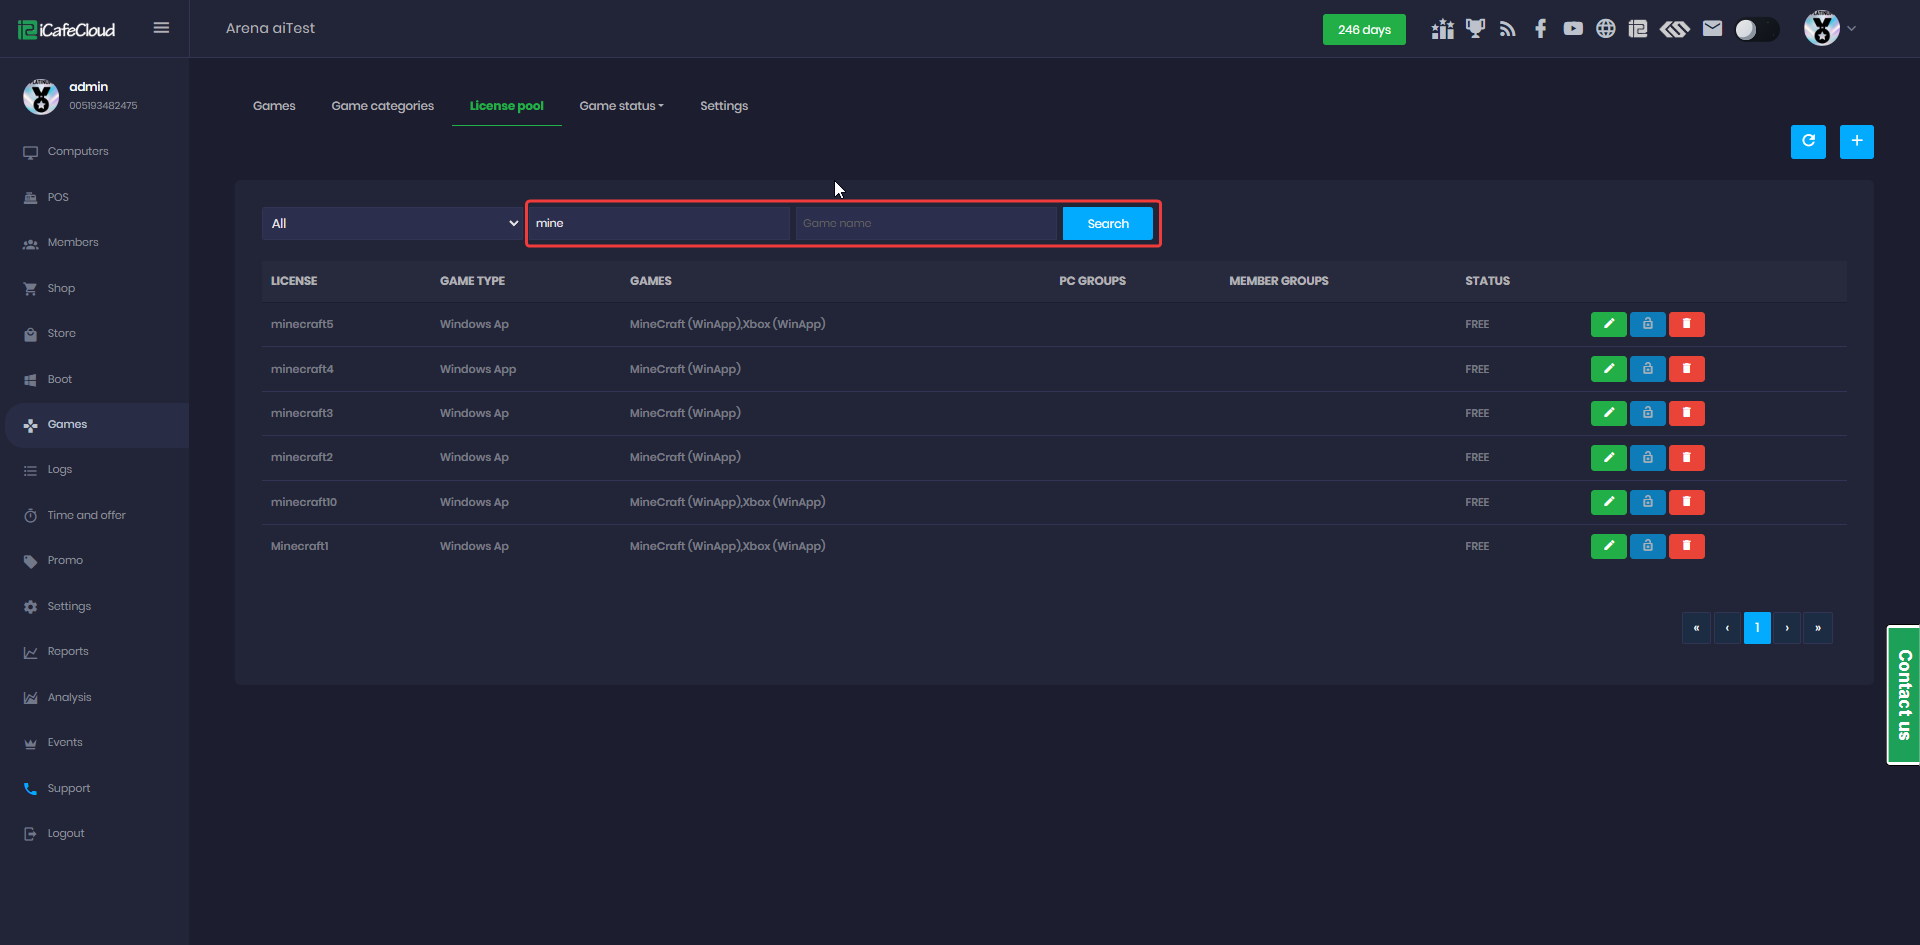
Figure 5
- If a license is currently in use, it will be displayed as Locked in the license pool status, indicating that the license is already assigned and cannot be used by another account at the same time. (Figure 6)

Figure 6
- The license is released back to the pool after the PC is checked out, changing its status from “Locked” to “Free”.
- There is an "Unlock" button that frees up the license even if the user is currently playing. This button is only active if the license status is "locked." (Figure 7)
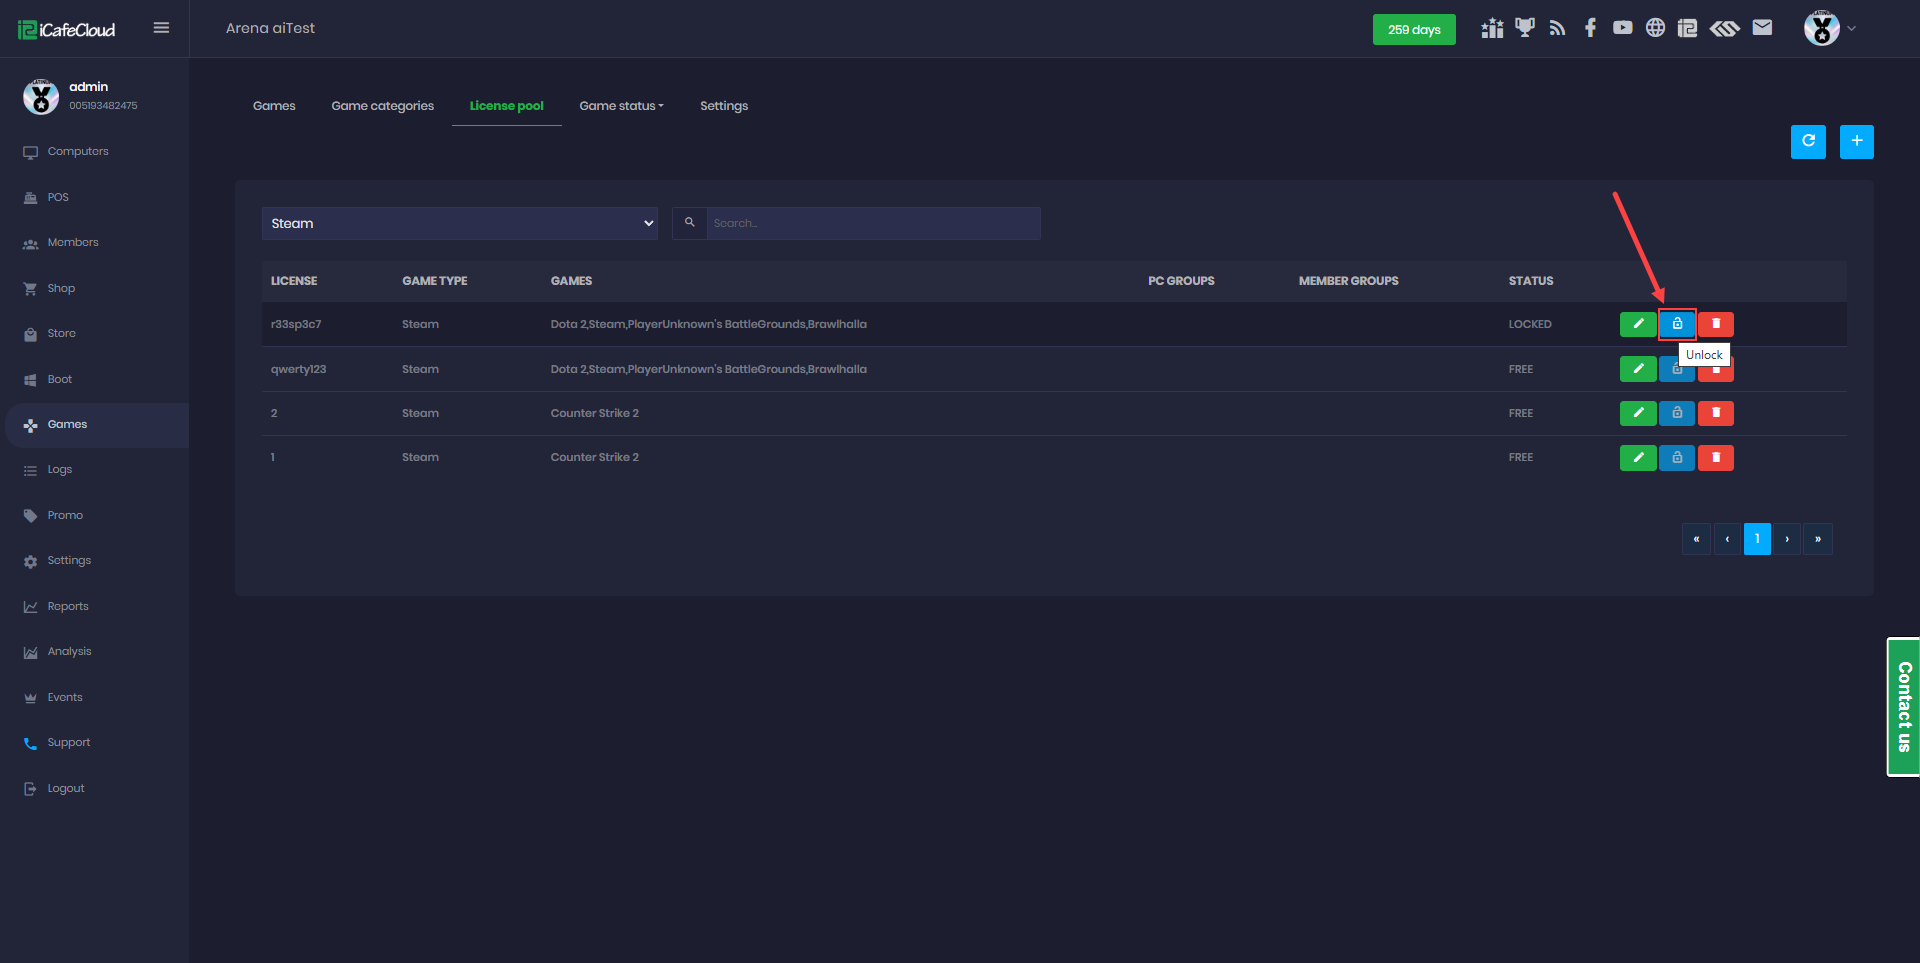
Figure 7
- All games that have an associated license in the license pool will be listed under the “Club Games” category (or under the custom name you assign to this category). These games will display the Free to Play button, allowing users to launch them without additional login steps.(Figure 8).
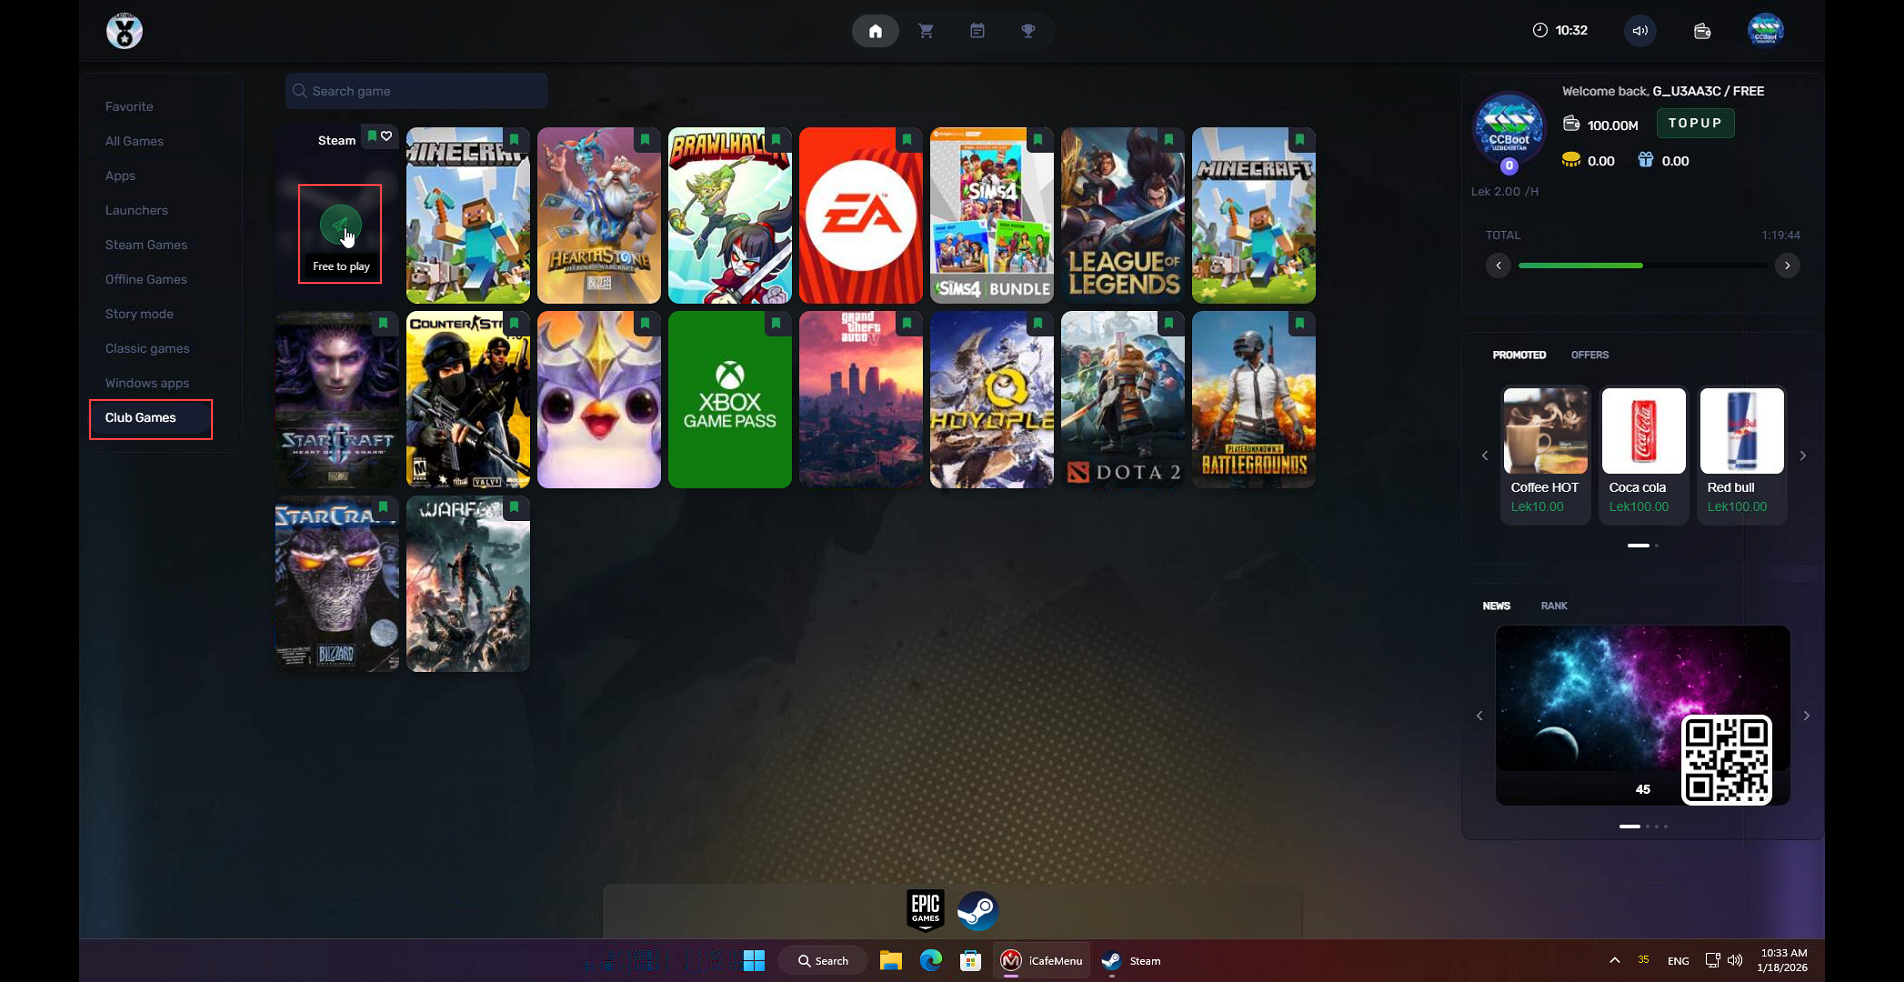
Figure 8
- If a client computer closes the game or experiences a crash, the game launcher will close after 5 minutes. If the client tries to launch the license again during those 5 minutes, they'll be told the game is still running and the launcher will close in time. Now the client can run the game again.
- You can enable or disable the automatic game process checking from the game settings. Disabling this will prevent the system from automatically checking for game closure after 5 minutes.(Figure 9)
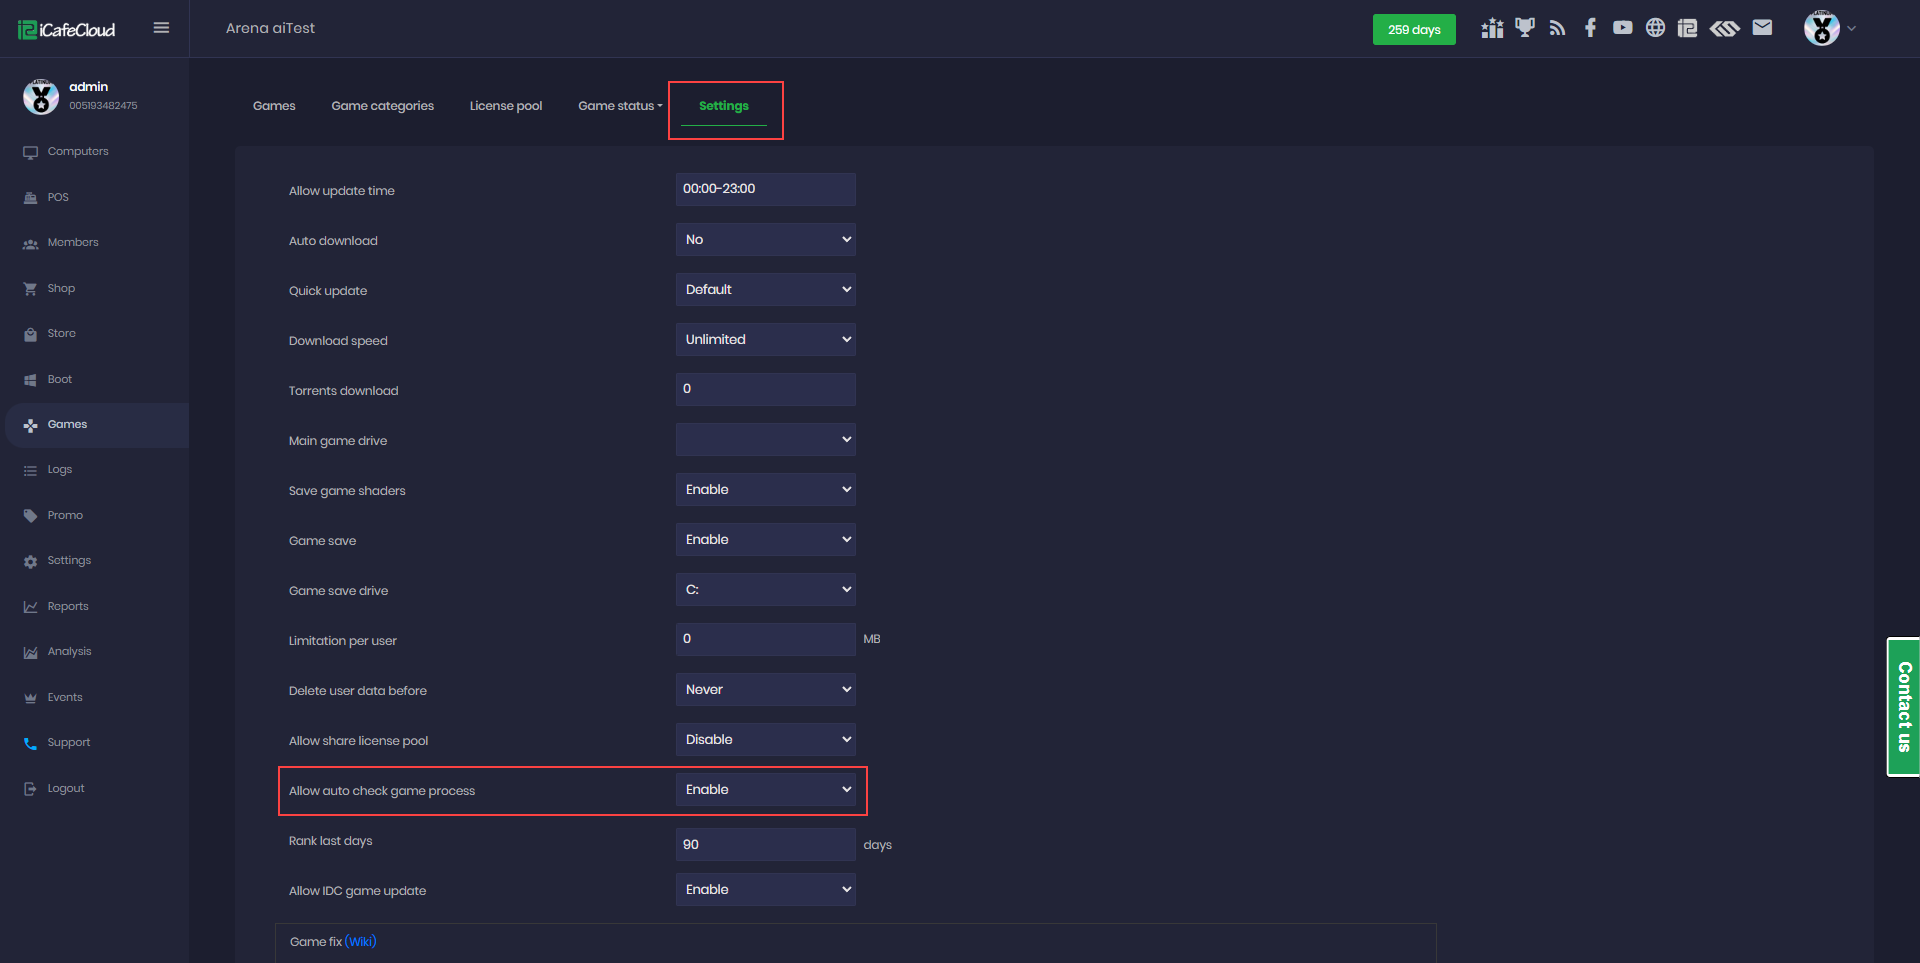
Figure 9
- When a customer uses a license from the game pool, it will be logged in the billing records with events such as “LicenseRequest,” “LicenseReleased,” and “LicenseUnlock.” (Figure 10)
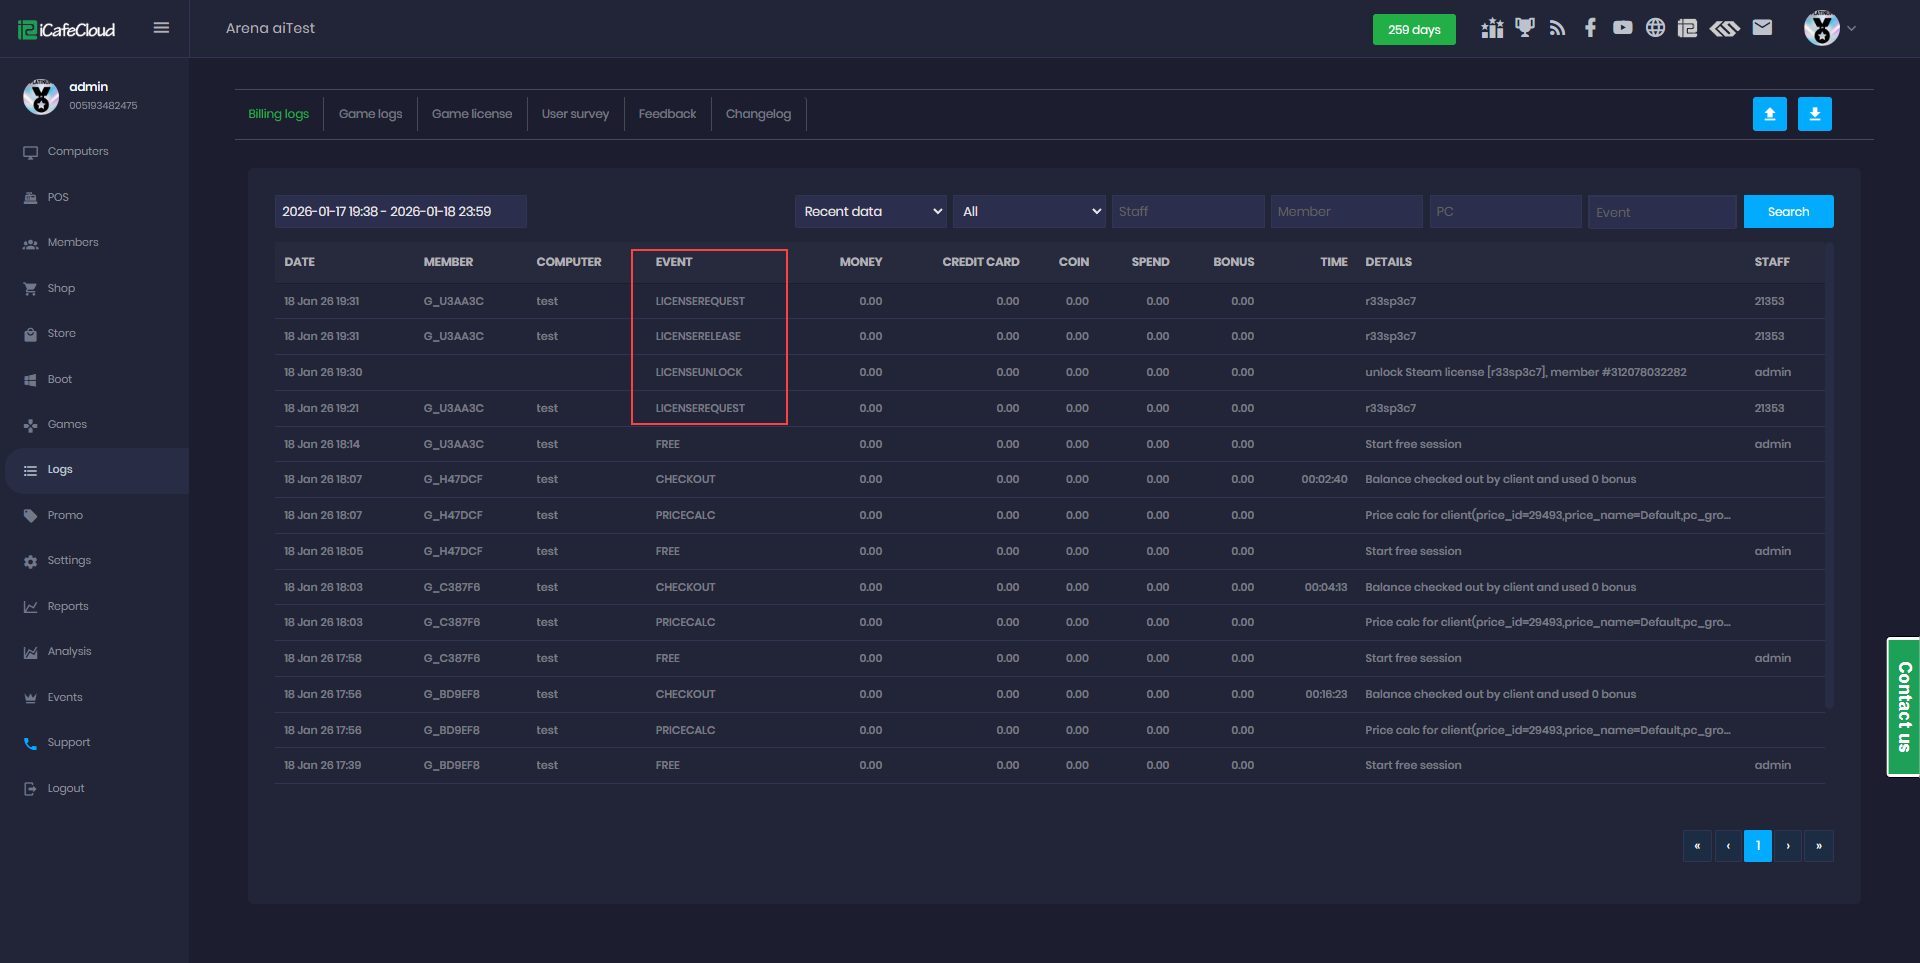
Figure 10