Wiki Home Computers page Add session
Add session
2024-12-02
add, additional, session, postpaid
The following explains how to add additional sessions to an already active postpaid, prepaid and member sessions.
- This functionality enables the main session to cover the payment for all added sessions.
- For example, if you start a postpaid session on PC01, you can click on it and select the Add Session button. This will open a list of PCs where you can select PC02. You can repeat the same process for PC03 and so on.
- It is applicable for postpaid, prepaid and member sessions.
- For prepaid sessions it is recommended to disable “Allow Prepaid Session Checkout” functionality.
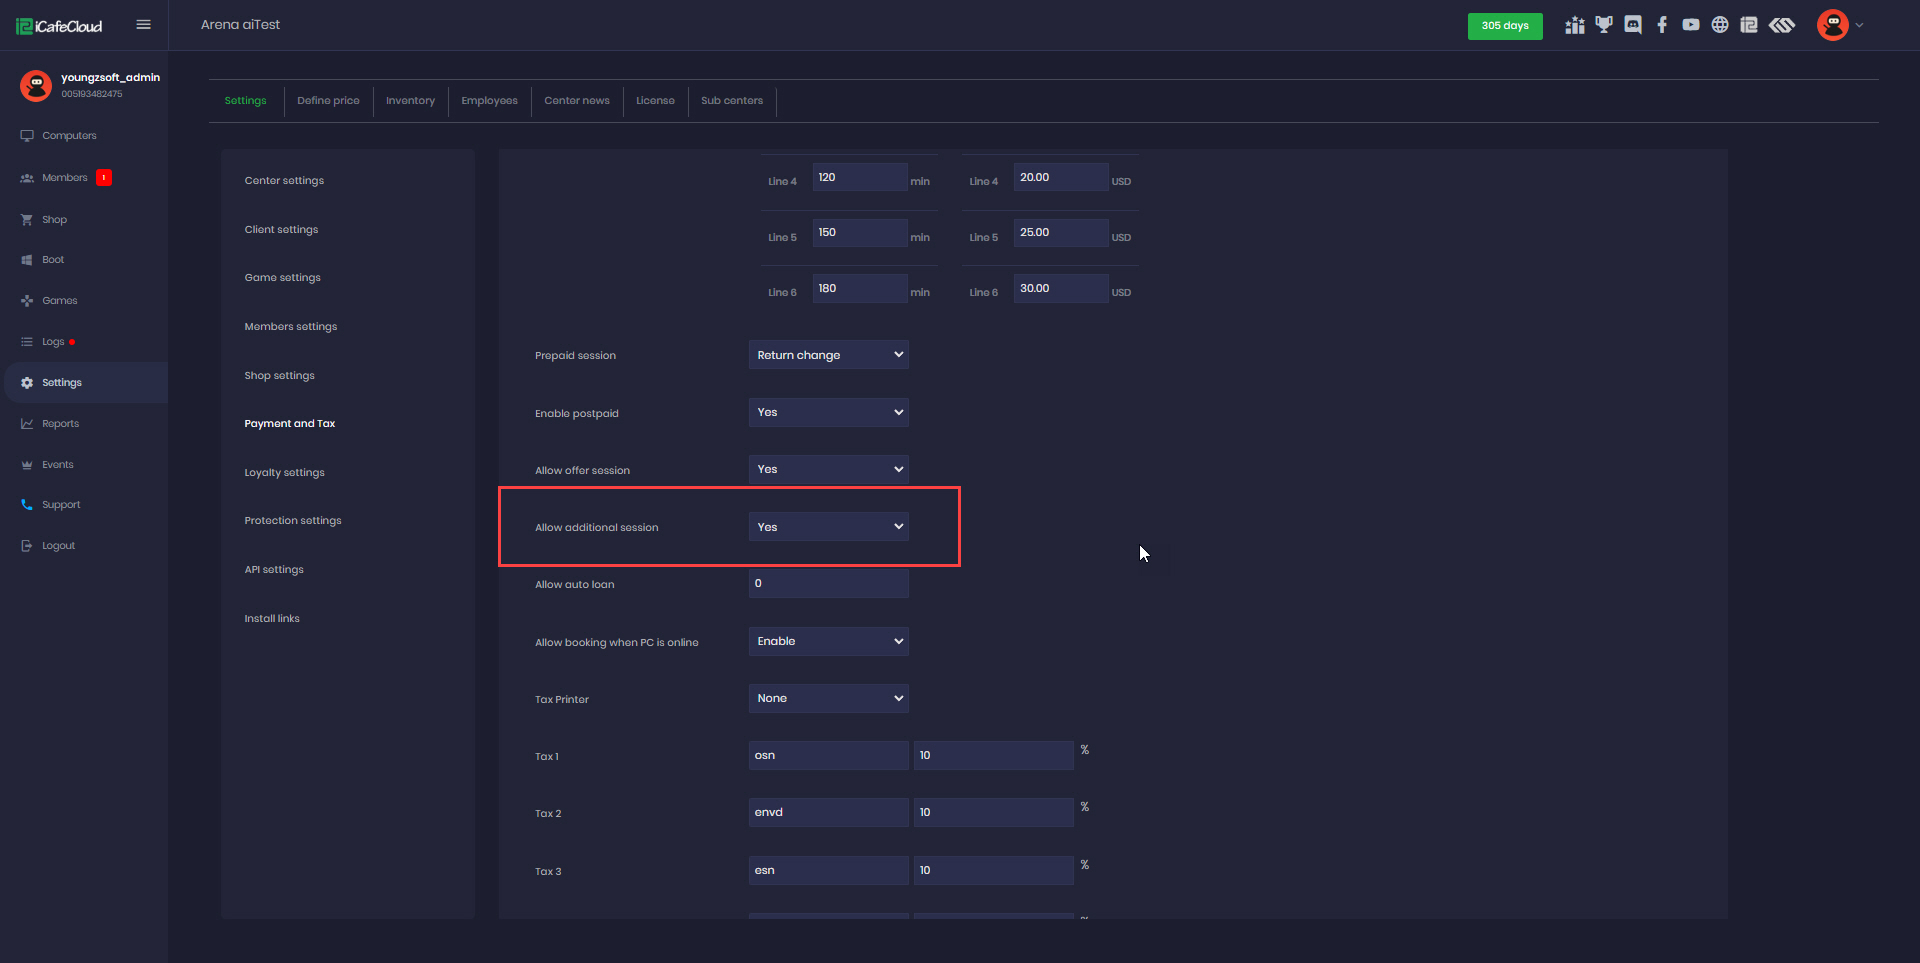
- To enable this feature, go to the Settings page, navigate to Payment and Tax, set the "Allow additional session" option to Yes, and click Save (Figure 1).
Figure 1
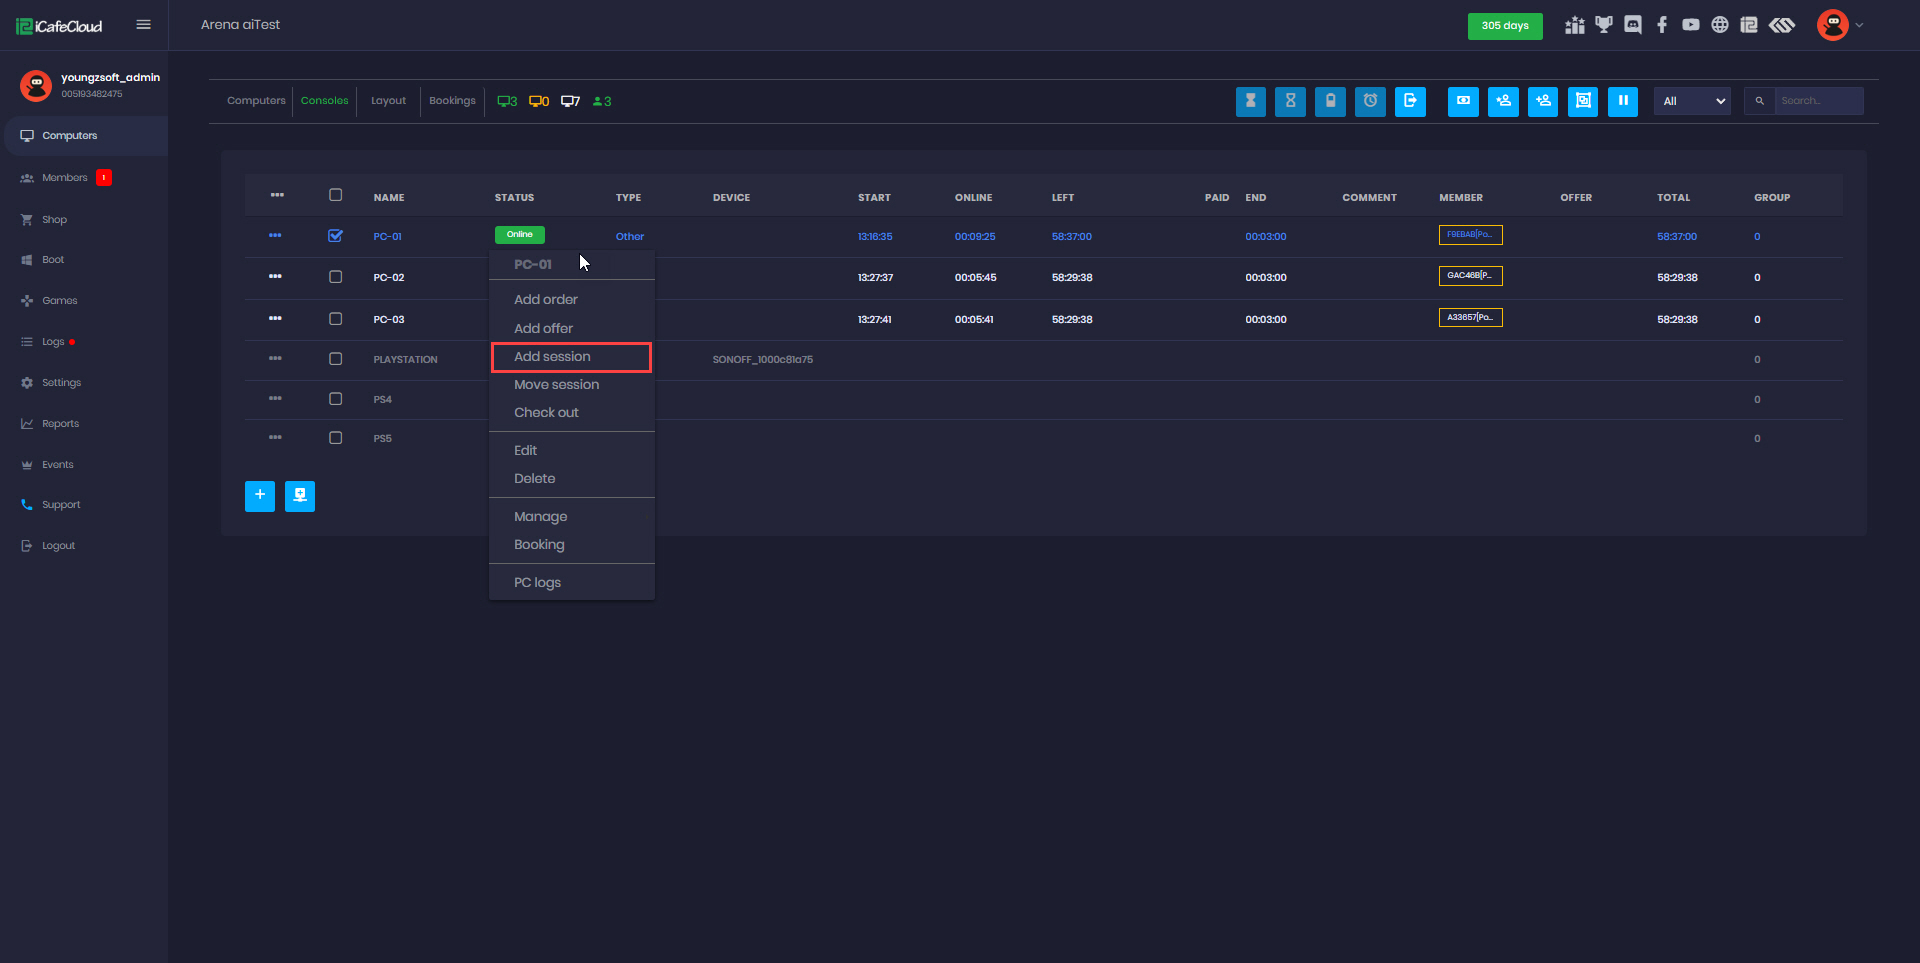
- On the Computer tab, you can start a postpaid session, and the Add Session option will be available (Figure 2).
Figure 2
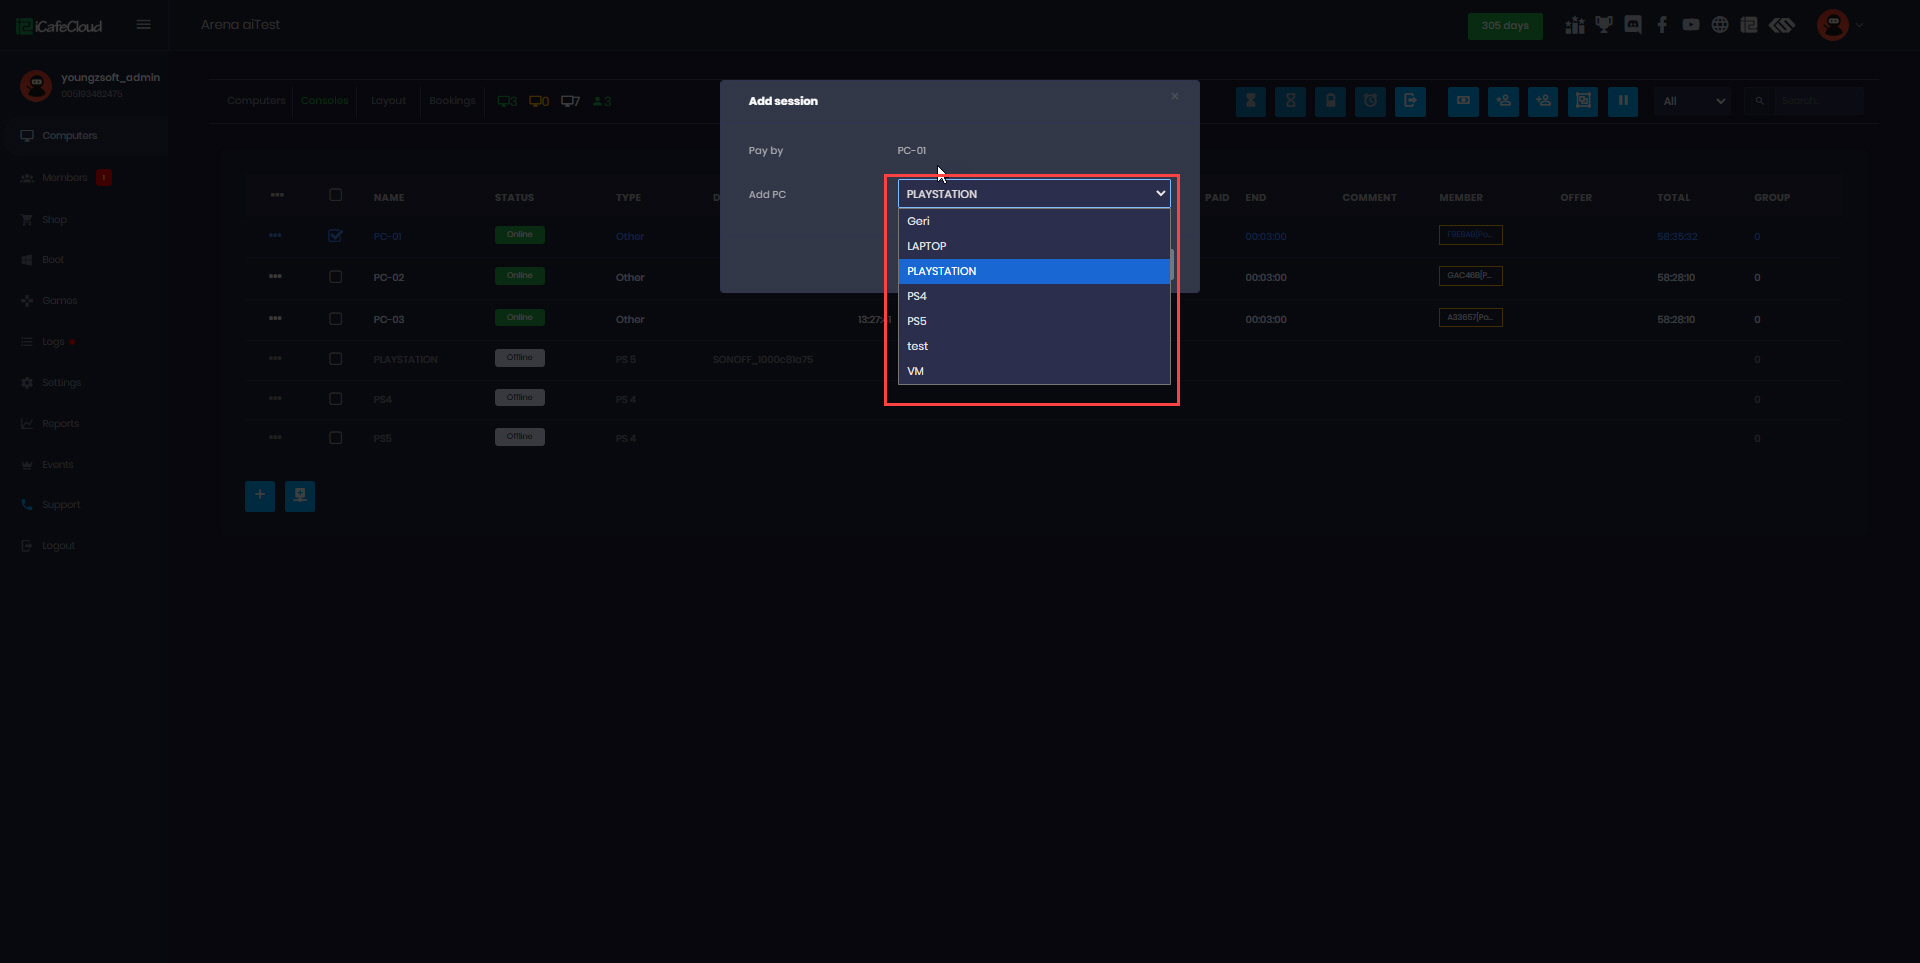
- Clicking the Add Session button will display a list of available PCs for starting additional sessions (Figure 3).
Figure 3
- Select the desired PC from the list and click Start.
- The selected PC will begin counting time as part of the postpaid session.
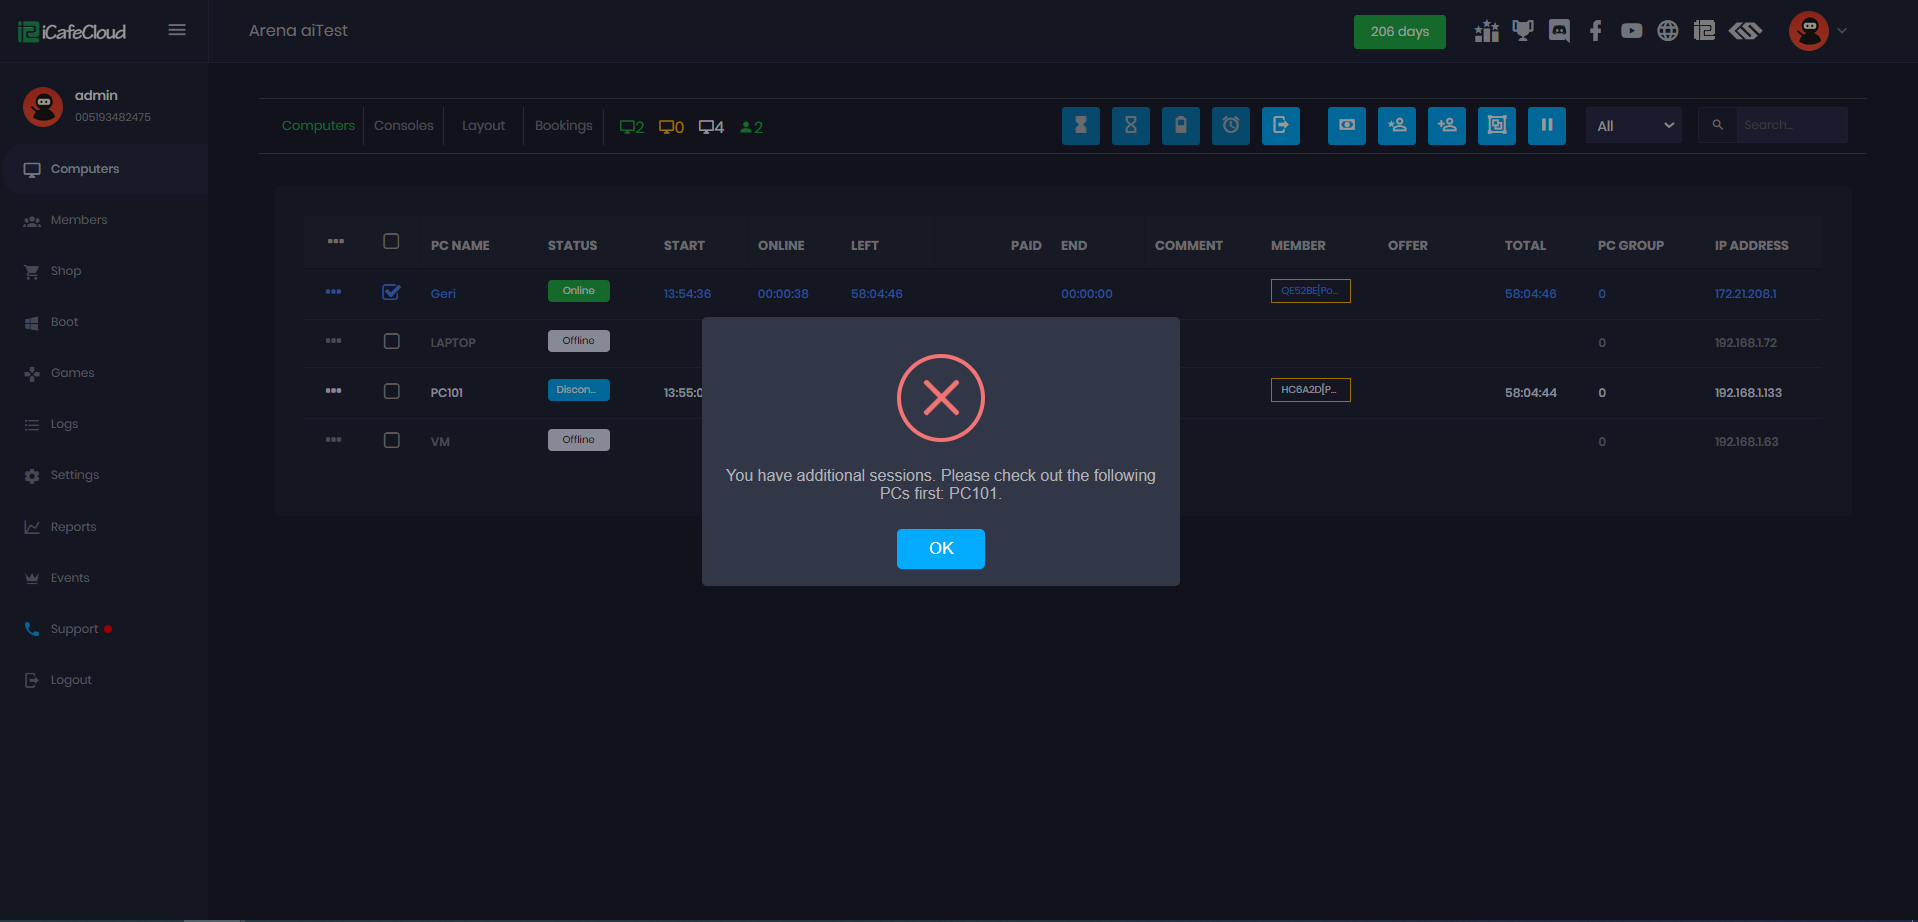
- To check out, you must first check out any additional sessions before checking out the main session. If you attempt to check out the main session directly, an error message will appear, specifying which PCs are being used as additional sessions for easier identification. (Figure 4)
Figure 4
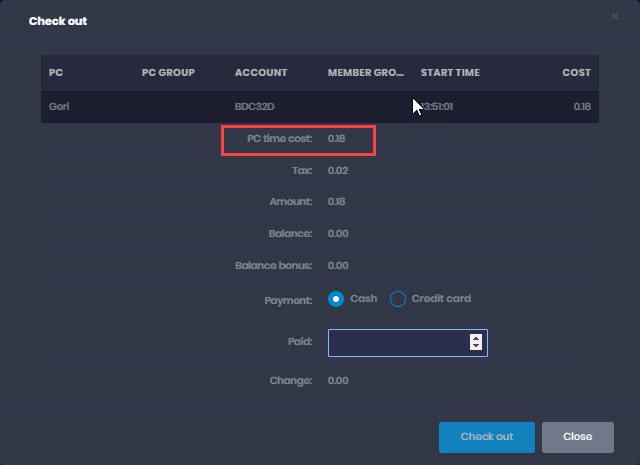
- When checking out the main postpaid session, it will display the total amount, including all added sessions . (Figure 5)
Figure 5

