2024-04-25
install, icafemenu, local, disk, hdd, ssd
The following explains how to install iCafeMenu on PCs using local storage (HDD or SSD), without a diskless system.
- Although it can operate without it, ICafeMenu was created for a diskless system like CCBoot. But you can also install iCafeCloud on a disk system .
Server Installation
iCafeCloud server installation for a local HDD environment please follow these steps.
- Regardless of whether you install games on the server, you must install the iCafeCloud server on one PC. Ensure that network discovery is enabled on the server PC before starting the installation. This is essential for updating iCafeMenu.
- Next login to https://cp.icafecloud.com panel
- Open web admin and at settings - client settings scroll down where it says “run iCafeMenu on diskless” select NO (Figure 1). iCafeMenu will auto update from the server on each start.

Figure 1
- Next navigate to “Settings” and click on the “Game settings”
- Set the Main Game Drive as the drive letter for your client PCs. All client PCs should have the same game path, set the game path directly on each client PC .(Figure 2).
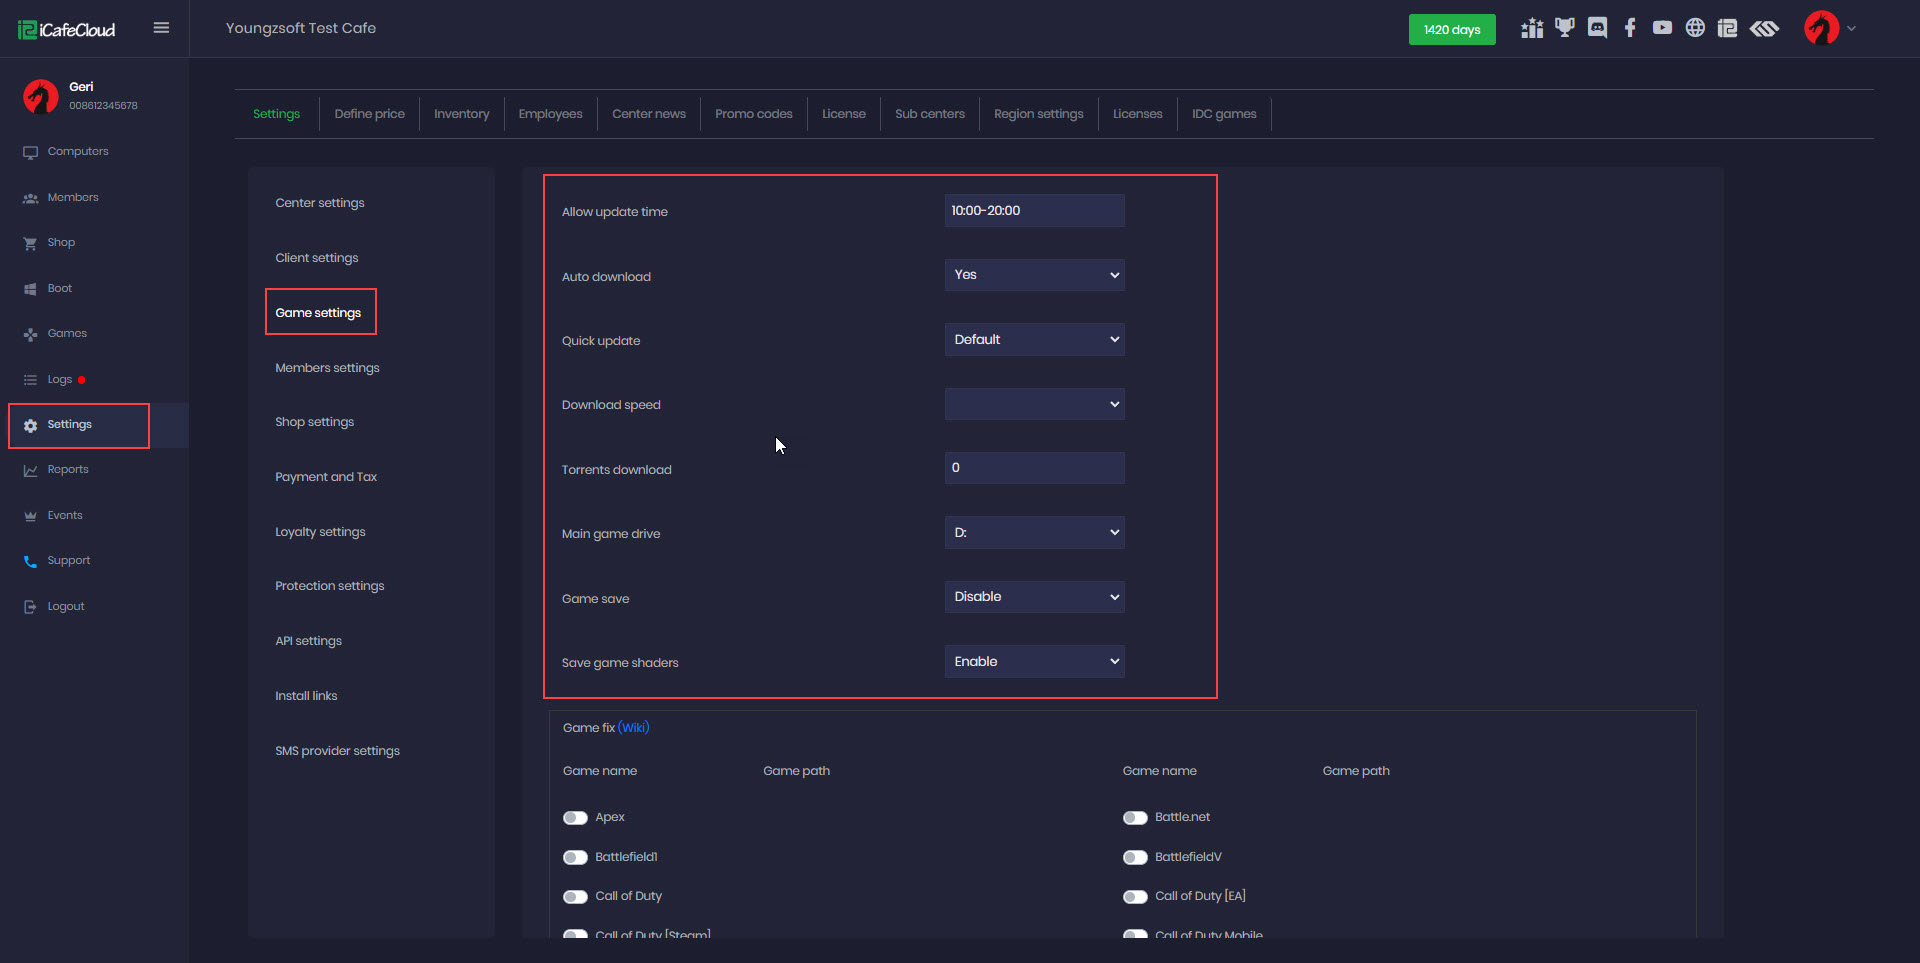
Figure 2
- The next step is to enable and install ICafeMenu from the game page.
- Navigate to "Games", search for iCafeMenu, right-click, and then select "Enable Game". (Figure 3)
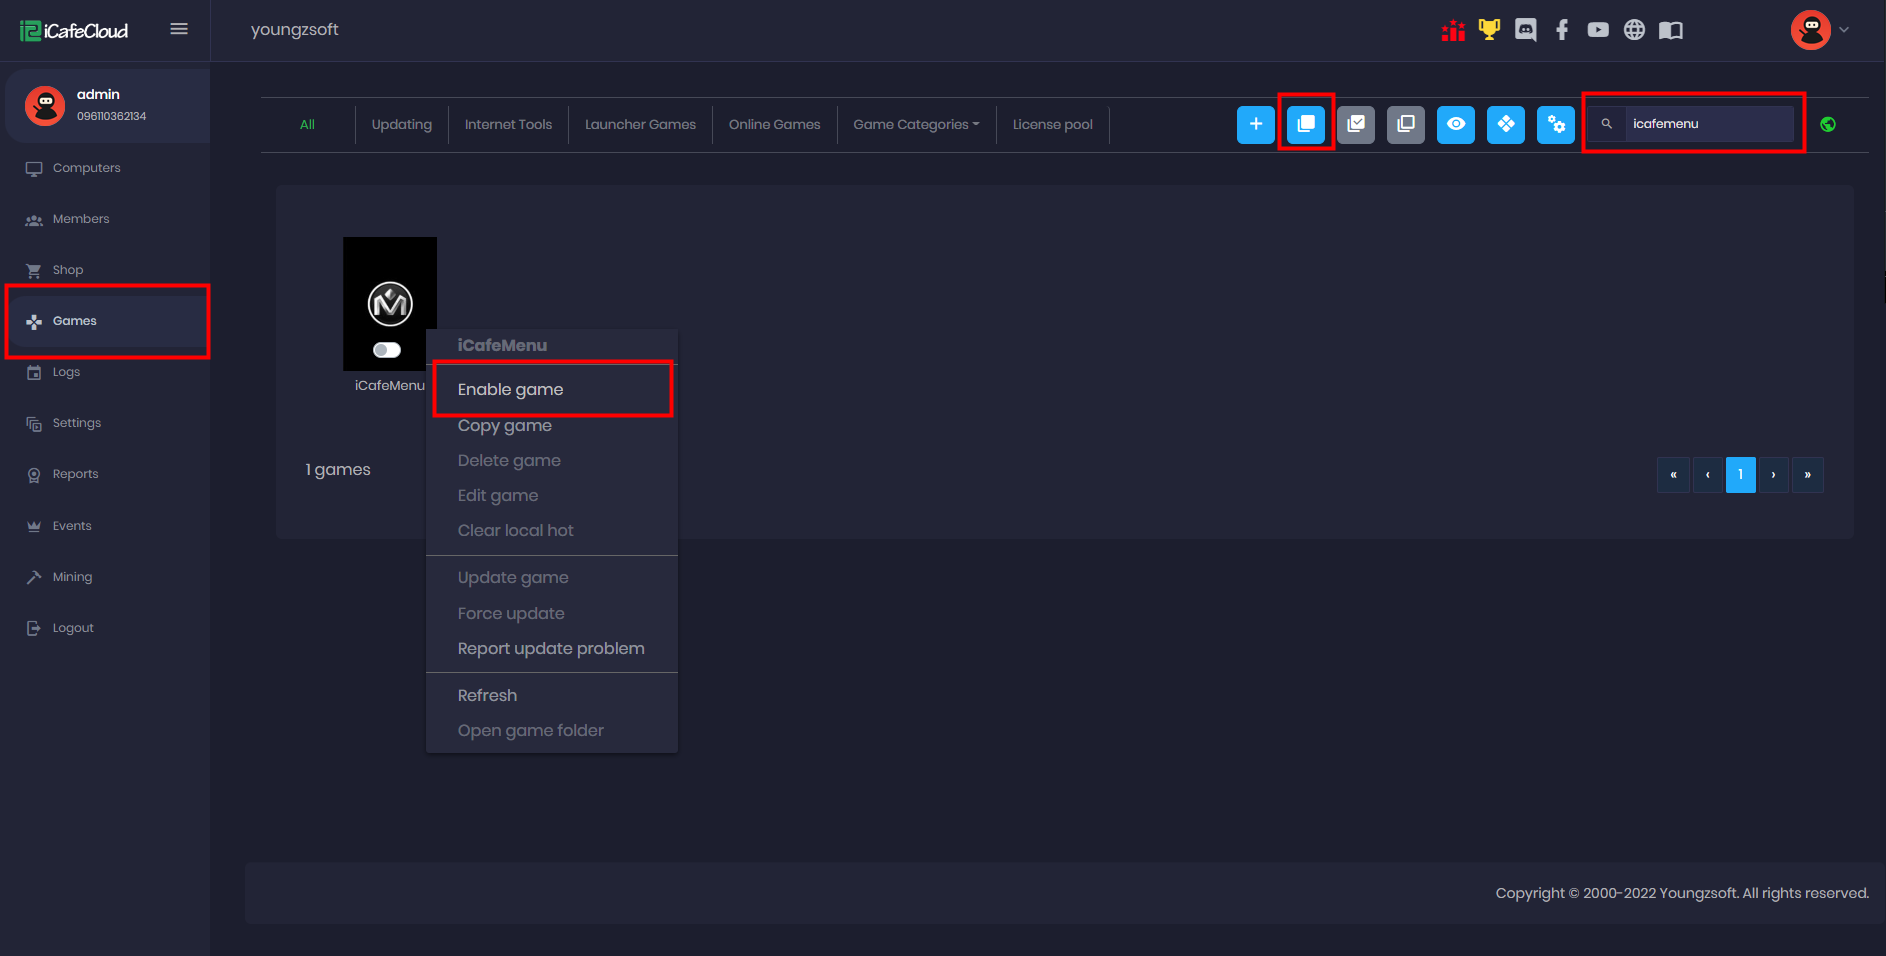
Figure 3
- The default path will be the main game drive (D:). However, if your client PCs only have one SSD (C:) change the "Main game drive" to C: (Figure 4)
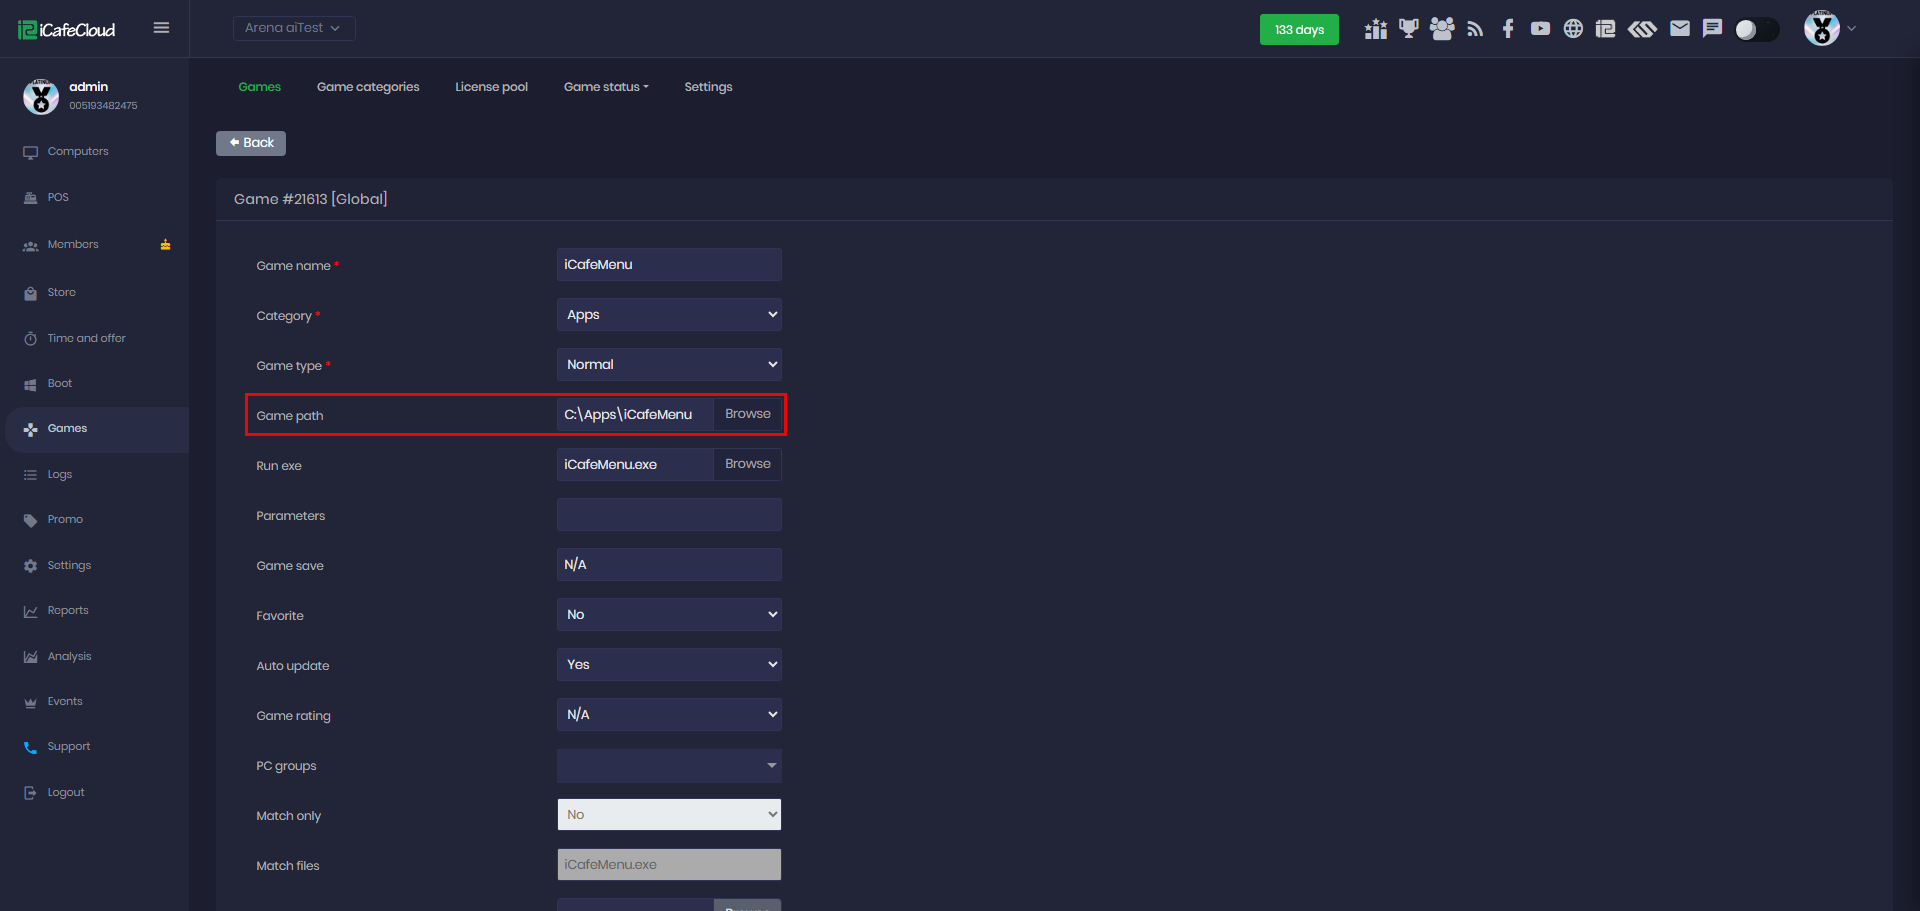
Figure 4
- Once the download of iCafeMenu has completed on the server it will be located to C:\Apps\icafemenu.
- Before continuing on the next step make sure your network sharing is working and network discovery is working on both sides (server and client).
- The next step is to refresh the iCafeCloud server. This will trigger the "gamefix" process and automatically create the iCafeMenu shared folder. (Figure 5)
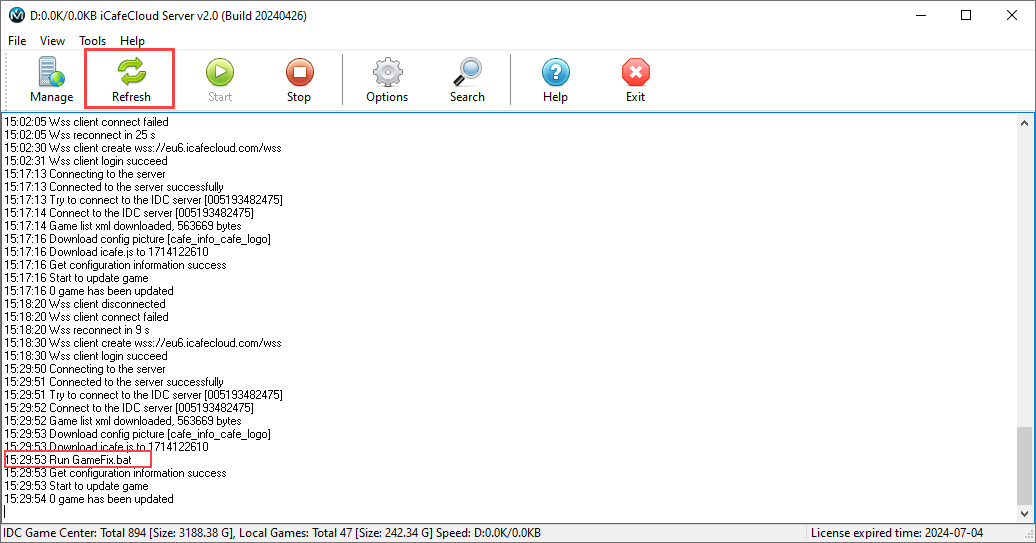
Figure 5
Client installation
For iCafeMenu client installation in a local HDD environment please follow the following steps .
- On the client side, copy iCafeMenu from the server's shared folder. (You can find the shared folder by typing the server's IP address in any folder address bar, for example: \192.168.1.150) and paste in your game drive .(Figure 6 & 7)

Figure 6
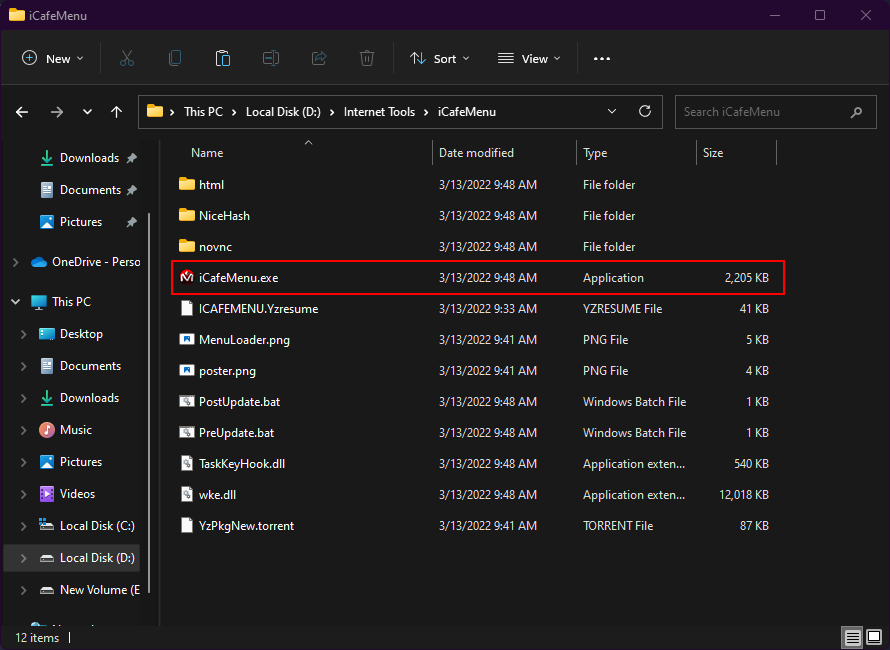
Figure 7
- You have to run iCafeMenu as an administrator on each PC for the first time. After the initial run, it will auto-start, and you will see the iCafeMenu login screen.(Figure 8)
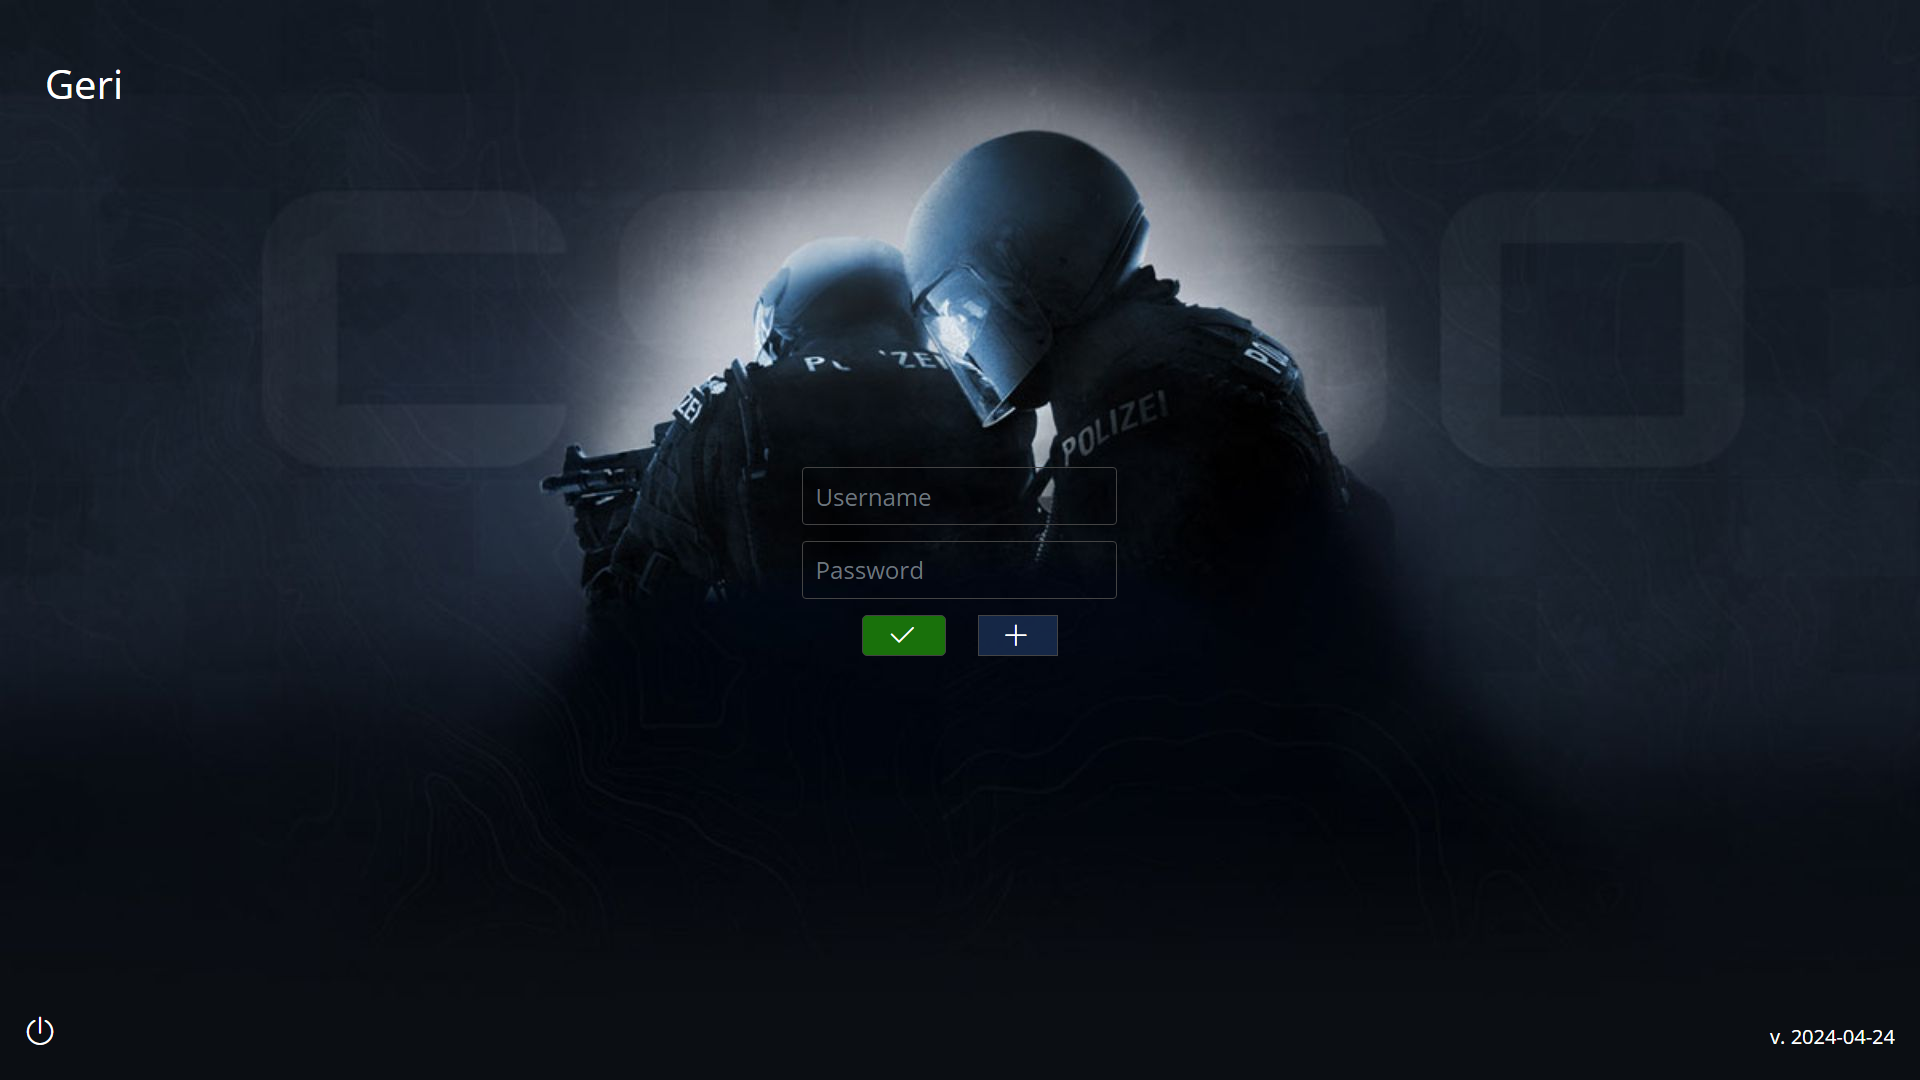
Figure 8
- iCafeMenu requires administrator privileges, so please disable UAC on the client PCs.
Some centers may not be able to auto-run iCafeMenu, mainly due to UAC or lack of admin privileges. - Additionally, you can set iCafeMenu to run before the desktop using the "Set iCafeMenu to run before the desktop" function in the admin panel.
- Once PC is booted and iCafeMenu is launched, the PC will be available on the computers page(Figure 9)
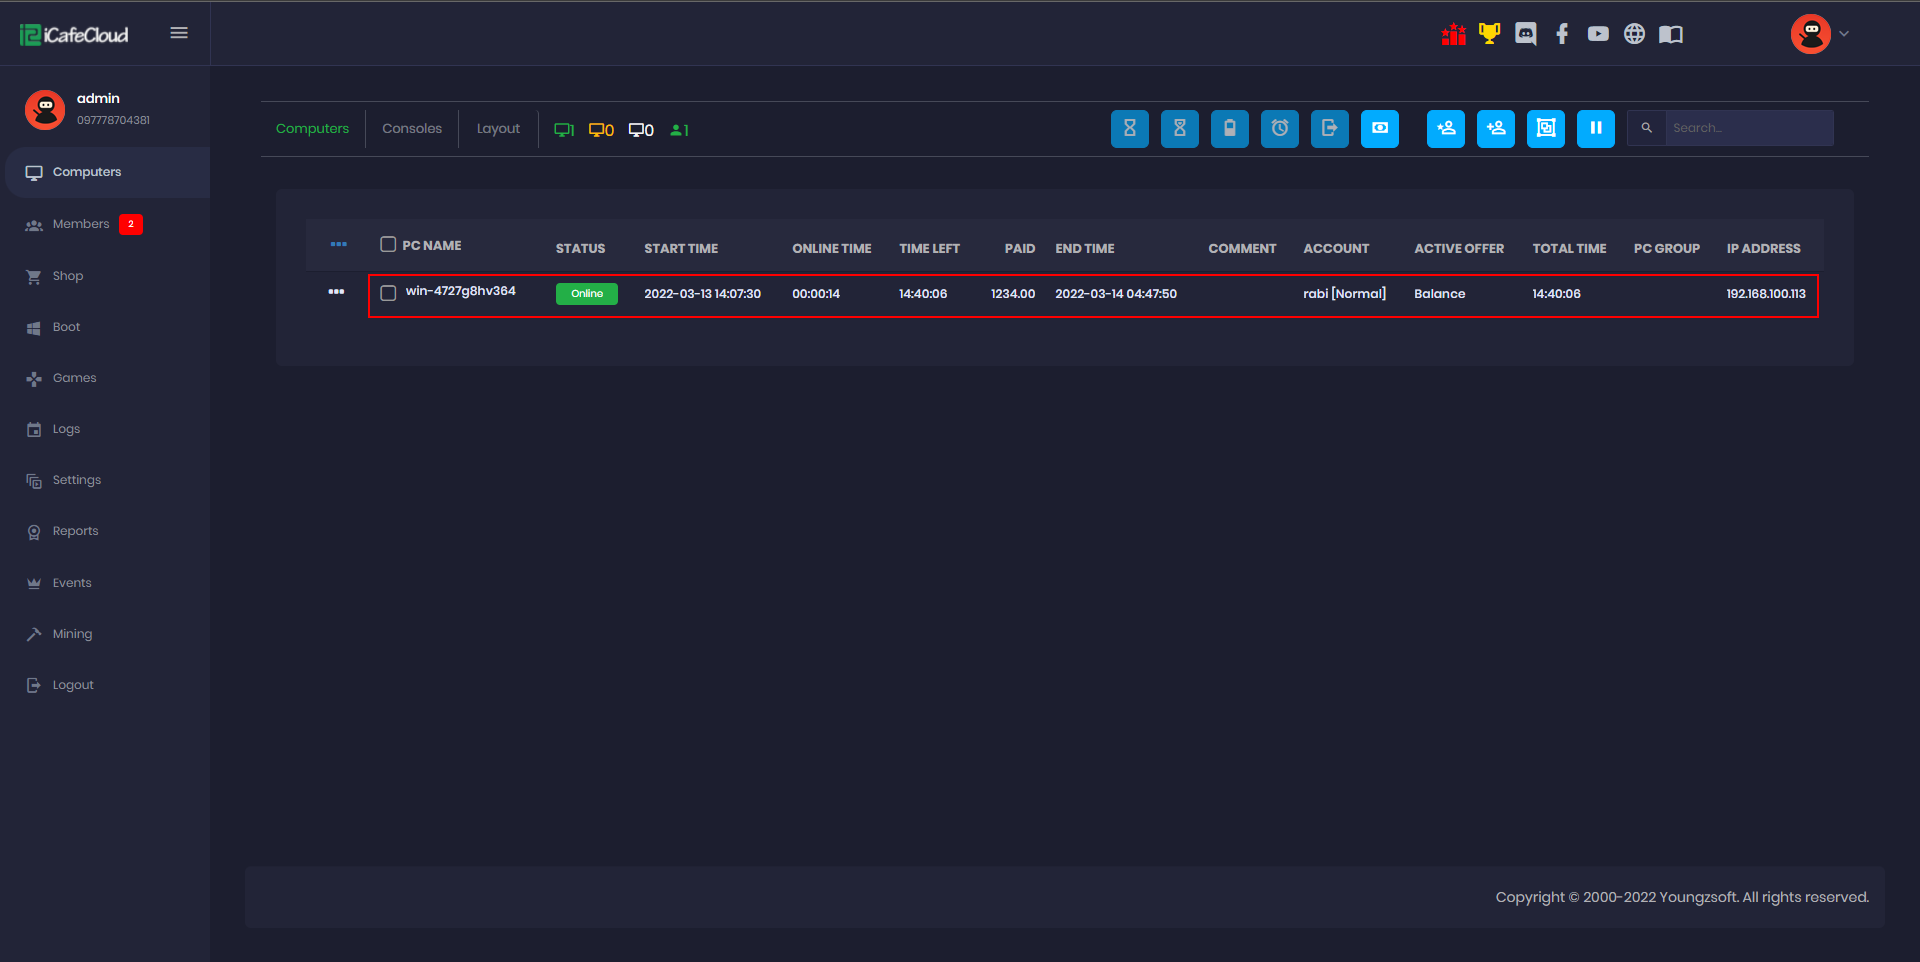
Figure 9
- After the client has been listed, you can control them as required and start sessions.
- Every time the client is restarted, iCafeMenu automatically gets the latest update from the server by running the icafemenu-update.bat file. Once the auto-update is complete, it will create a log file where you can see all the details. (Figure 10)
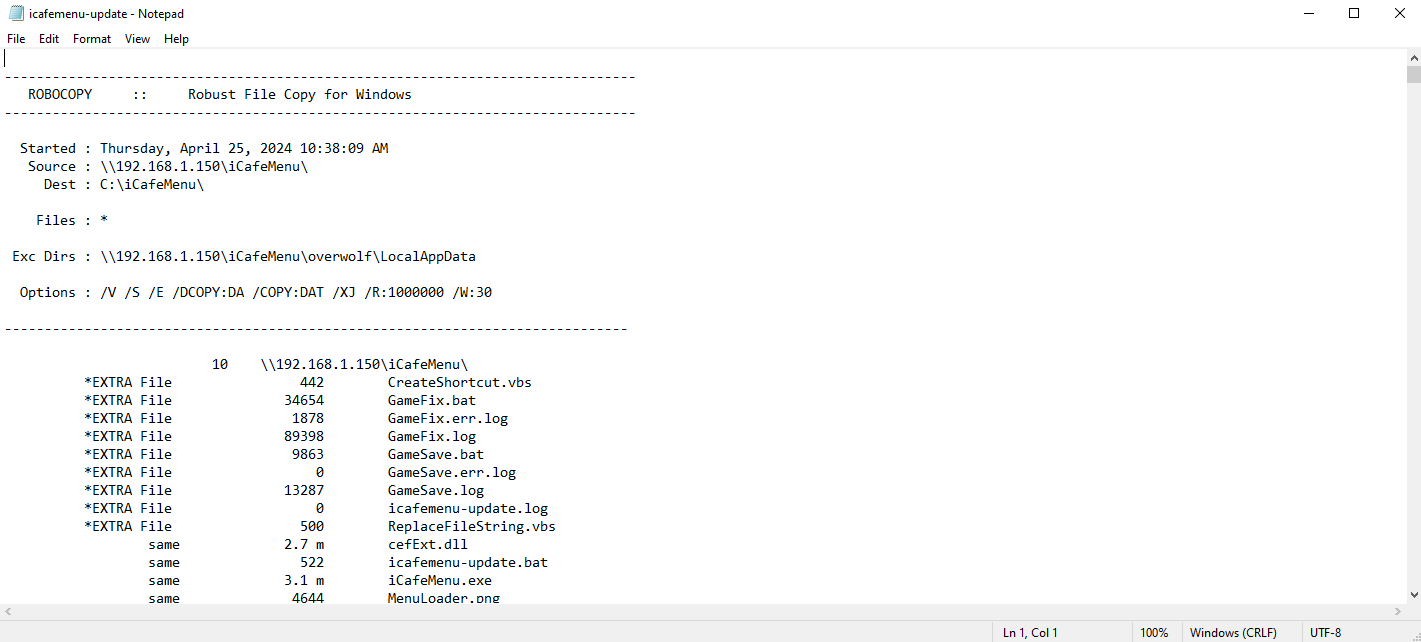
Figure 10
Update games
for updating games on iCafeCloud.Follow these steps to ensure all client PCs have the latest game versions efficiently.
- If your server, where iCafeCloud is installed, doesn't act as a game server or doesn't have any games, you would update the game on each client directly.
- However, if you have a disk on the server with all the games, you should update the game on the server first. Enable Games fixes on Admin panel and then, use a sync tool like Robocopy to update the game on each client PC from the server. This will make game updates easier.For example, you can first share the server game drive and then run the following command at each client:
robocopy \\server_ip\game_drive\game_folder "game_drive:\game_folder" * /E /V /XJ /SL
Stop iCafeMenu auto run
- If there's a fatal error with iCafeMenu, possibly due to an incomplete update, it could be causing the client's PC to reboot. To resolve this issue, boot the client PC into “Safe mode” and remove iCafeMenu.
- Afterward, reboot the client, and it should start normally on the desktop. To restore the iCafeMenu interface and ensure it auto-starts again, download a fresh copy from the shared folder.