2026-04-03
export, reports
This following explains how to export report data to your local system, allowing you to download and analyze reports offline.
- Staff shift
- Attendance by day
- Created user
- Attendance and occupancy
- Transactions
- Topup operations
- Canceled reservations
- Shop items stock
- Offer usage
- Used promo codes
- Refunds
- Profit with royalty
- Cash Deposit/withdrawal
- Order list
- Movements of product
- Created bookings
- Used bookings
- General occupancy
- Access code usage
- Shop quantity
- Navigate to Reports - Report Export, then select the desired date range (Figure 1).
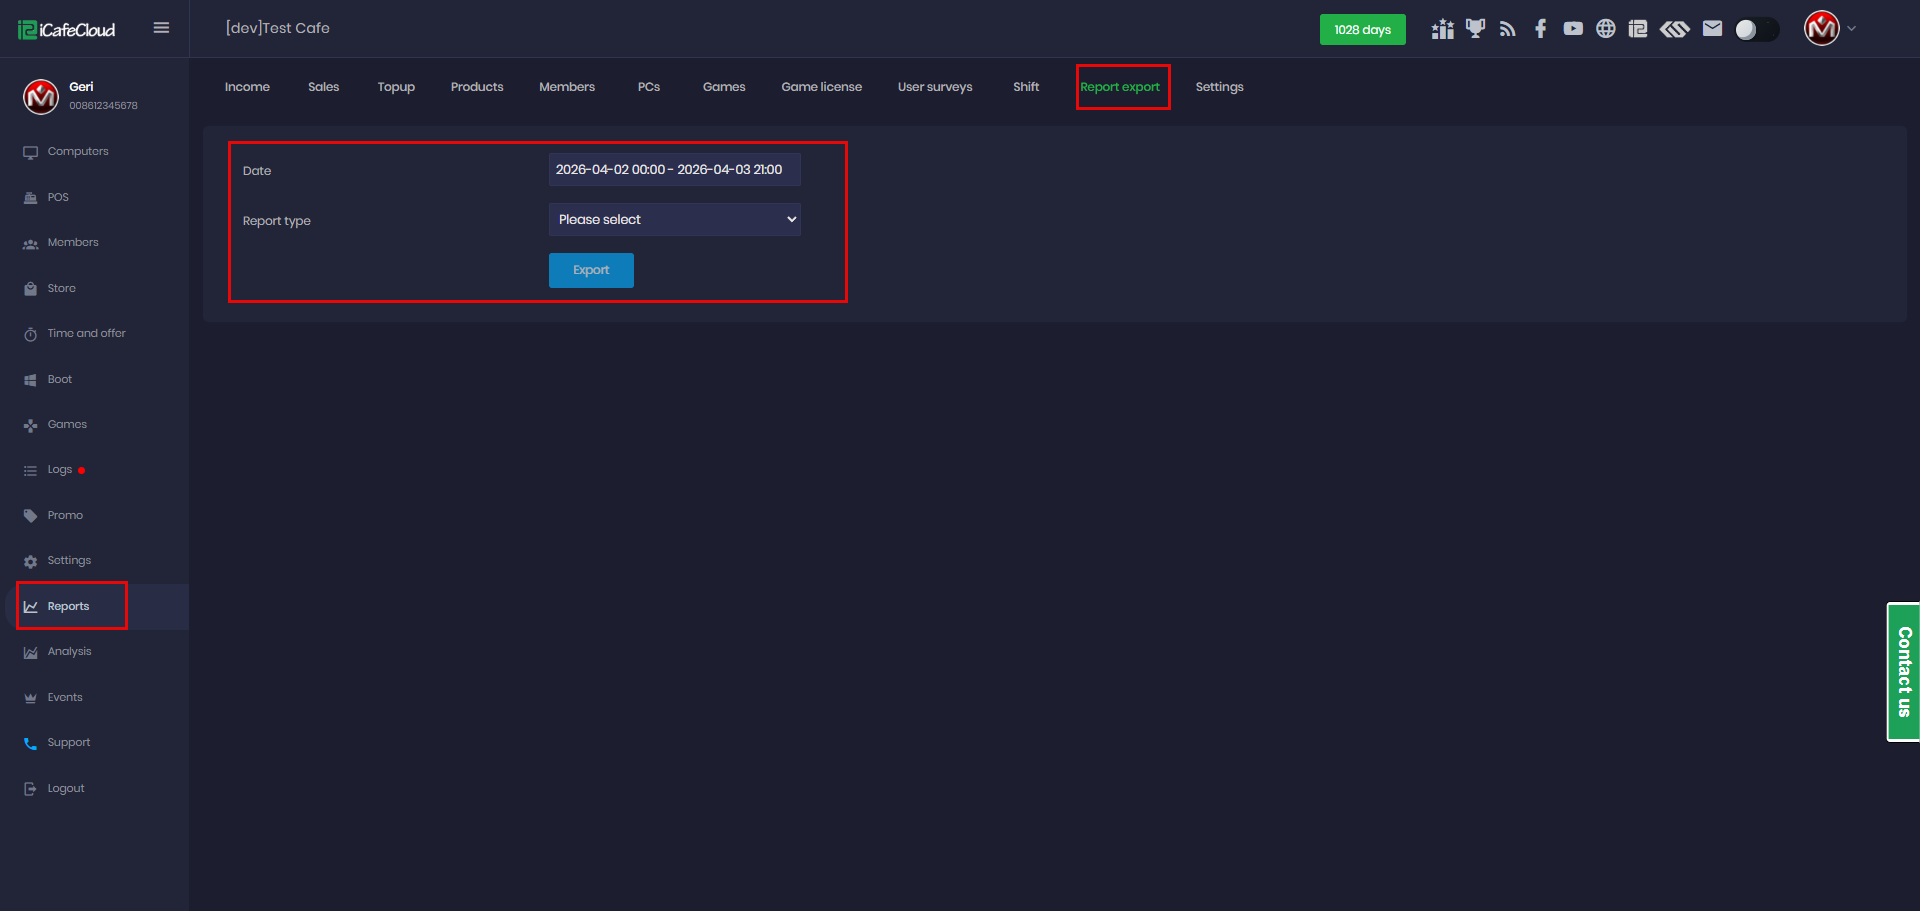
Figure 1
Staff Shift
- Choose Staff Shift as the report type and click Export (Figure 2).
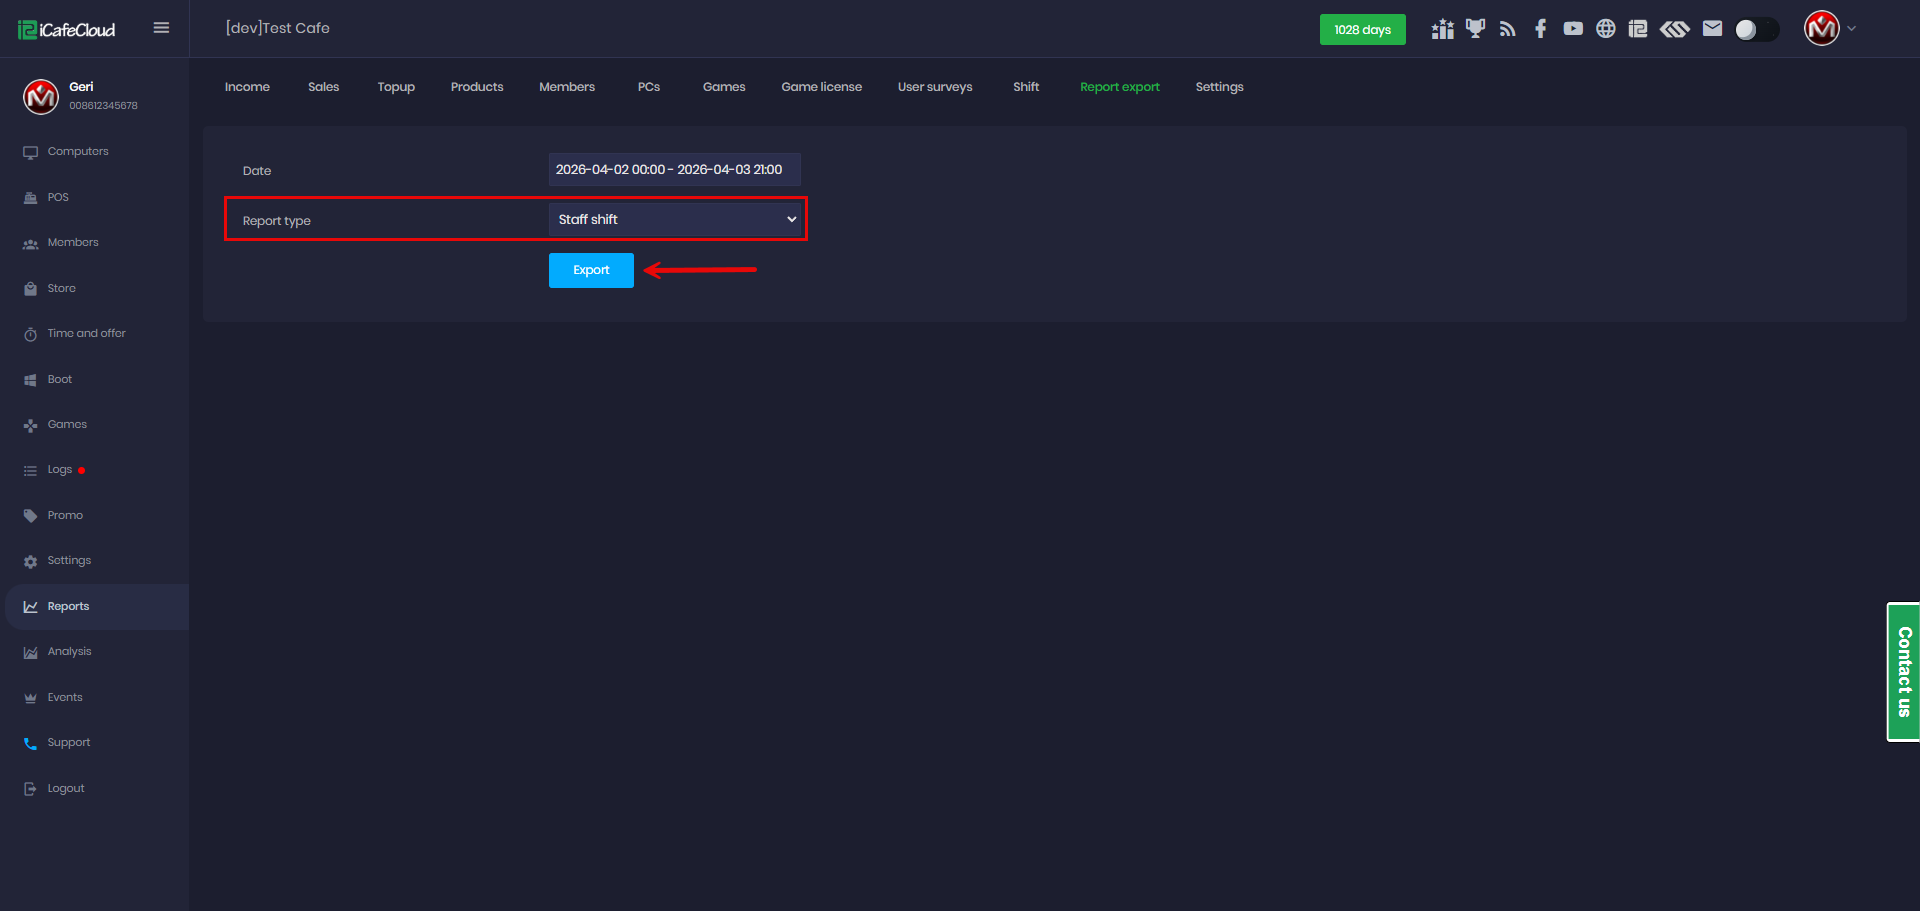
Figure 2
- An XLSX file will be generated and downloaded, containing all shift data for the selected period. (Figure 3)
Staff – The username or identifier of the staff member who worked the shift.
Start time – The date and time when the staff member started the shift.
End time – The date and time when the shift ended.
Working hours – The total duration of the shift (in hours or system-calculated units).
Cash start – The amount of cash in the register at the beginning of the shift.
Cash sales – Total cash received from sales during the shift.
Cash refund – Total amount refunded in cash during the shift.
Center expense – Any expenses deducted from the cash register (e.g., operational costs).
Cash – Net cash movement during the shift (after sales, refunds, and expenses).
Cash end – The final cash amount in the register at the end of the shift.
Credit card – Total payments received via credit/debit cards.
QR – Total payments made via QR code methods
Cashless – Other non-cash payment methods (e.g., digital wallets, balance payments).
Total Bonus – Bonuses applied or given during the shift (could be discounts or promotional credits).
Total amount – The final total revenue for the shift across all payment methods (including adjustments).
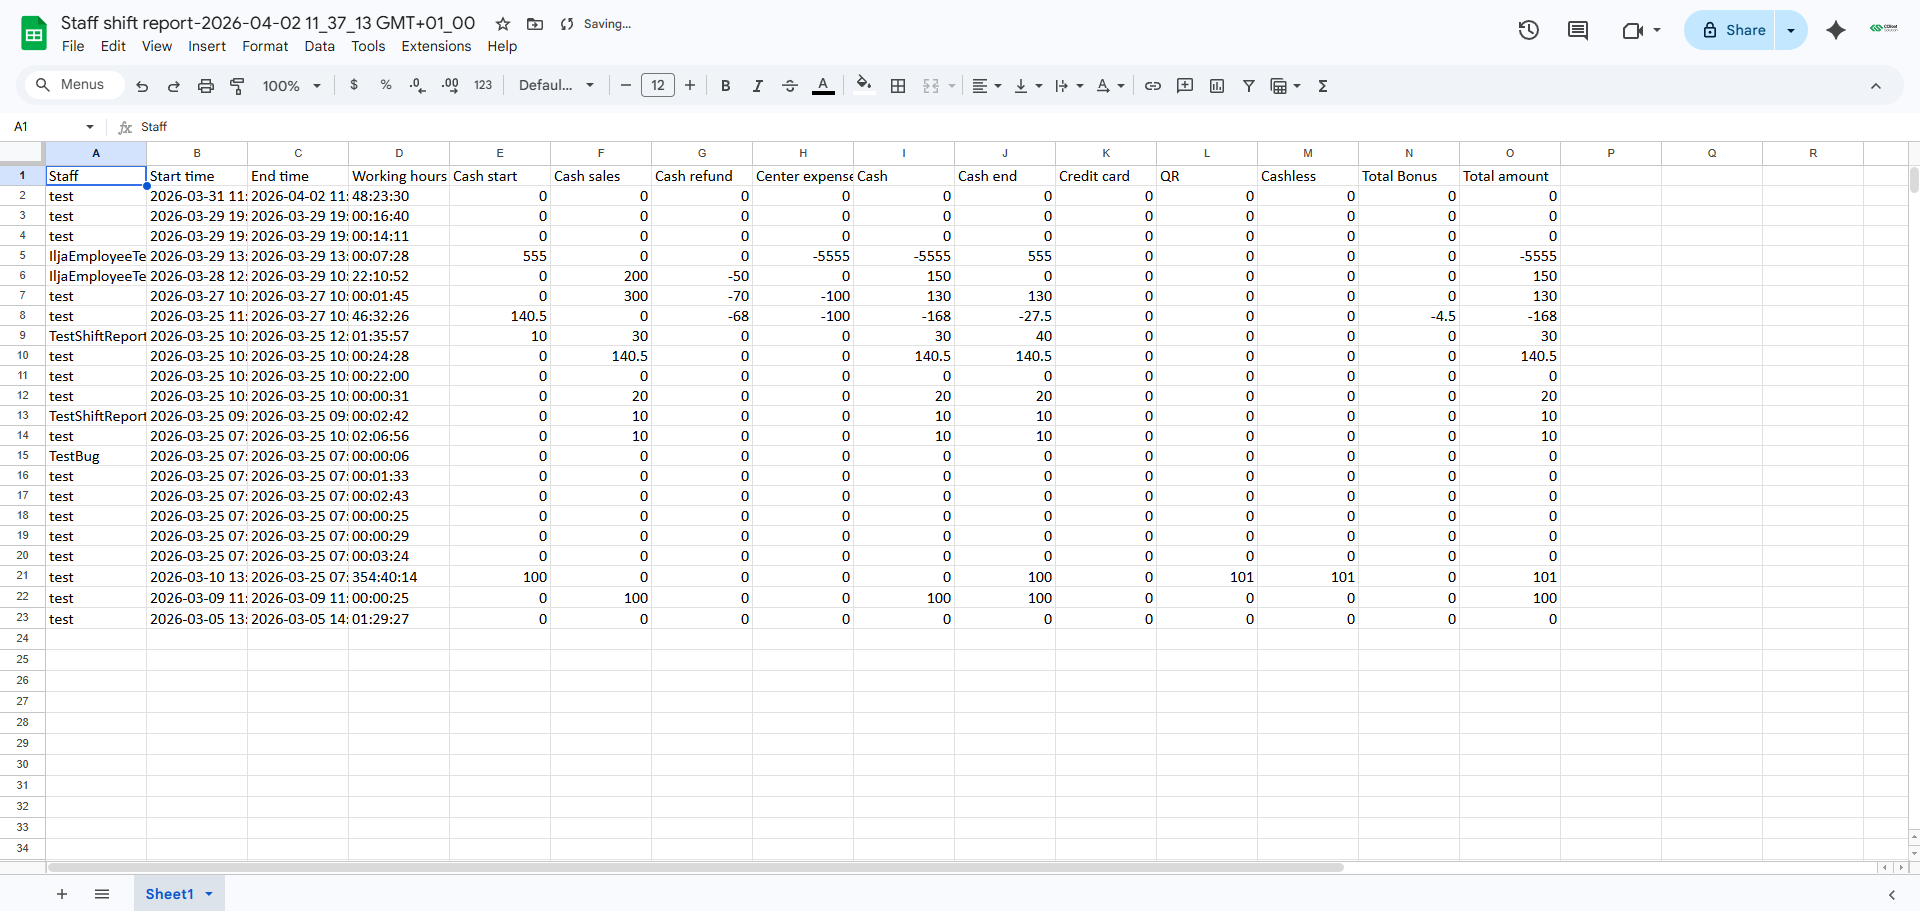
Figure 3
Attendance by Day
- Choose Attendance by Day as the report type, then click Export to generate the file. (Figure 4)
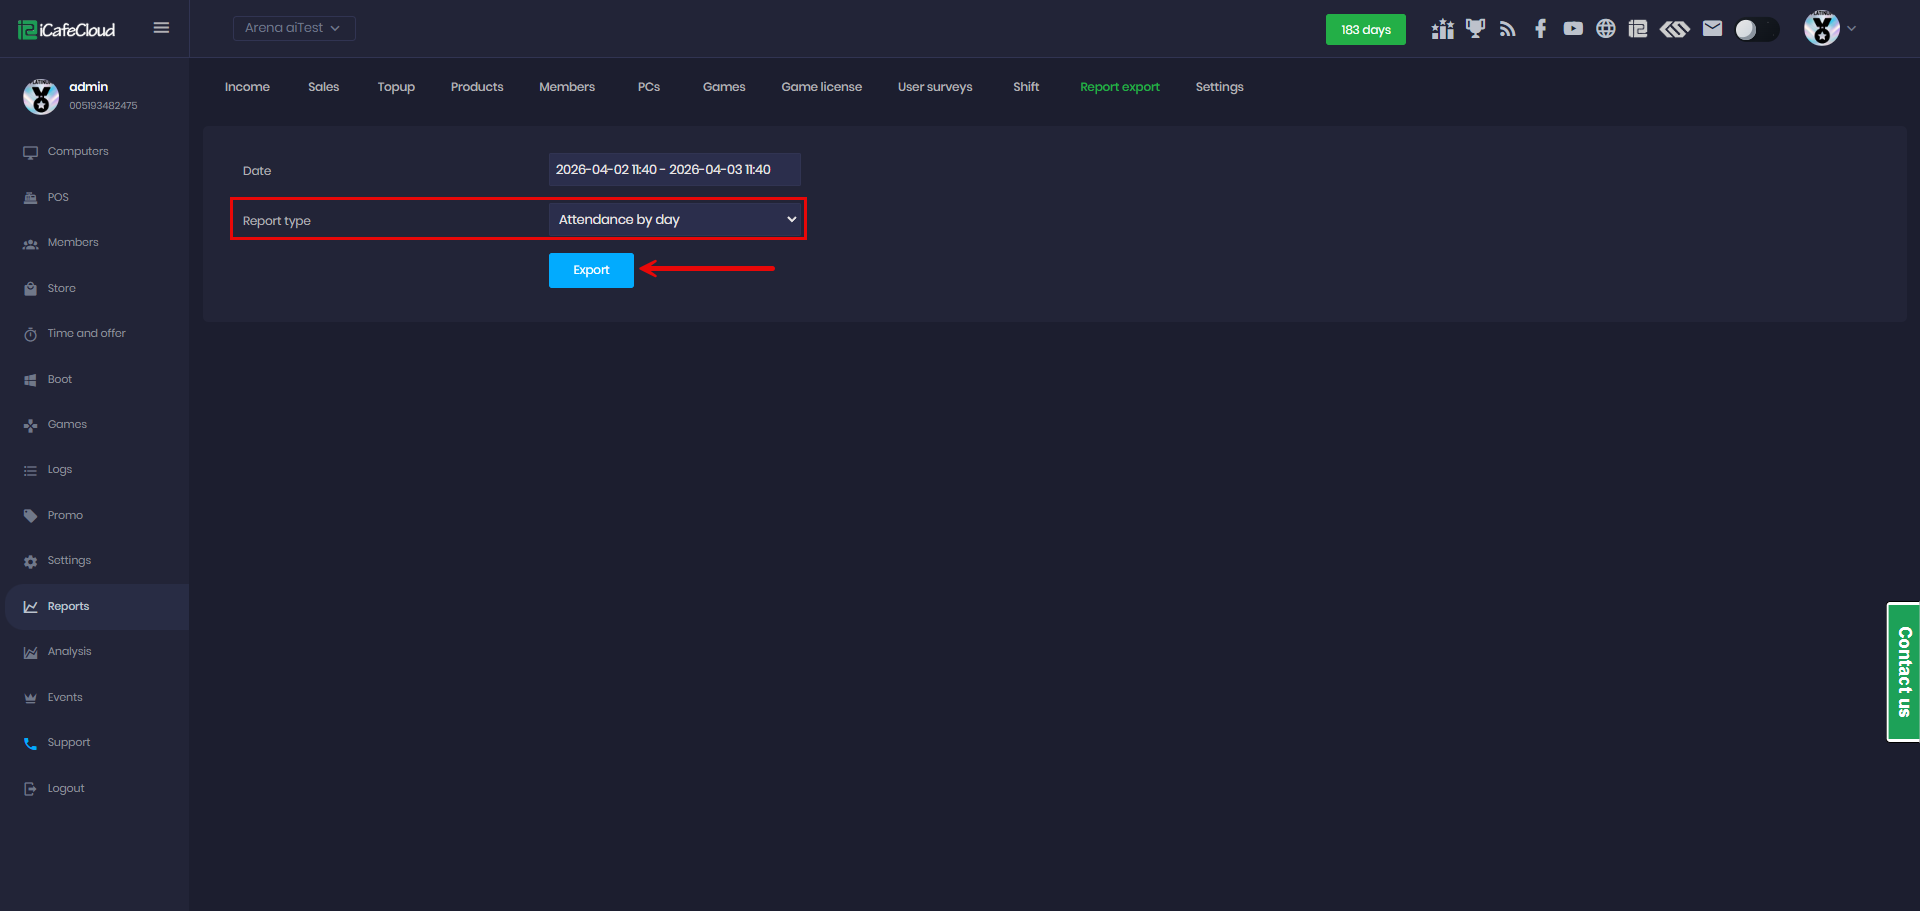
Figure 4
- An XLSX file will be generated and downloaded, containing all day's data for the selected period. (Figure 5)
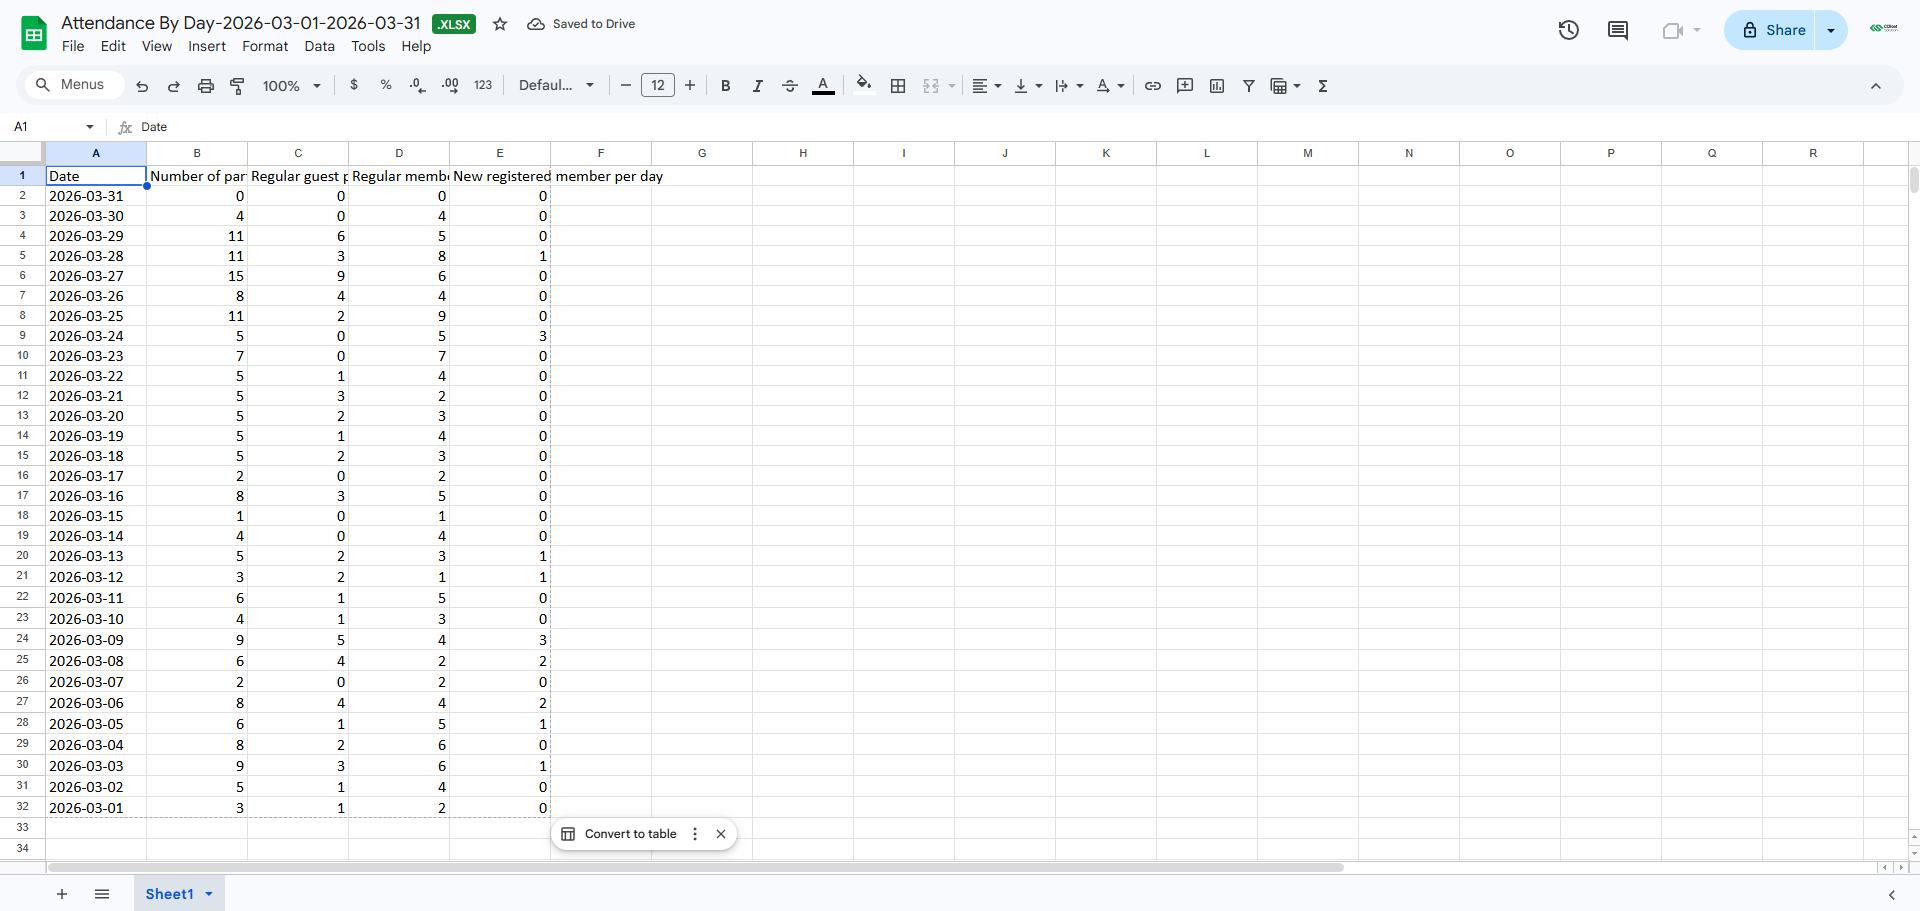
Figure 5
Created User
- Select Created User to view all member accounts created within the chosen date range. Then, select the license you want to retrieve data from, especially if you have multiple licenses connected as sub-centers. (Figure 6)
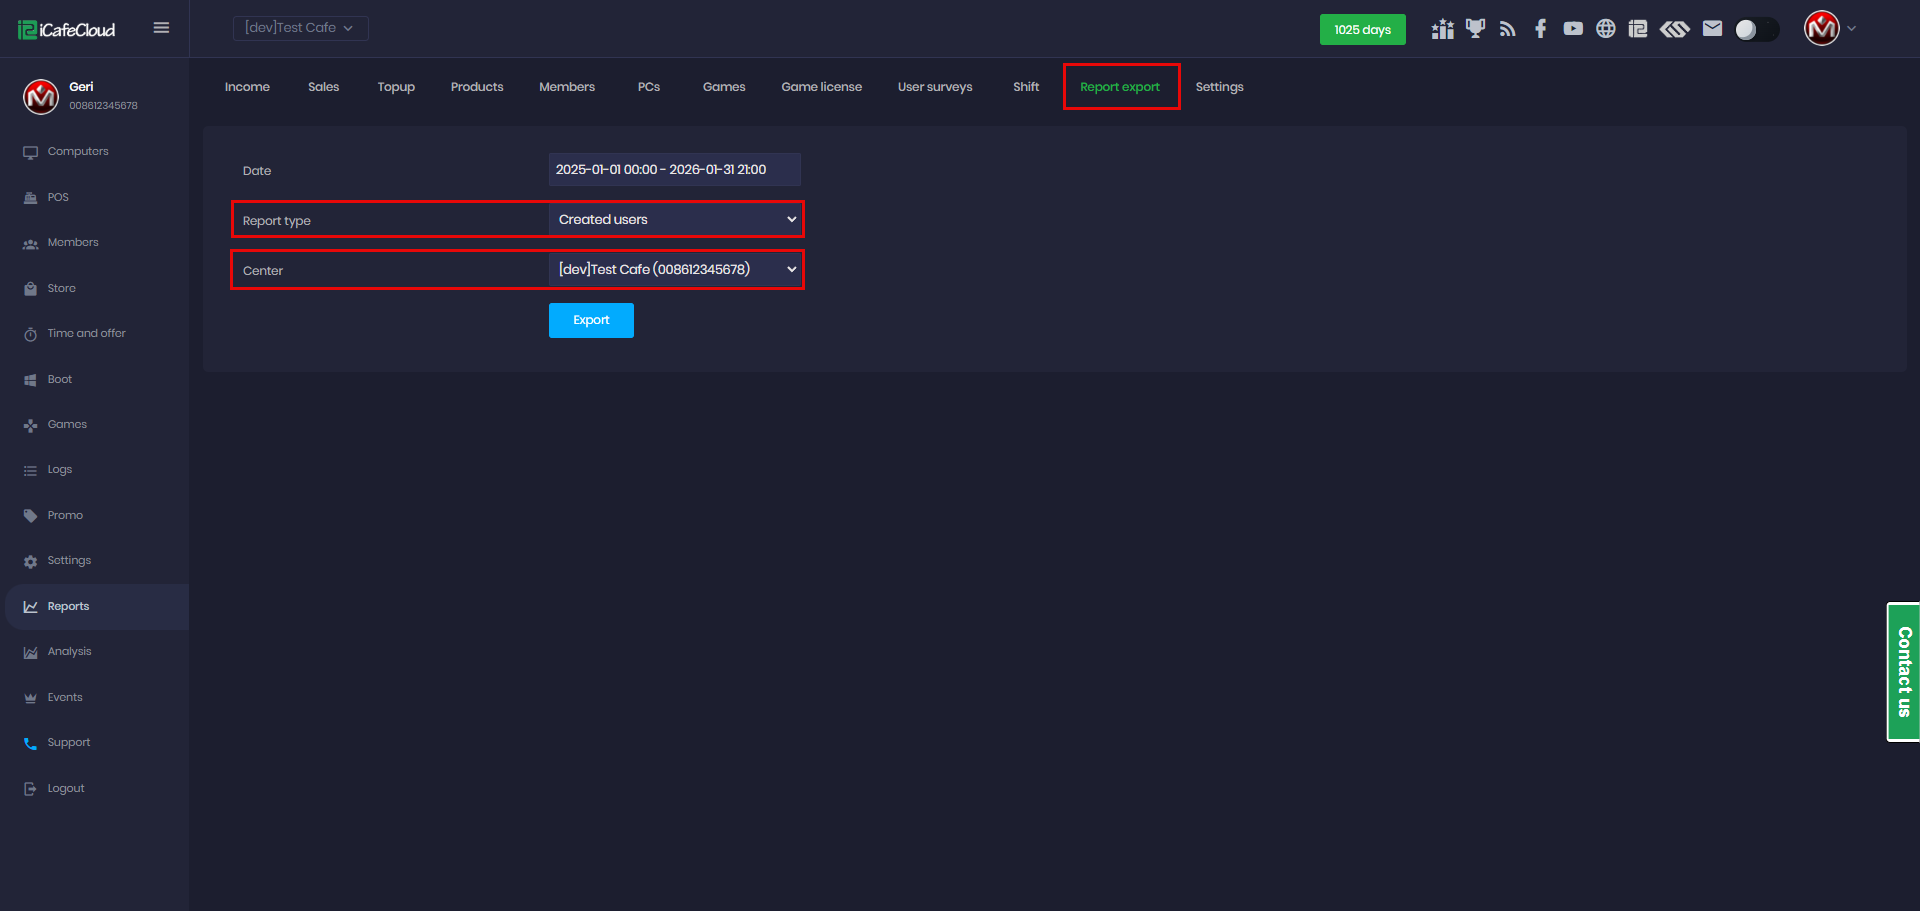
Figure 6
- After clicking the Export button, an XLSX file will be downloaded containing a list of all member details (Figure 7).
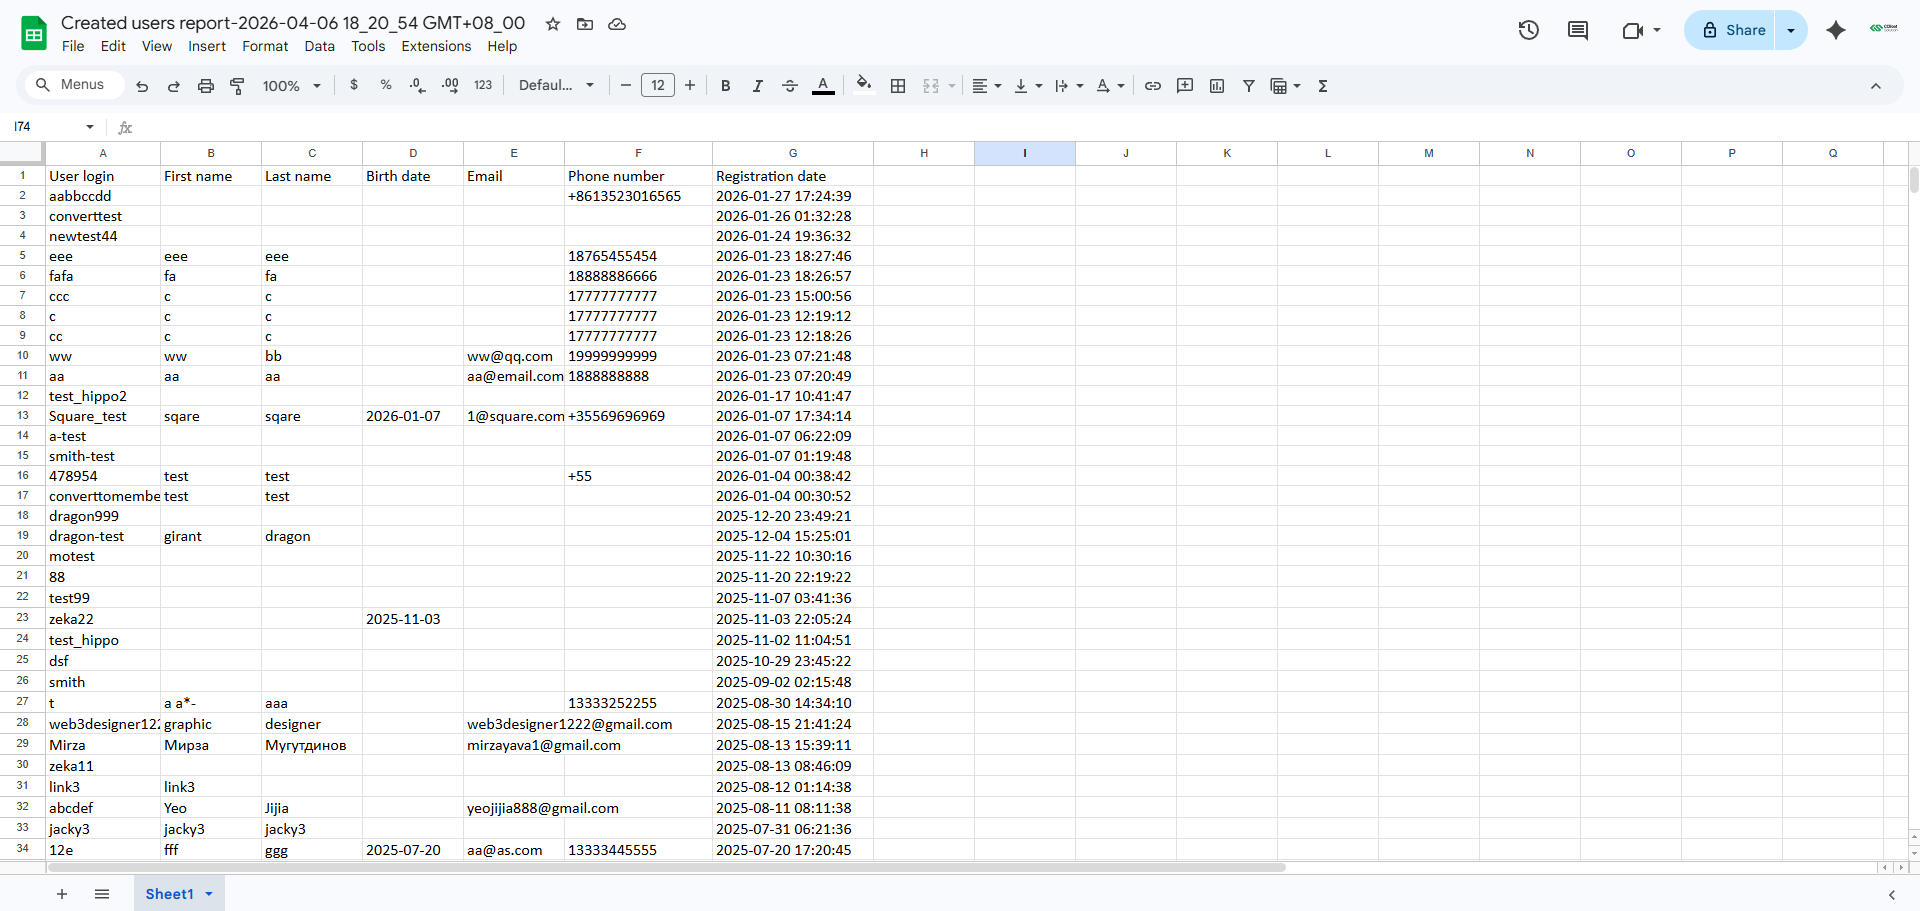
Figure 7
Attendance and occupancy
- Select report type attendance and occupancy and click export (Figure 8)
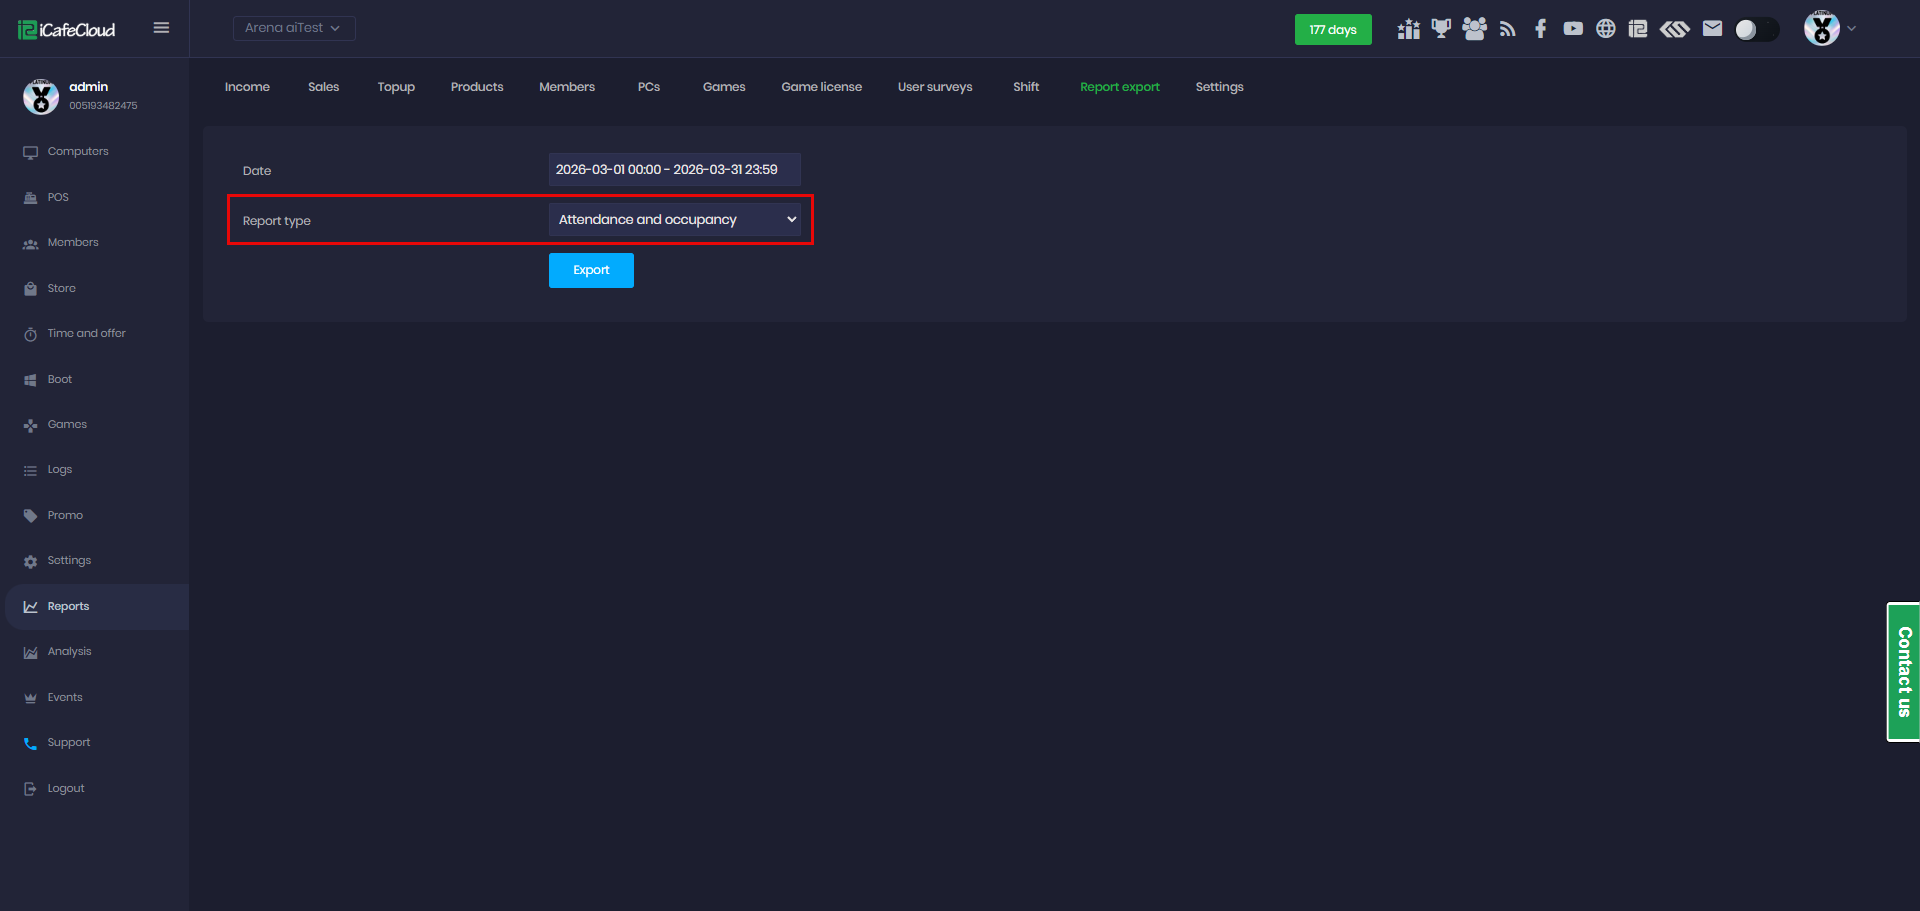
Figure 8
- After clicking the Export button, an XLSX file will be downloaded containing a list of all member details (Figure 9)
From Date / To Date: The selected time range for the report. All data shown applies only to this period.
Users Count: The total number of users who used the system during the selected period.
New Users: Users who used the system for the first time within the selected date range.
Regular Members: Existing registered members who have used the system (excluding newly registered users in this period).
New Registered Members: Users who created a new account during the selected period.
Guests: Users who accessed the system without a registered account.
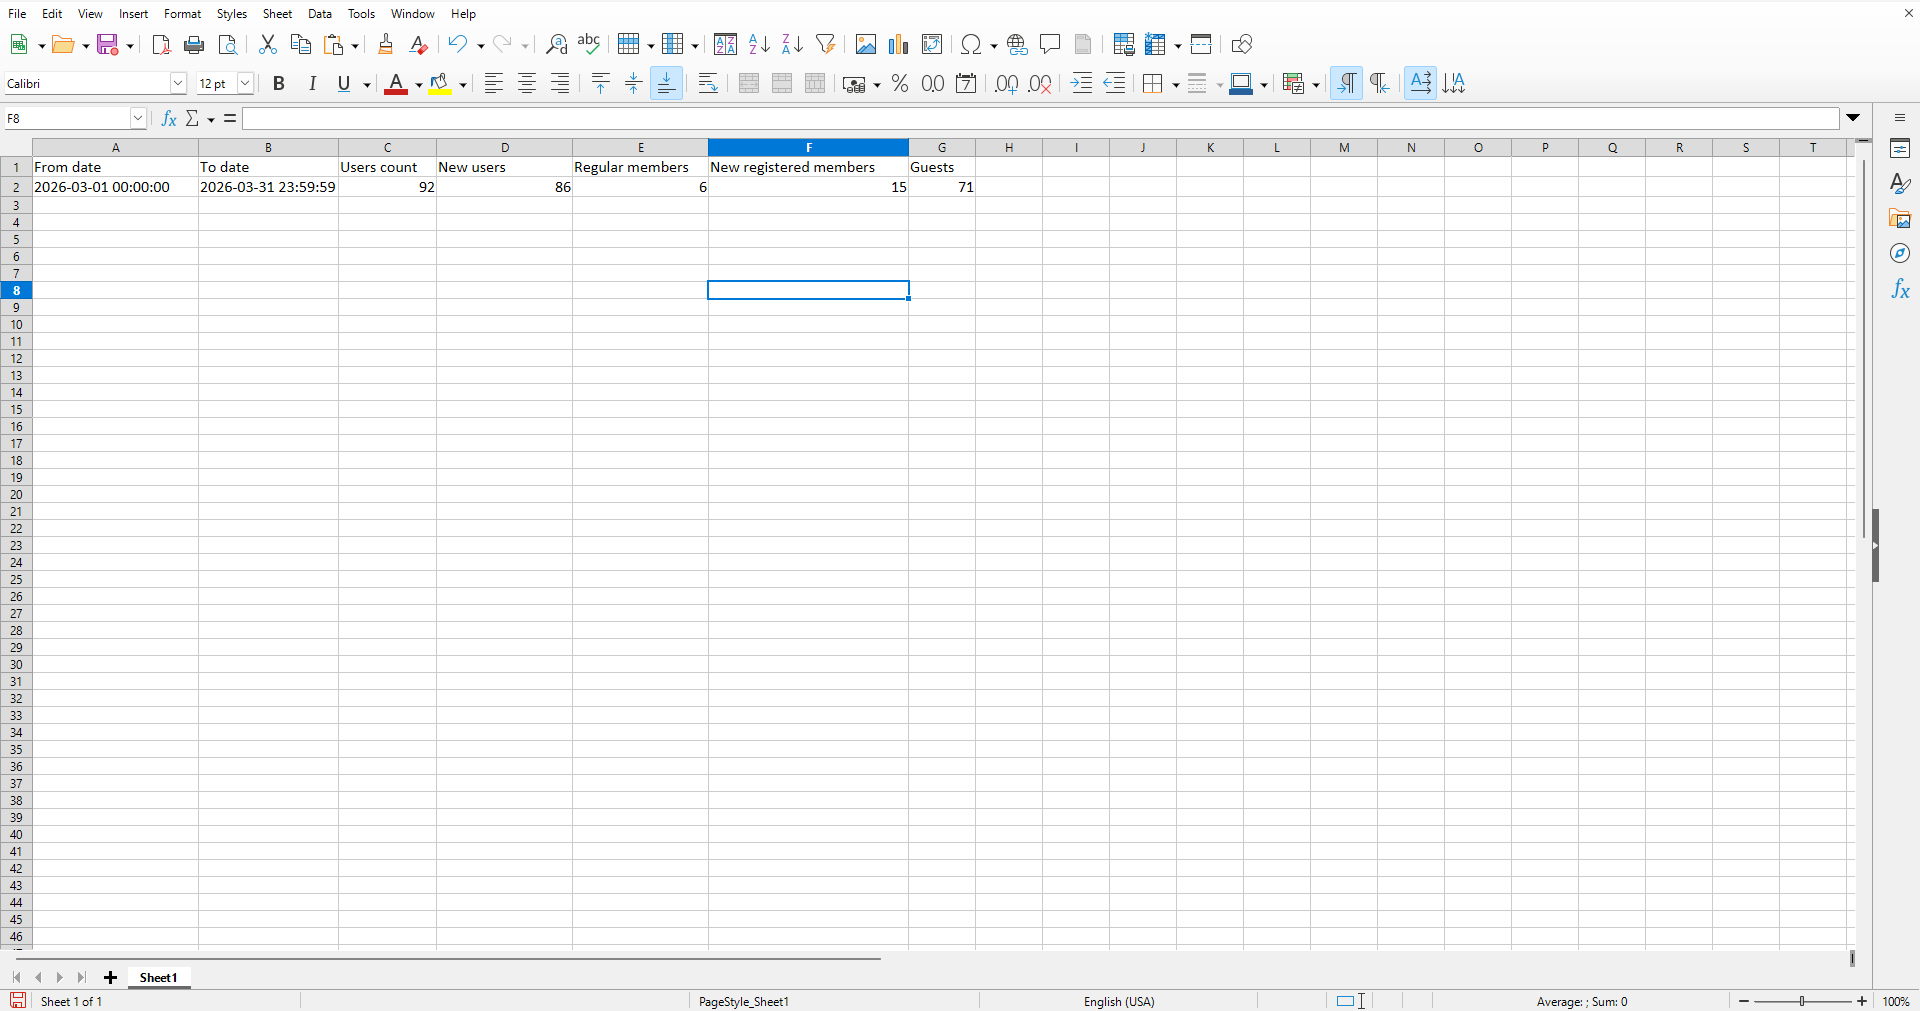
Figure 9
Transactions
- Select the date range, then choose Transactions as the report type.(Figure 10)
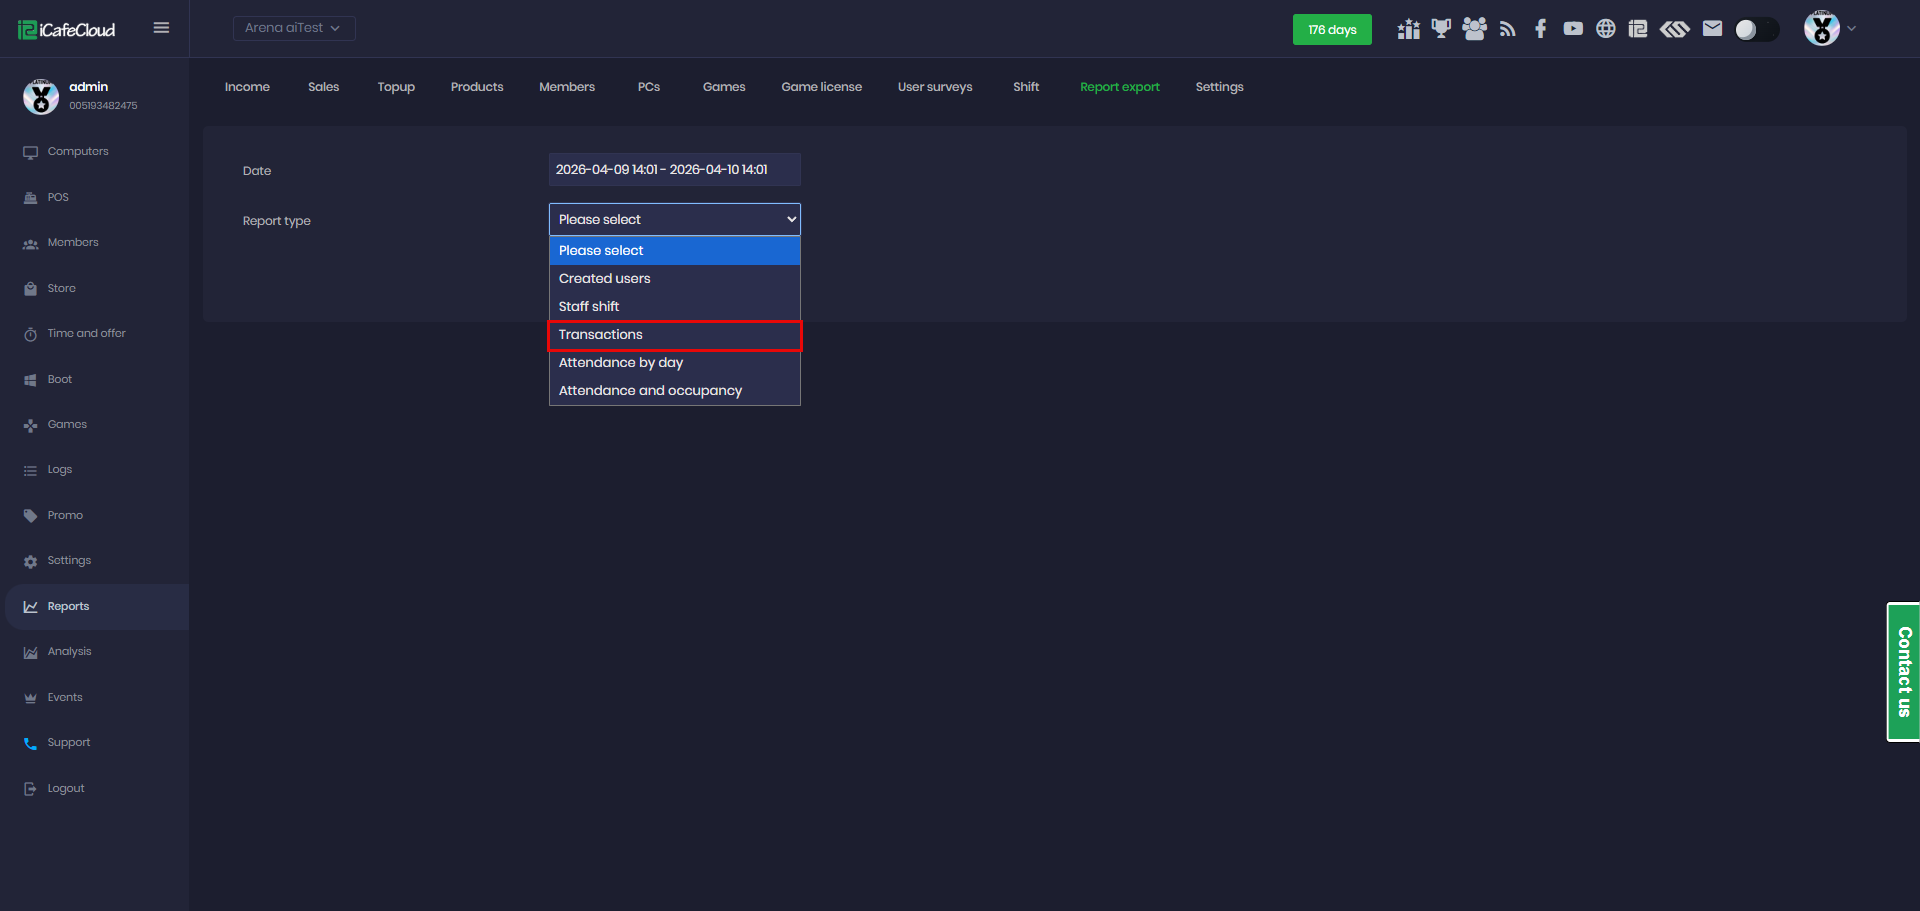
Figure 10
- In Transactions, two additional options will appear. One of them is Operation Type, where you can choose between Sales or Refunds.(Figure 11)
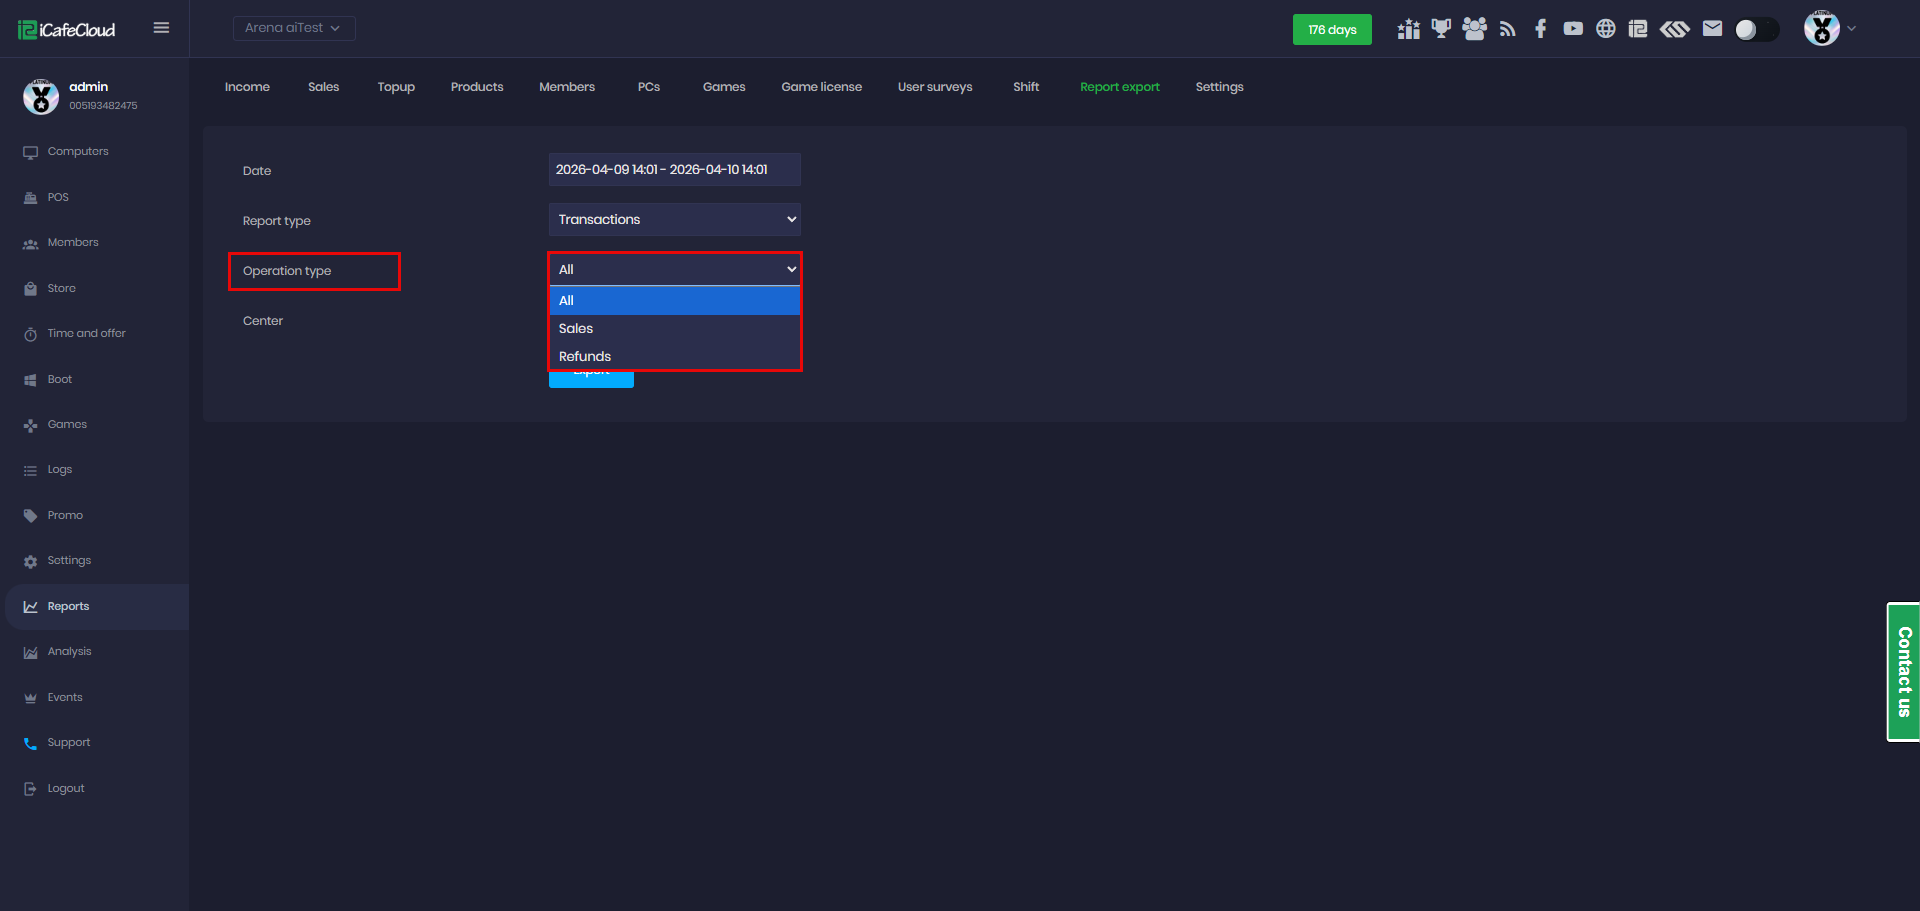
Figure 11
- Finally, you can select which center to generate the report from, in case you have multiple centers.(Figure 12)
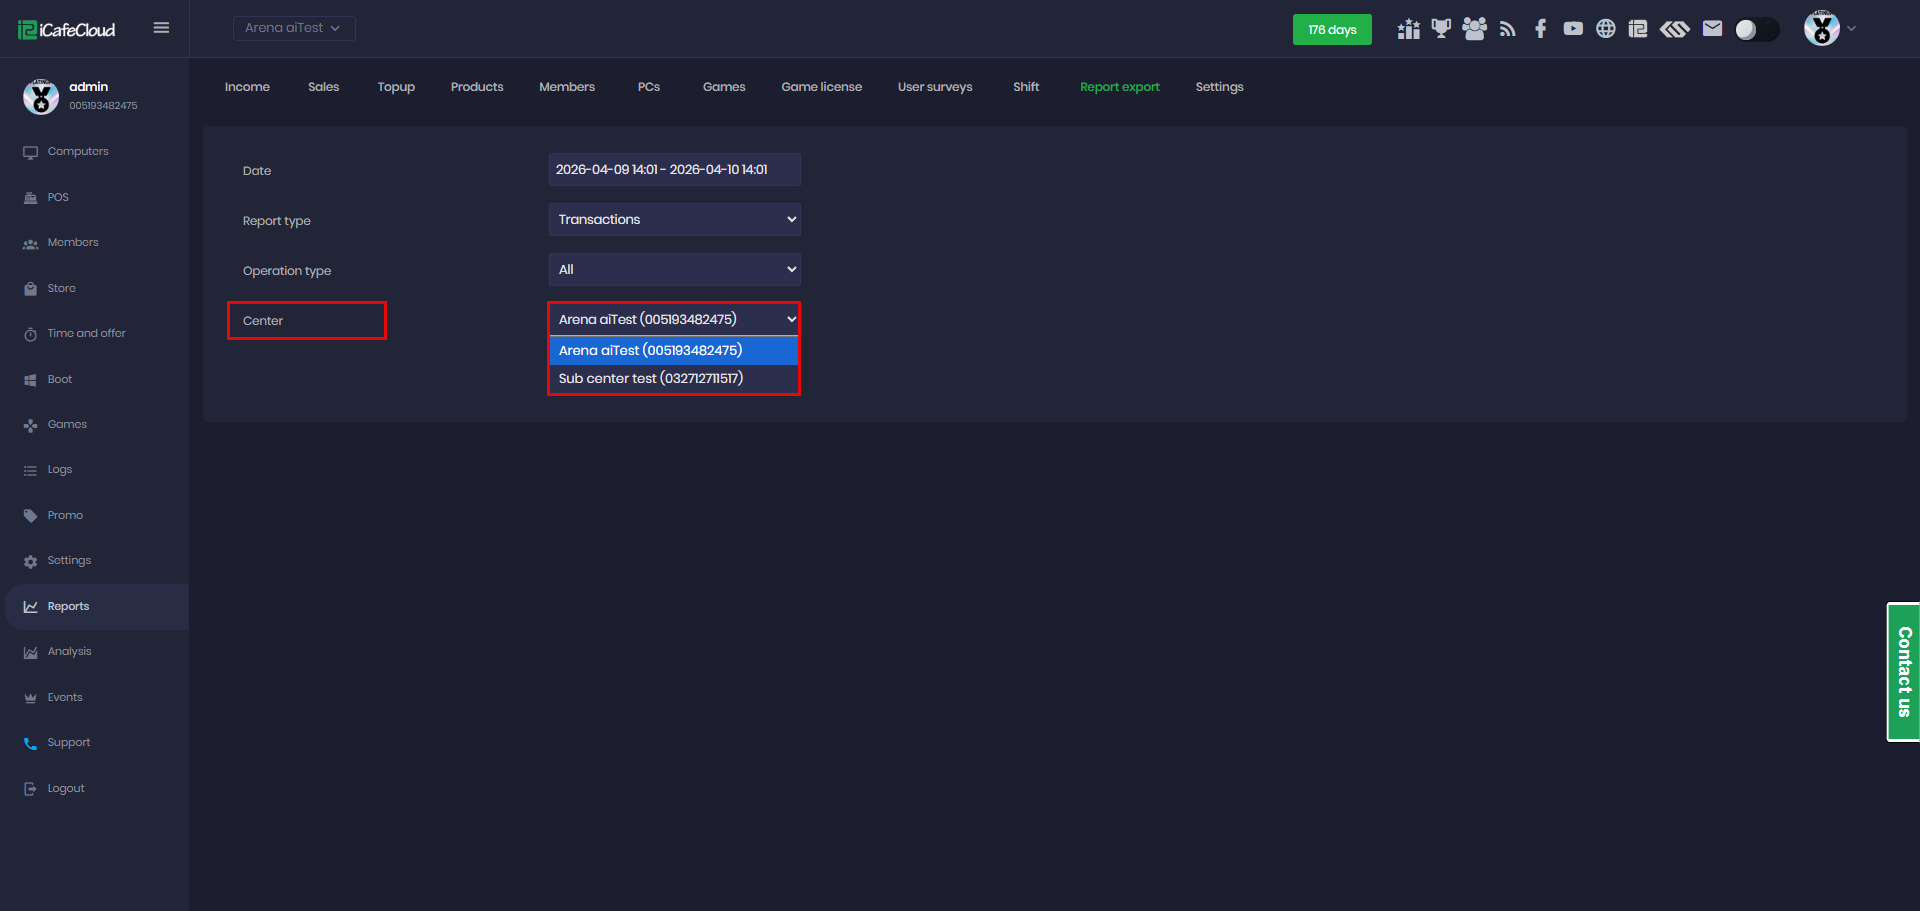
Figure 12
- Select All translations under Operation Type, then click Export to download the report as an XLSX file.(Figure 13)
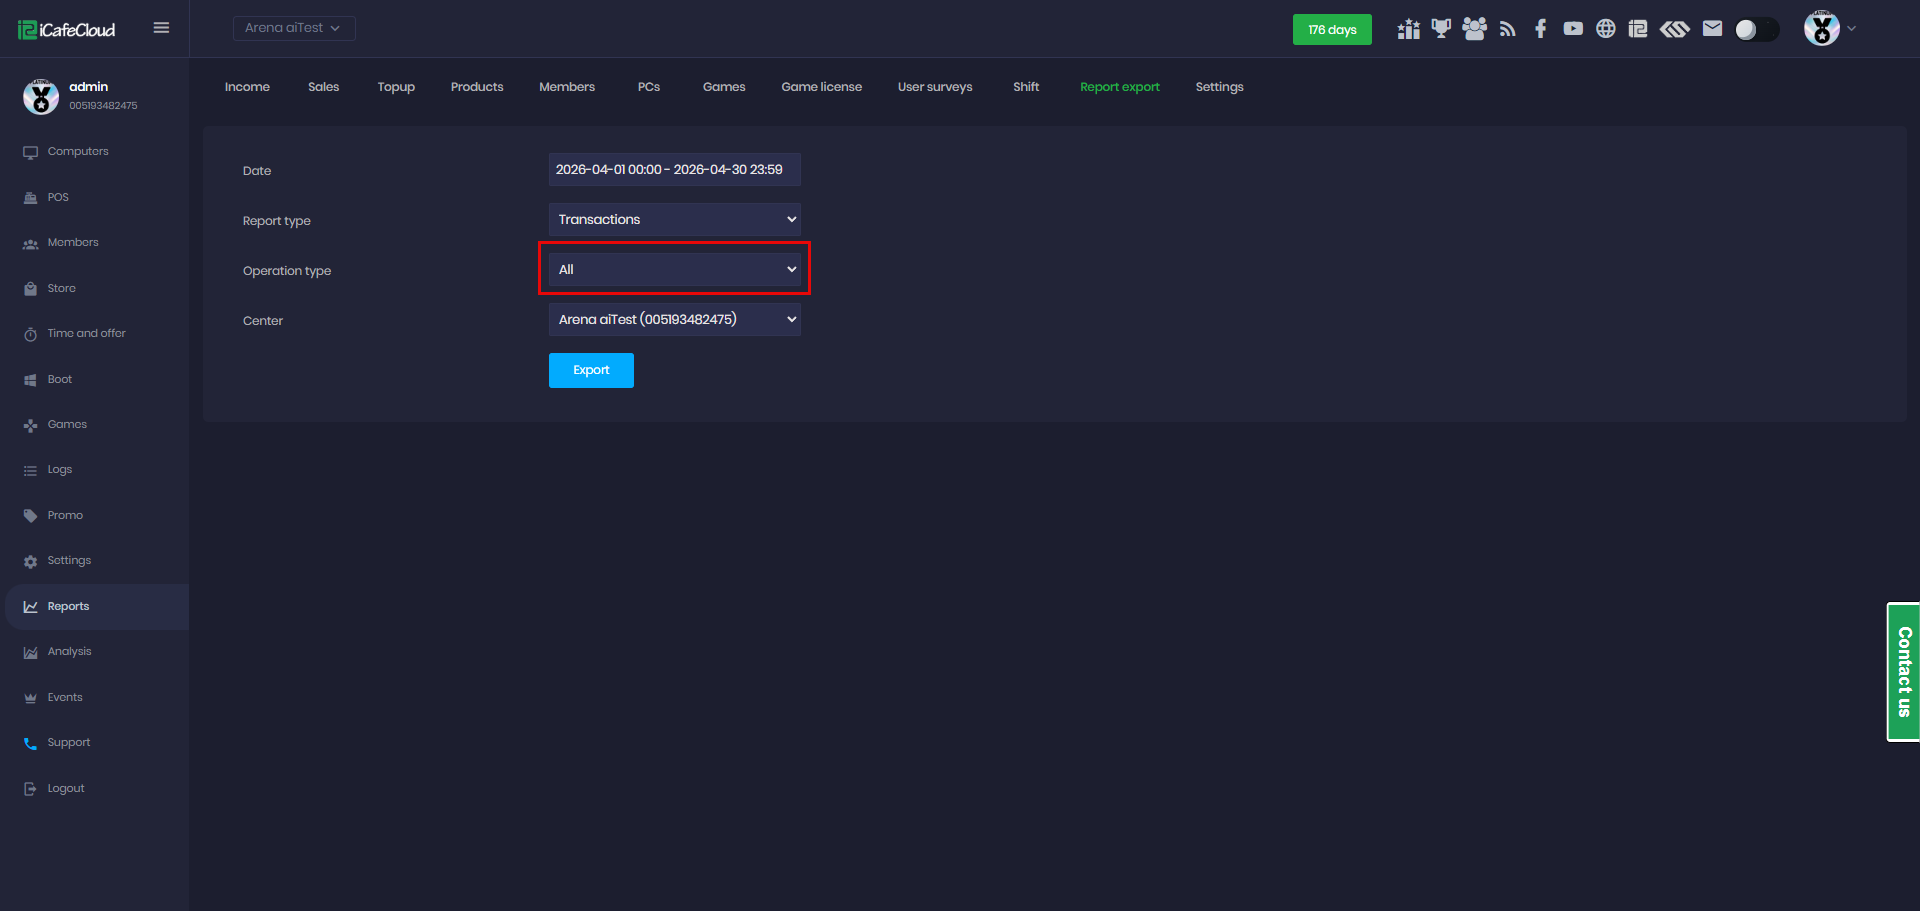
Figure 13
- The downloaded file contains:
Office Name: The name of the center (location) where the transaction was made.
Period: The selected date range for the report; all transactions fall within this timeframe.
Transaction Date: The exact date and time when the transaction occurred.
Order ID: A unique identifier assigned to each transaction/order.
Operation Type: The type of transaction, such as purchase (sale) or refund.
Amount: The total value of the transaction. Positive values indicate sales, while negative values indicate refunds.
Is Cash: The payment method used for the transaction, such as Cash, QR, Credit Card, or Balance.(Figure 14)
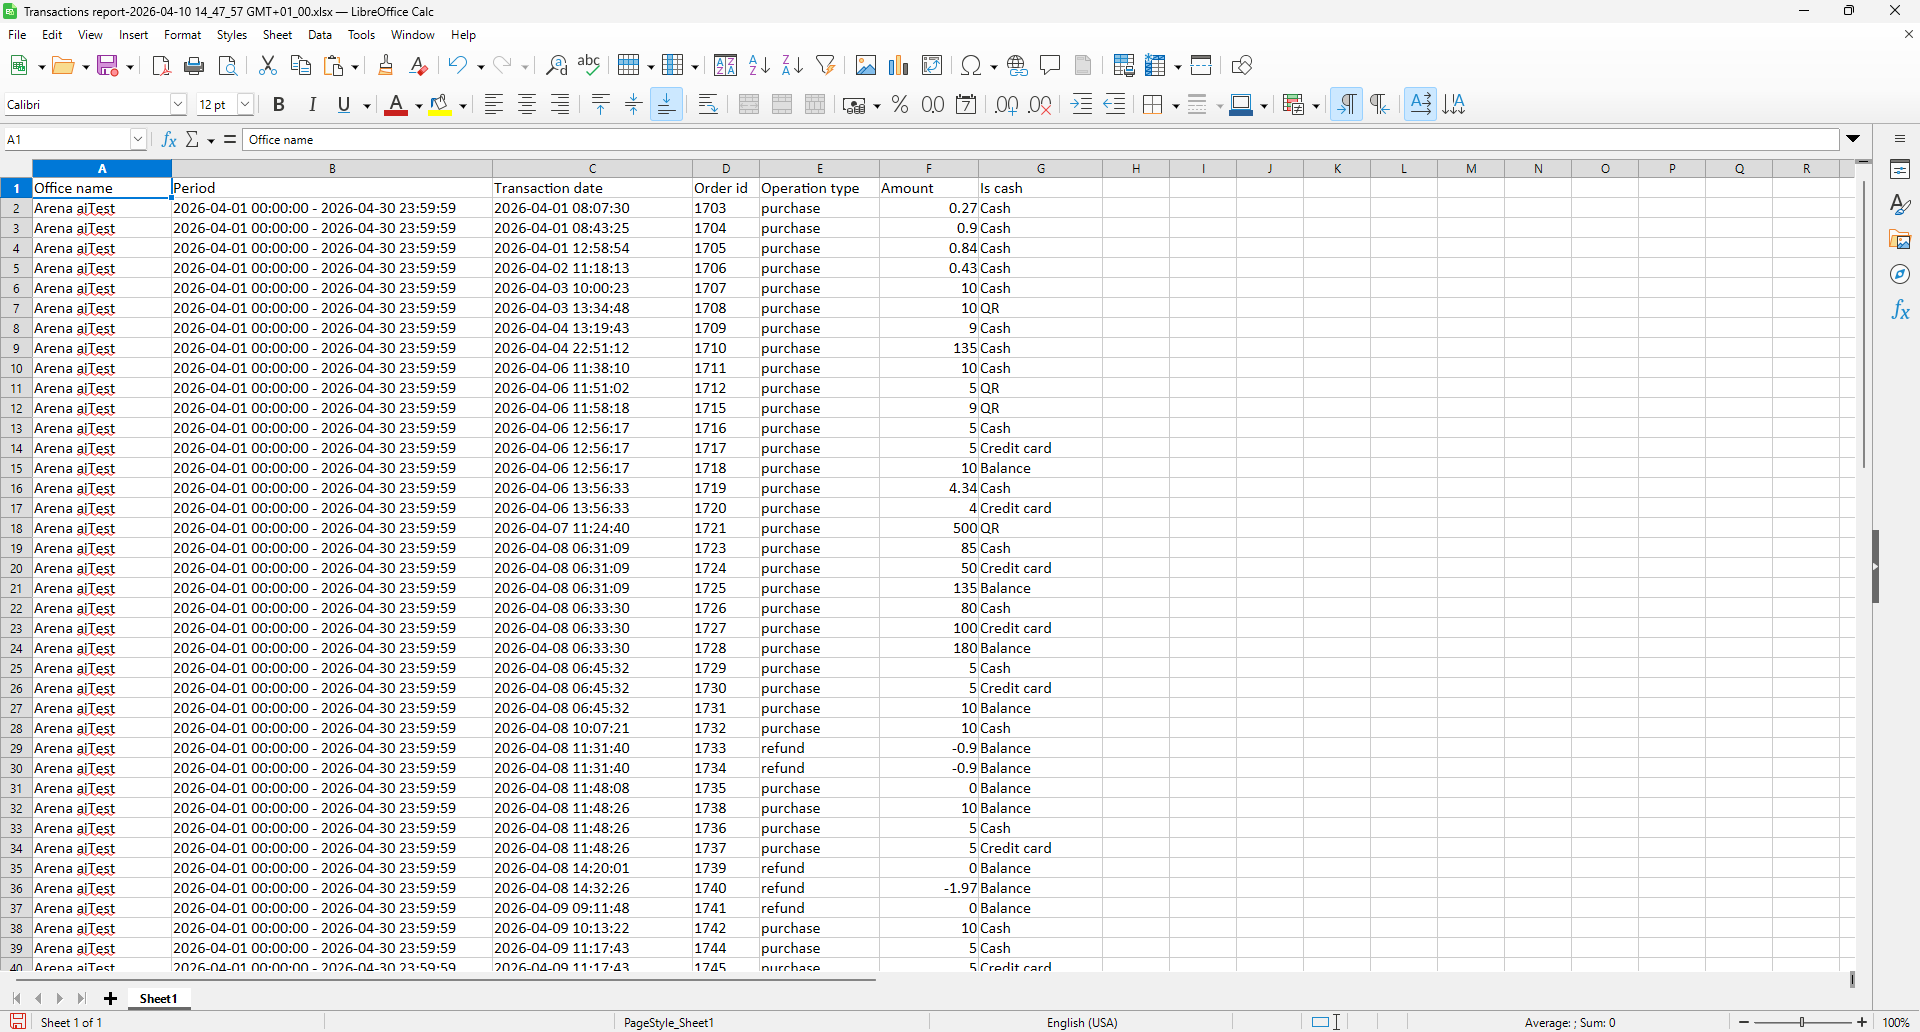
Figure 14
Topup operations
- Select the date range, then choose Top-Up Operations as the report type.(Figure 15)
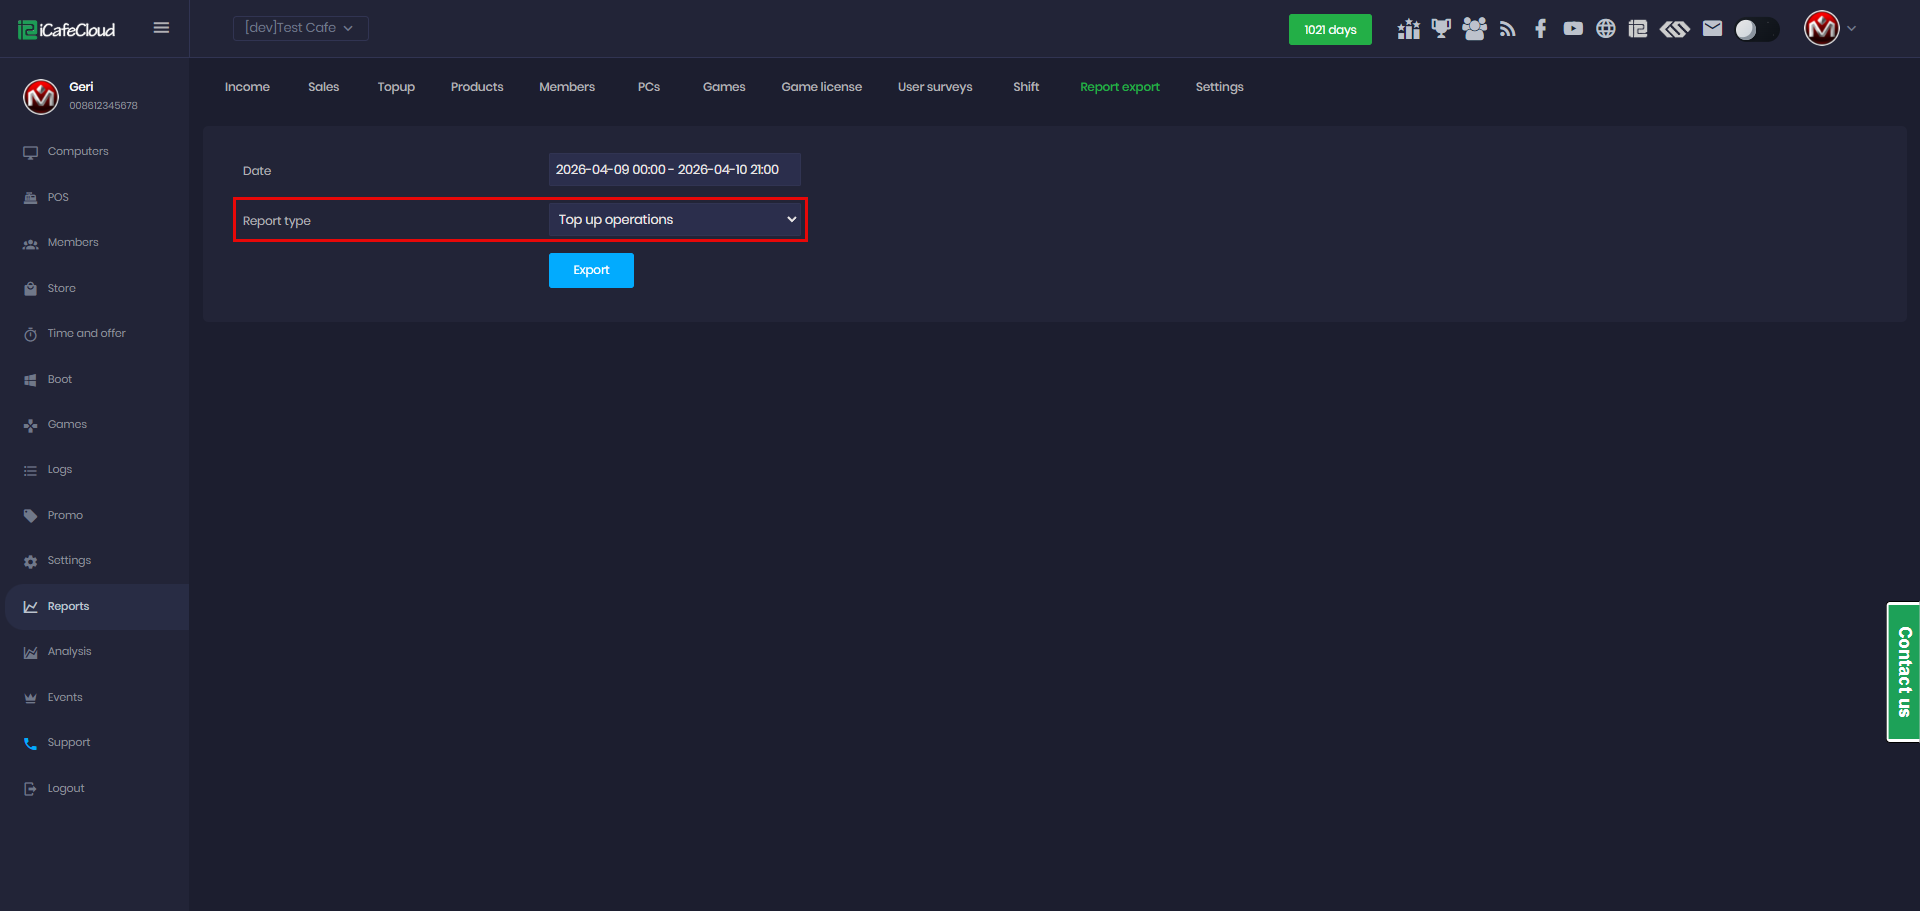
Figure 15
- Click Export to download the data as an XLSX file locally.(Figure 16)
Refill Date: The exact date and time when the top-up was made.
User Login: The user's account of the member who received the top-up.
Account Type: The member group of the account, such as guest or general/member.
Phone Number: The phone number linked to the user account (if provided).
Total Amount: The value added to the user’s balance during the top-up.
PC Name: The name or identifier of the PC where the top-up was performed (if applicable).
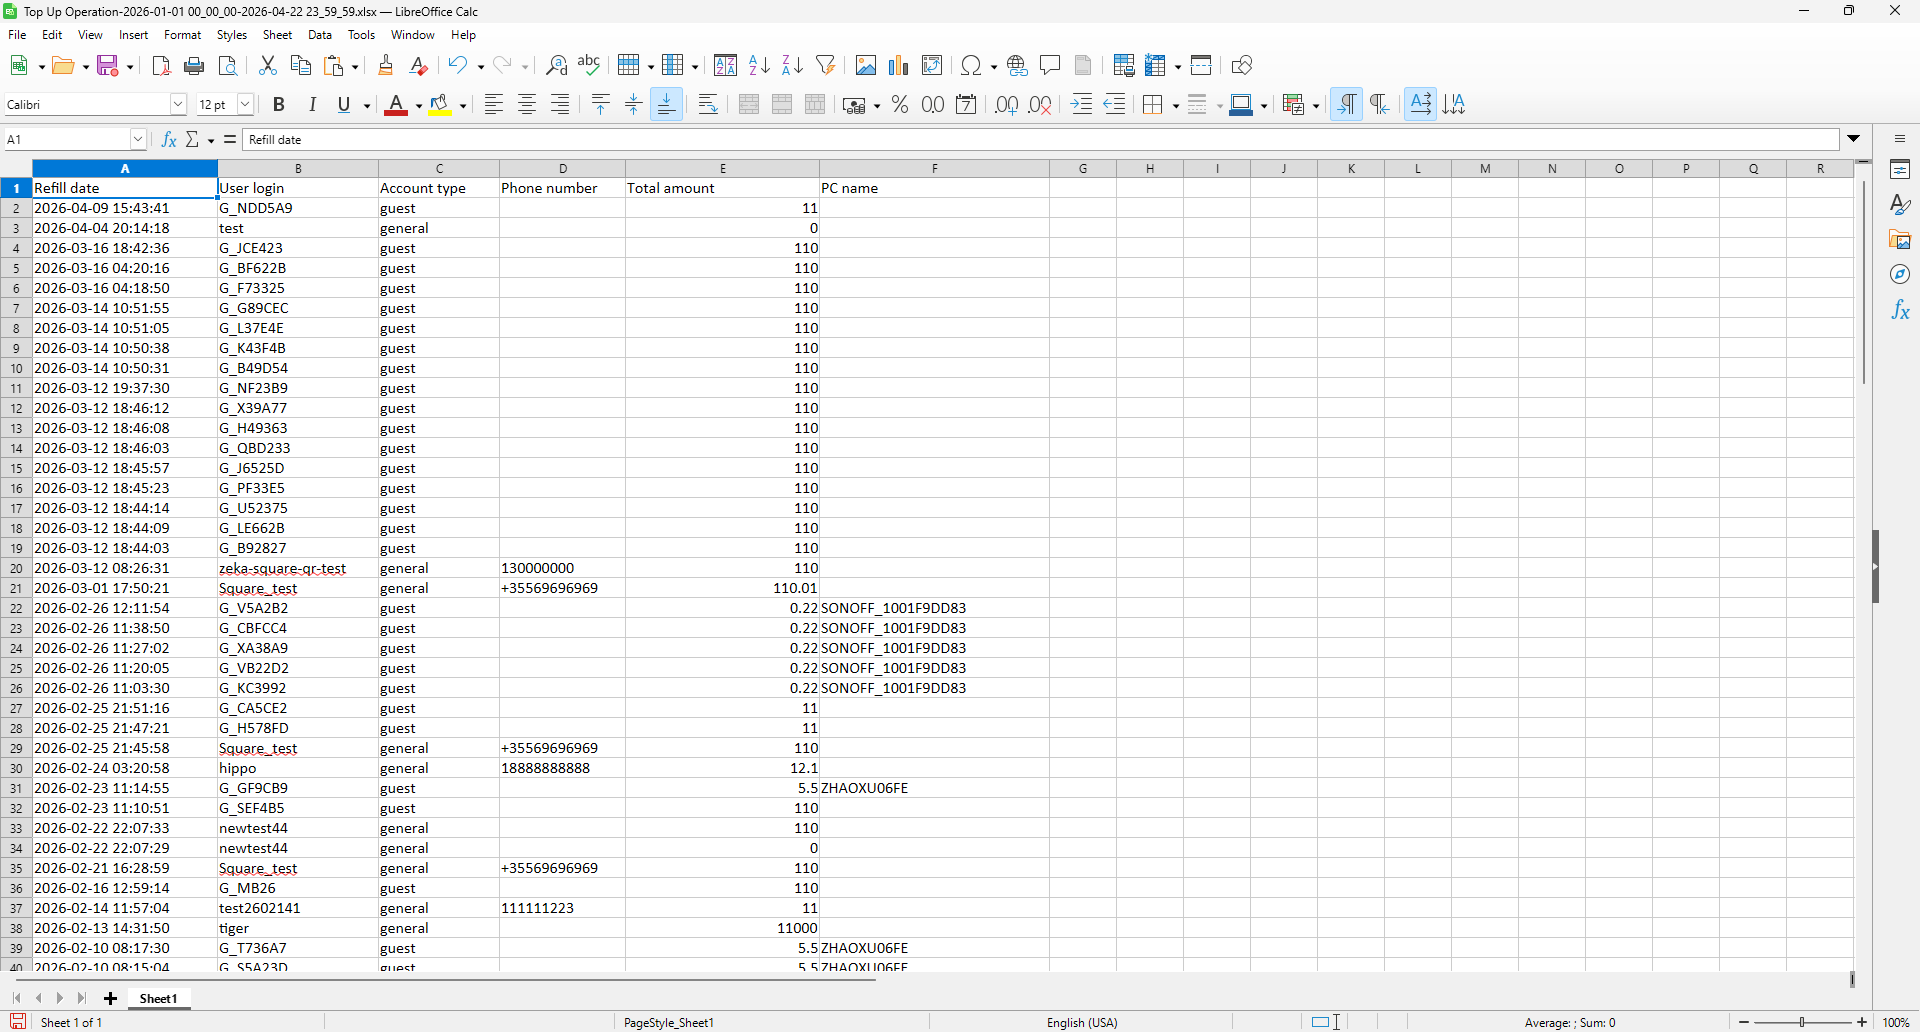
Figure 16
Canceled reservations
- Select the date range, choose Canceled Reservations as the report type, and pick the desired center (if you have more than one) to retrieve the data. (Figure 17)

Figure 17
- Click Export to download the XLSX file to your local device. (Figure 18)
Office name – The center where the reservation was made.
Reservation date – The scheduled date and start time of the reservation.
Reservation duration – The total length of the reservation (e.g., 01:00:00 = 1 hour).
Reservation type – The category of the reservation (Member or Guest).
Canceler login – The username of the staff or user who canceled the reservation.
Cancel date – The exact date and time when the reservation was canceled.
User login – The account associated with the reservation (the customer or user who booked it).
Comment – Any additional notes or remarks related to the cancellation (if provided).
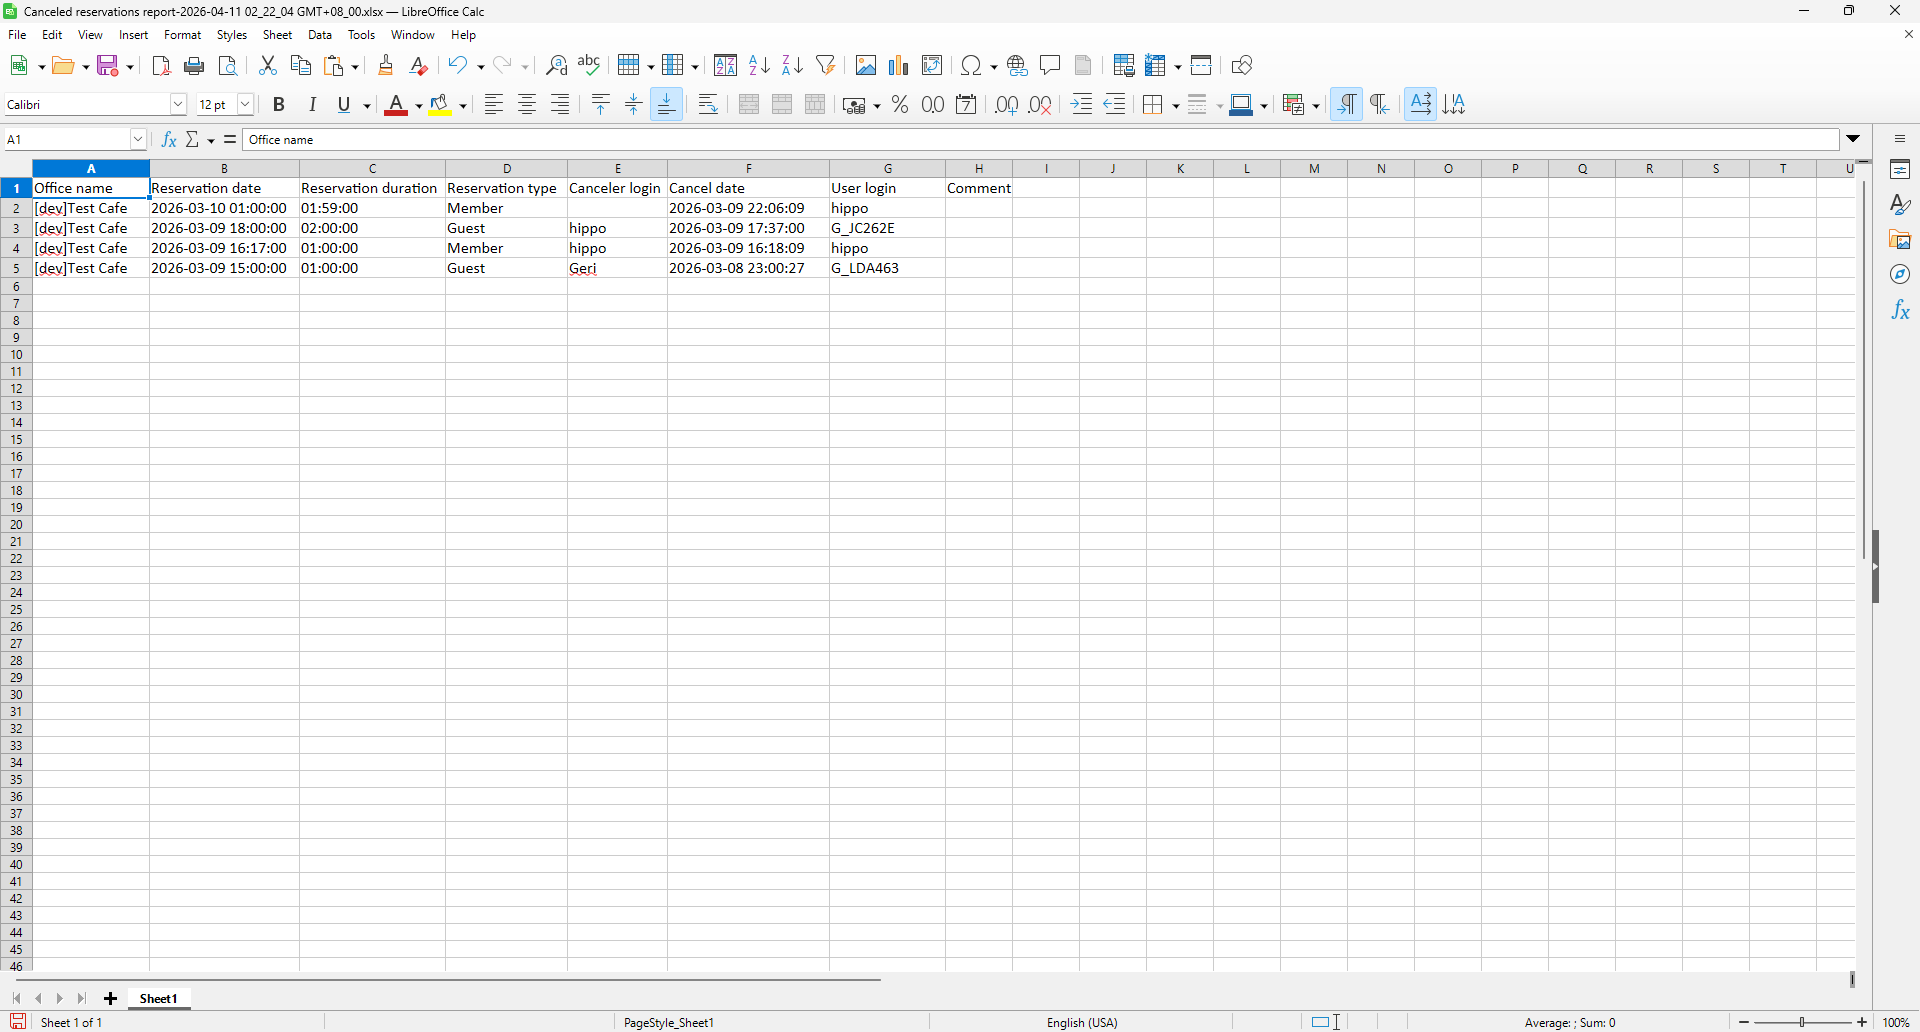
Figure 18
Shop items stock
- Select the preferred date range, choose Shop Item Stock as the report type, and select the center you want to export the data from (if you have multiple centers). (Figure 19)
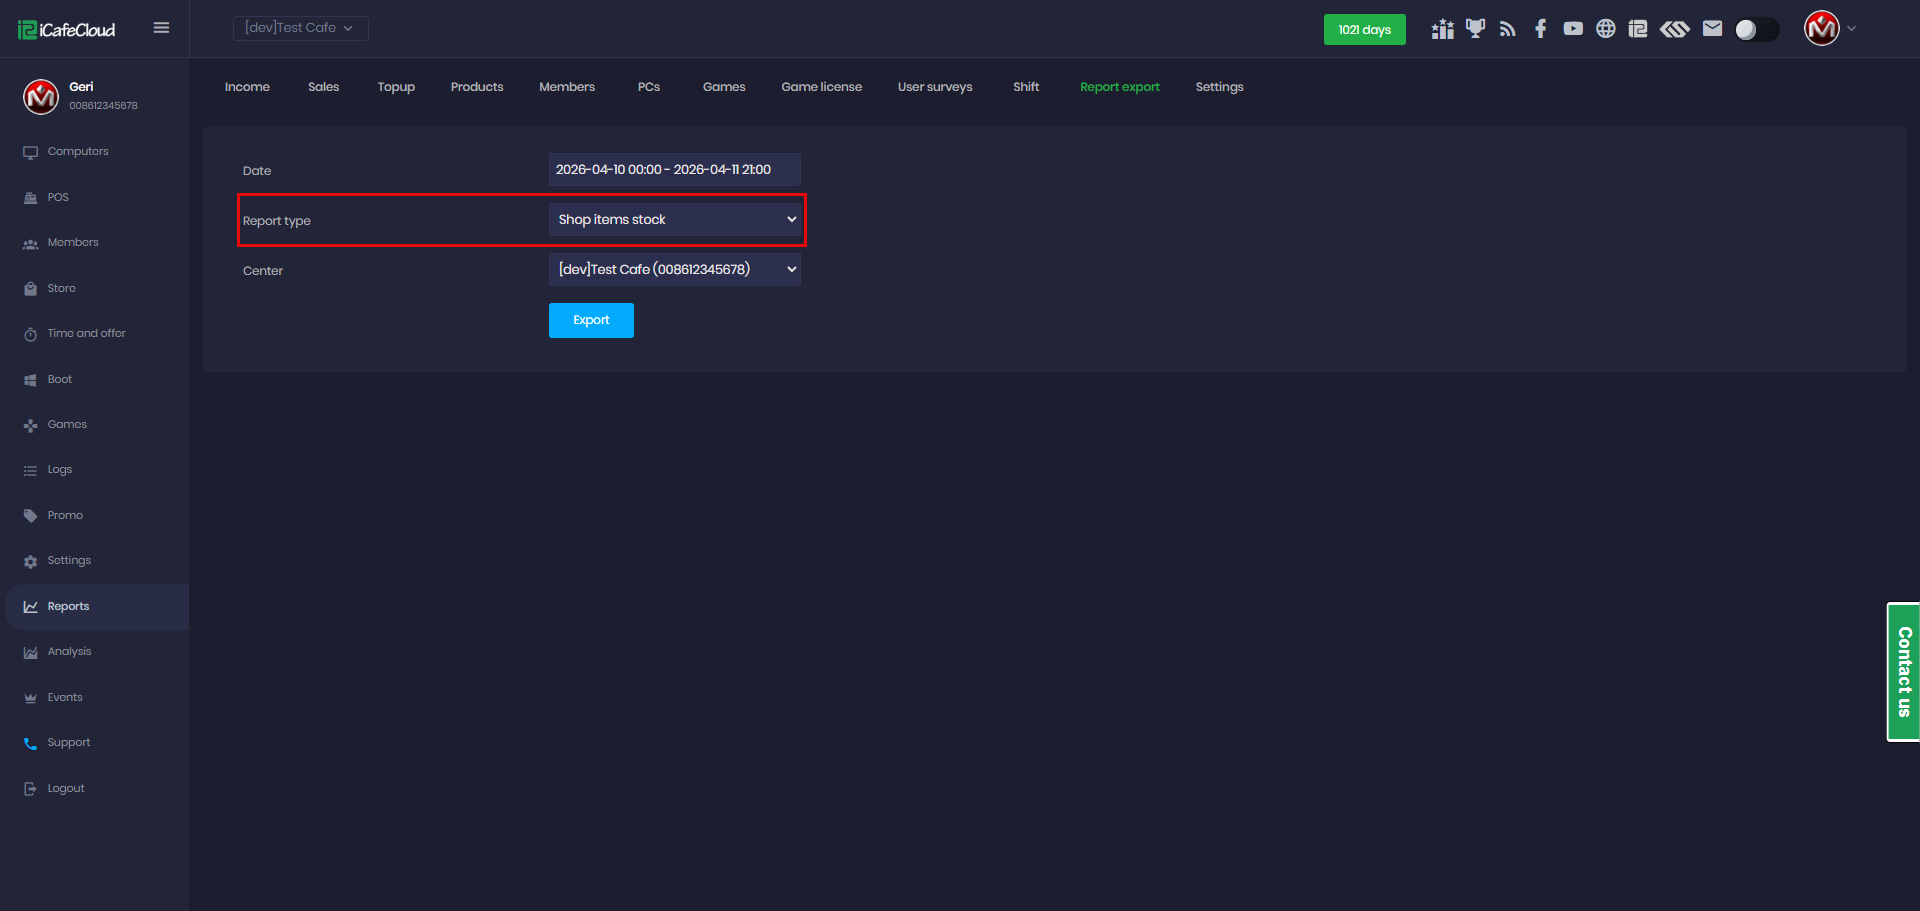
Figure 19
- Click Export to download the data as an XLSX file to your local device. (Figure 20)
Product category – The group or classification the product belongs to (e.g., Drinks, Snacks).
Barcode – The unique identifier (usually numeric) assigned to the product for scanning and tracking. It may be empty if not defined.
Product name – The name or label of the item as registered in the system.
Actual quantity – The current stock level available in inventory (real-time quantity).
Creation date – The date and time when the product was added to the system.
Selling price – The price at which the product is sold to customers.
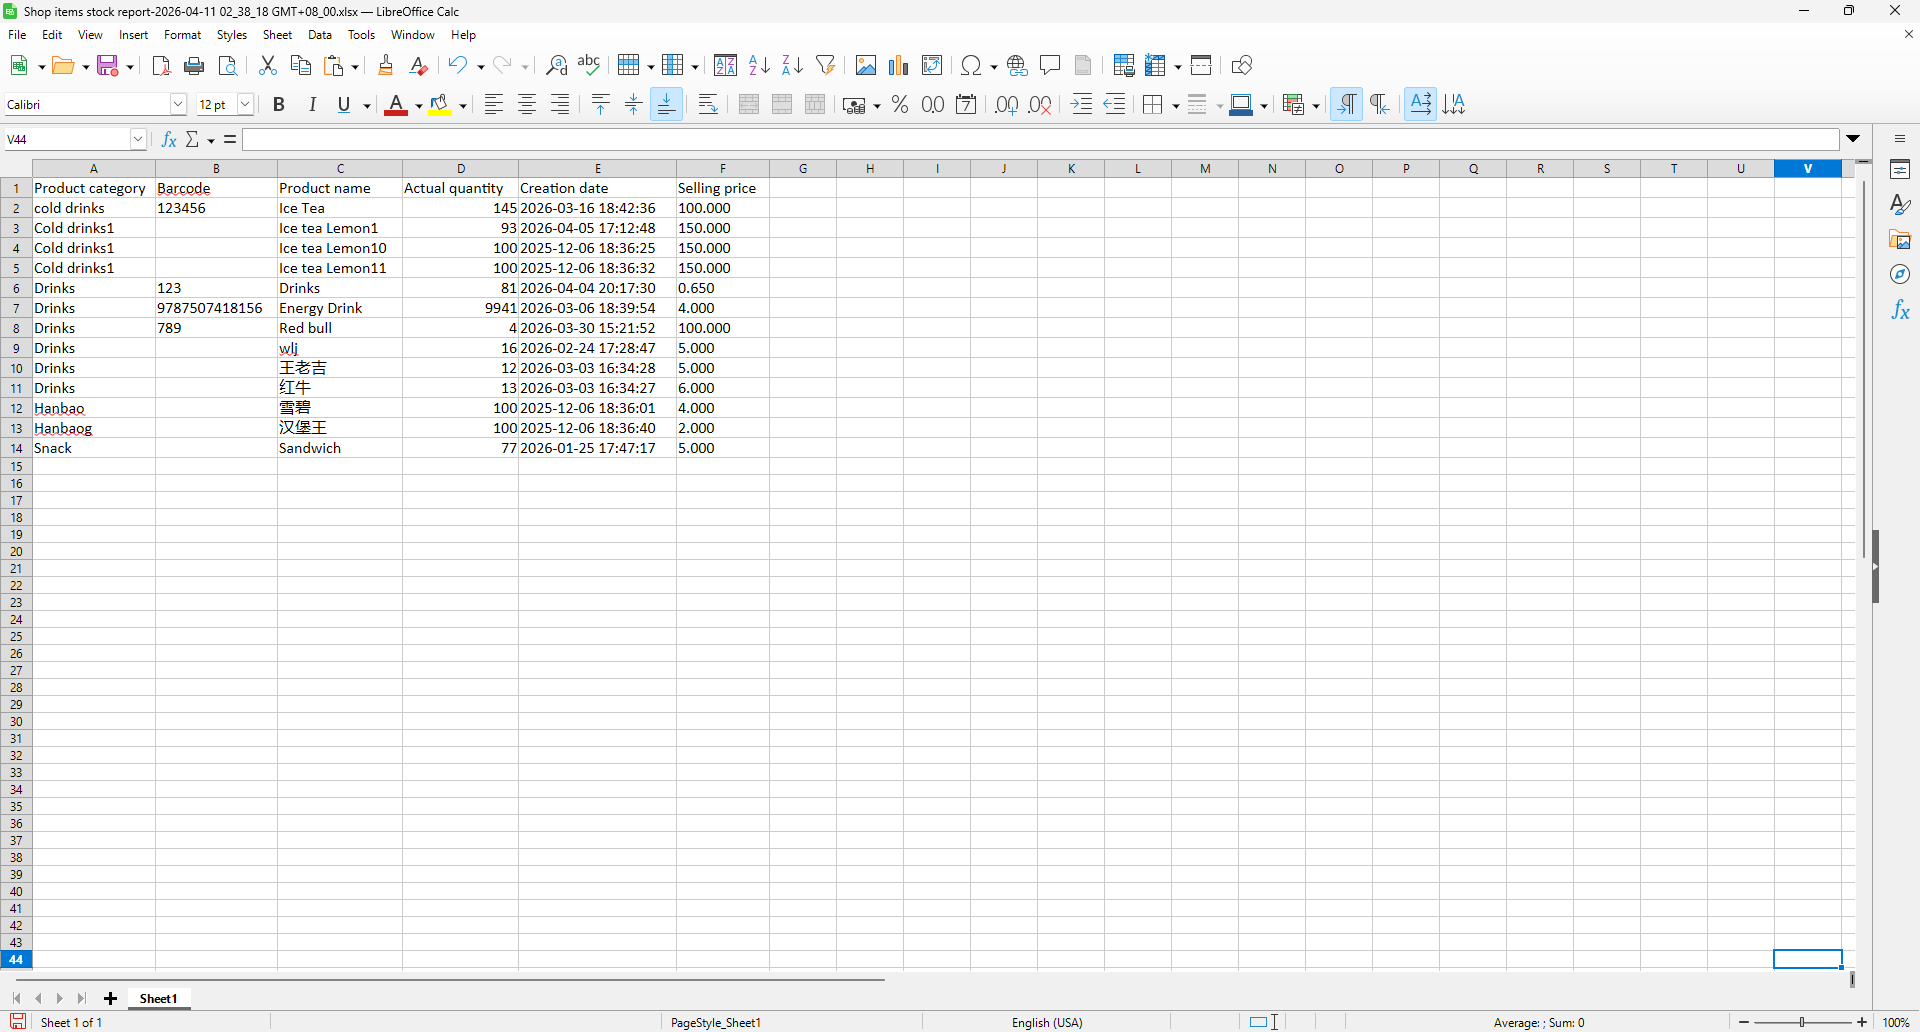
Figure 20
Offer usage
- Select the preferred date range and choose Offer usage as the report type (Figure 21)

Figure 21
- Click Export to download the data as an XLSX file to your local device. (Figure 22)
Member account – The account of the customer who used or purchased the offer.
Offer name – The name of the offer or package applied.
Purchase time – The exact date and time when the offer was purchased or activated.
Price – The amount paid for the offer. A value of 0 typically indicates a free or promotional offer.
Duration (mins) – The amount of time (in minutes) granted by the offer.
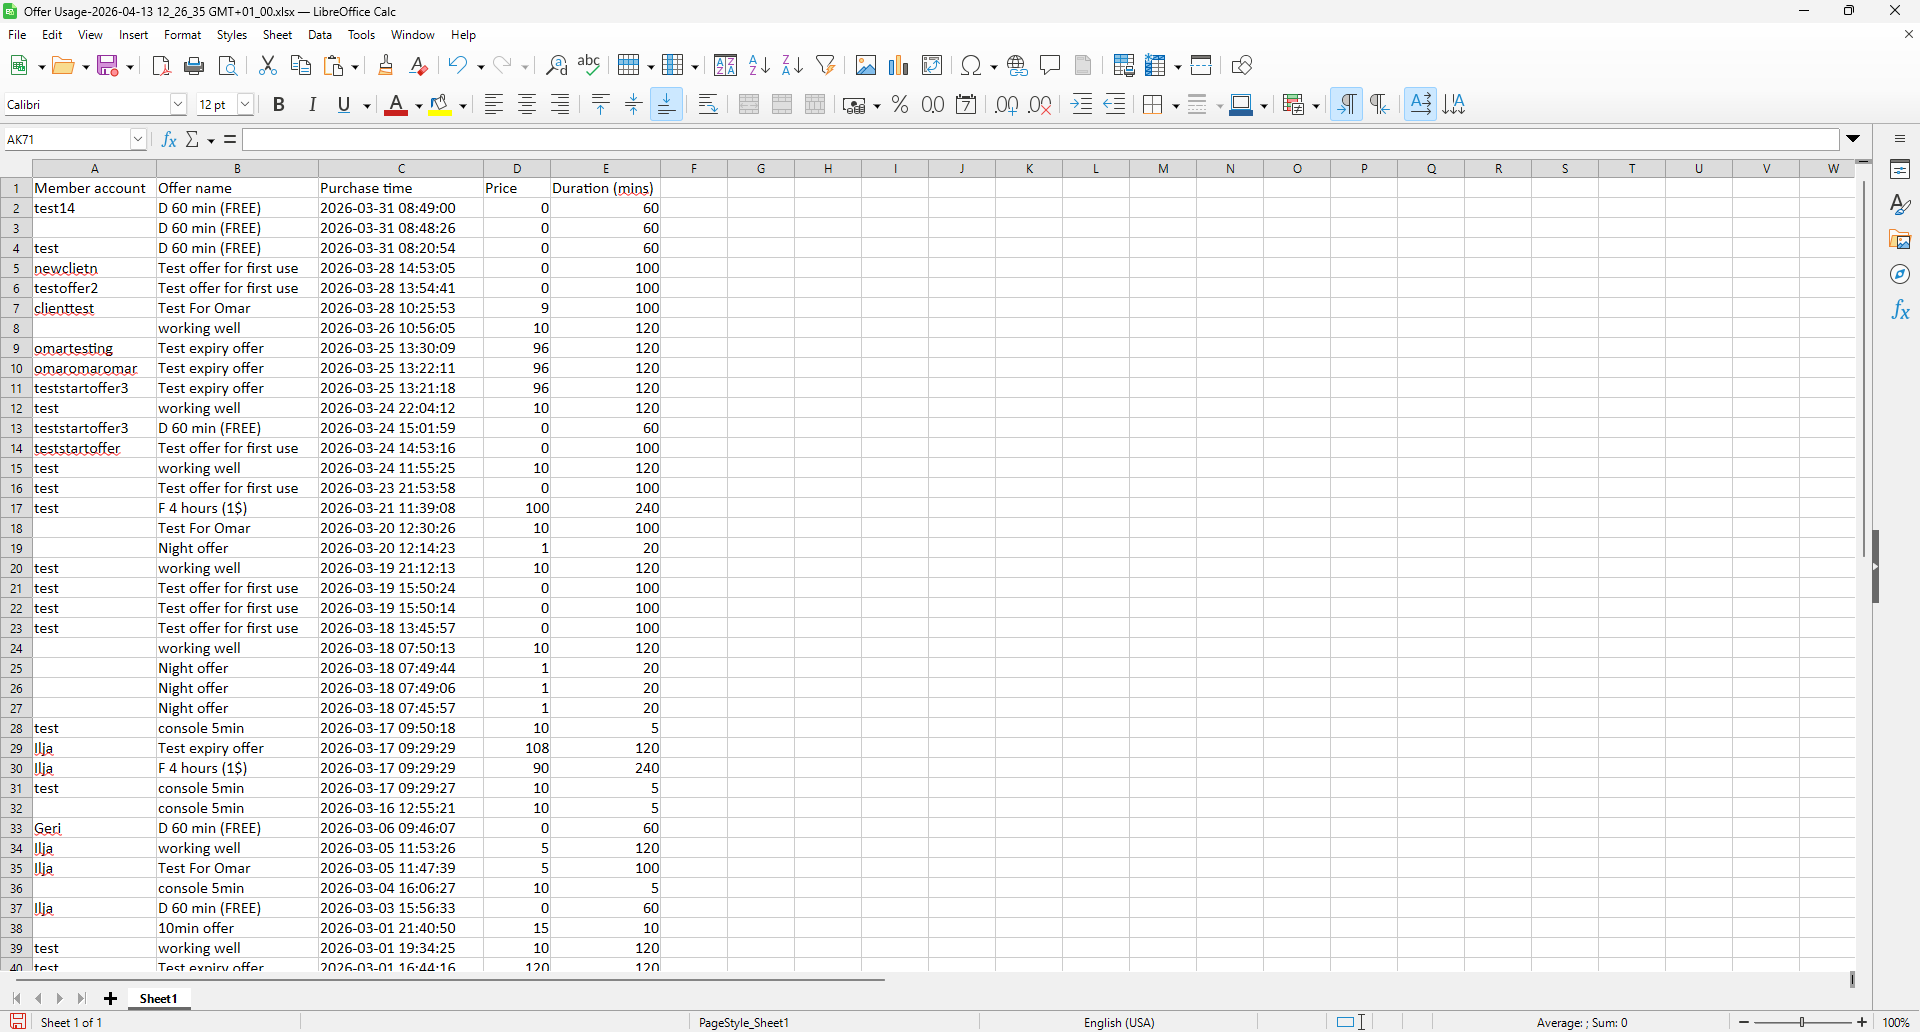
Figure 22
Used promo codes
- Select the preferred date range and choose Used promo codes as the report type (Figure 23)
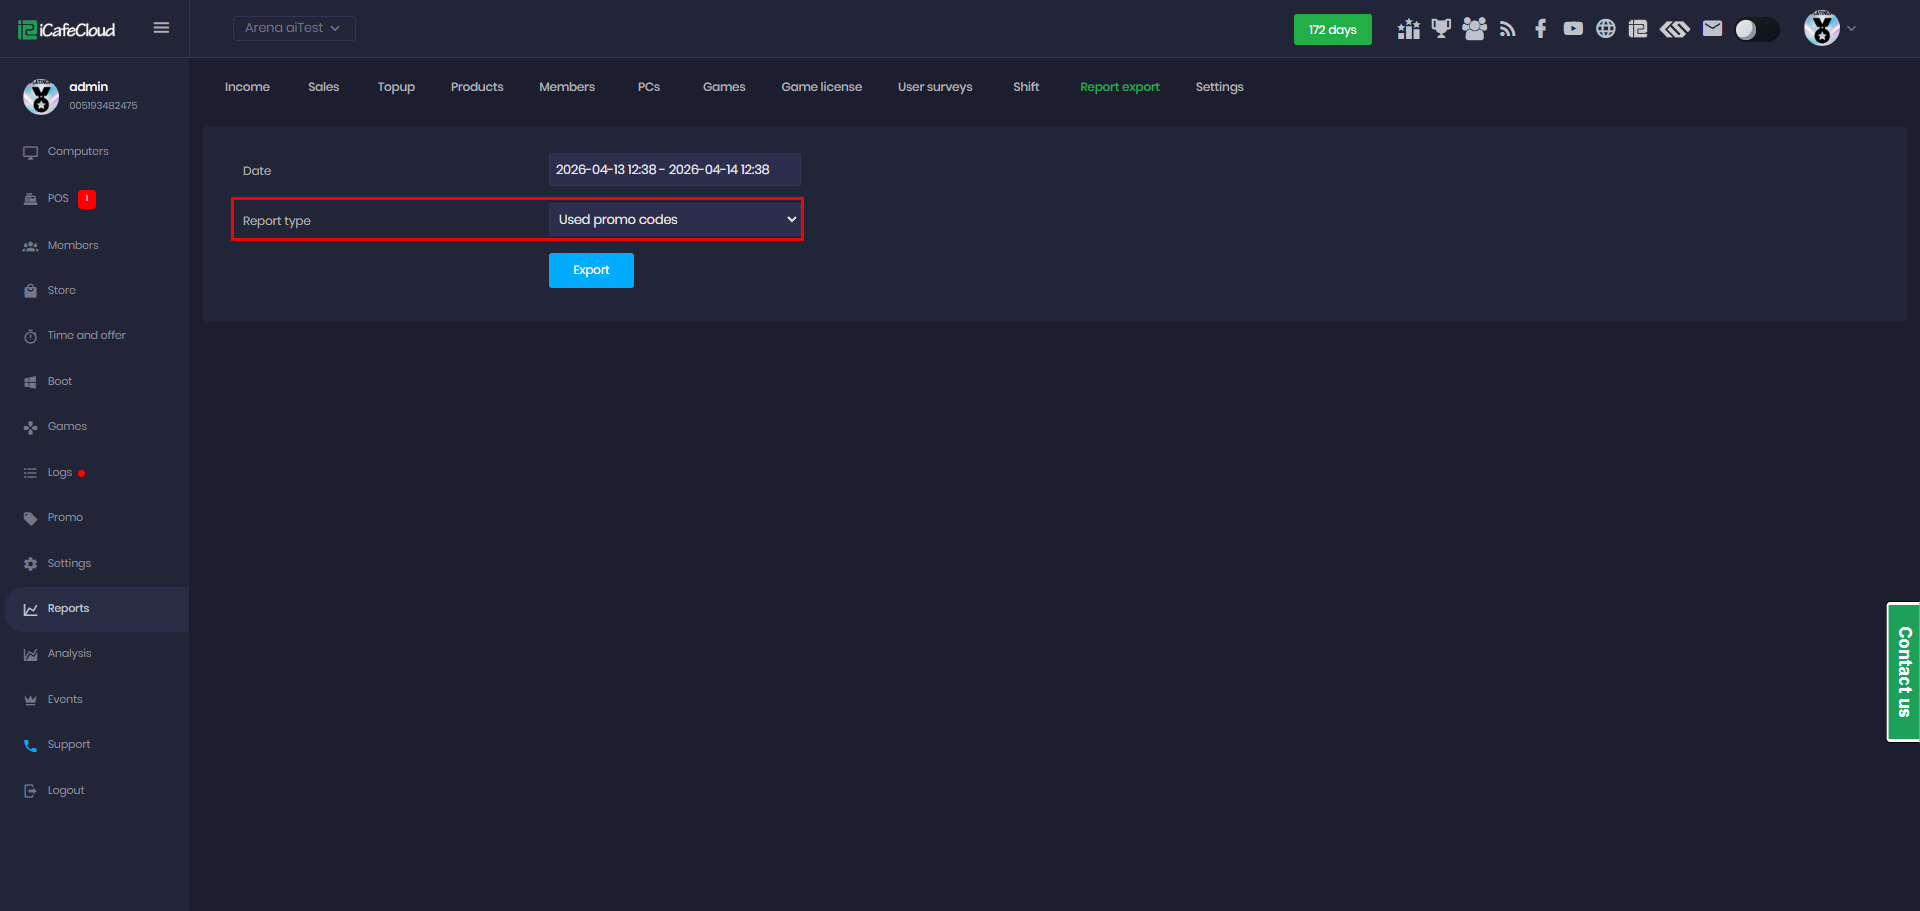
Figure 23
- Click Export to download the data as an XLSX file to your local device. (Figure 24)
Redeemed count – The number of times the promo code has been used.
Remaining qty – How many uses are still available for the promo code. “Unlimited” means no usage limit.
Member account – The user account that redeemed the promo code.
Promo name – The name or label assigned to the promotion (e.g., DISCOUNT40).
Promo code – The actual code entered by the user to redeem the promotion.
Promo type – The type of promotion (e.g., Topup, Discount, Bonus).
Use date – The date and time when the promo code was used.
To date – The expiration date of the promo code. A value like 9999-12-31 usually means no expiration.
Bonus amount – The bonus value granted by the promo
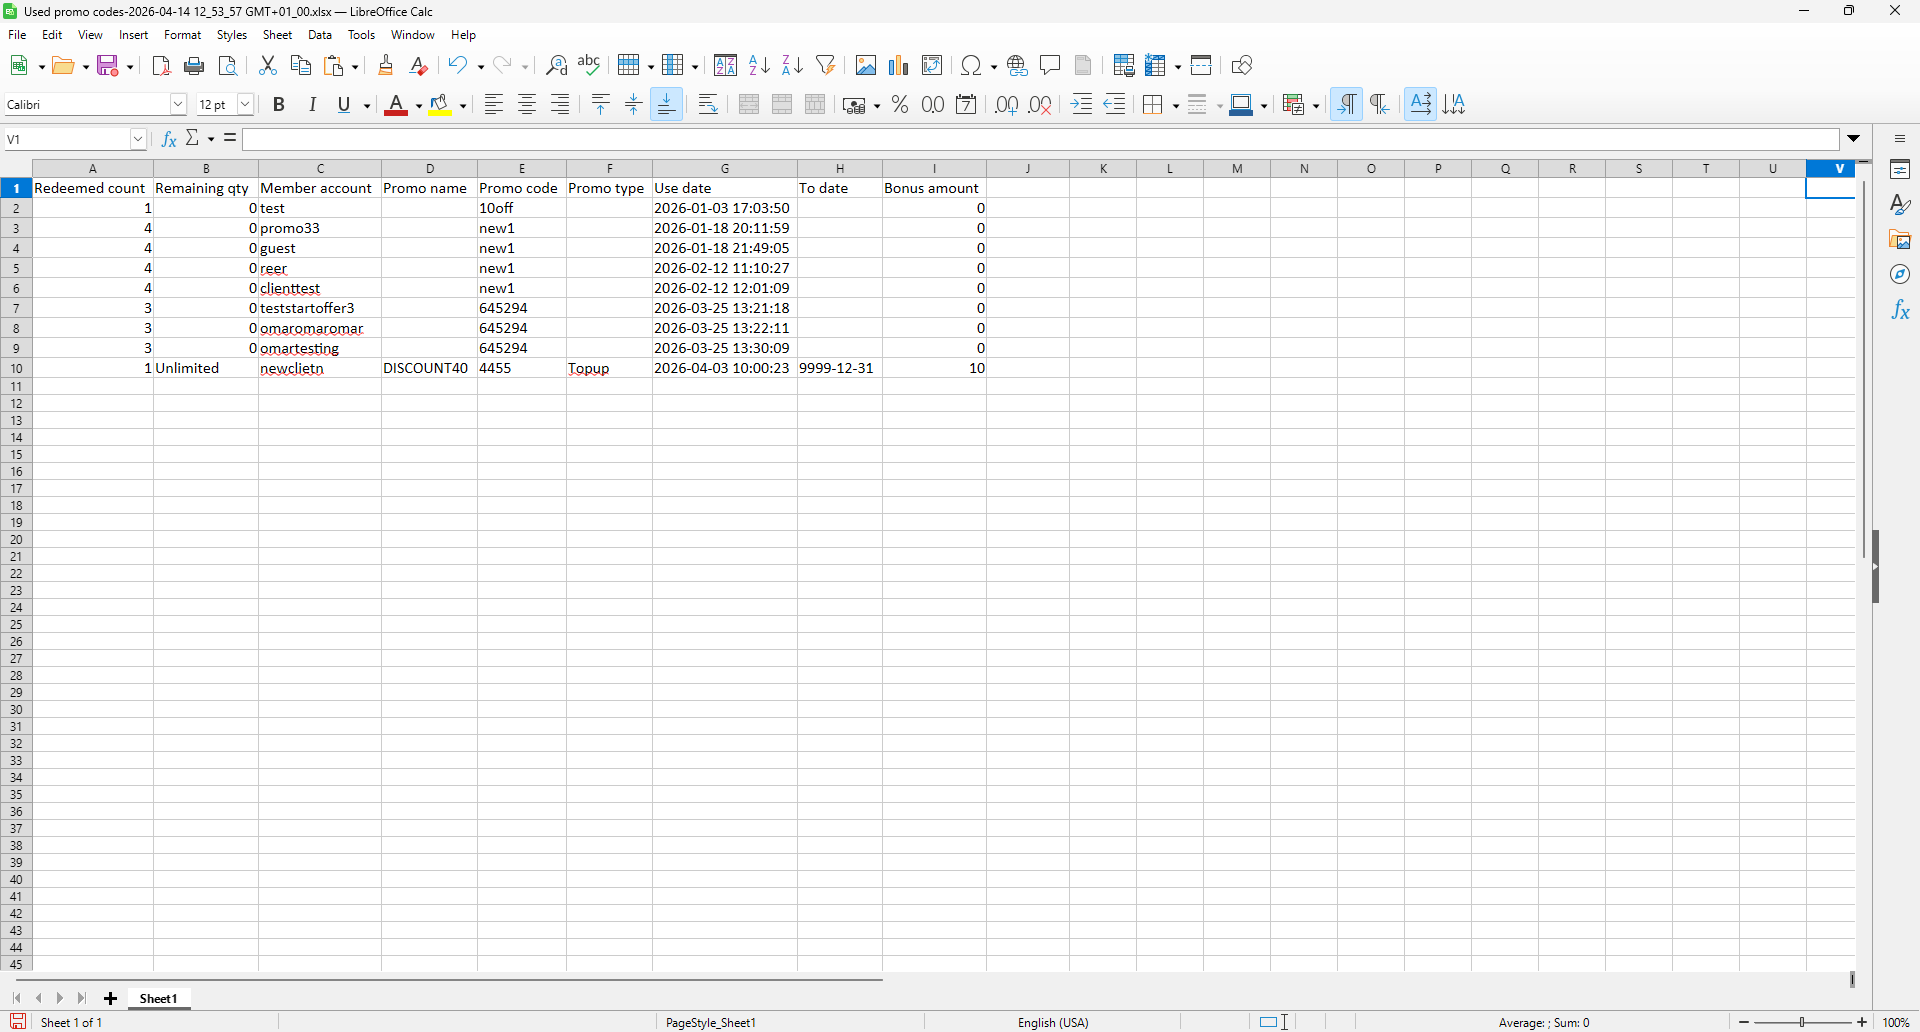
Figure 24
Refunds
- Select the preferred date range and choose Refunds as the report type (Figure 25)
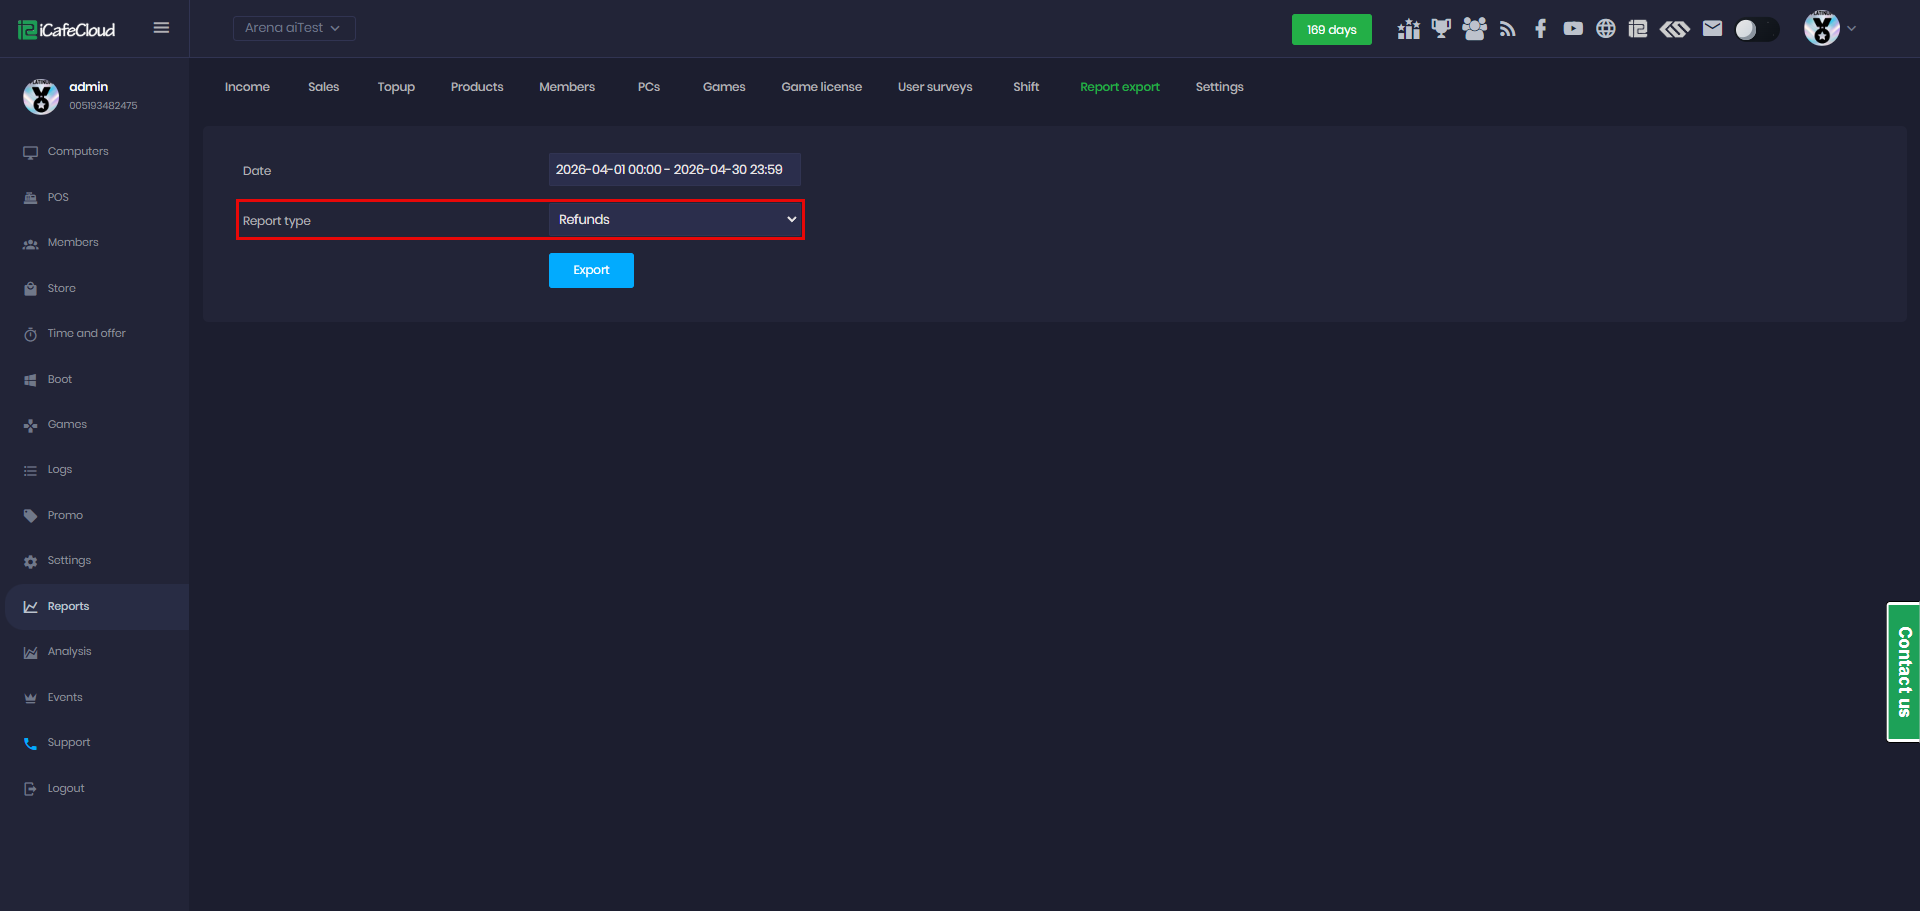
Figure 25
- Click Export to download the data as an XLSX file to your local device. (Figure 26)
Order No: The unique identification number of the order or transaction.
Purchase date: The date and time when the order was created.
Return date: The date and time when the order was closed.
Return sum: The amount refunded or returned to the customer.
Order total: The total amount charged for the order or session.
Cashier login: The username of the staff member who processed the order.
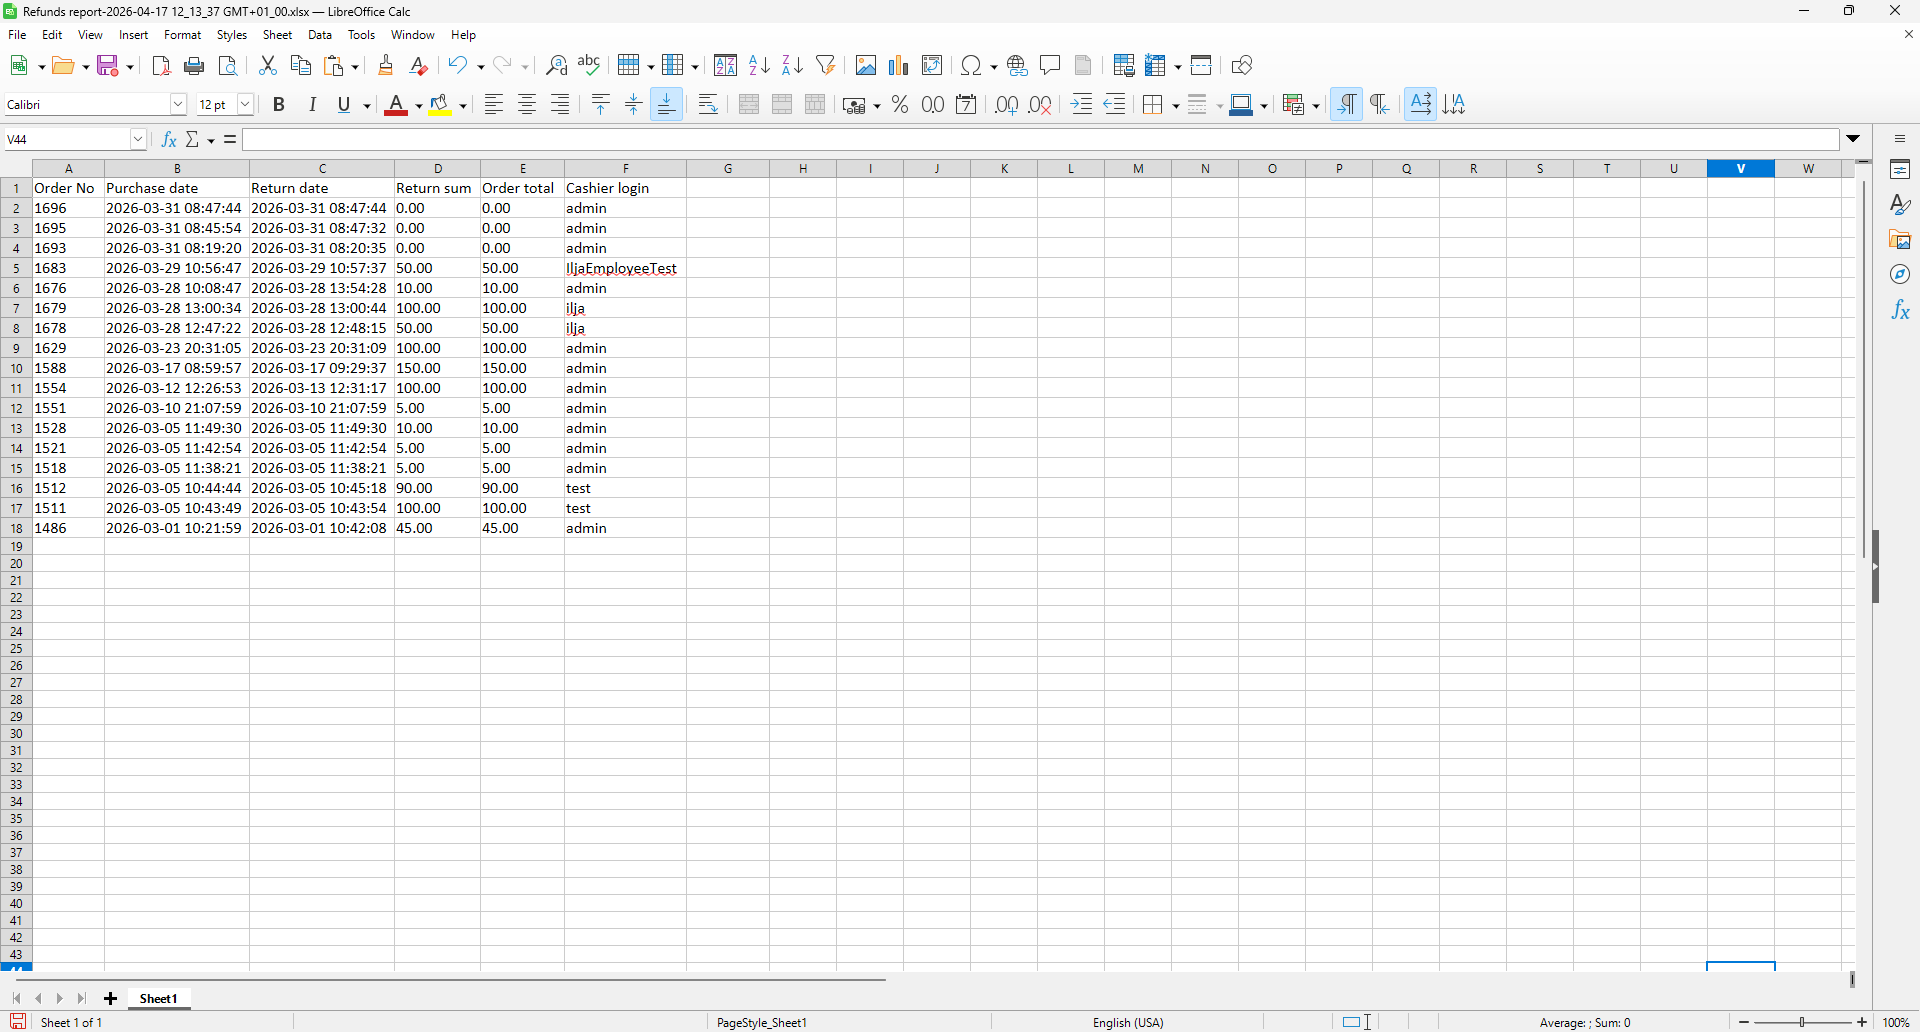
Figure 26
Profit with royalty
- Select the preferred date range and choose “Profit with royalty” as the report type (Figure 27)

Figure 27
- Click Export to download the data as an XLSX file to your local device. (Figure 28)
Center: The name of the center where the transactions occurred.
Topup: Total amount added to member accounts (balance recharges).
Product sales: Total revenue from selling products (e.g., food, drinks, items).
Offer sales: Total revenue generated from selling offers (e.g., packages or offers).
Refund sales: Total amount refunded to customers.
Total sales: The overall revenue, typically calculated as the sum of Topup, Product sales, Offer sales and refunds if applicable.
Refund rate (%): The percentage of total sales that has been refunded. [refund / (sales + refund)]

Figure 28
Cash deposit/withdrawal
- Select the desired date range, choose “Cash Deposit/Withdrawal” as the report type, and then select a specific staff member or all staff. (Figure 29)
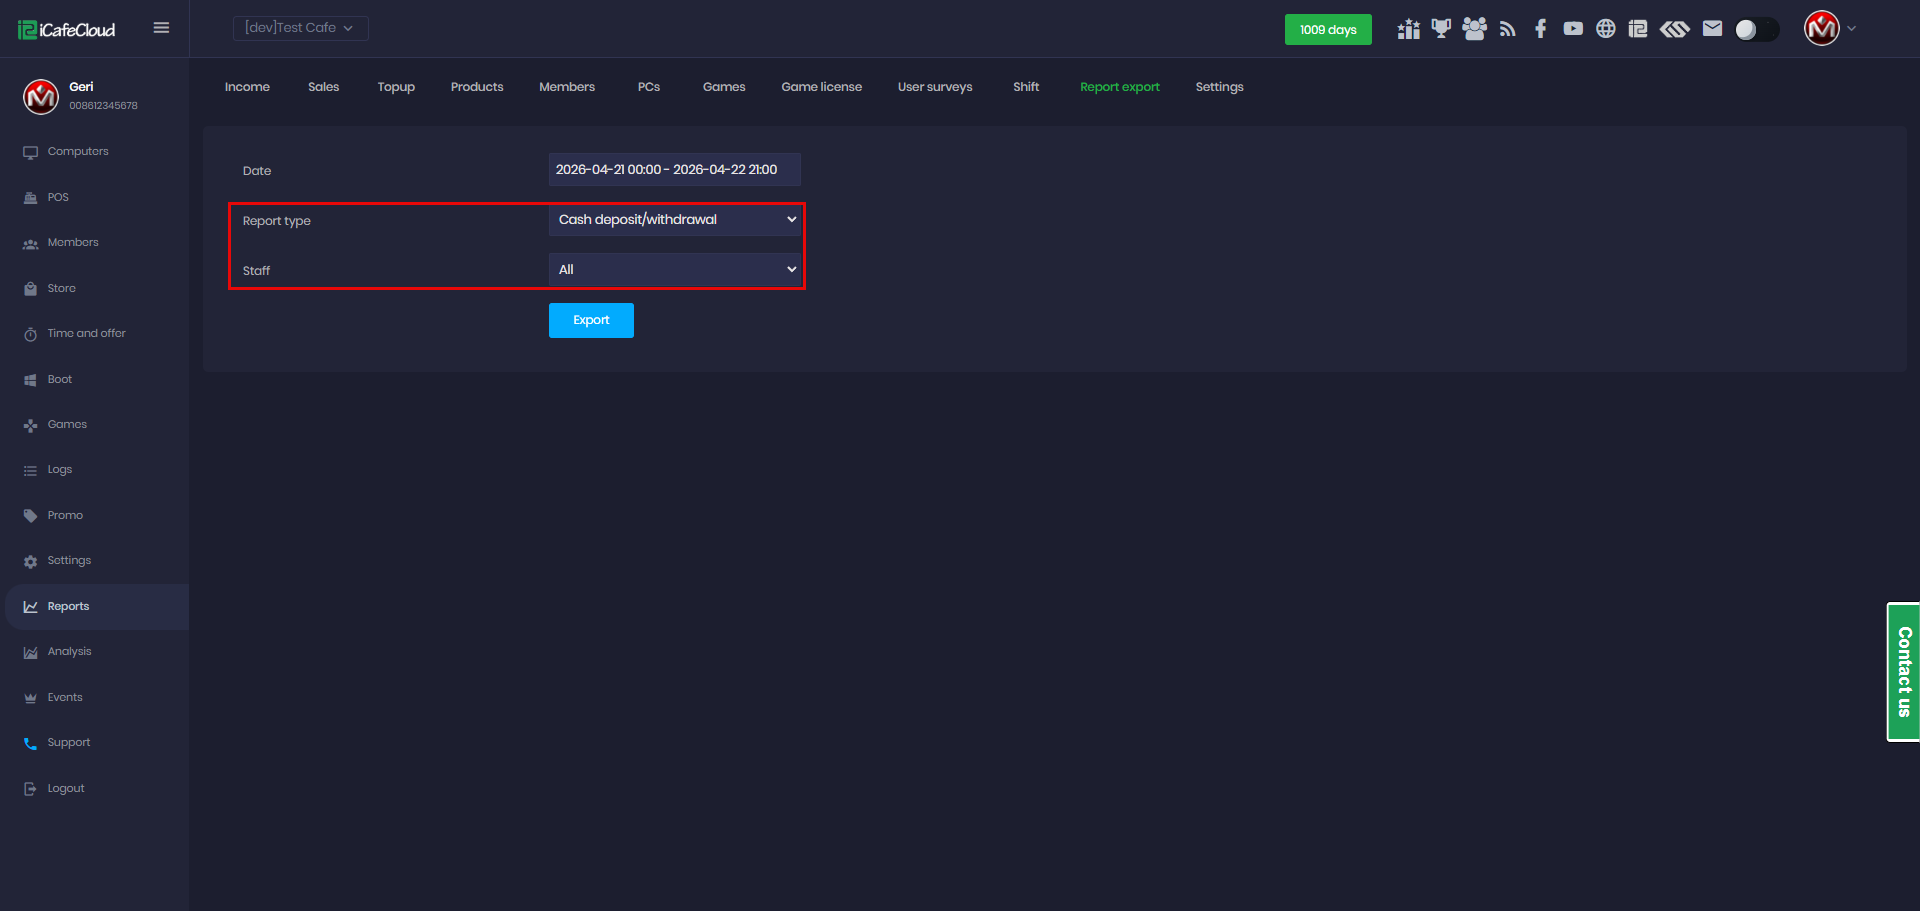
Figure 29
- Click Export to download the data as an XLSX file to your local device. (Figure 30)
Staff: Username or identifier of the employee assigned to the shift.
Start Time: Date and time when the shift began.
End Time: Date and time when the shift ended.
Cash Start: Opening cash balance in the register at the beginning of the shift.
Cash End: Closing cash balance in the register at the end of the shift.
Deposit: Total cash deposited during the shift.
Withdraw: Total cash withdrawn during the shift.
Cash Income: Net cash income generated during the shift.

Figure 30
Order list
- Select the desired date range, choose “Order list” as the report type, and then select between main or sub centers. (Figure 31)
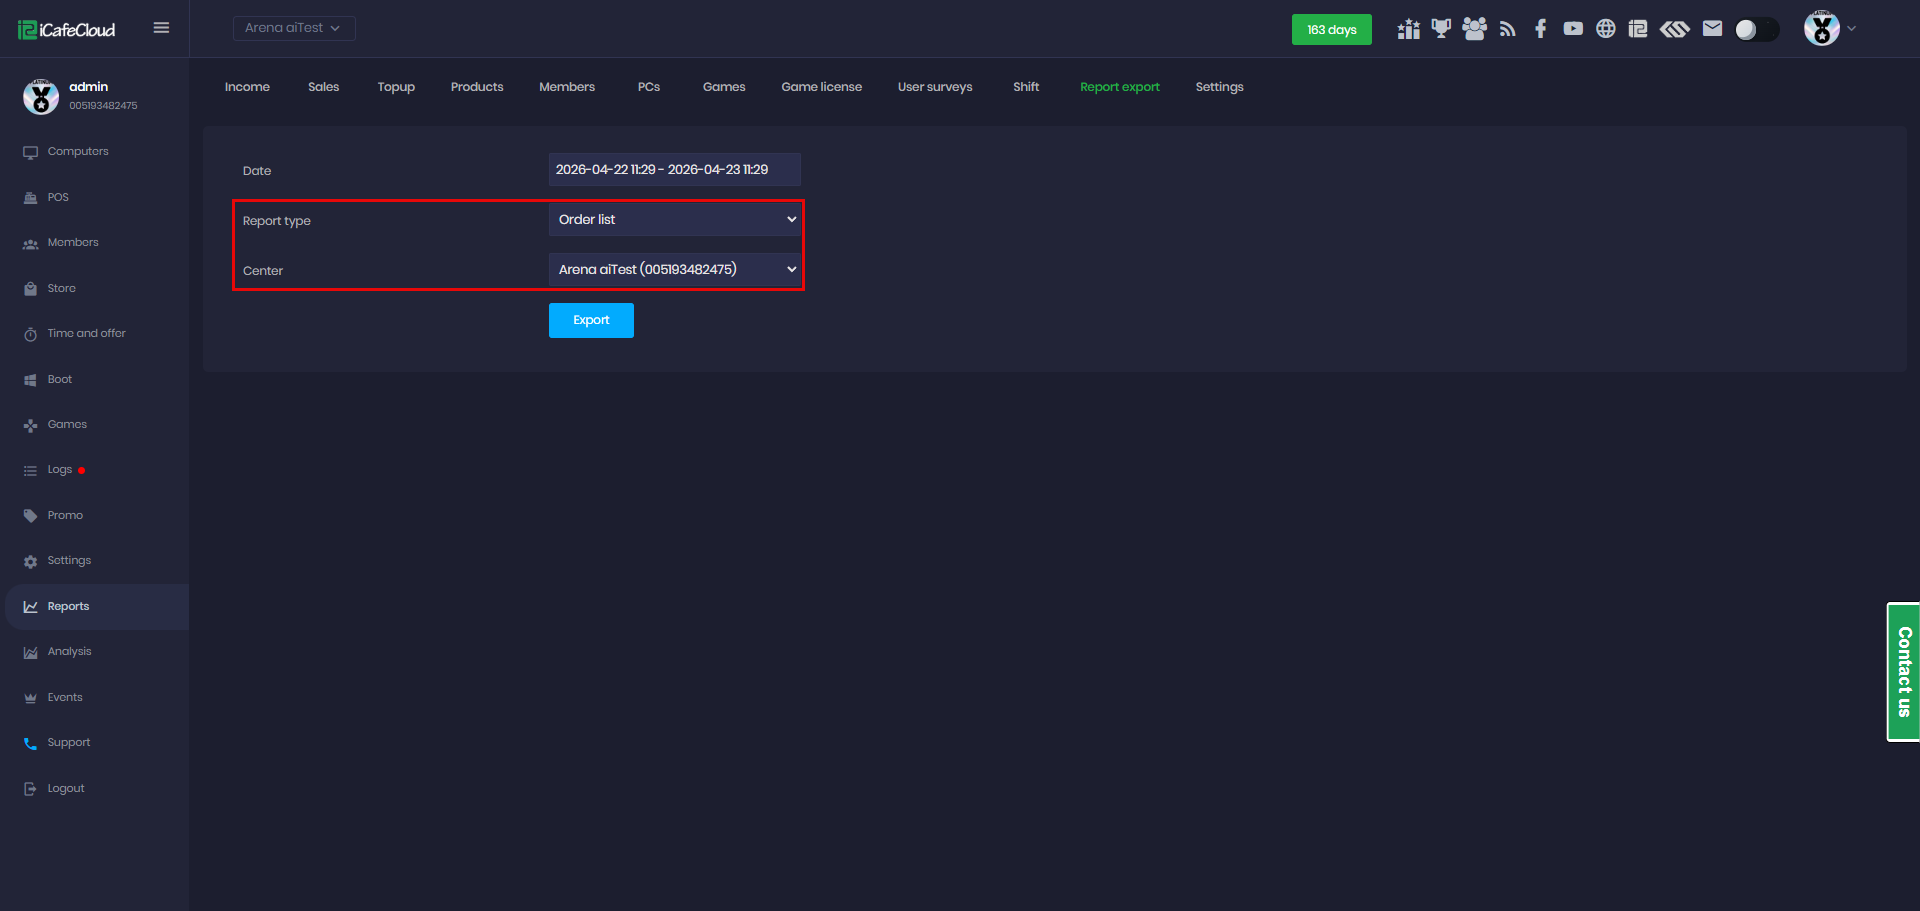
Figure 31
- Click Export to download the data as an XLSX file to your local device. (Figure 32)
Date: The exact date and time when the order or transaction was created.
Order ID: A unique identifier assigned to each order for tracking purposes.
Payment: The payment method used for the transaction (e.g., Cash, Balance, QR).
Product: The item or service that was purchased (e.g., drinks, PC time, offers).
Order sales: The selling price charged to the customer for that item or service.
Cost: The internal cost of the product (used for profit calculation).
Staff: The staff member who handled or processed the transaction.
Refund: The amount refunded for that specific order, if any.
Is canceled: Indicates whether the order was canceled (Yes) or completed (No).
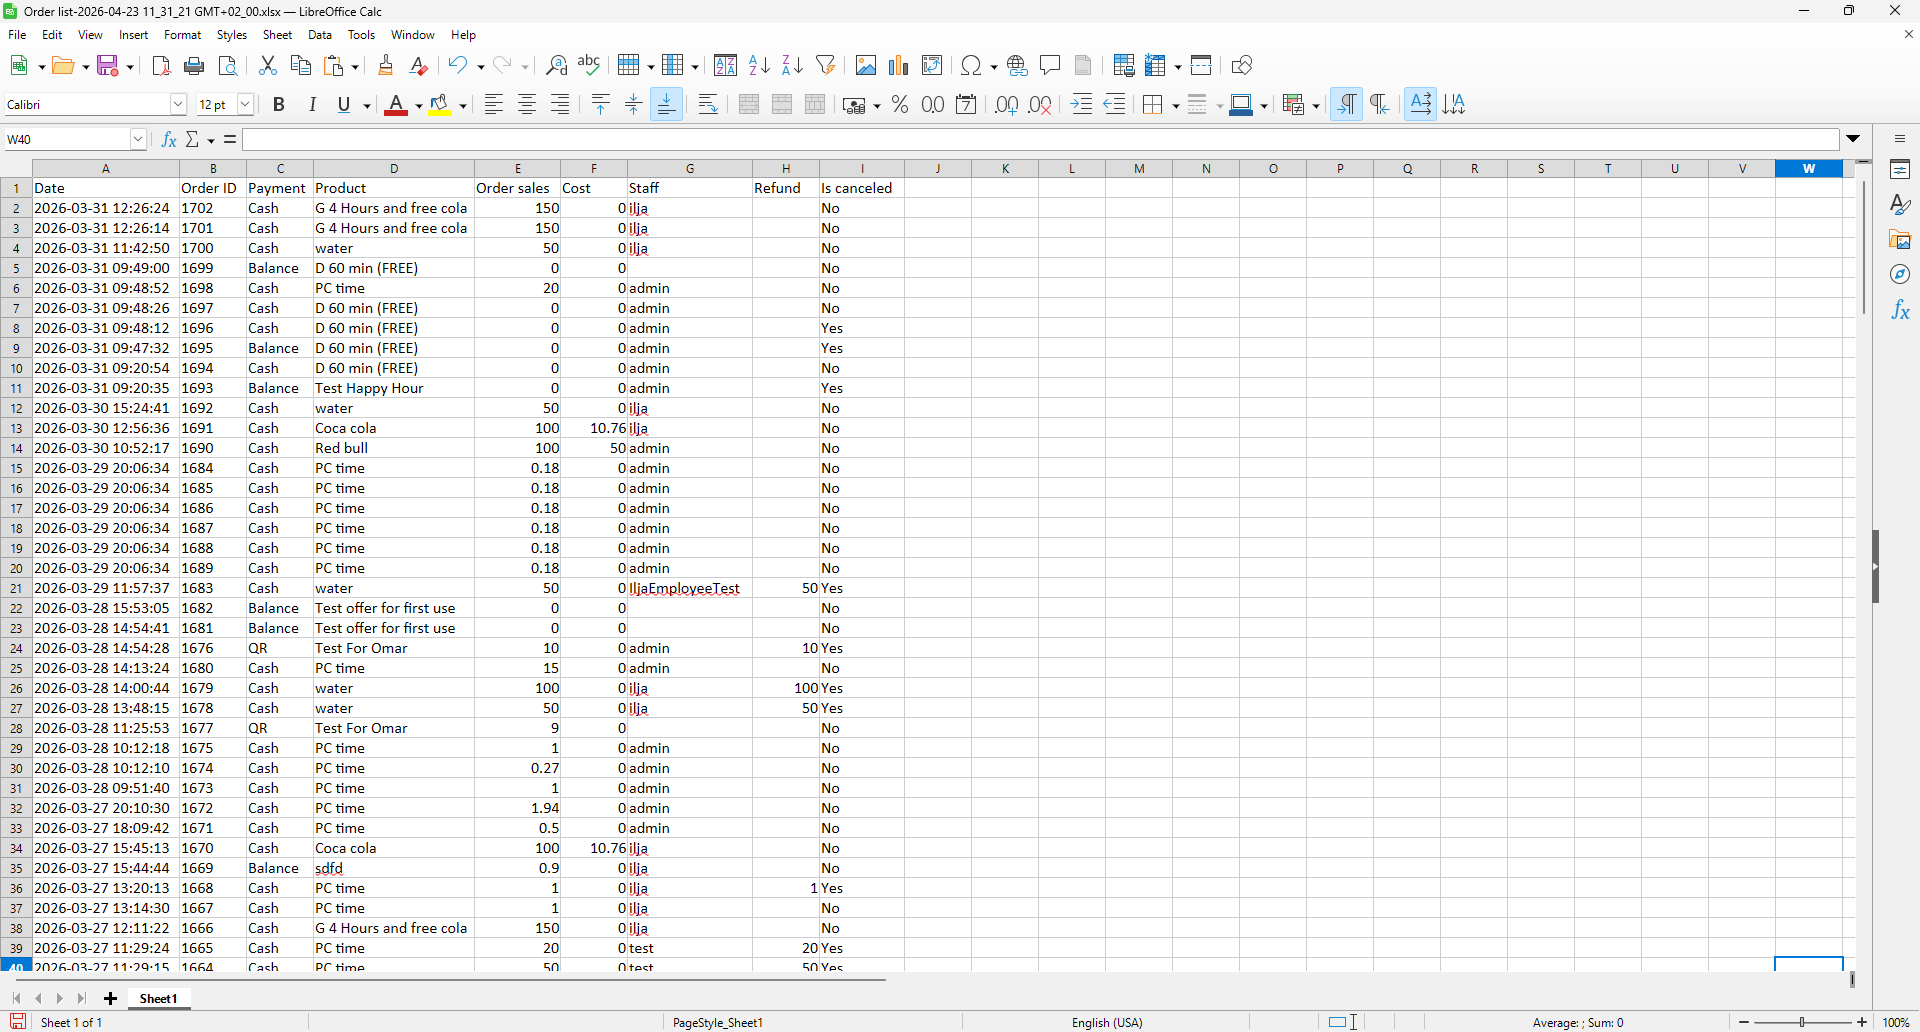
Figure 32
Movements of product
- Select the desired date range, choose “Movements of Product” as the report type, then select a product category (either all categories or a specific one) and choose the staff filter (all staff or a specific staff member). (Figure 33)
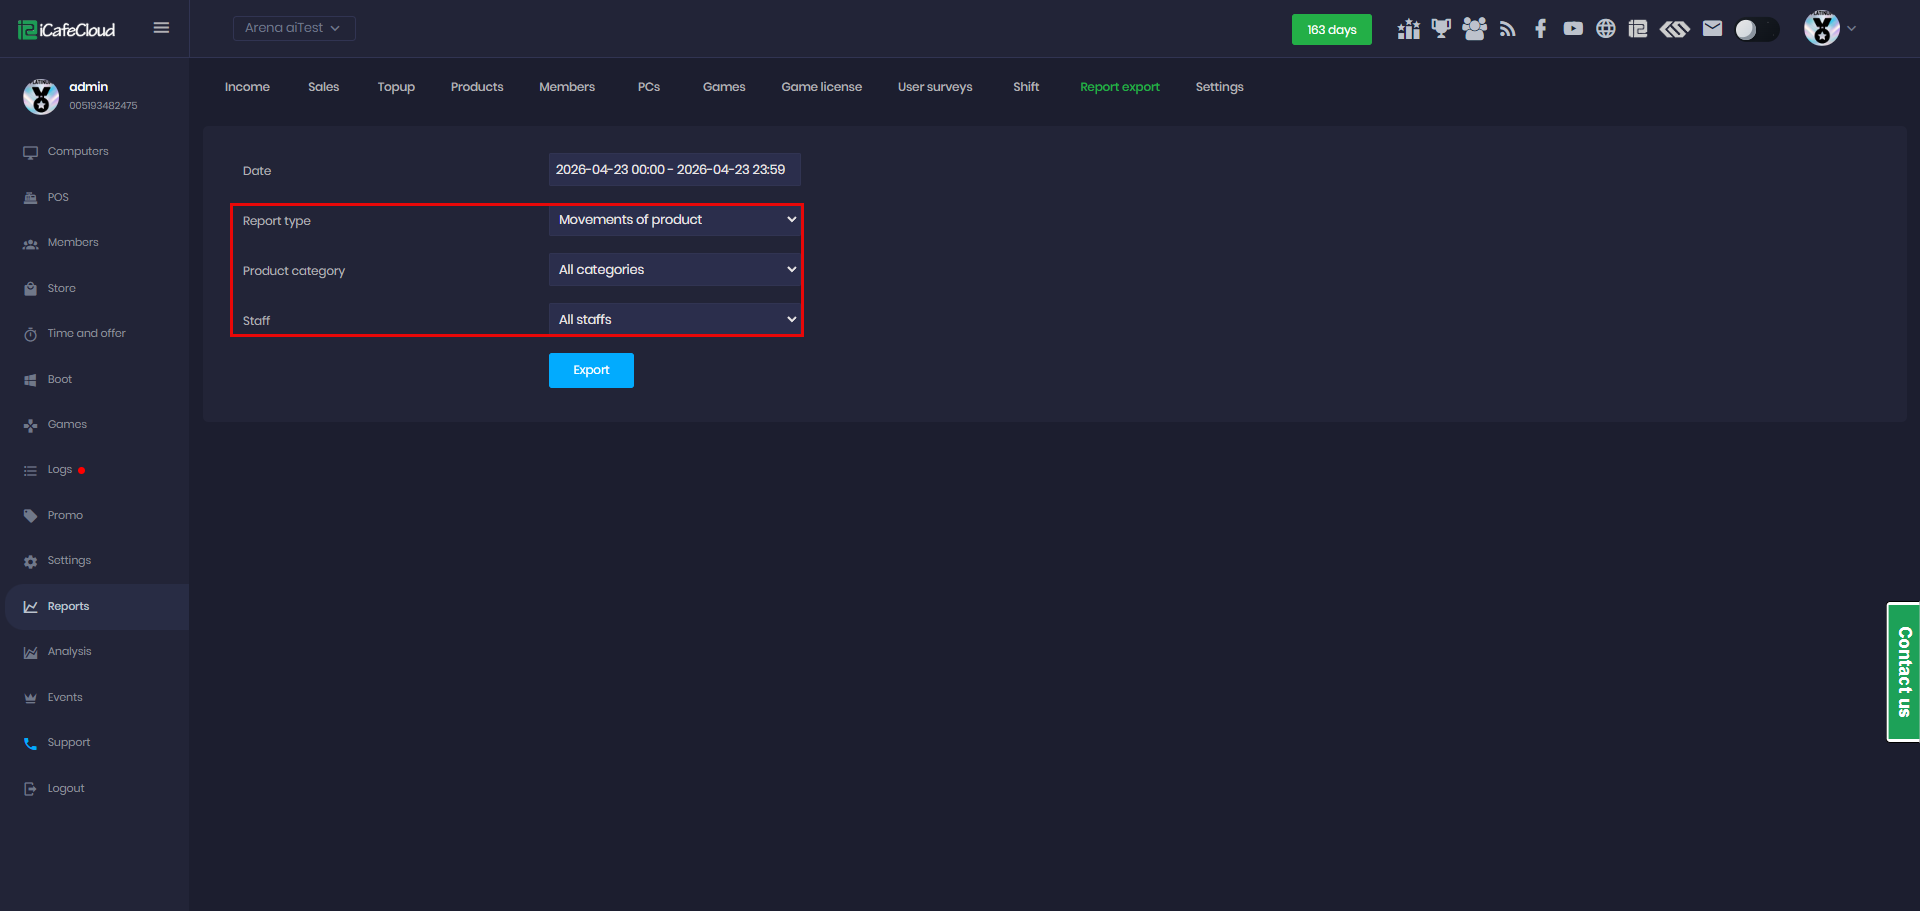
Figure 33
- Click Export to download the data as an XLSX file to your local device. (Figure 34)
Staff: The staff member responsible for the product movements (restocking, sales, etc.).
Product category: The category the product belongs to (e.g., Drinks, Soft drinks).
Product name: The name of the product.
Restock quantity: The number of units added to inventory during the selected period.
Write-off quantity: The number of units removed from inventory due to loss, damage, or adjustments.
Restock price: The cost per unit when restocking the product.
Restock price sum: The total cost of restocked items (Restock quantity × Restock price).
Stock balance: The current quantity of the product available in stock.
Sales items: The number of units sold during the selected period.
Price: The selling price per unit.
Sales amount: The total revenue generated from sales (Sales items × Price).
Cost: The total cost of the sold items.
Profit amount: The profit generated (Sales amount - Cost).
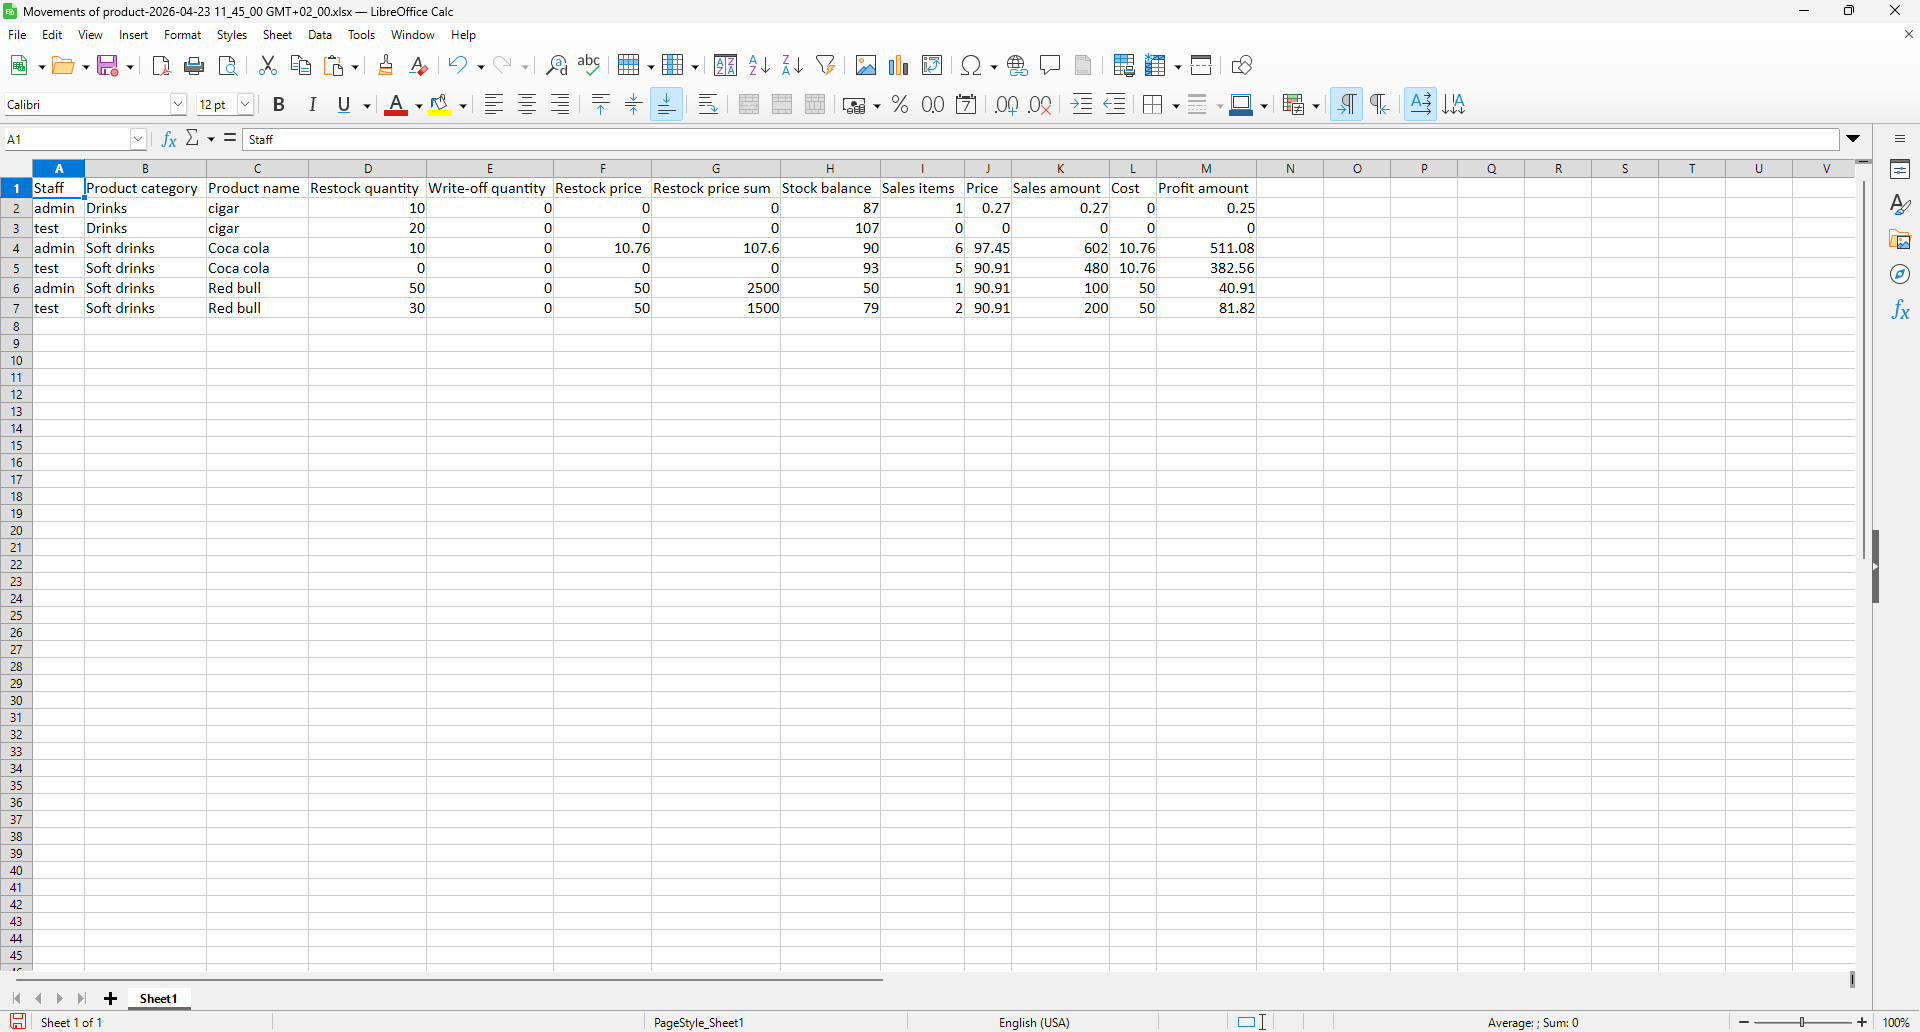
Figure 34
Created bookings
- Select the desired date range and choose “Created bookings” as the report type.(Figure 35)
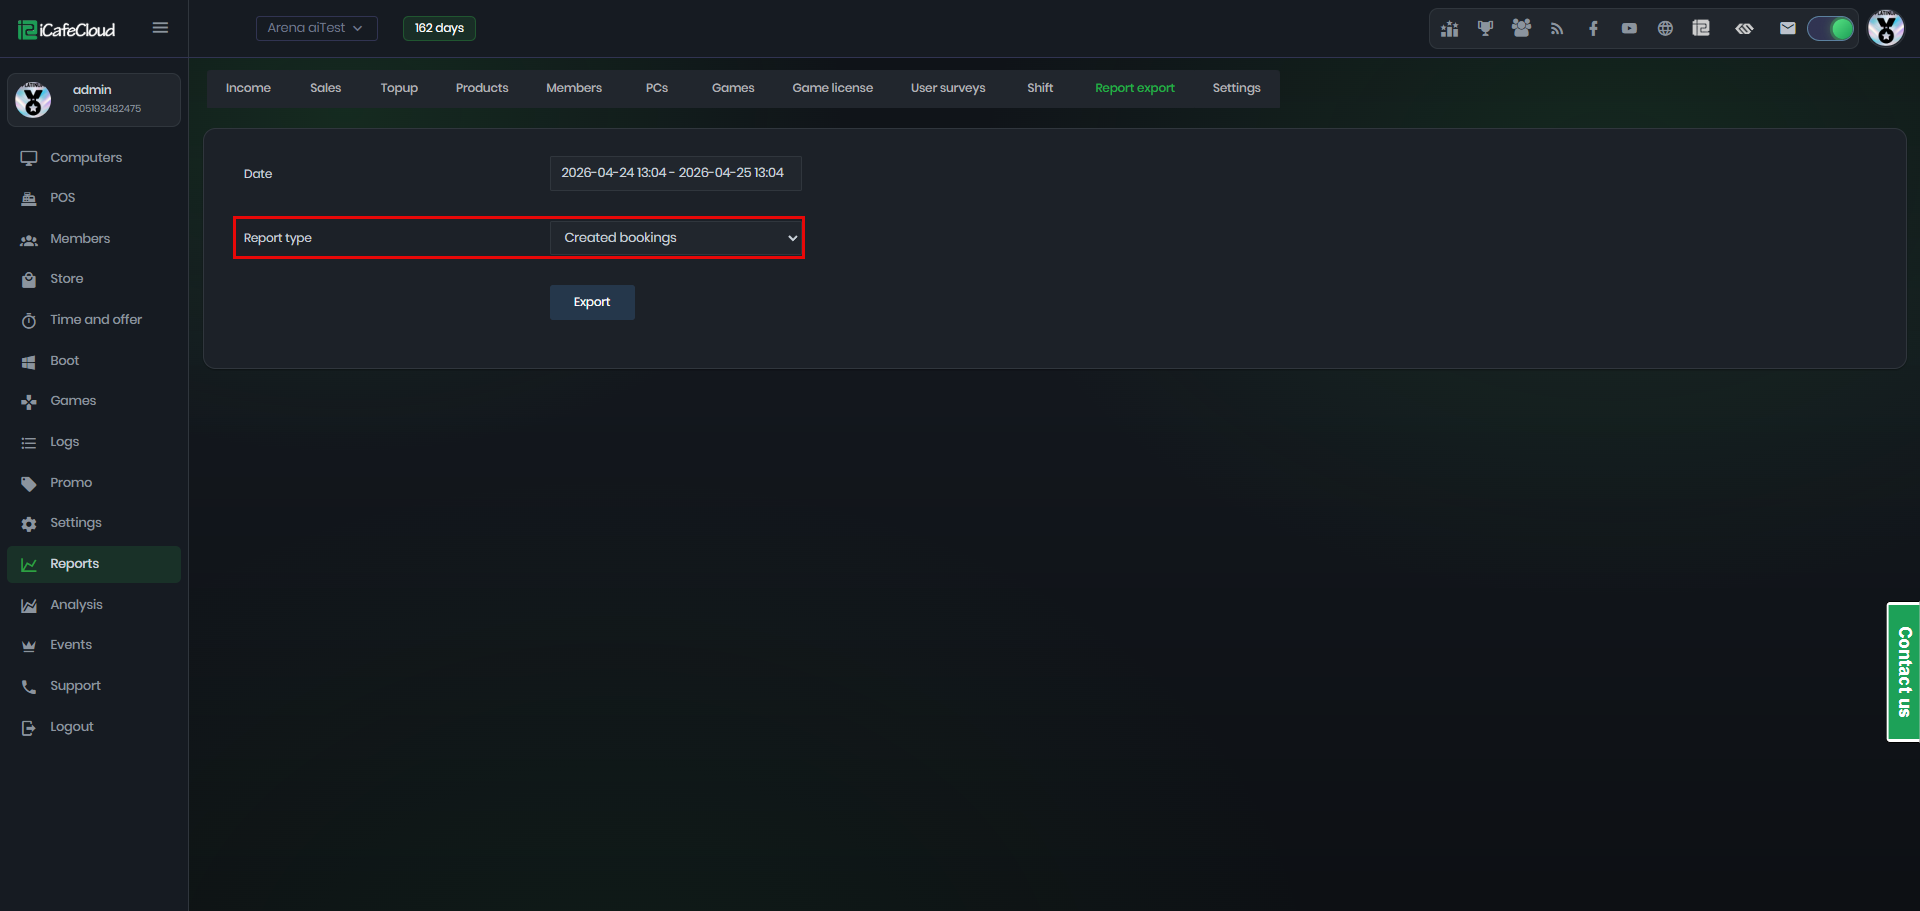
Figure 35
- Click Export to download the data as an XLSX file to your local device. (Figure 36)
Booking time: The scheduled time range for the booking, showing both the start and end time.
PC name: The name of the computer reserved for the booking.
Login member account: The member account used to create the booking.
Booking status: The current state of the booking, such as Canceled, Expired & Deleted, or active (if applicable).
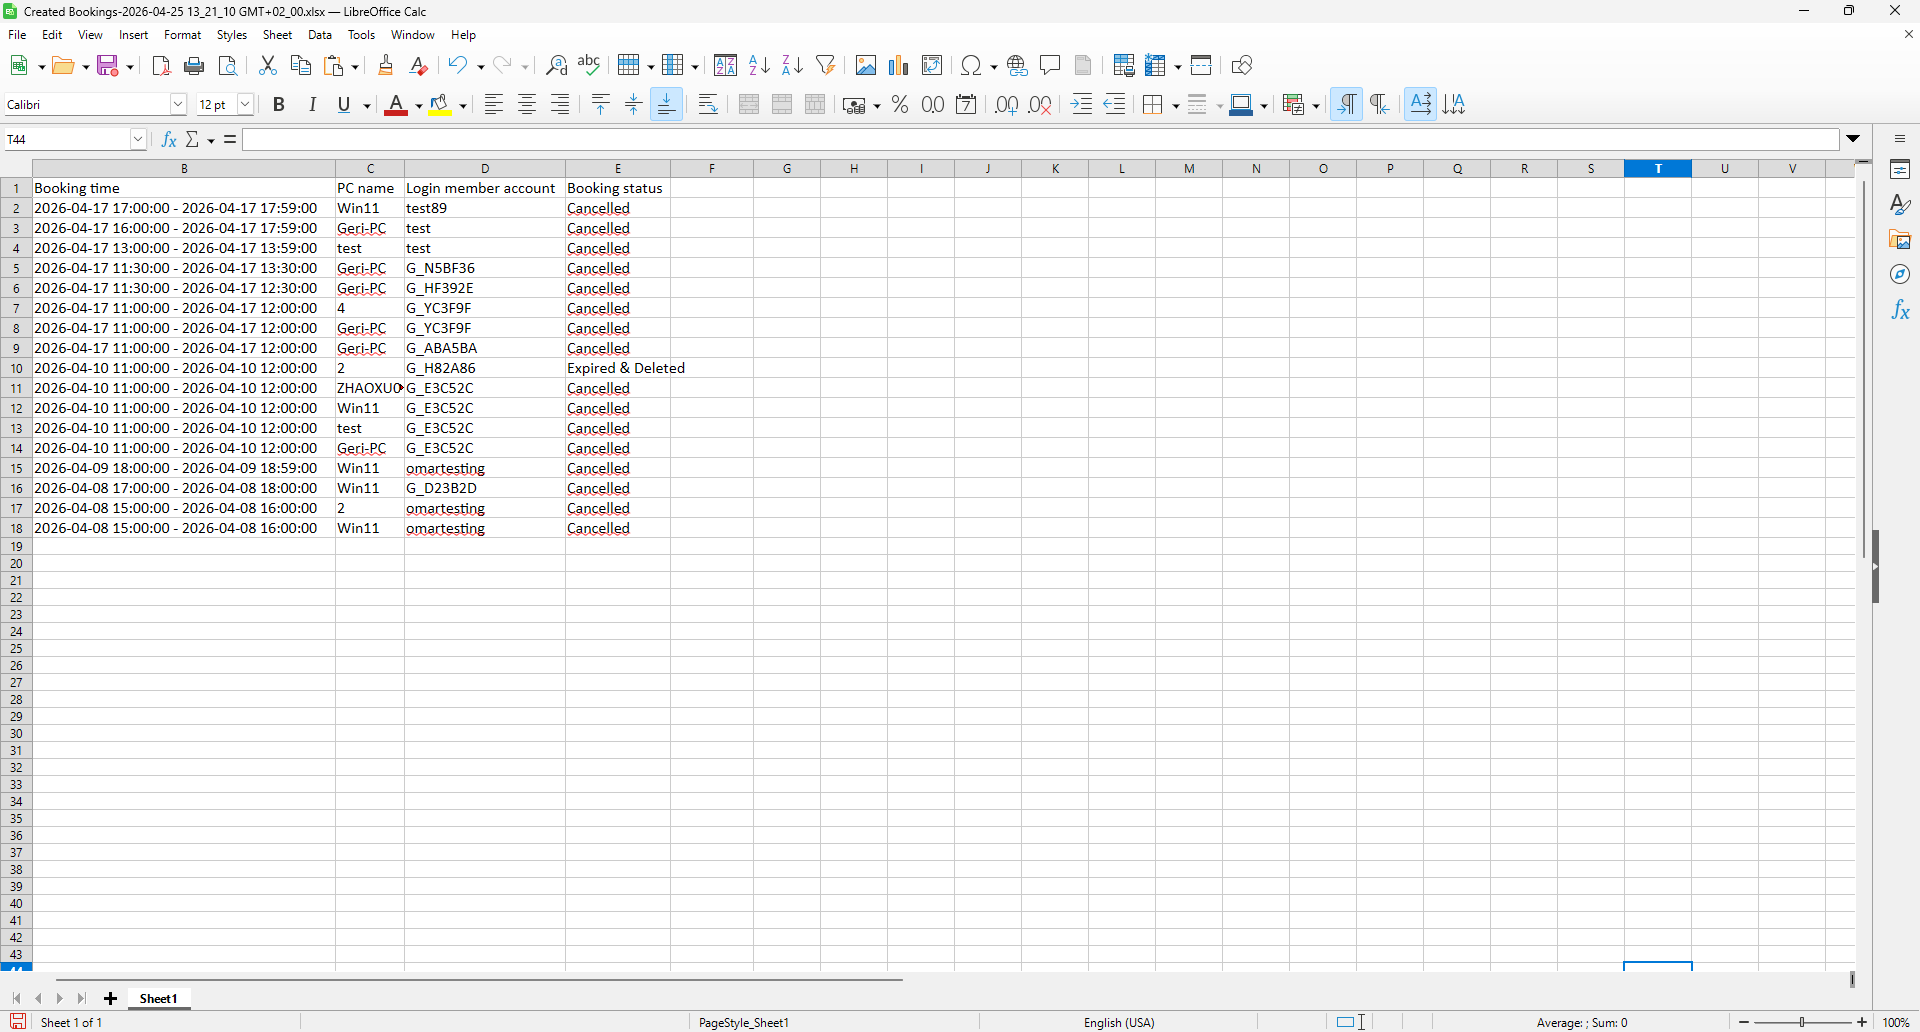
Figure 36
Used bookings
- Select the desired date range and choose “Used bookings” as the report type.(Figure 37)

Figure 37
- Click Export to download the data as an XLSX file to your local device. (Figure 38)
Creation date: The date and time when the booking was created.
Center name: The name of the center the booking was made.
PC name: The name of the computer used for the booking.
Booking date: The scheduled start time of the booking.
Booking end date: The scheduled end time of the booking.
Actual booking end date: The actual time when the session ended (may differ from the scheduled end time).
Login member account: The member account that used the booking.
Operation type: Indicates how the booking was created or used (e.g., client).
Booking deposit: The amount charged or reserved as a deposit for the booking.
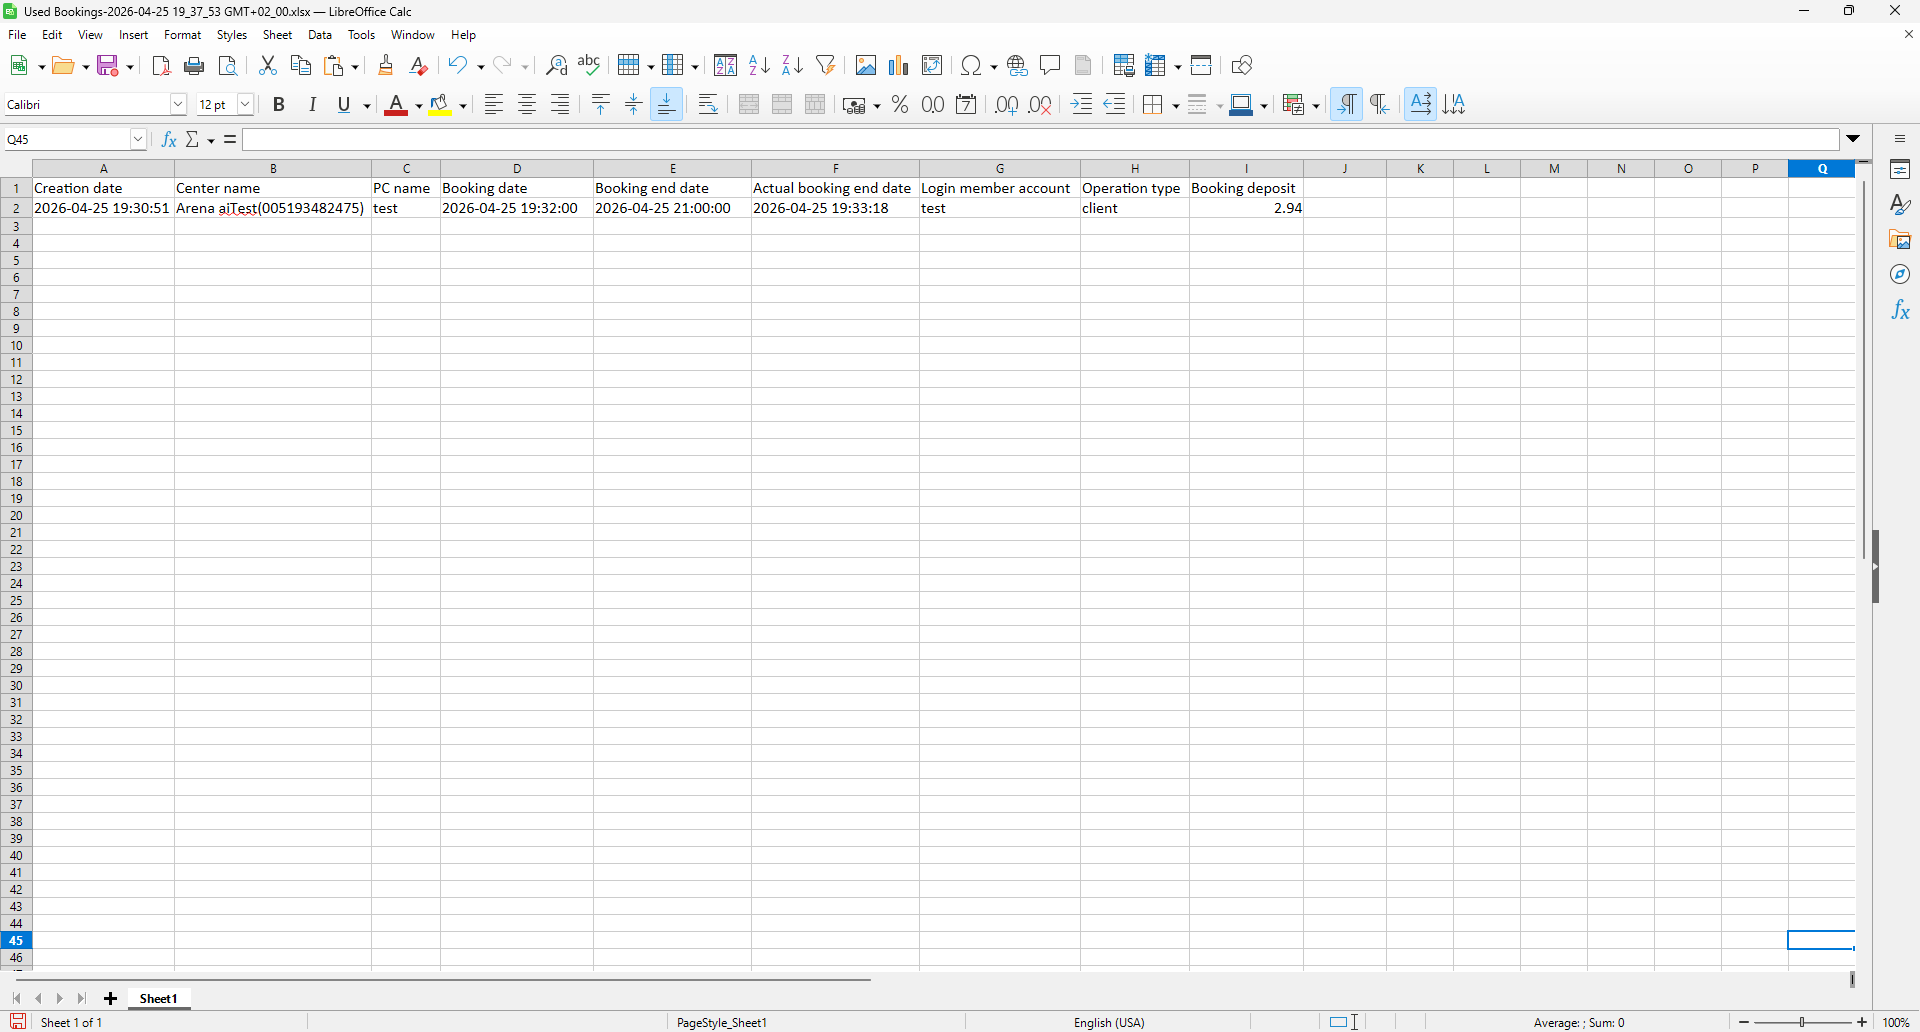
Figure 38
General occupancy
- Select the desired date range, choose ‘General Occupancy’ as the report type, and then select either all staff or specific staff under the Staff Selection option (Figure 39).
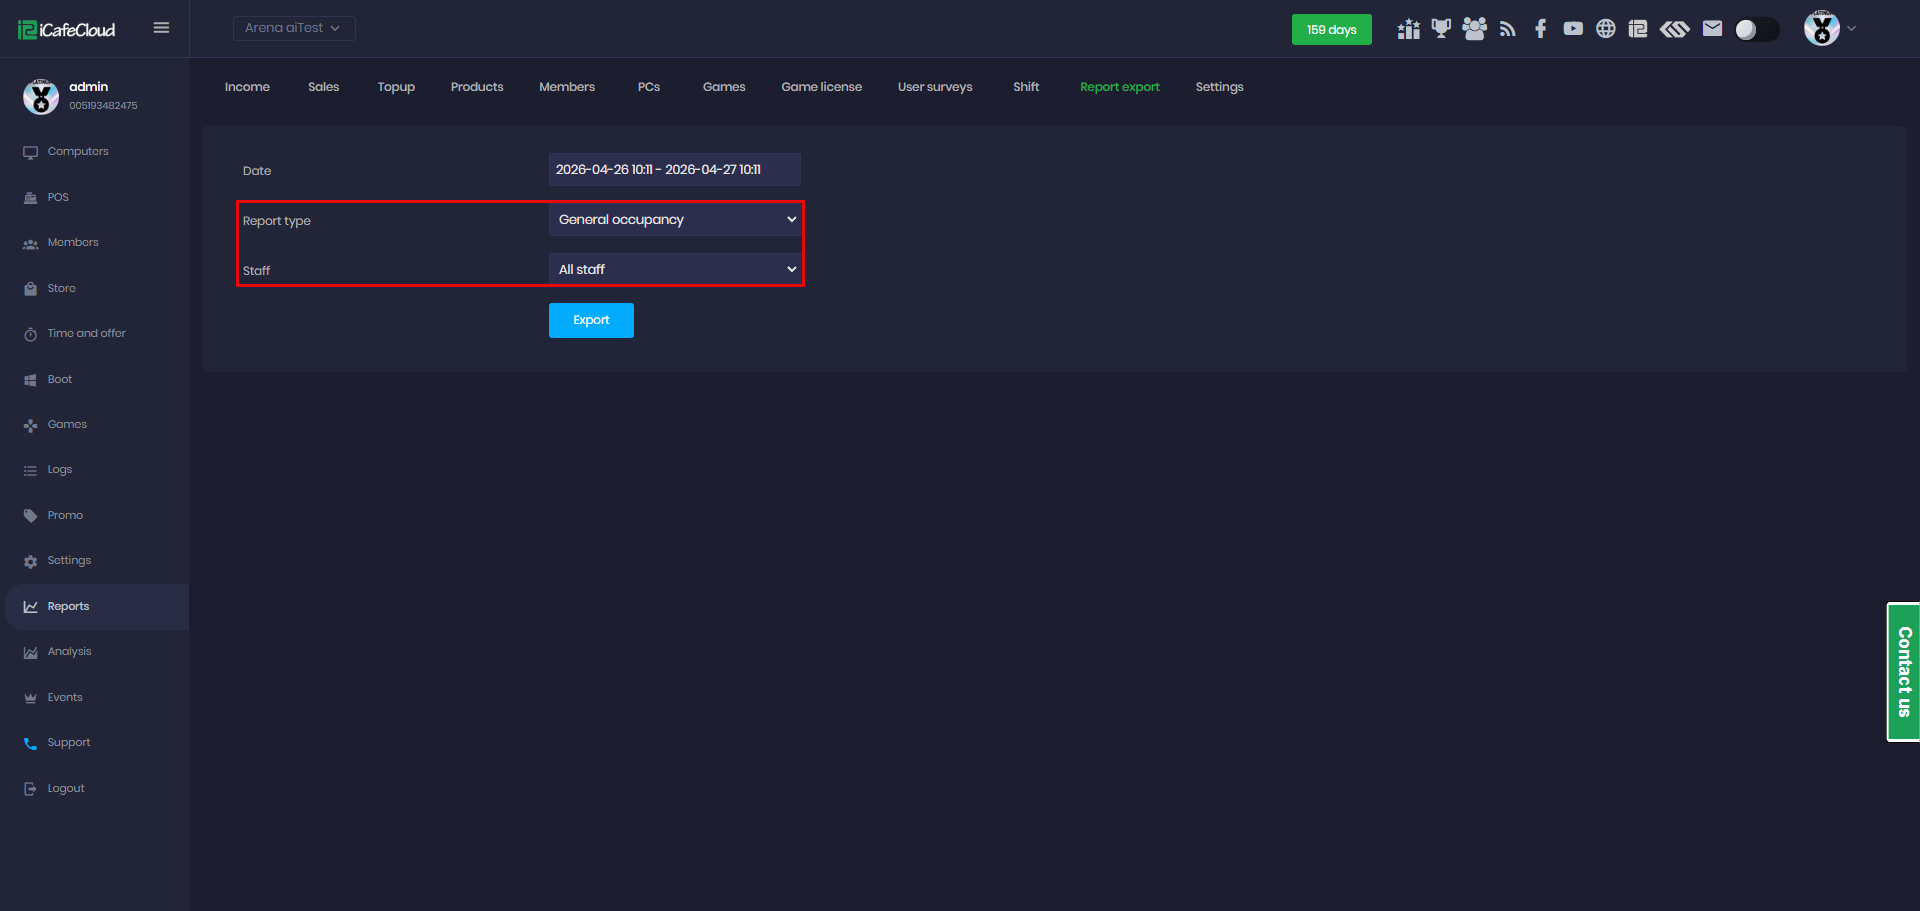
Figure 39
- Click Export to download the data as an XLSX file to your local device. (Figure 40)
Cafe name: shows the name of the center where the session took place
Staff name: indicates the staff member associated with the session if applicable
Session start date: shows the exact date and time when the session began
Session end date: shows the exact date and time when the session ended
Session duration: represents the total length of the session calculated from start to end time
Member account: identifies customer account used during the session
Member group: indicates the category of the user such as Guest, Member, or VIP
Phone number: shows the contact number linked to the member account if available
PC name: identifies the computer used for the session
Total amount: shows the total charge for the session including any applied pricing or usage fees
Tax amount: represents the portion of the total amount that corresponds to tax
Tax name: indicates the type or label of the tax applied
Offer: shows any offer applied to the session
Promo code: indicates the promotional code used for discounts or special pricing if applicable

Figure 40
Access code usage
- Select the desired date range and choose ‘Access code usage’ as the report type (Figure 41).

Figure 41
- Click Export to download the data as an XLSX file to your local device. (Figure 42)
Access code: The unique code generated for customer access.
Created time: The exact date and time when the access code was created.
Expired time: The date when the access code becomes invalid and can no longer be used.
Balance: The remaining value or credit associated with the access code.
Used: Indicates whether the access code has already been used.
Expired: Shows whether the access code has passed its validity period.
Refunded: Indicates whether the value of the access code has been refunded.
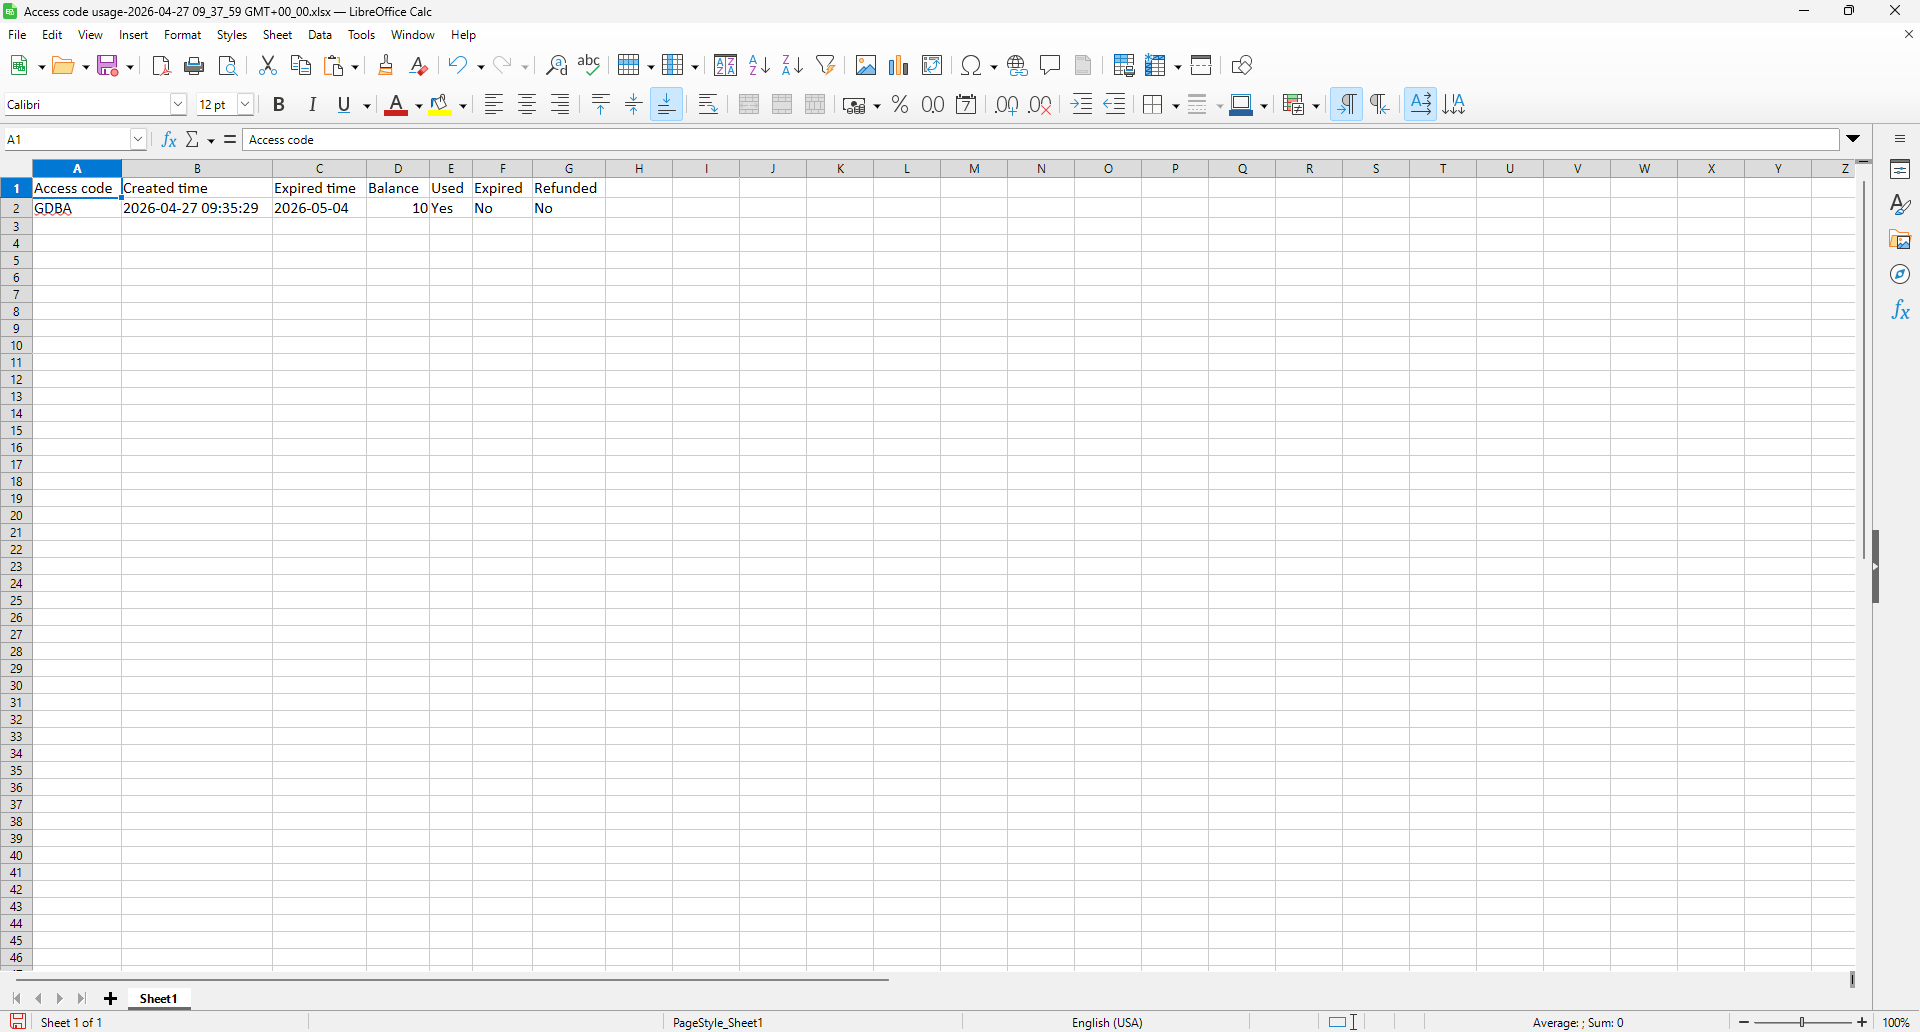
Figure 42
Shop quantity
- Select the desired date range and choose ‘Report of shop quantity’ as the report type (Figure 43).
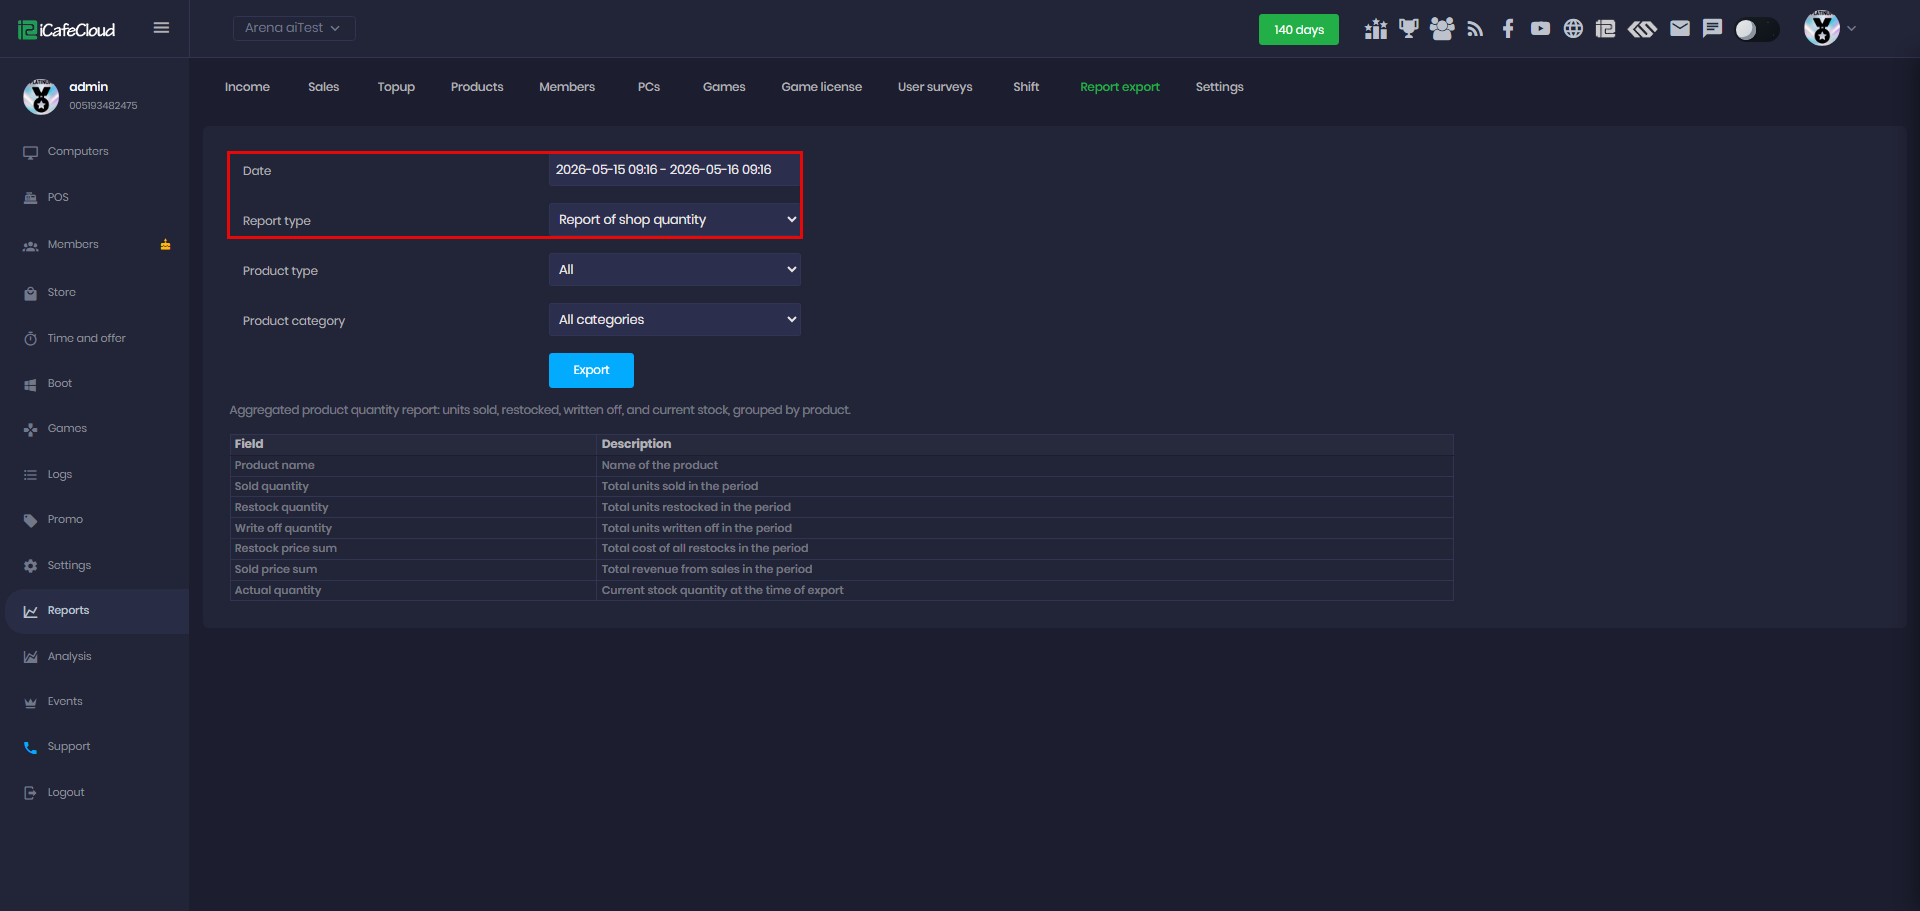
Figure 43
- In Product Type, you can choose between Product and Services. You can also select a specific product category for the report, or choose all categories together.
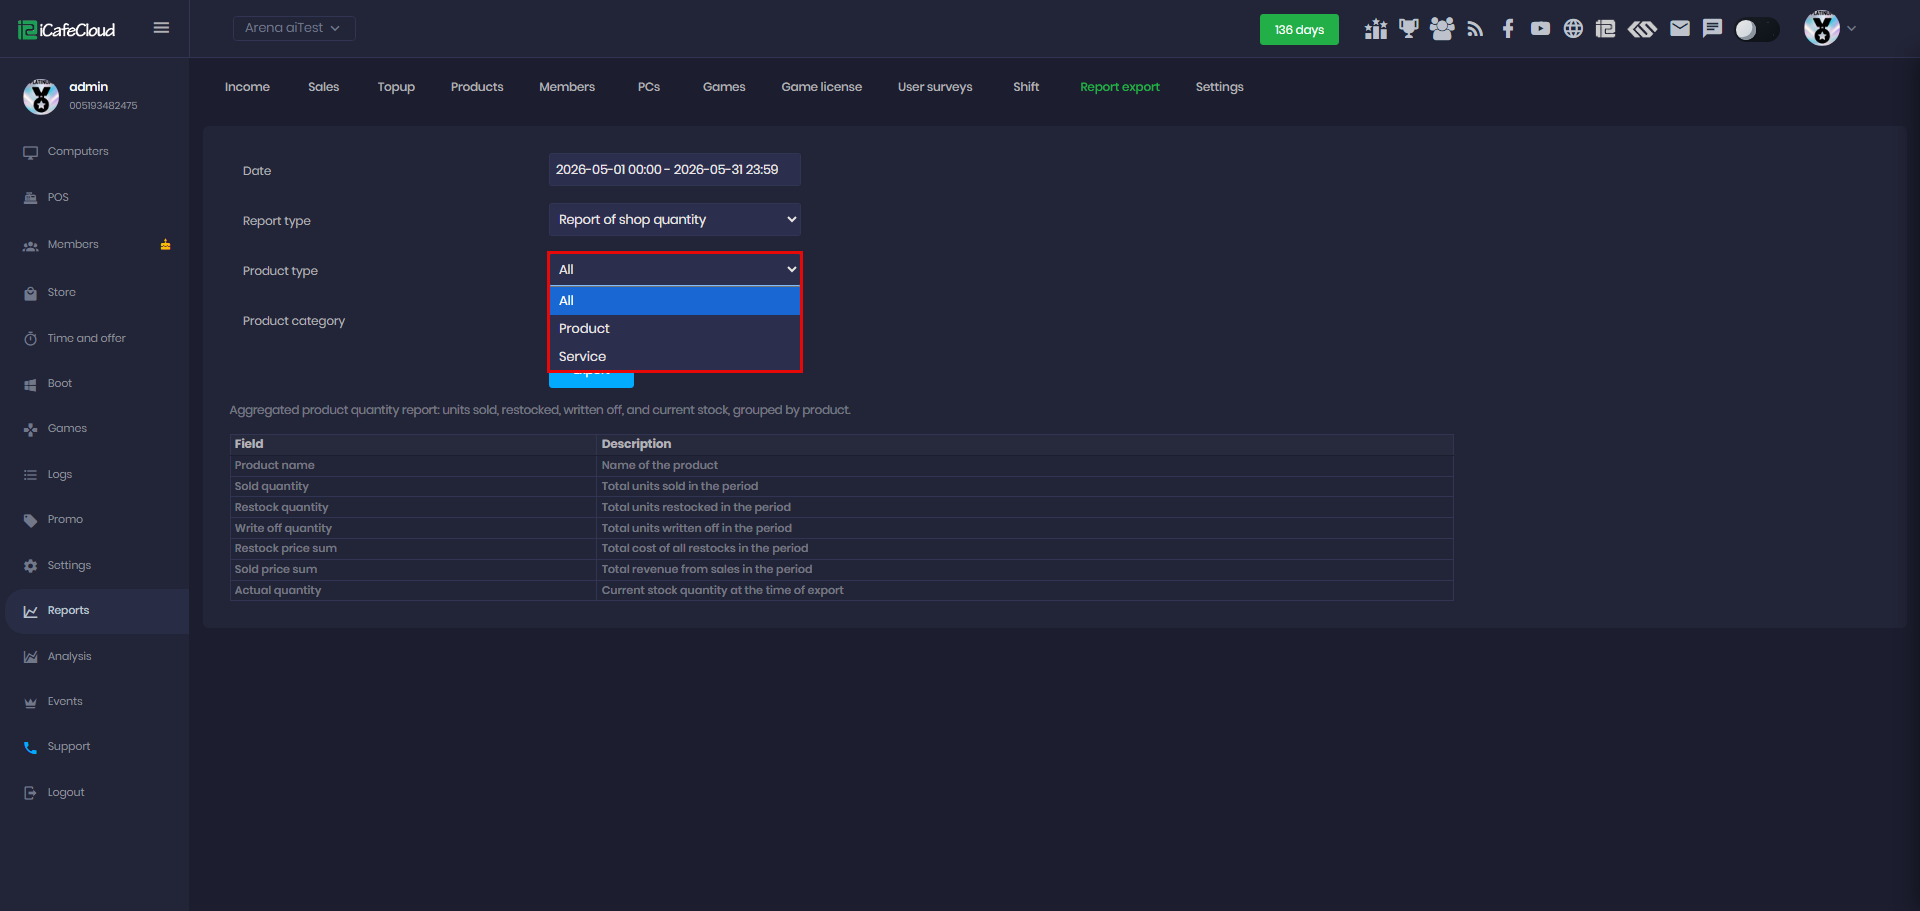
Figure 44
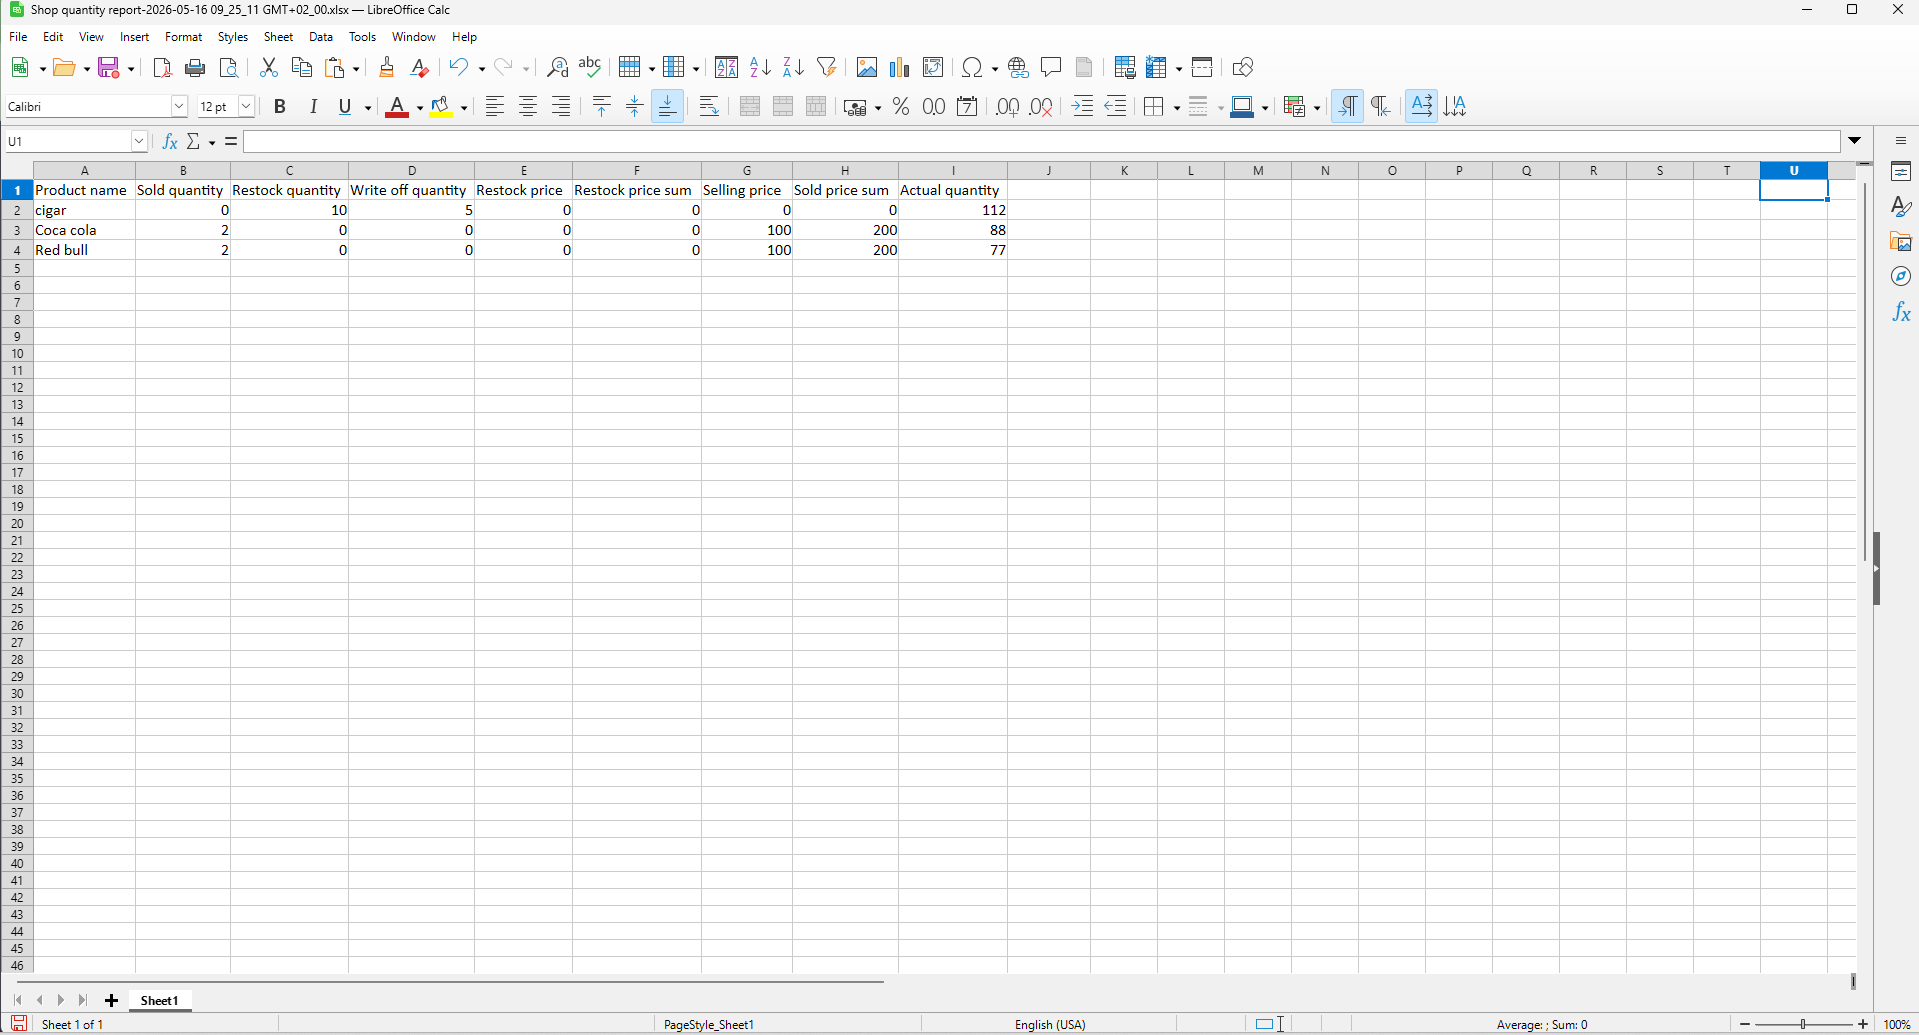
- Click Export to download the data as an XLSX file to your local device. (Figure 45)
Product Name – Name of the product.
Sold Quantity – Total number of items sold.
Restock Quantity – Number of items added back into stock.
Write Off Quantity – Number of items removed from stock or write-off.
Restock Price – Purchase cost for one restocked item.
Restock Price Sum – Total cost of all restocked items.
Selling Price – Selling price for one item.
Sold Price Sum – Total sales amount from sold items.
Actual Quantity – Current remaining stock quantity available.