

A Raspberry Pi that turns the TV off when time is up
Connect a Raspberry Pi 4 to the TV over HDMI. When a PlayStation or Xbox session starts, iCafeCloud powers the TV on through HDMI-CEC, and at checkout it powers it off. No mains wiring, and nothing to install on the TV.
What it does
TV on and off over HDMI
The Pi sends HDMI-CEC power commands to the TV at session start and at checkout.
No rewiring
Nothing is cut or spliced. One micro-HDMI to HDMI cable is the whole connection.
Paired with a TV PIN
Each Pi is tied to one console seat with a 4-digit PIN generated in iCafeCloud.
One-line install
A single command over SSH installs the iCafeCloud client for Raspberry Pi.
Wi-Fi or Ethernet
Set up Wi-Fi while writing the card, or plug in a network cable.
Any console behind the TV
PlayStation 5, Xbox Series X or anything else on HDMI — it is the TV that gets controlled.
Same billing rules
Console seats use the prices, offers and member balances you already set for PCs.
Players start their own
Print the console's QR code and players start the session from their phone.
What you need
Everything is off the shelf, and one Raspberry Pi goes with one TV.
The TV has to accept HDMI-CEC commands. Most brands support it under their own name — Anynet+, SimpLink, Bravia Sync and similar — so check it is switched on in the TV settings.
- Raspberry Pi 4 Model B
- A power adapter for the Pi that supports CEC
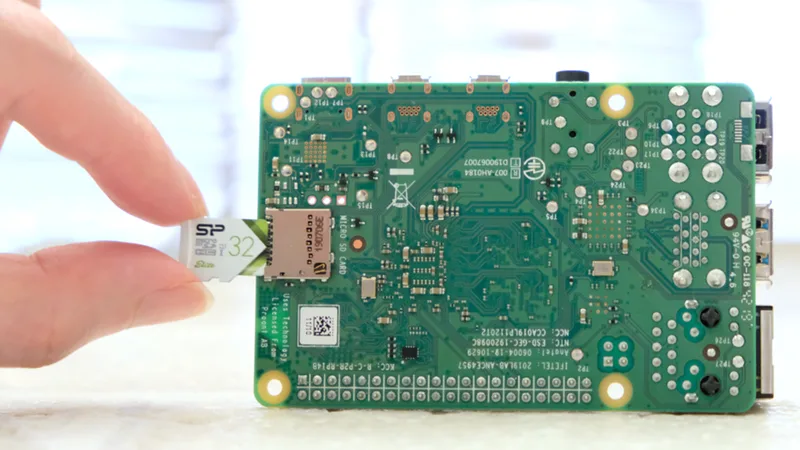
- A microSD card for Raspberry Pi OS, plus a USB card reader
- A micro-HDMI to HDMI cable to the TV
- A TV with HDMI-CEC switched on
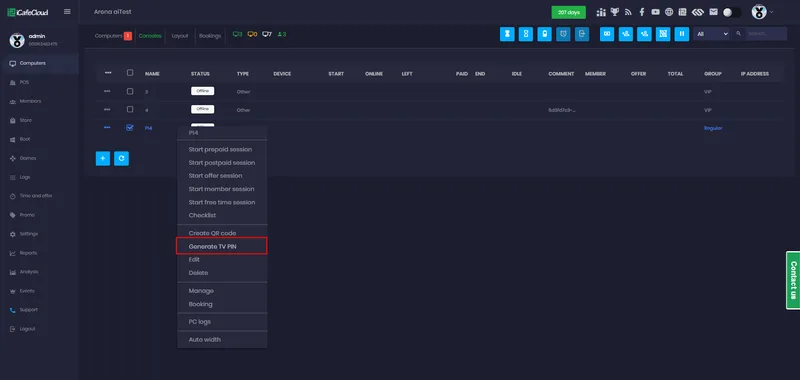
Paired from the Consoles page
Add the console in iCafeCloud under Computers → Consoles, right-click it and choose Generate TV PIN. The 4-digit PIN tells the Pi which seat it belongs to.
From then on the seat behaves like any other: start a session and the TV comes on, check out and it goes dark.
Set up a Raspberry Pi in four steps
- 01
Write the card
Write Raspberry Pi OS to the microSD card with Raspberry Pi Imager, and set up Wi-Fi there or use Ethernet.
- 02
Connect the TV
Insert the card, connect the Pi to the TV over HDMI and power it on. Find its IP address in your router — it usually shows as piXX.
- 03
Generate a TV PIN
In cp.icafecloud.com add the console, right-click it and click Generate TV PIN.
- 04
Run the installer
Log in to the Pi over SSH and run the install command with your PIN.
The install command
Run it over SSH on the Raspberry Pi, replacing <PIN> with the console's 4-digit TV PIN. After it finishes, the TV powers on when a session starts and off at checkout.
curl -k https://cp.icafecloud.com/pi/install.sh | sudo bash -s -- <PIN>Documentation
The full setup guide and the wiki pages for running console seats.
Watch it in action
Short tutorials from the iCafeCloud YouTube channel.
Common questions
Which Raspberry Pi do I need?
The setup guide uses a Raspberry Pi 4 Model B running Raspberry Pi OS, one for each TV.
Does the Pi switch off the console?
No. It controls the TV over HDMI-CEC and leaves the console alone, so the console never loses power in the middle of a game.
What does the TV need?
A free HDMI input and HDMI-CEC switched on, so it accepts power commands from the Pi. Nothing is installed on the TV itself.
How is this different from iCafeTV?
iCafeTV is an app that runs on a Google TV or Android TV and locks the screen. The Raspberry Pi works from outside the TV, so it also suits screens that cannot install apps.
Wi-Fi or cable?
Either. Set up Wi-Fi in Raspberry Pi Imager when you write the card, or connect an Ethernet cable.