2026-03-10
raspberry pi, consoles
This section explains the process of installing and configuring Raspberry Pi with iCafeCloud in order to manage and control consoles like PlayStation 5 and Xbox Series X.
Hardware Requirements
- Raspberry Pi4 model B
- Power adapter (support CEC)
- MicroSD card (for Raspberry Pi OS) (Figure 1)
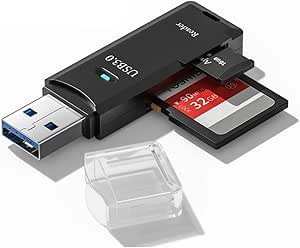
- MicroSD reader (USB)(Figure 4)
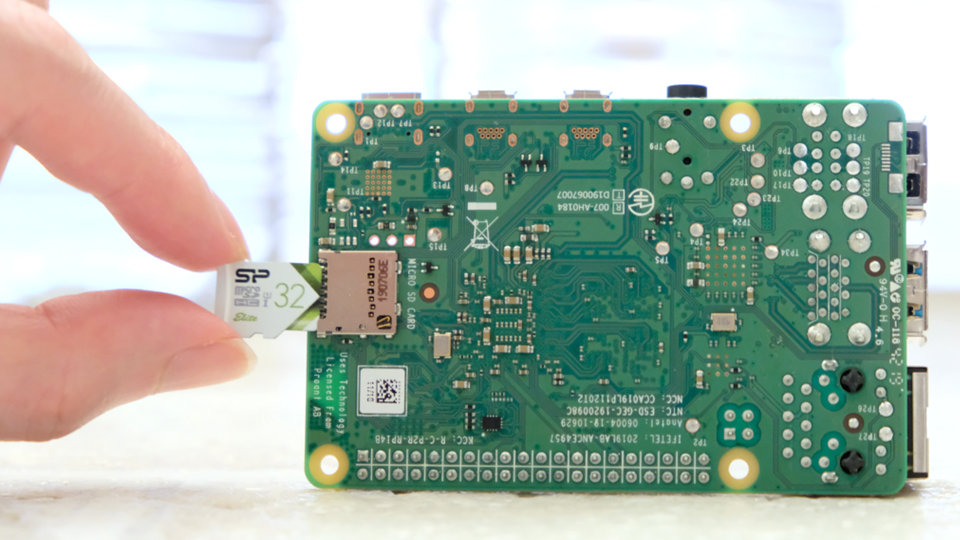
Figure 1
- Micro HDMI to HDMI cable (Figure 2)
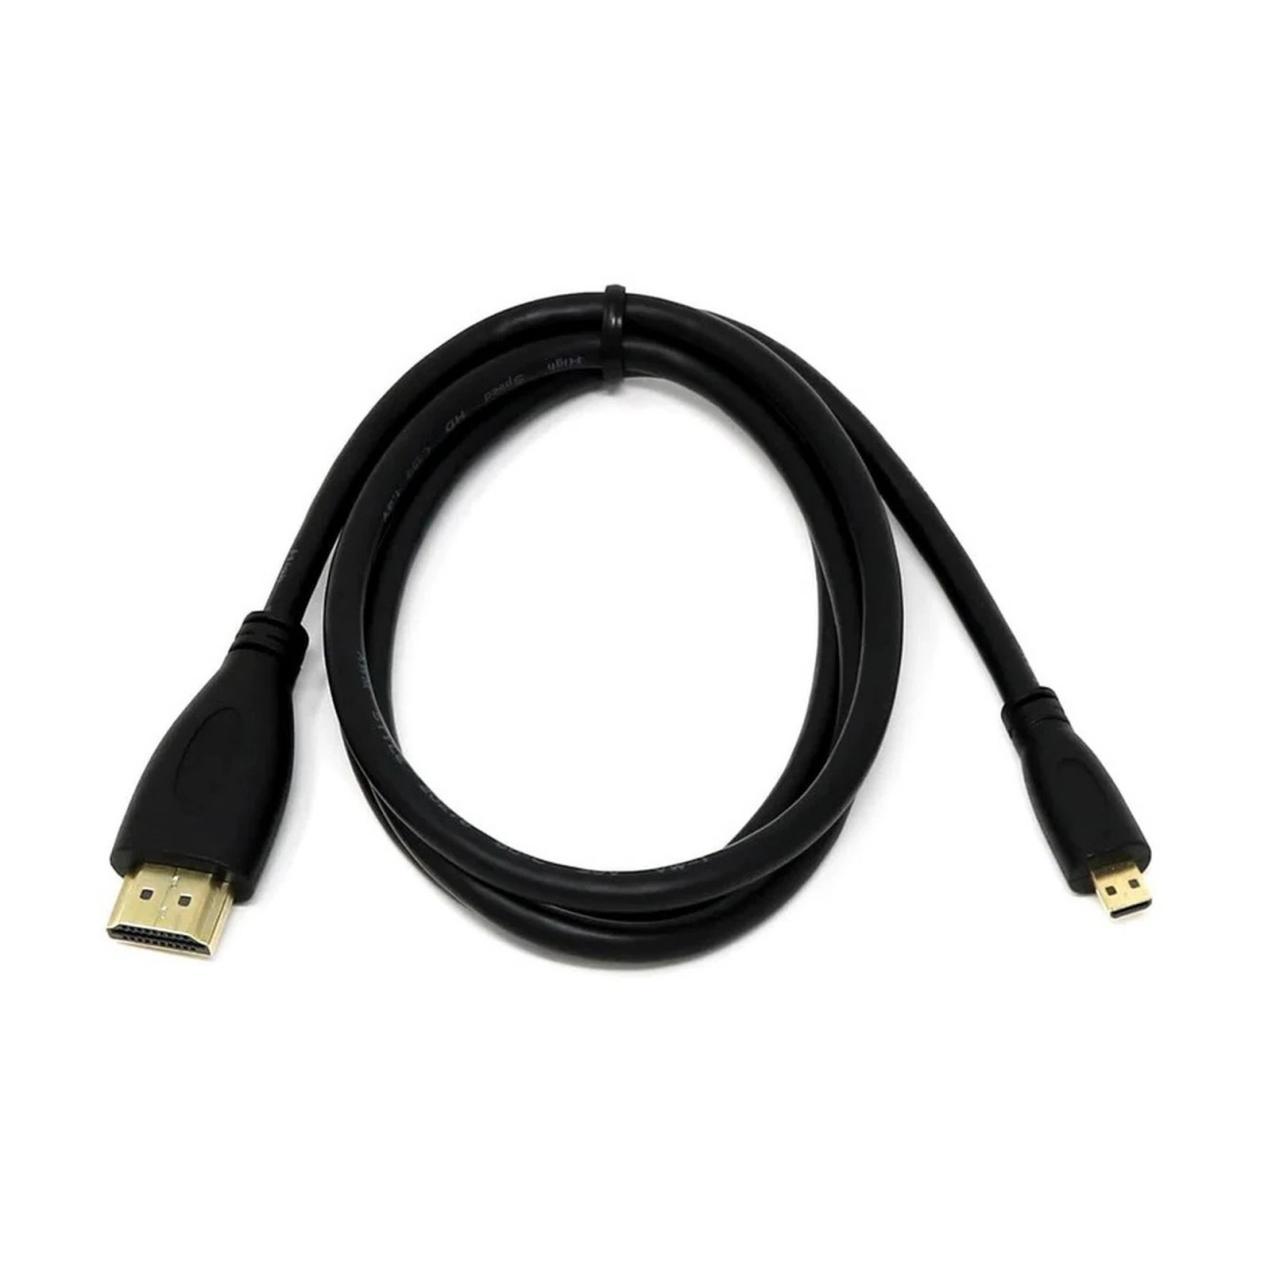
Figure 2
- Use HDMI cable to connect the Pi and TV (Figure 3)
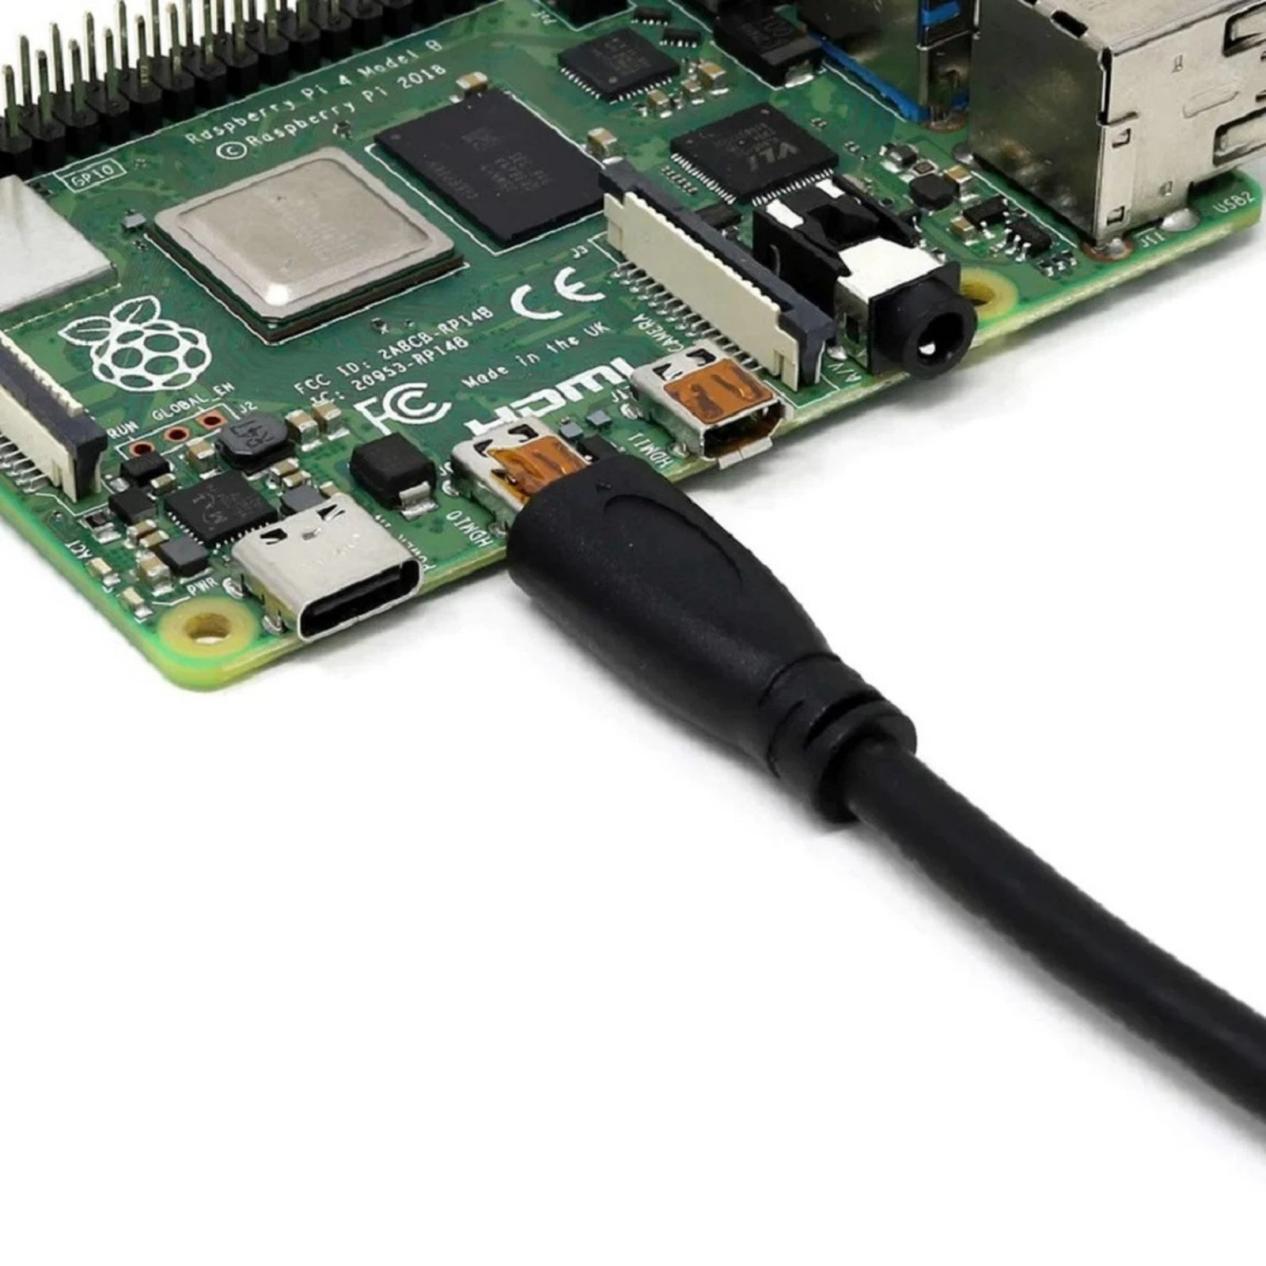
Figure 3
Figure 4
Install Raspberry Pi OS
- Download Raspberry Pi Imager ( https://www.raspberrypi.com/software/ ).
- Connect the MicroSD card to your PC (using MicroSD Reader).
- Run Raspberry Pi Imager on your PC, and follow the on-screen instructions to select the correct Raspberry Pi model and write Raspberry Pi OS to the MicroSD card.
- In Raspberry Pi Imager, you can configure WiFi settings, or choose to use a wired (Ethernet) connection.
- Insert the MicroSD card into the Raspberry Pi. (Figure 4)
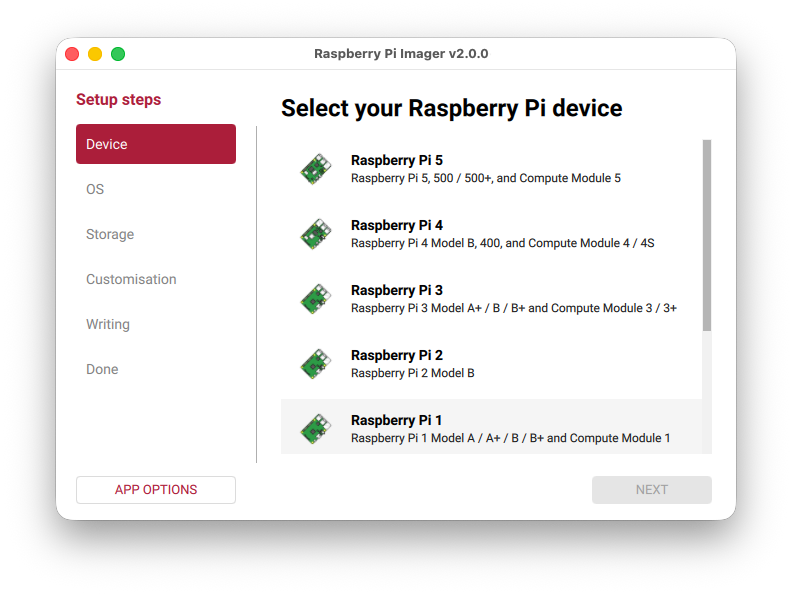
Figure 4
Install iCafeCloud Client for Raspberry Pi
- After powering on the Raspberry Pi, obtain its local IP address from your router (the device name is usually piXX ).
- Log in to the Raspberry Pi via SSH (the username and password were set during Raspberry Pi OS installation).
- Log in to cp.icafecloud.com and add a Console under the Computers/Consoles page. (Figure 5)
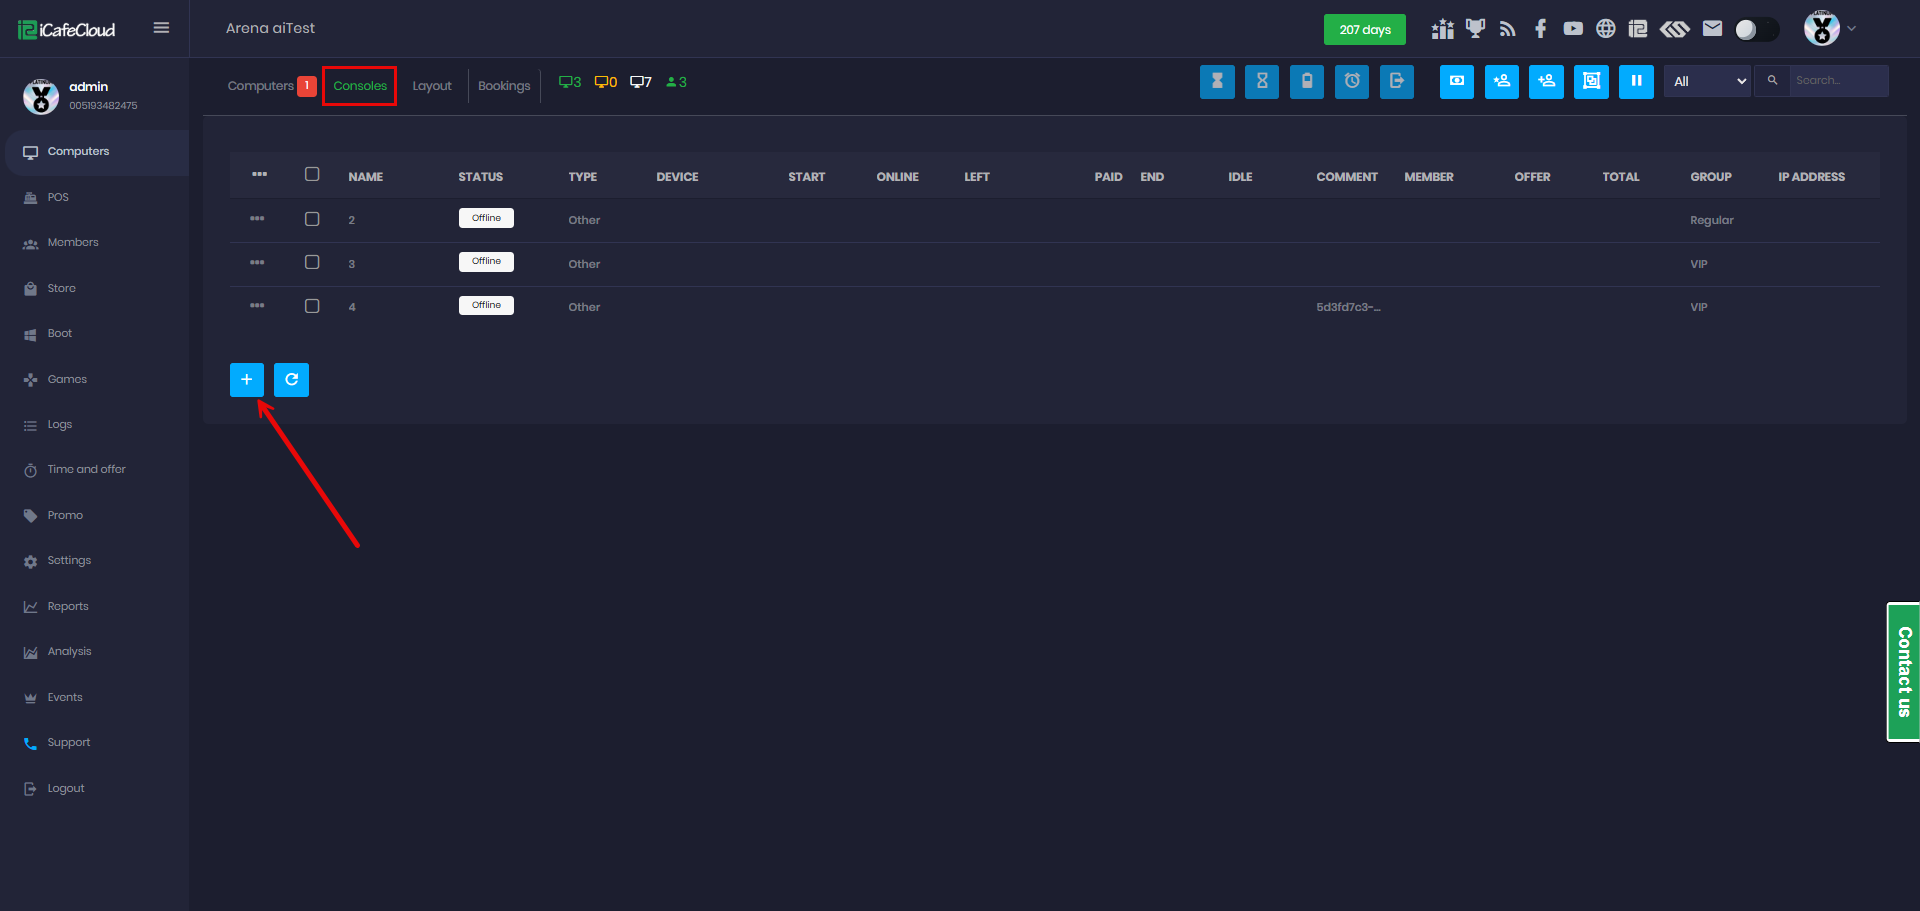
Figure 5
- Add console name and click Done (Figure 6)
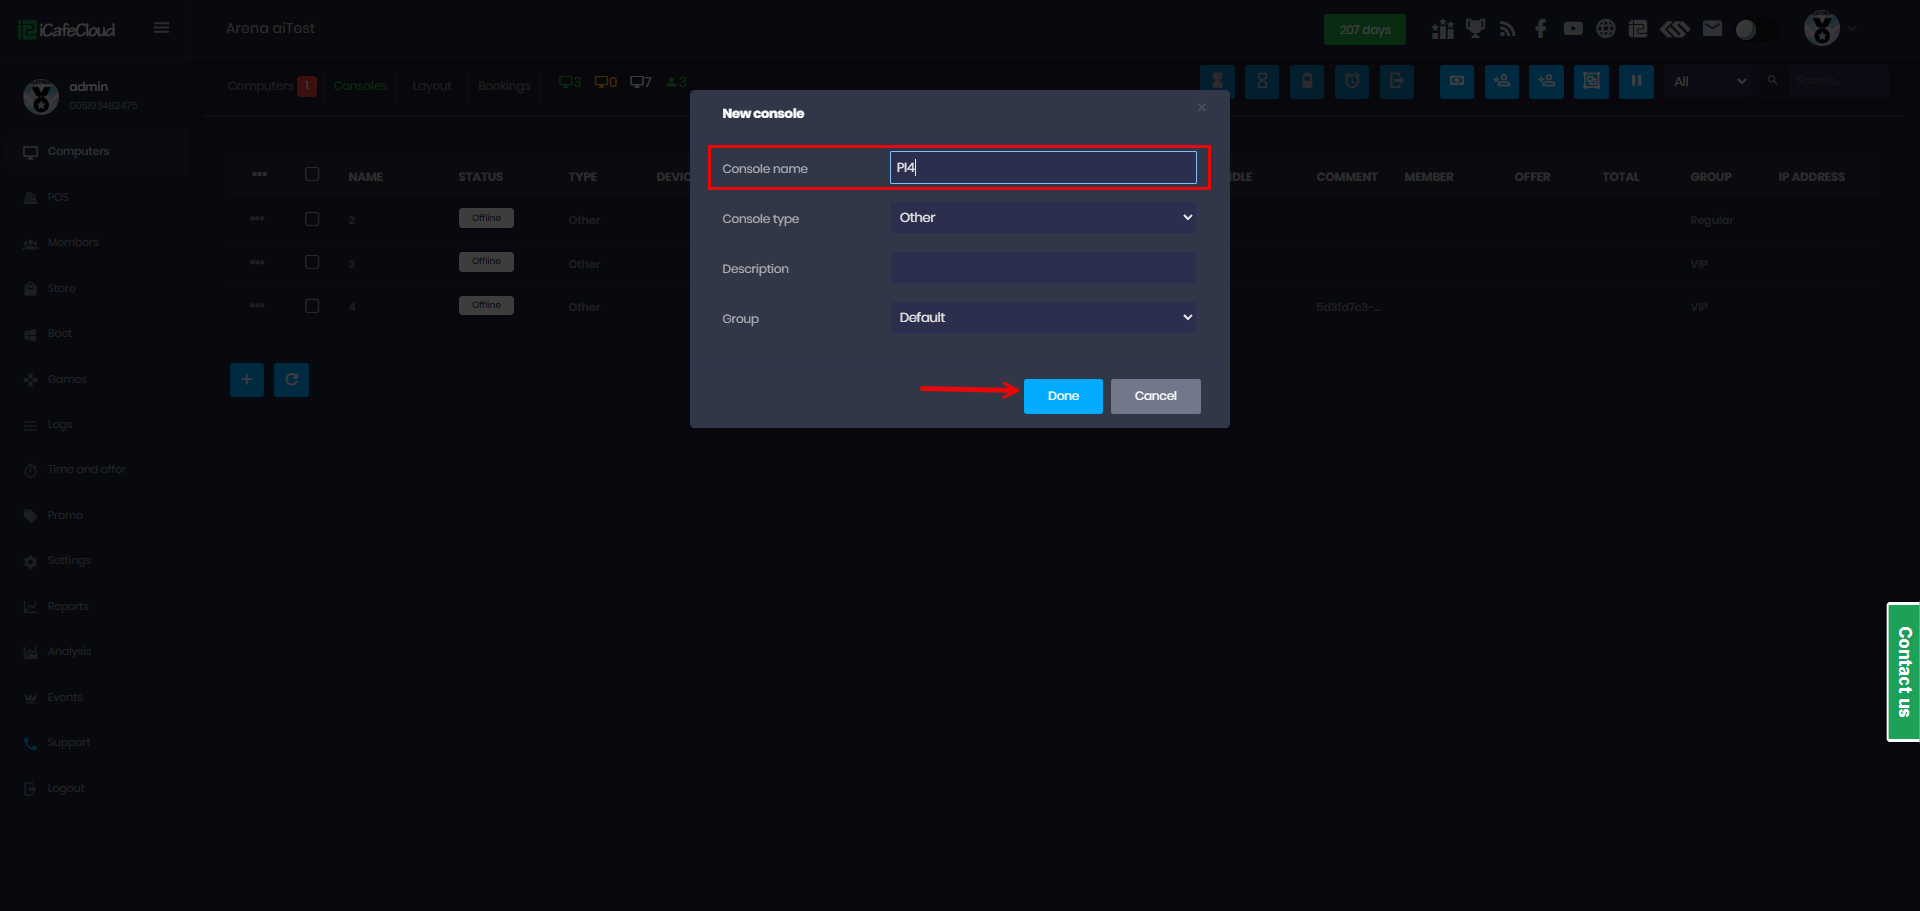
Figure 6
- Select the Console you just added, then right-click to open the menu and click Generate TV PIN. (Figure 7)
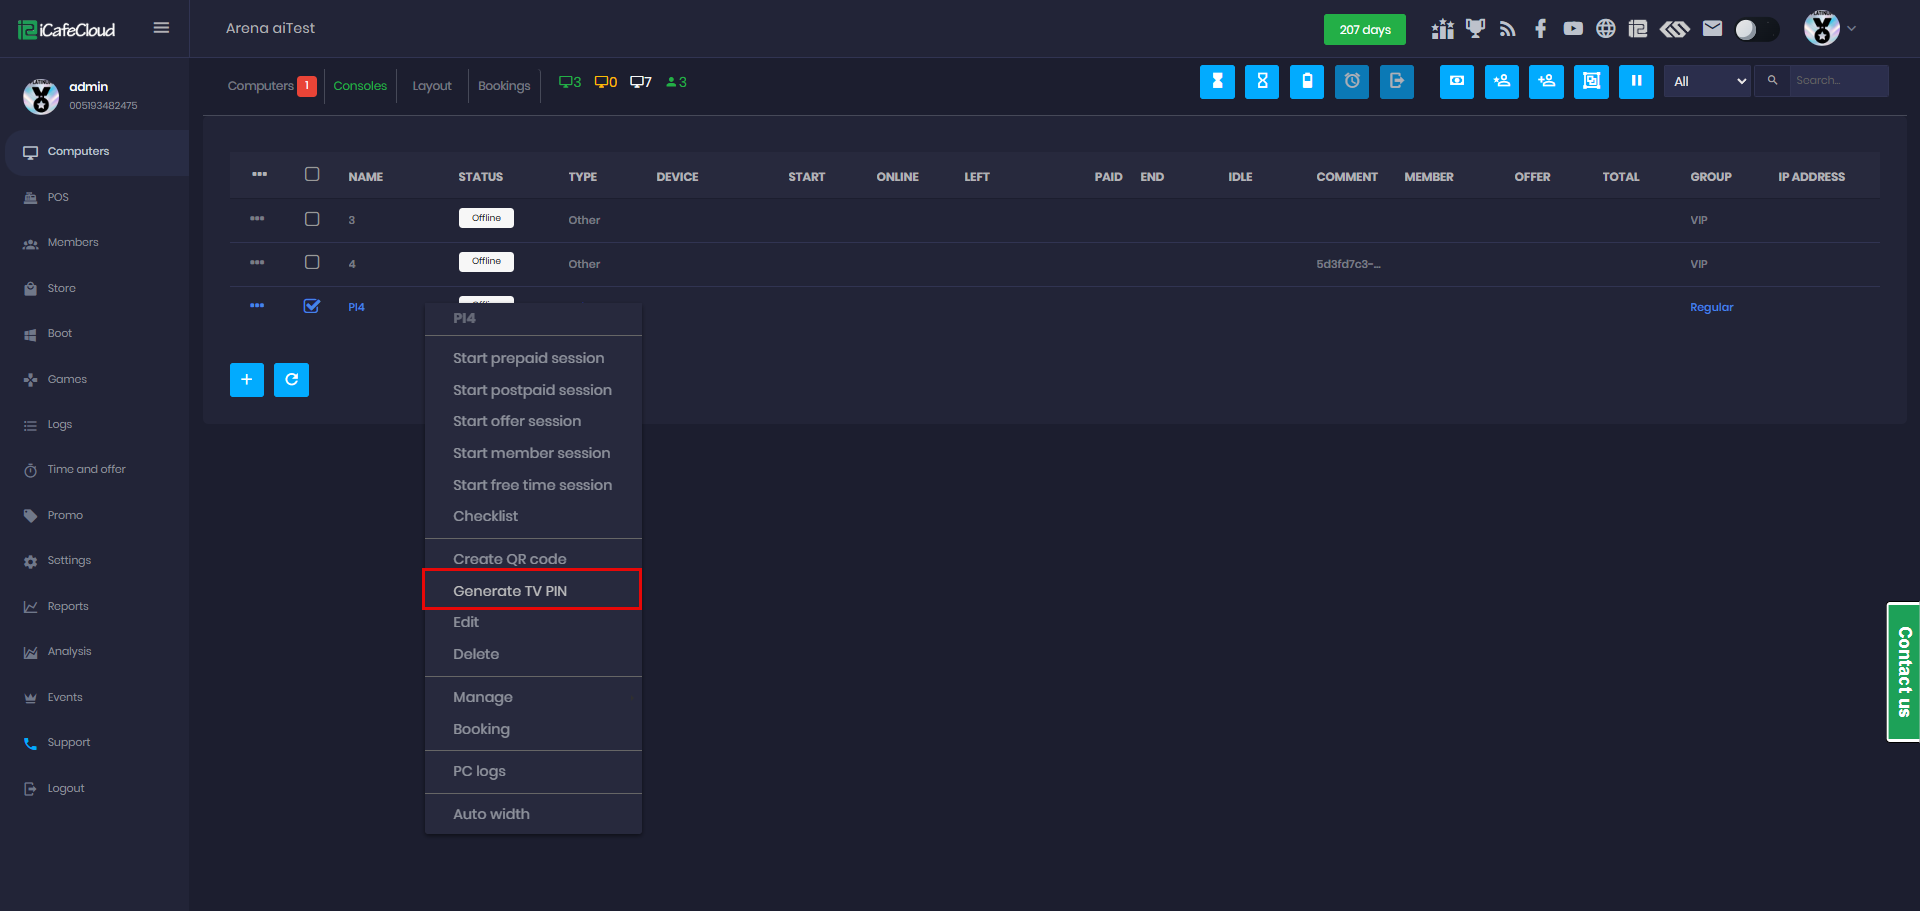
Figure 7
- The system will display a 4-digit TV PIN for the console. (Figure 8)
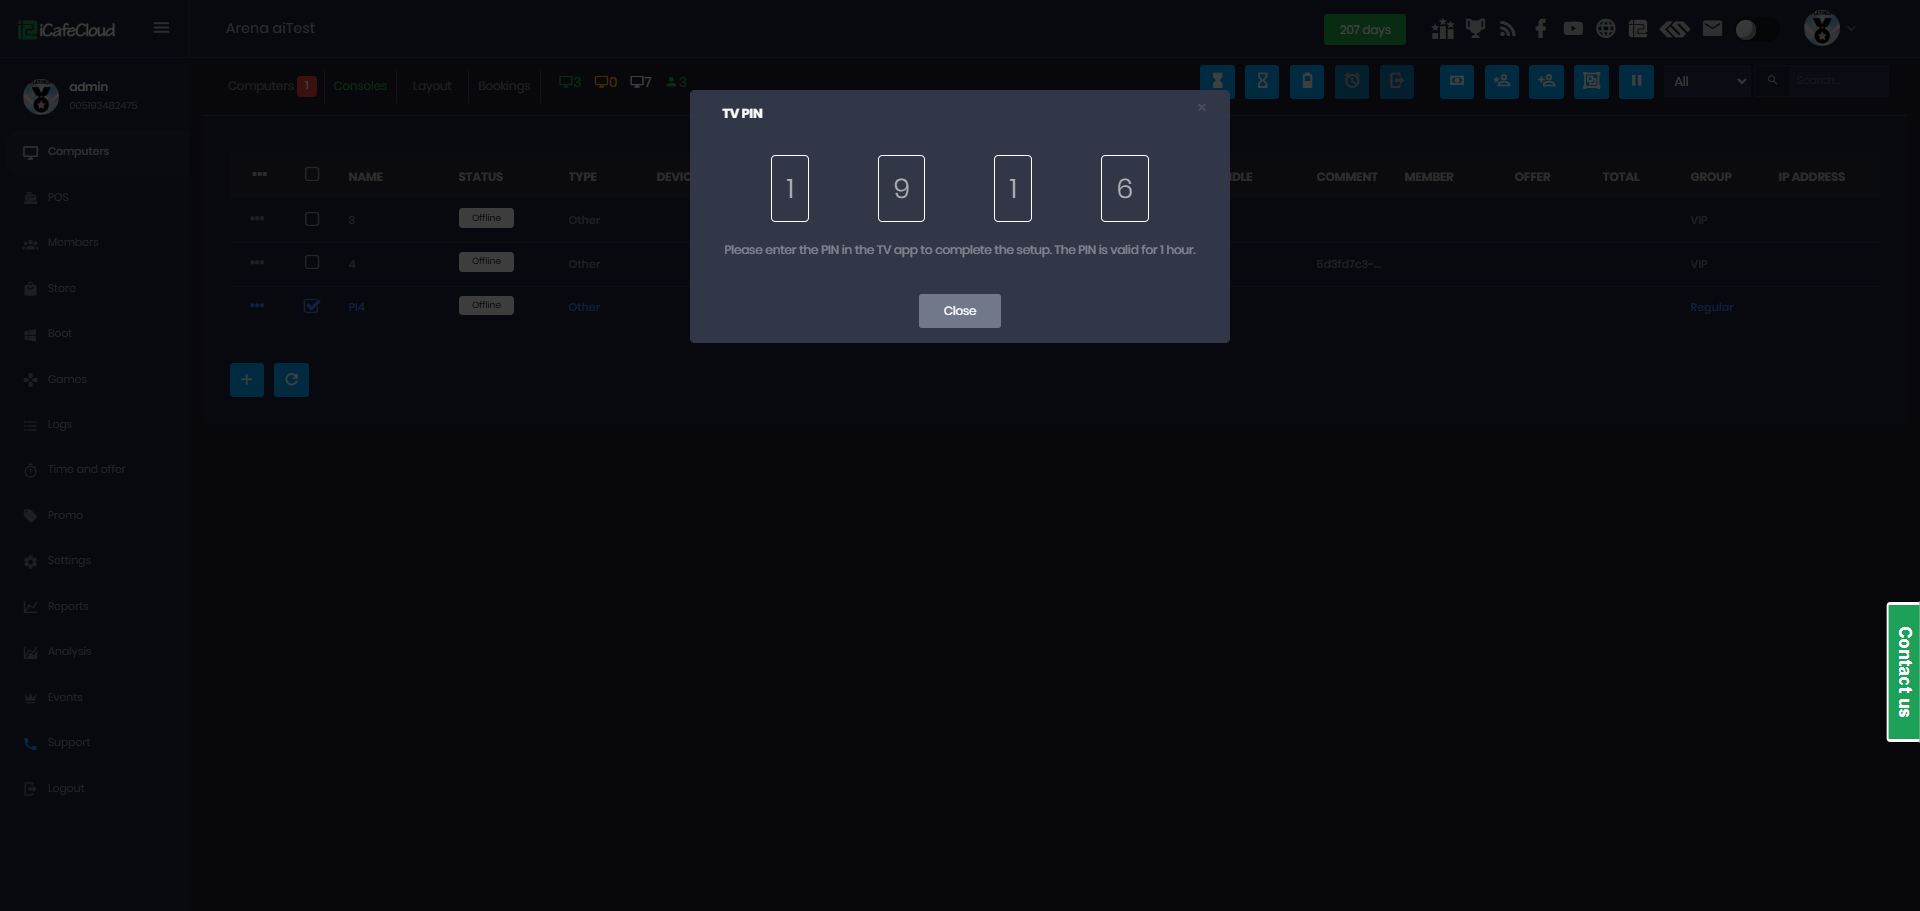
Figure 8
- Obtain the Console TV PIN and note it down.
- In the SSH session, run the following command (replace
- curl -k https://cp.icafecloud.com/pi/install.sh | sudo bash -s -- <PIN>
- After successful installation, when a session starts, the TV will power on under Raspberry Pi control, and it will power off on checkout (Figure 9)
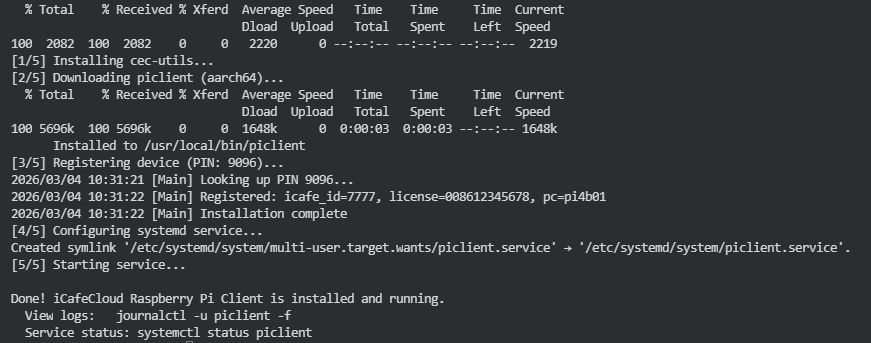
Figure 9