2025-01-08
guest, qr, login, topup
The following explains how a guest can create a guest account and make a payment directly from the client interface.
- In the web panel, navigate to Settings and then to Client Settings. Scroll down to locate the Top-up Login at Client option, and change its status to Enable.(Figure 1)
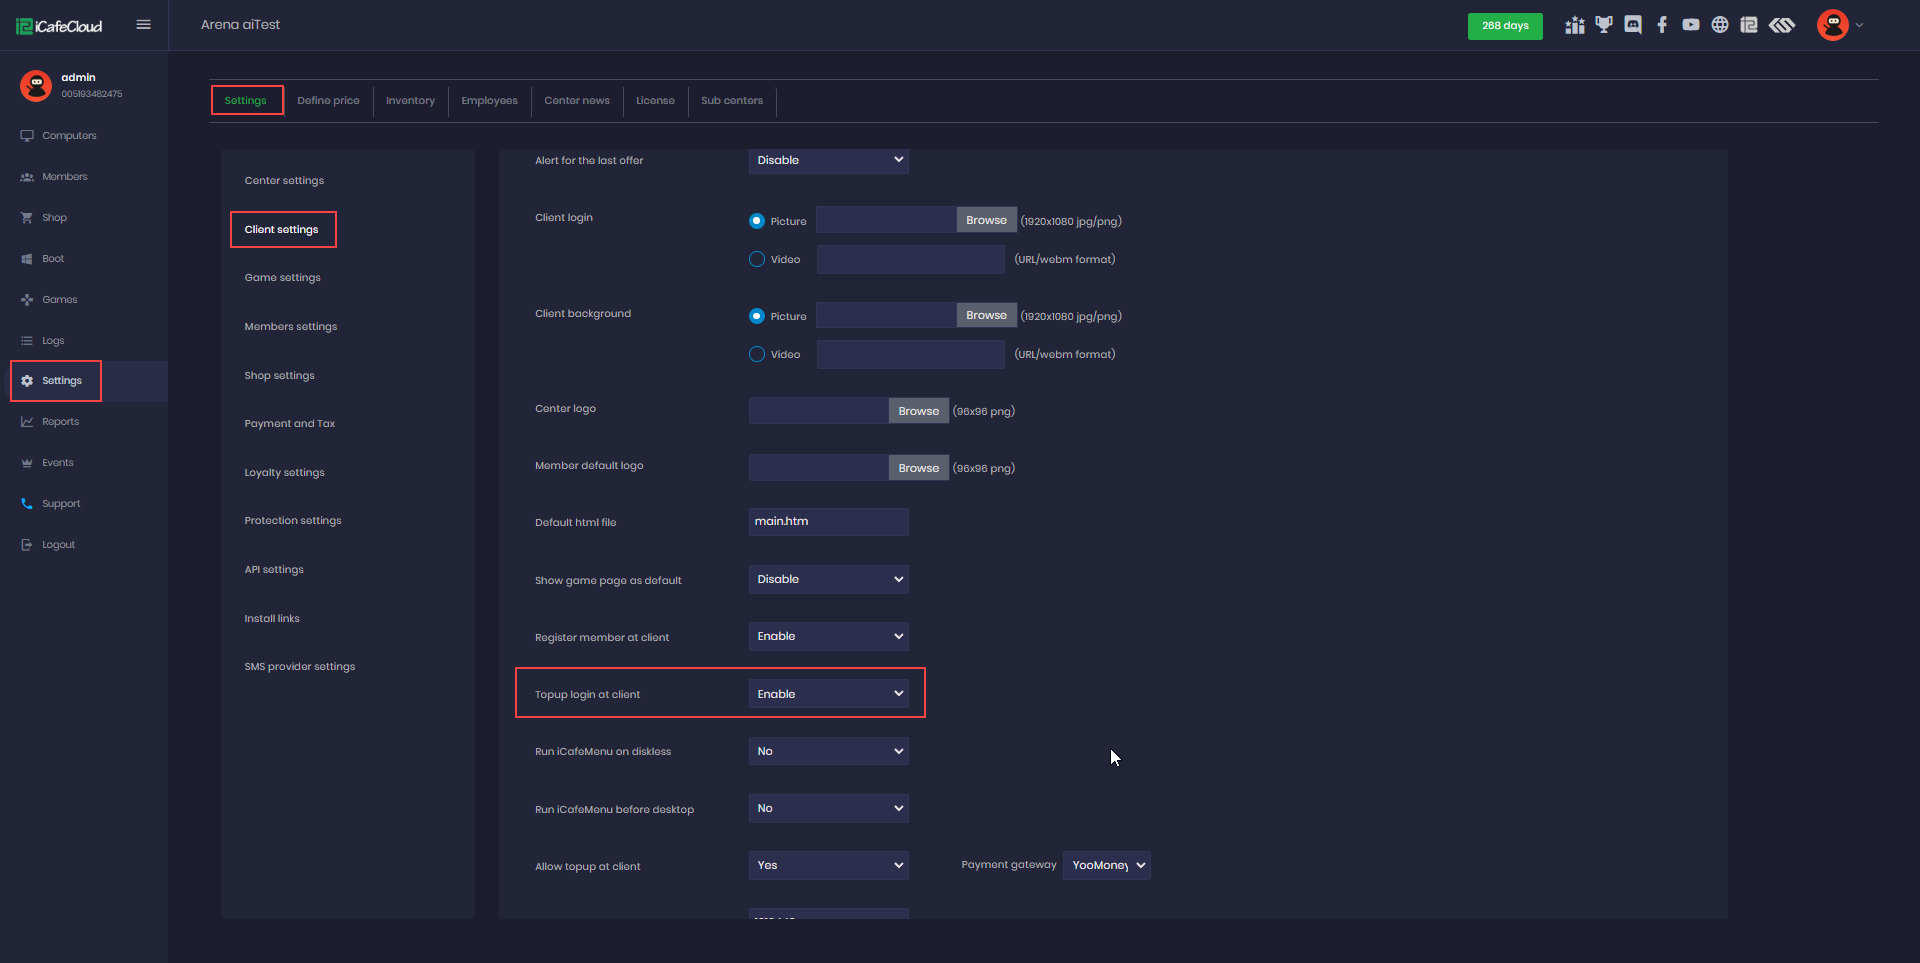
Figure 1
- For this function to work, you must first enable the Allow Top-up at Client option and configure it with one of the supported providers, such as Stripe, YooMoney, or Paysley.
- On the client side, at the login page, you will notice a new icon labeled "TopupLogin." (Figure 2)
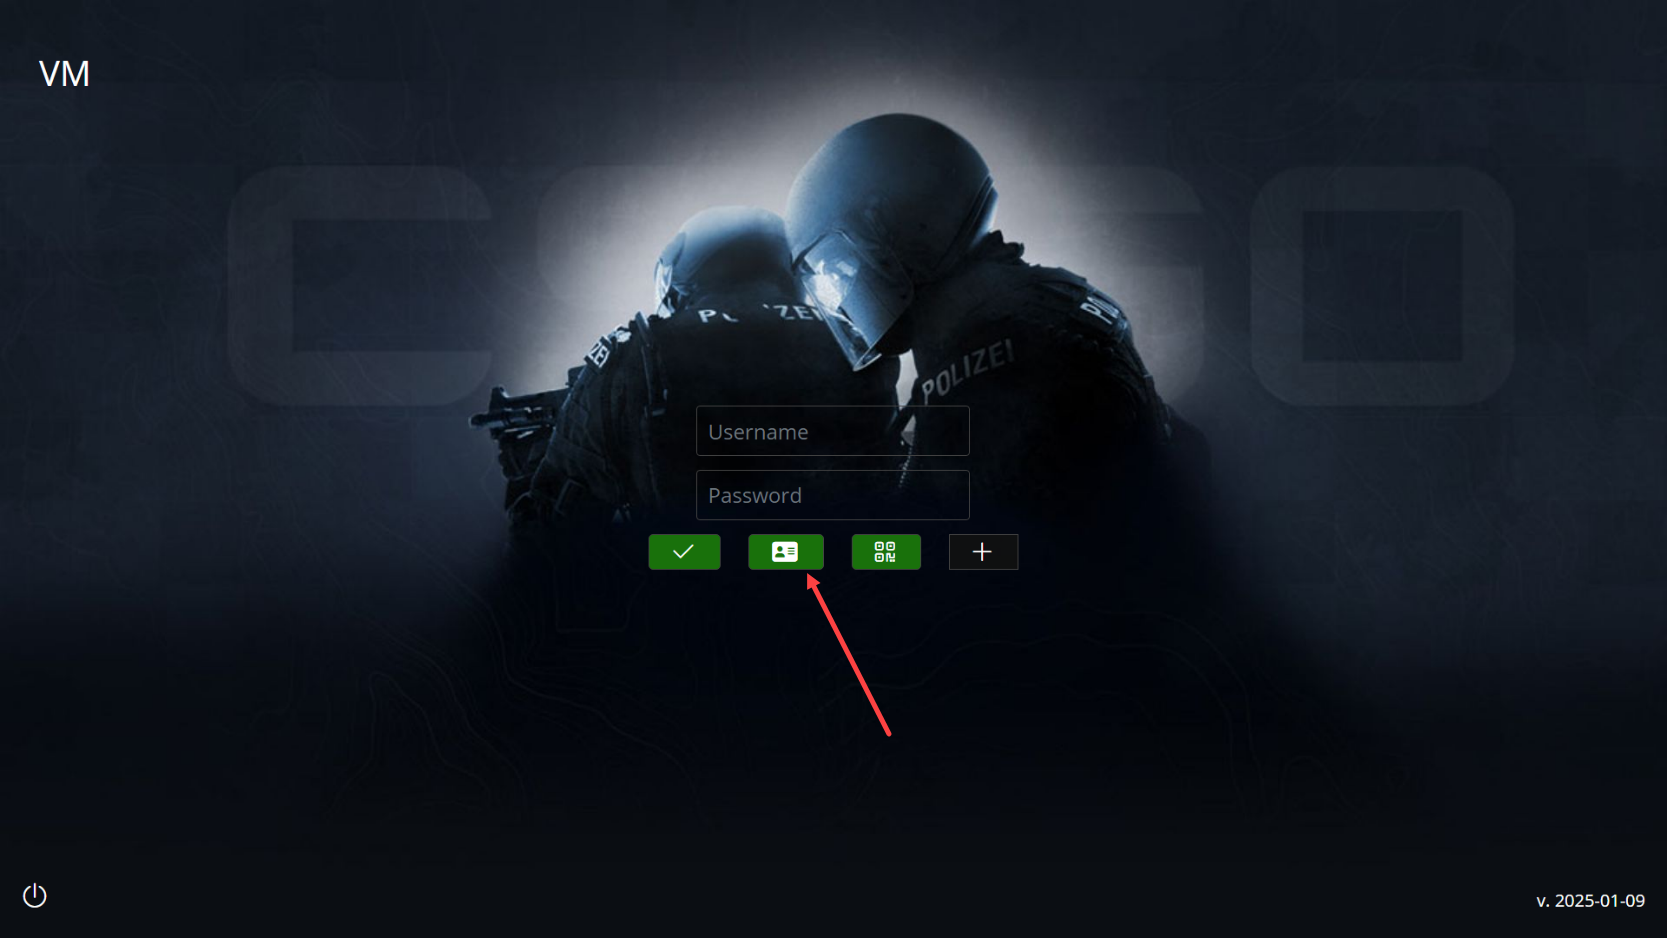
Figure 2
- Click on it, and a new window will pop up—enter the account or playtime you want, and the system will automatically calculate the amount to top up; then click the green button to confirm. (Figure 3)
Figure 3

- After confirming, a QR code will be automatically generated. Use your mobile device to scan the QR code and proceed with the transaction. (Figure 4)
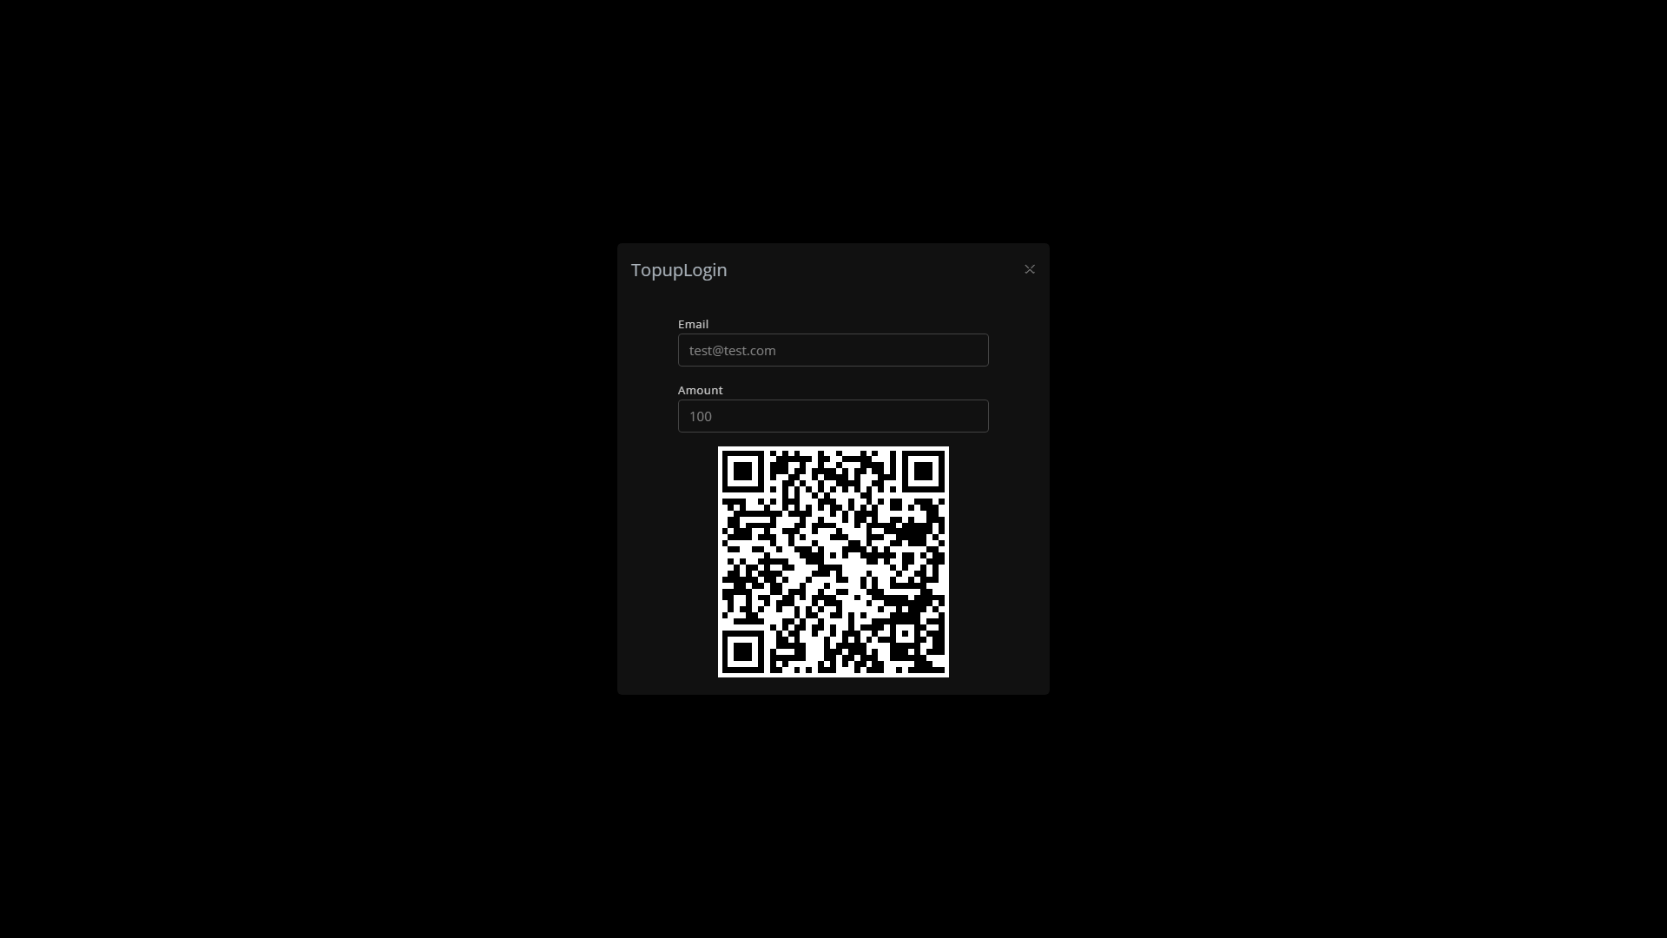
Figure 4
- Once the transaction is successful, the client interface will automatically create a guest account using the provided email and top up the amount directly. A success message will appear as a popup, indicating that the operation was completed successfully. Click OK to close the window, and the guest can then proceed to use the PC. (Figure 6)
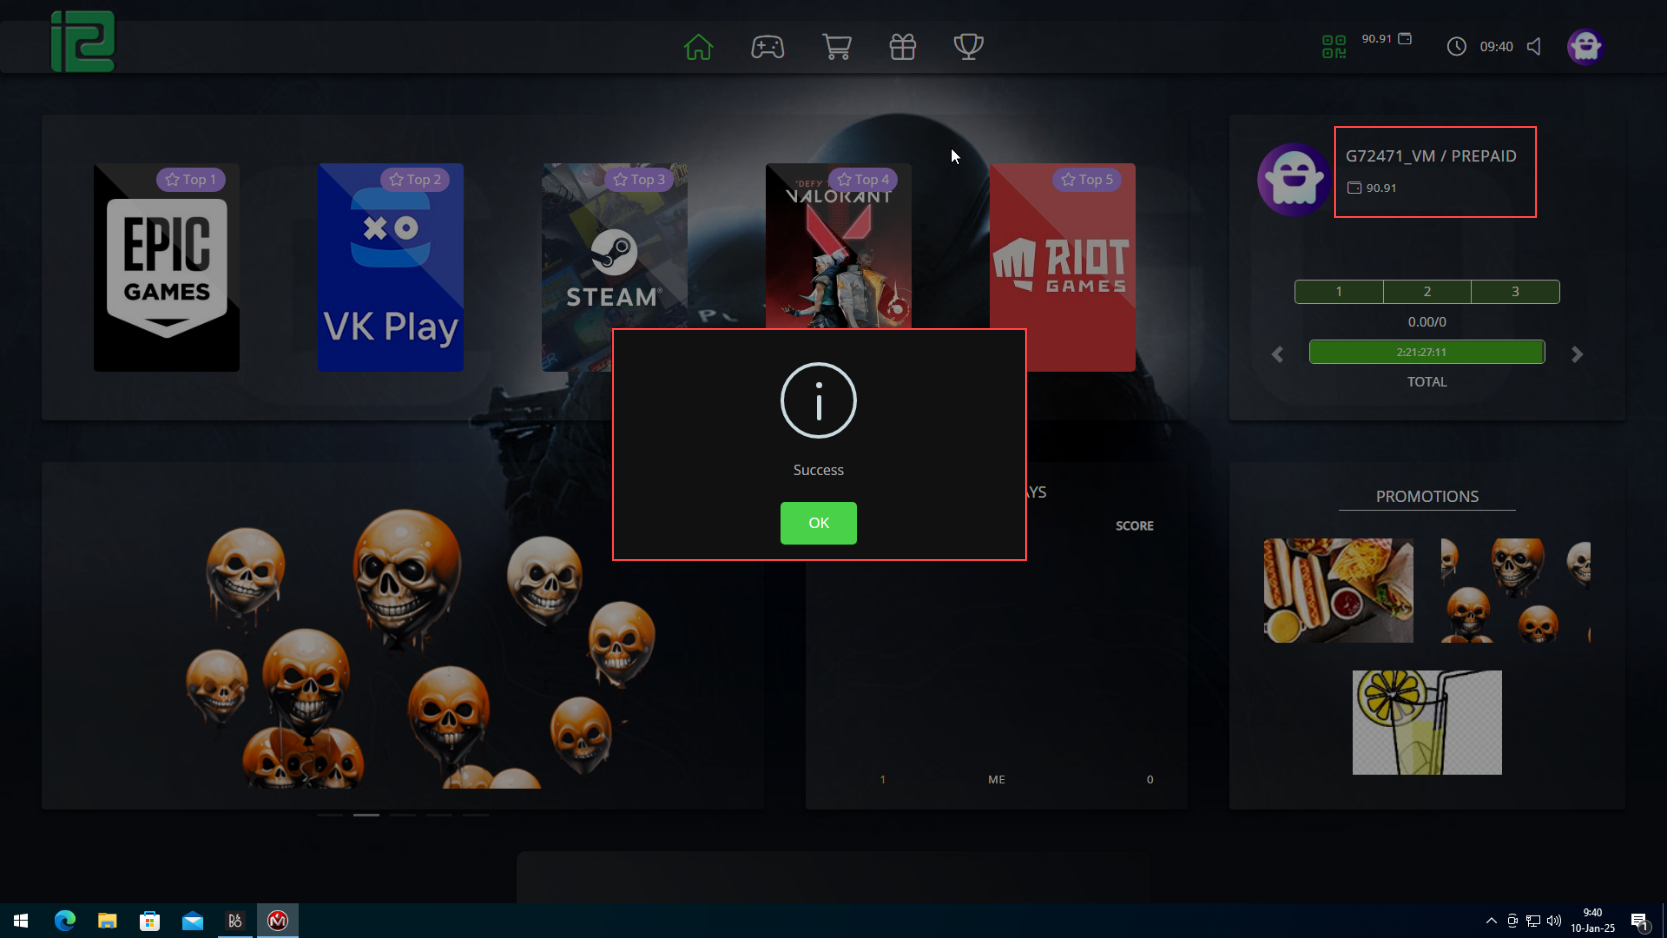
Figure 6