

The following explains how to create guest accounts and how to use them
- Click the Members tab, then select Guest and click the + button to create a new guest account (Figure 1).
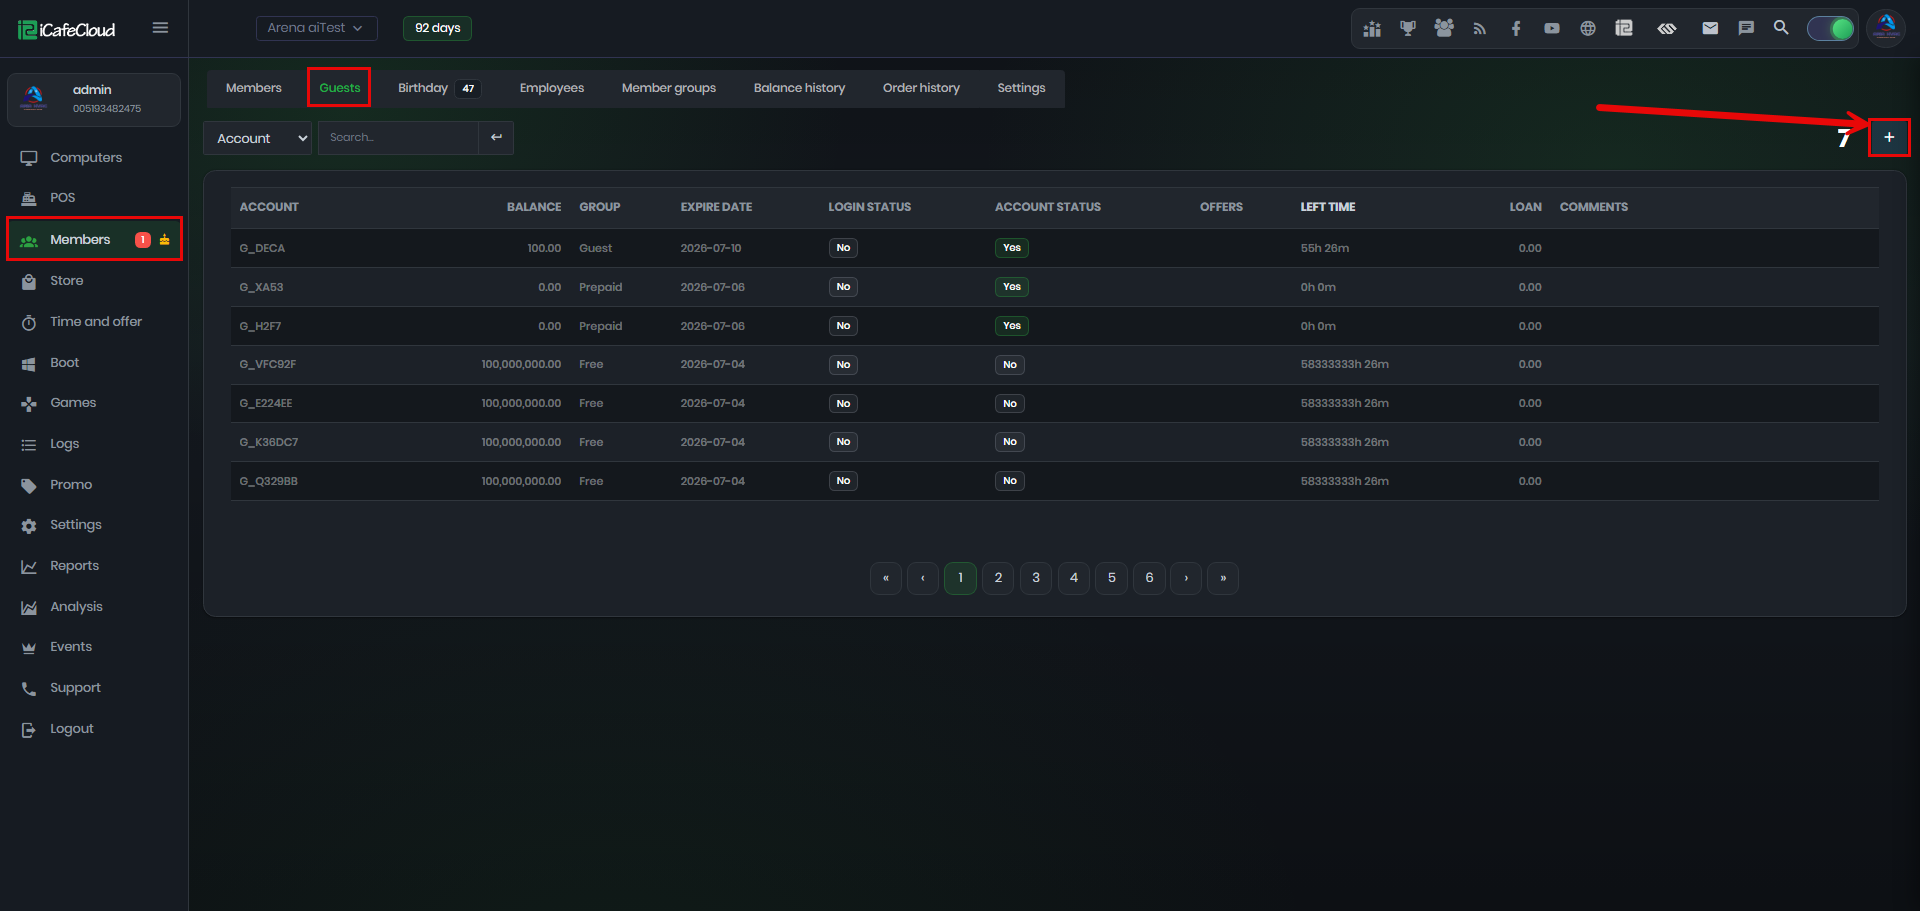
Figure 1
- In the Guest dialog, set the Expire Time, select the Payment Type, and enter the Balance to be added to the account. Then click Submit to create the guest account (Figure 2).
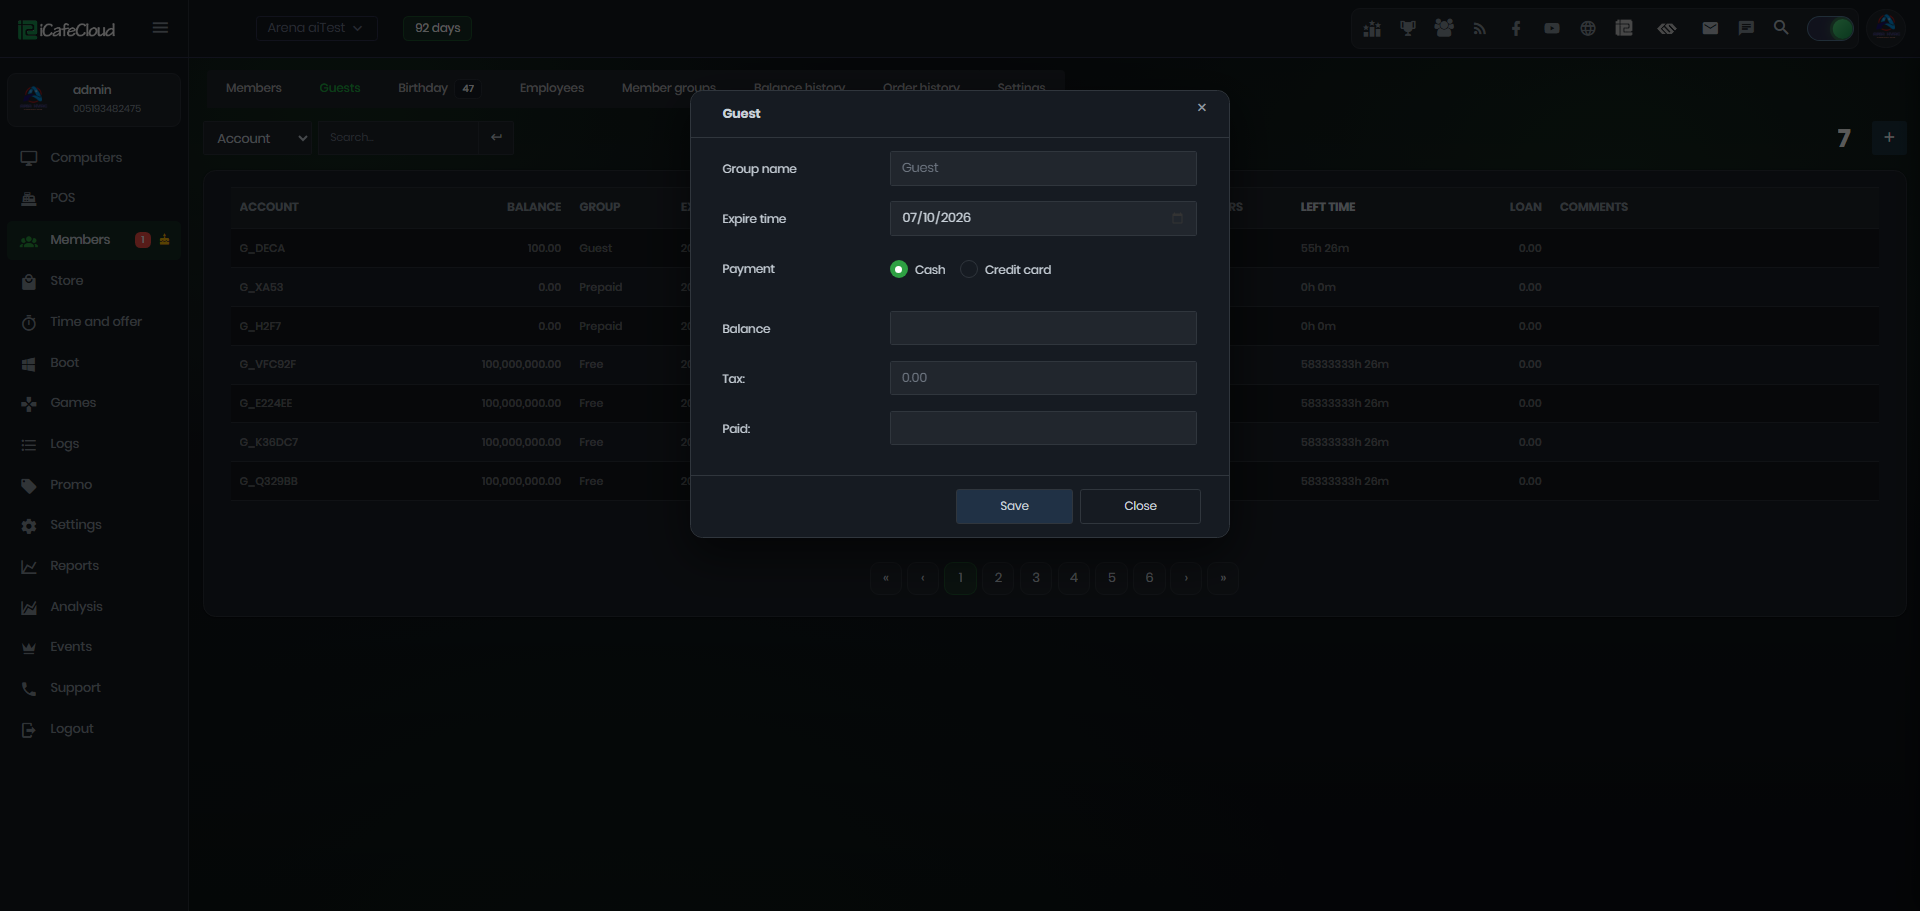
Figure 2
- An account with a random username will be created using the specified balance amount and expiration time (Figure 3).
- The default password for all guest accounts is 123456.
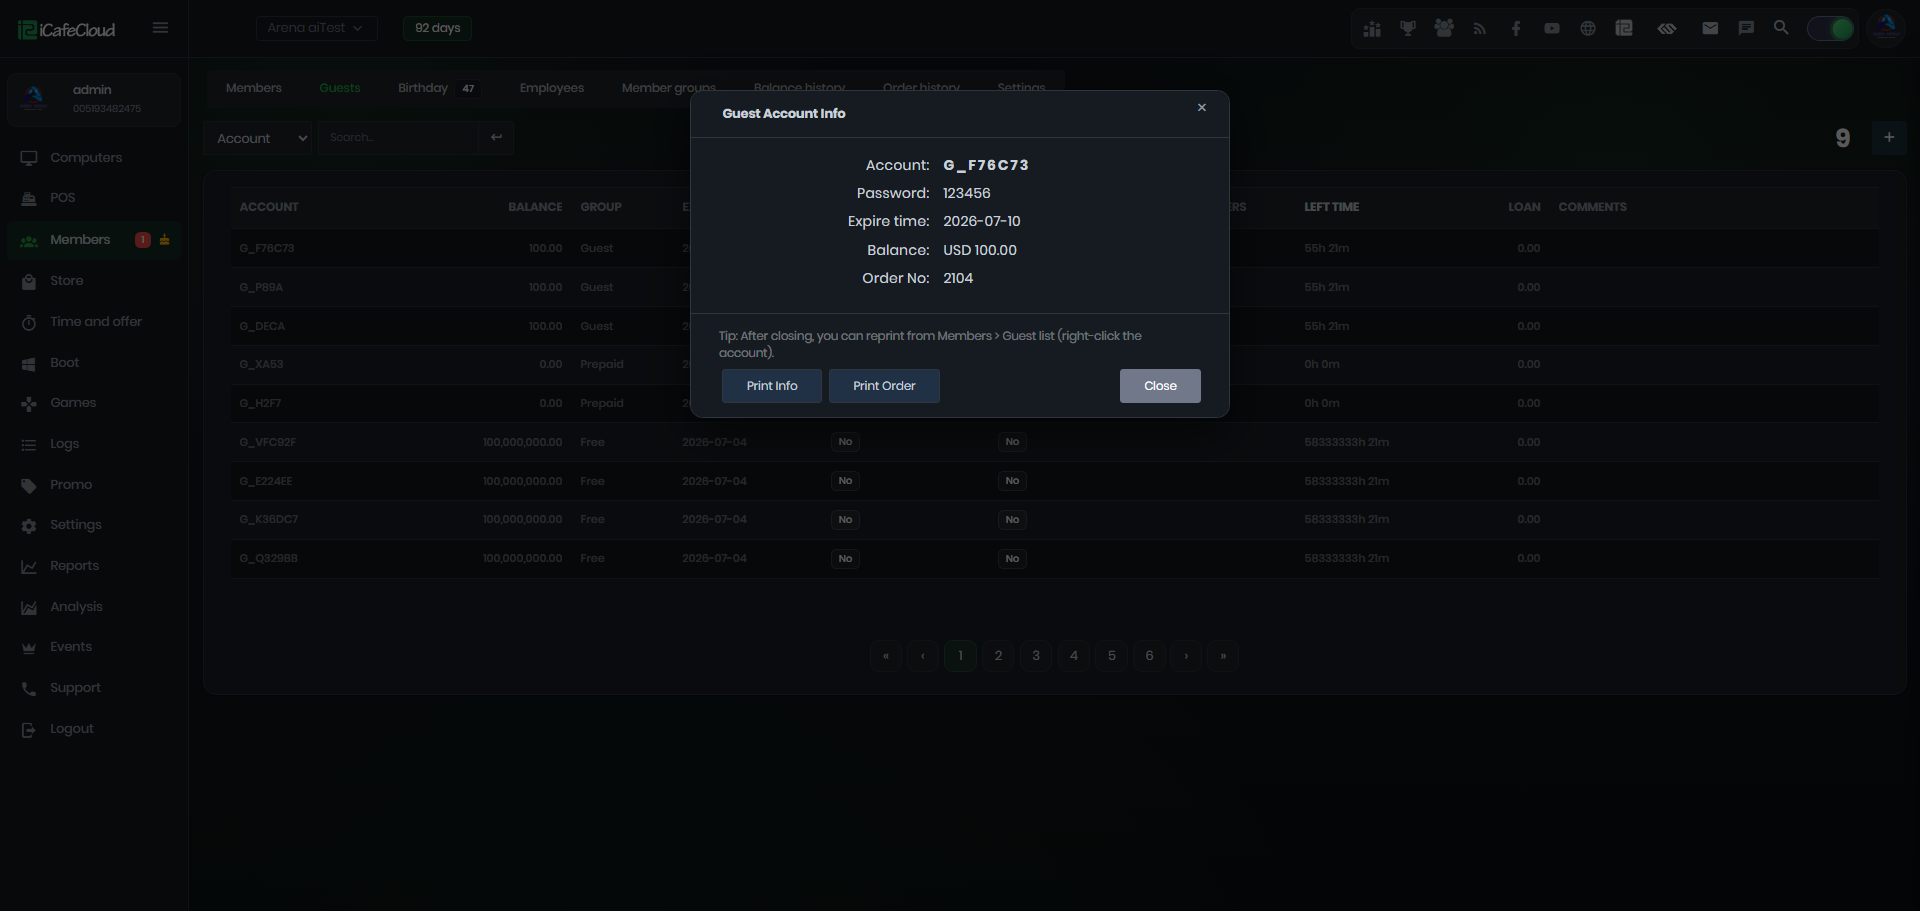
Figure 3
- You can have as many accounts you need for guests.
- Guest accounts now come with their own exclusive Guest group. This allows for customized offers and promotions specifically designed for guests, separate from those offered to all members. (Figure 4)
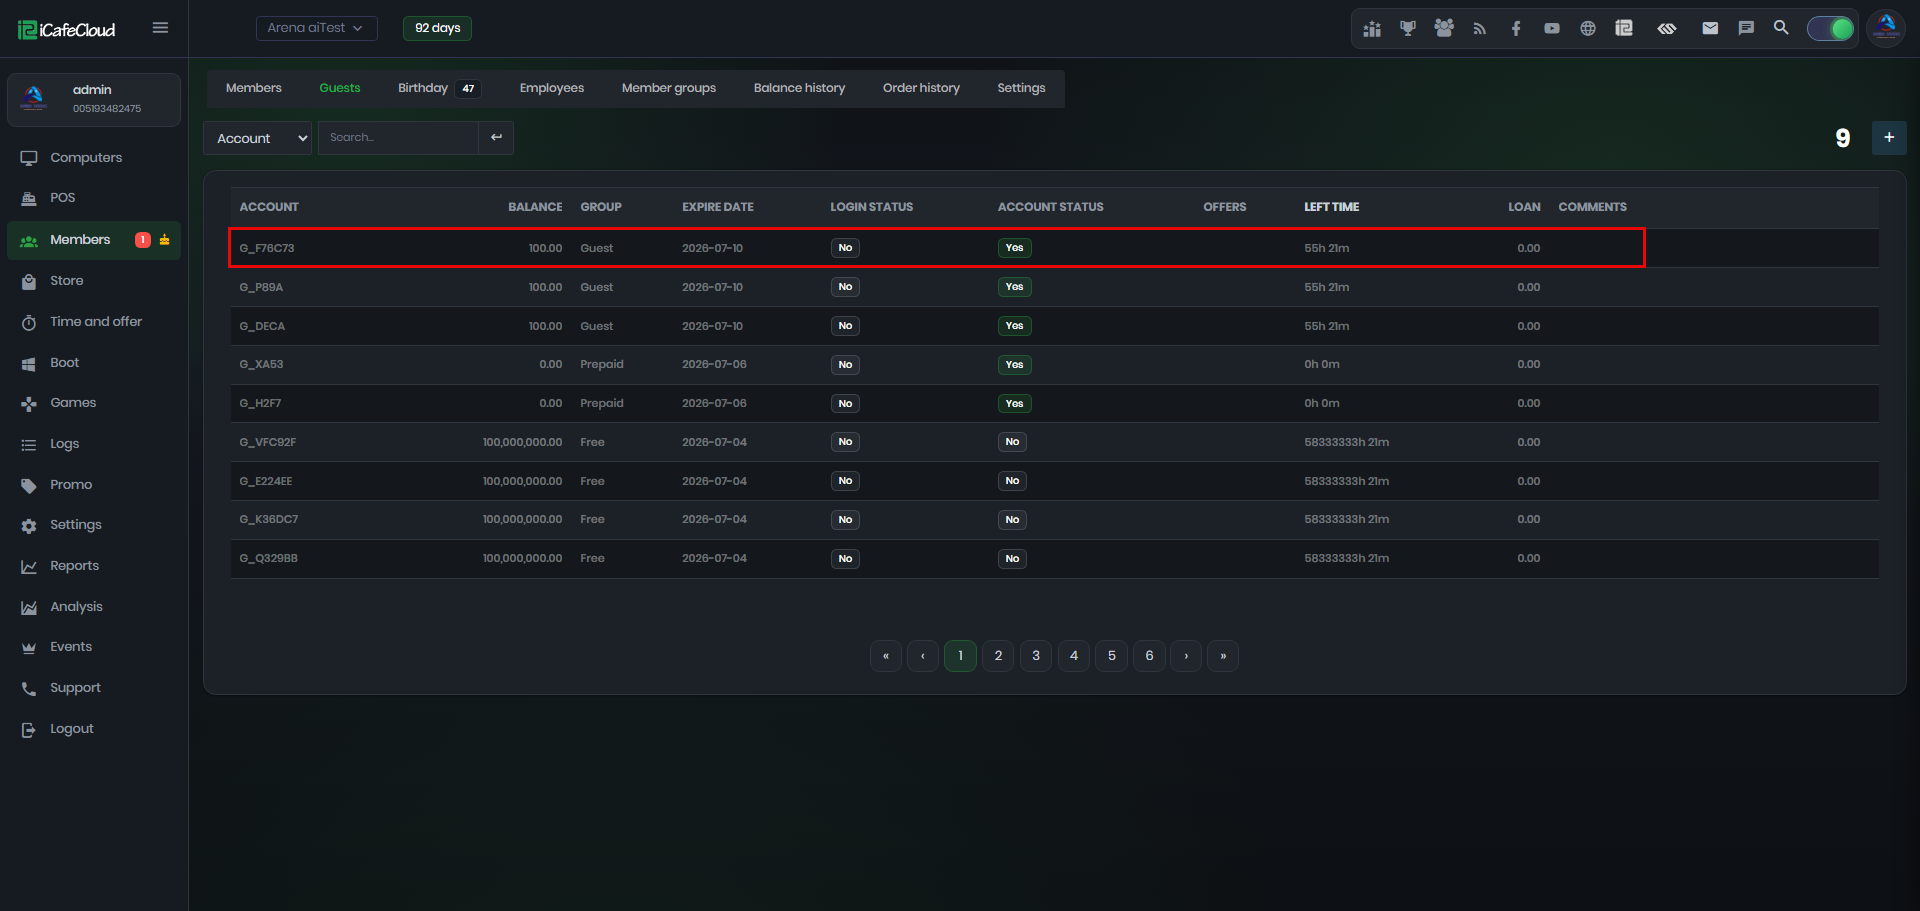
Figure 4
- To give the account to the user you can print it, to print the guest account details, click the account link and then click on the “Print info” button on the “Guest” modal (Figure 5).
- The default expiration time is 7 days from creation.
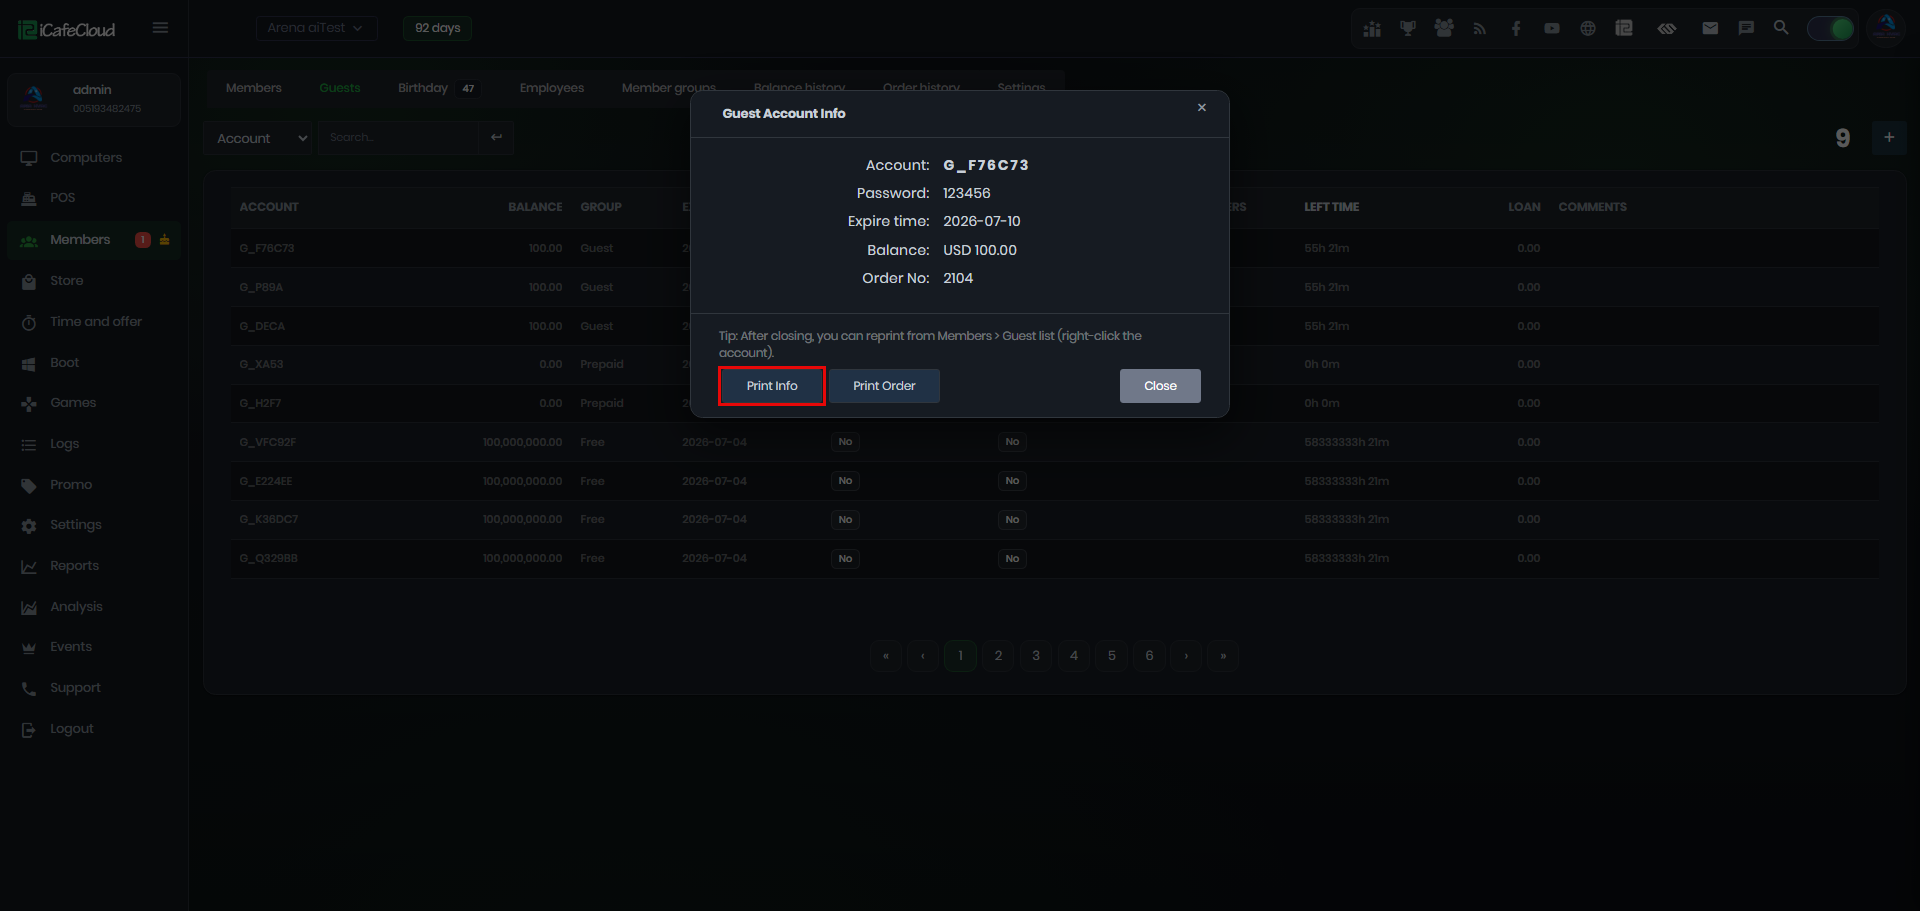
Figure 5
.
- The expired guest account will be deleted in the background after 6 hours
- Select your ticket printer and then click on the “Print” button (Figure 6).
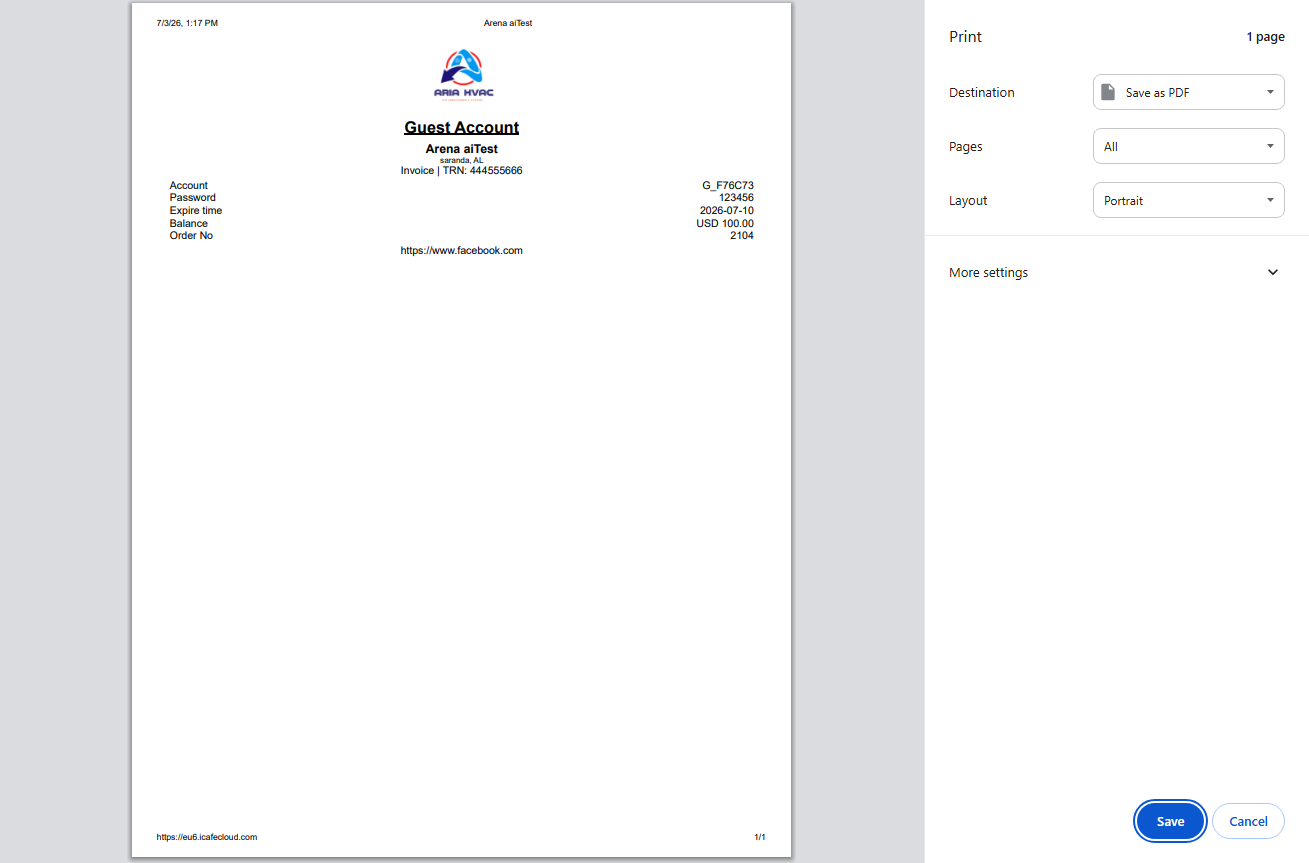
Figure 6
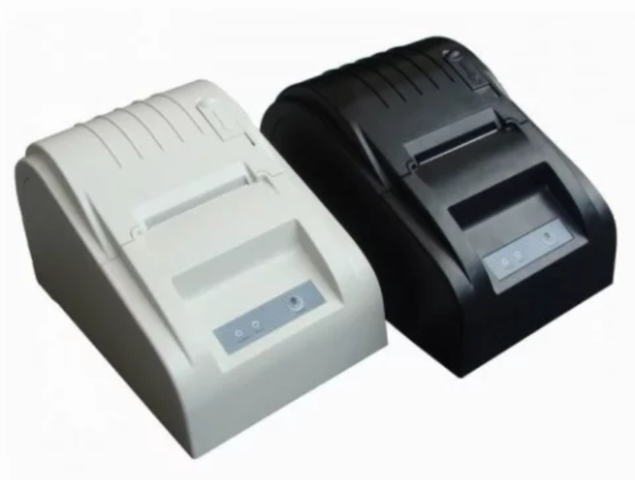
Refer to the picture below for supported printer type
- If the printer prints a long receipt for guest account details, click "More settings" on print modal (Figure 7) and then uncheck "Headers and footers" (Figure 8).
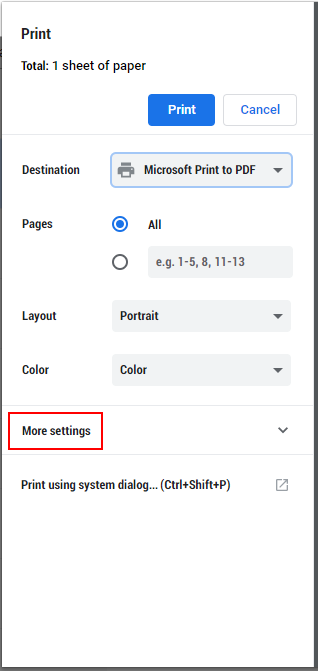
Figure 7
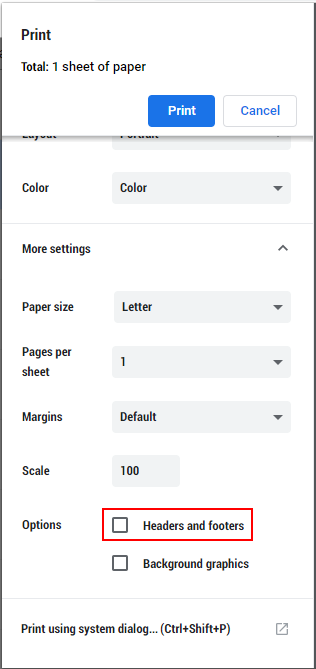
Figure 8