

The following explains how to use the Warehouse page to manage physical shop stock, including receiving goods, moving items between storage locations, counting stock, and removing lost items.
- The warehouse is turned off by default, so it must be enabled before any stock operation can be used.
- Navigate to Warehouse in the left menu. If the warehouse is not enabled yet, the message "Warehouse is not enabled, operations are disabled" appears at the top right. Click Enable now (Figure 1).
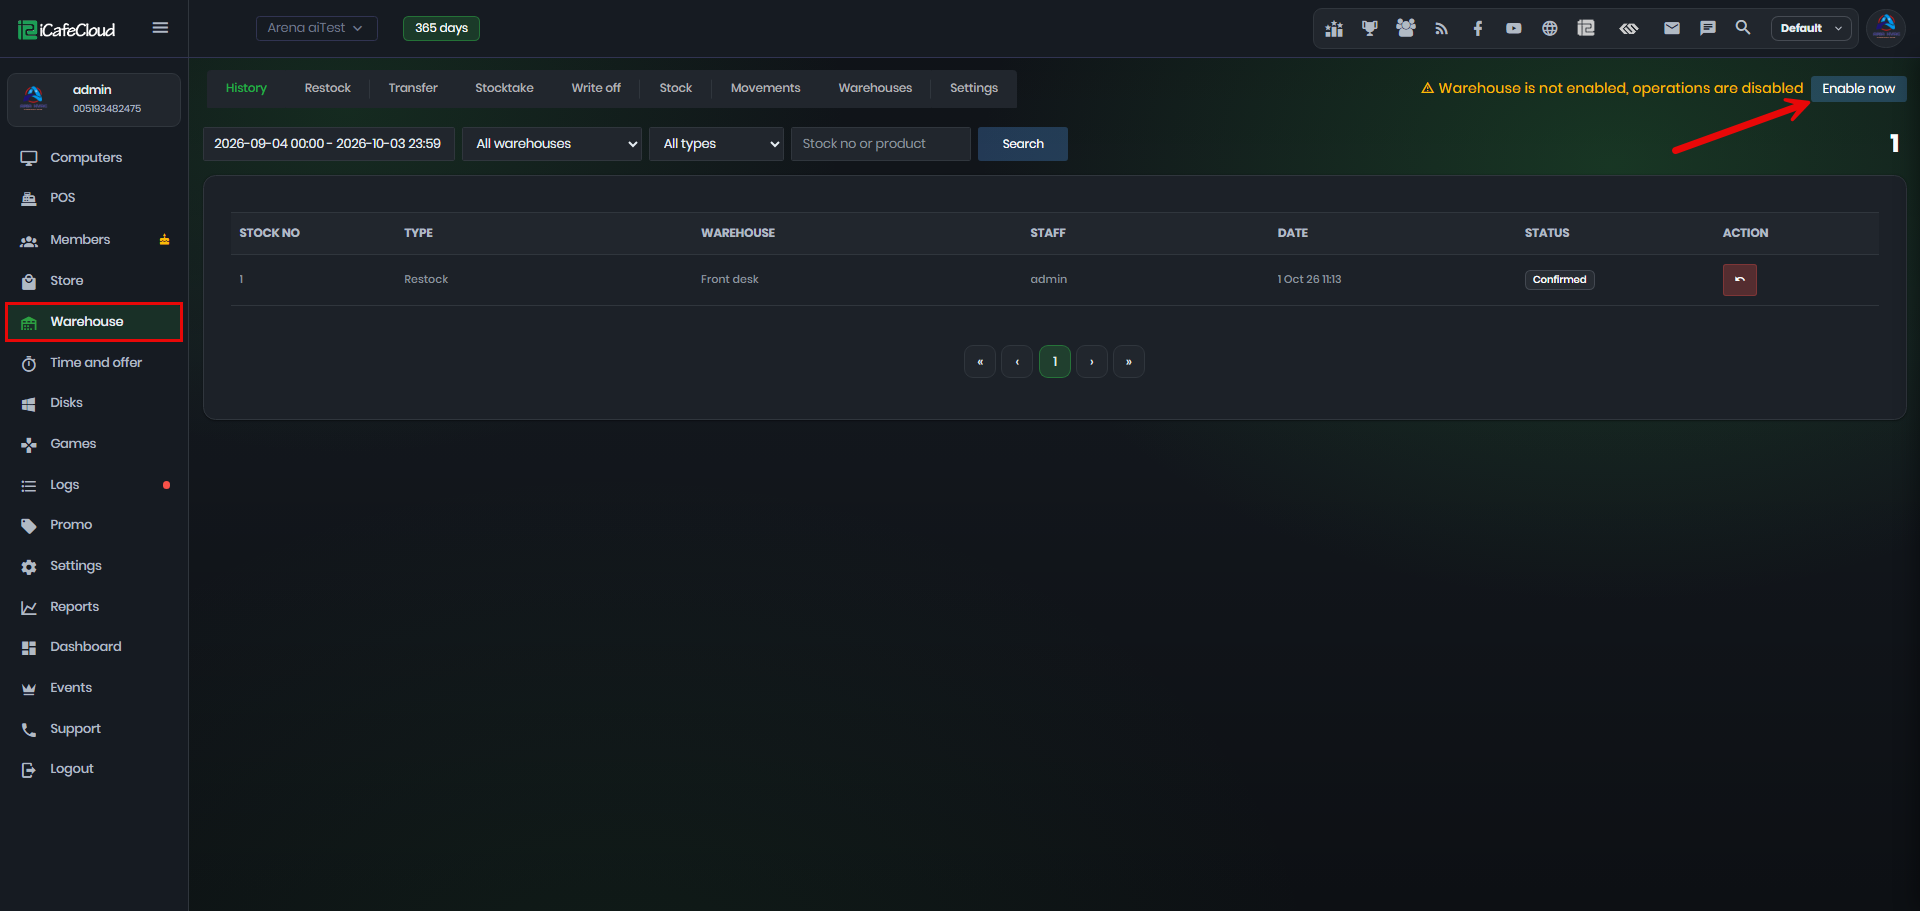
Figure 1
- The Settings tab opens. In the Enable warehouse, change Disable to Enable (Figure 2).
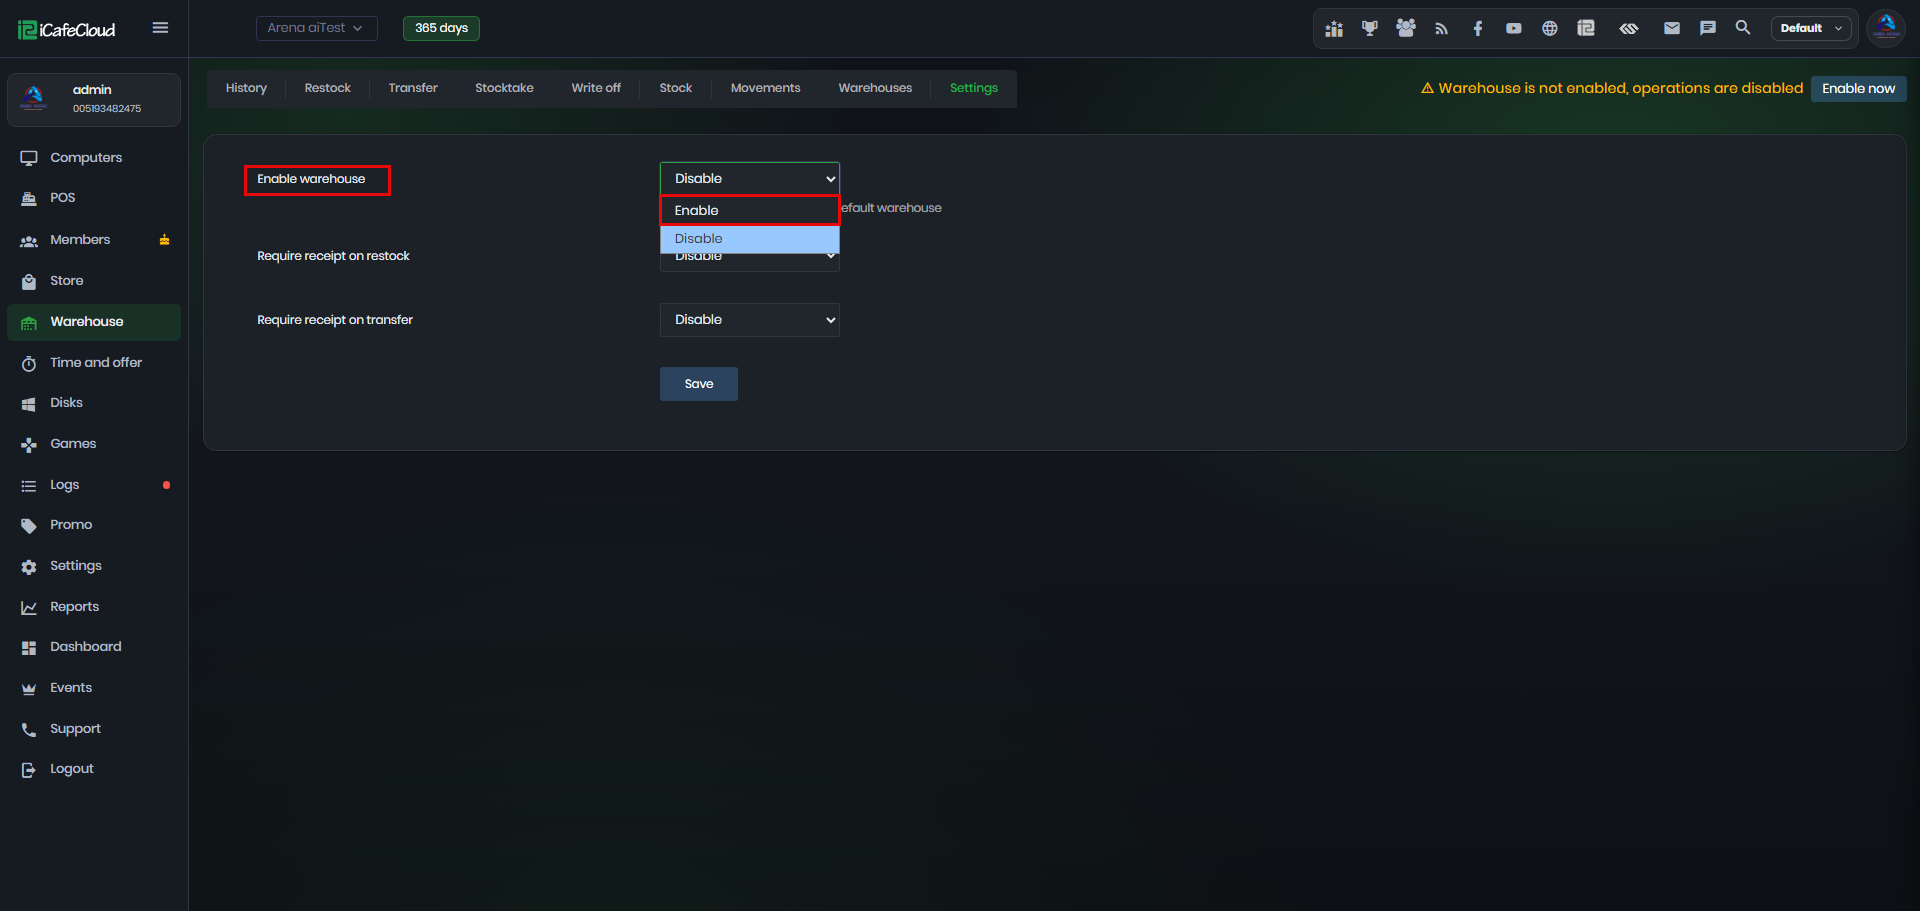
Figure 2
- Click Save. A Warning window explains that stock will now be managed in the Warehouse module and that the Restock and Write off buttons on the Store product list will be hidden. Click Yes to confirm (Figure 3).
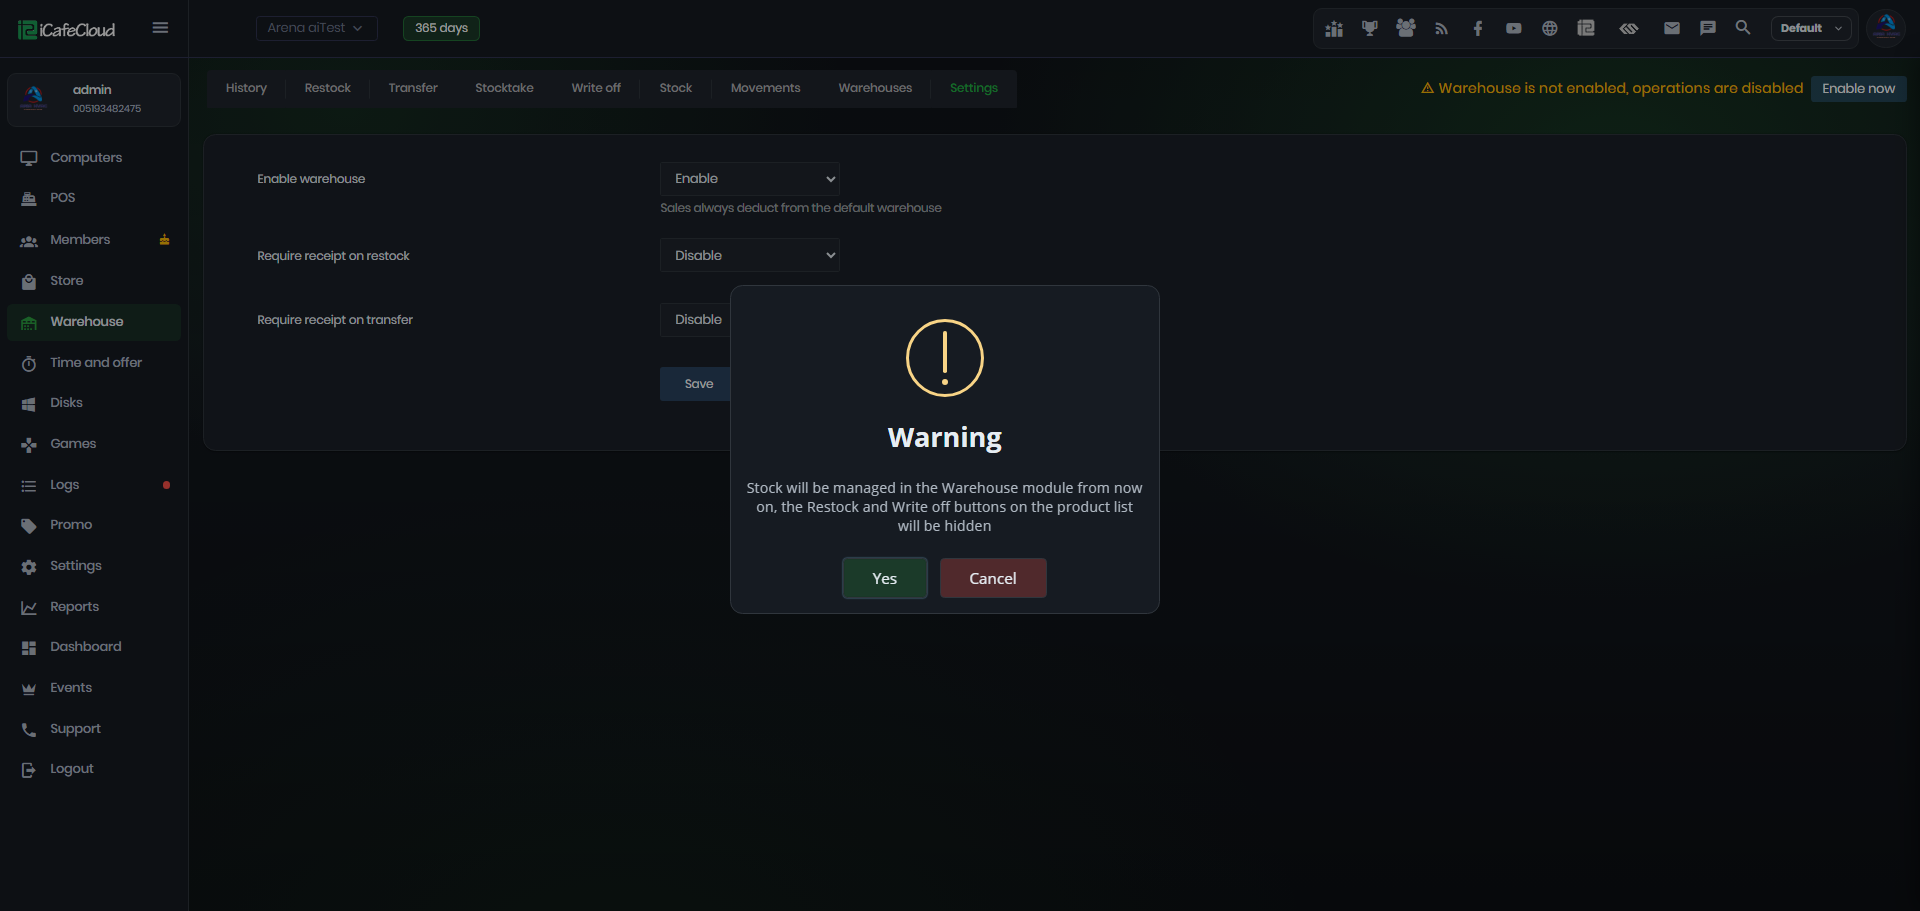
Figure 3
4. The warehouse is now enabled and the page has 9 tabs:
- History: list of all stock documents (restock, transfer, stocktake, write off).
- Restock: add incoming goods to stock.
- Transfer: move stock from one warehouse to another.
- Stocktake: count the stock on the shelf and correct the system quantity.
- Write off: remove broken, expired or damaged stock.
- Stock: see current quantities per warehouse.
- Movements: see every single stock change, including POS sales and refunds.
- Warehouses: add or edit storage locations.
- Settings: turn the warehouse feature and receipt rules on or off.