2026-01-17
add, games, manual, local
The following explains how to manually add games that are not yet available in the iCafeCloud IDC game list.
- Download the game, or navigate to the game’s folder if it has already been downloaded. (Figure 1).
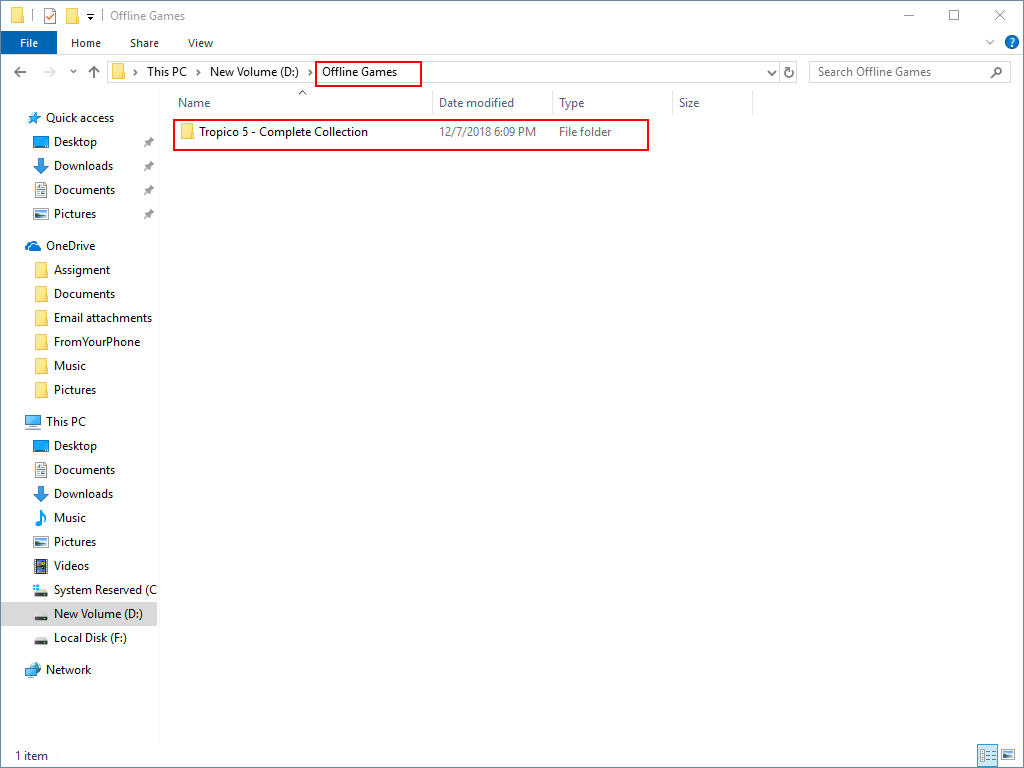
Figure 1
- Open the iCafeCloud web admin panel, go to the Games section, and click Add Game or the Add (+) button. (Figure 2).
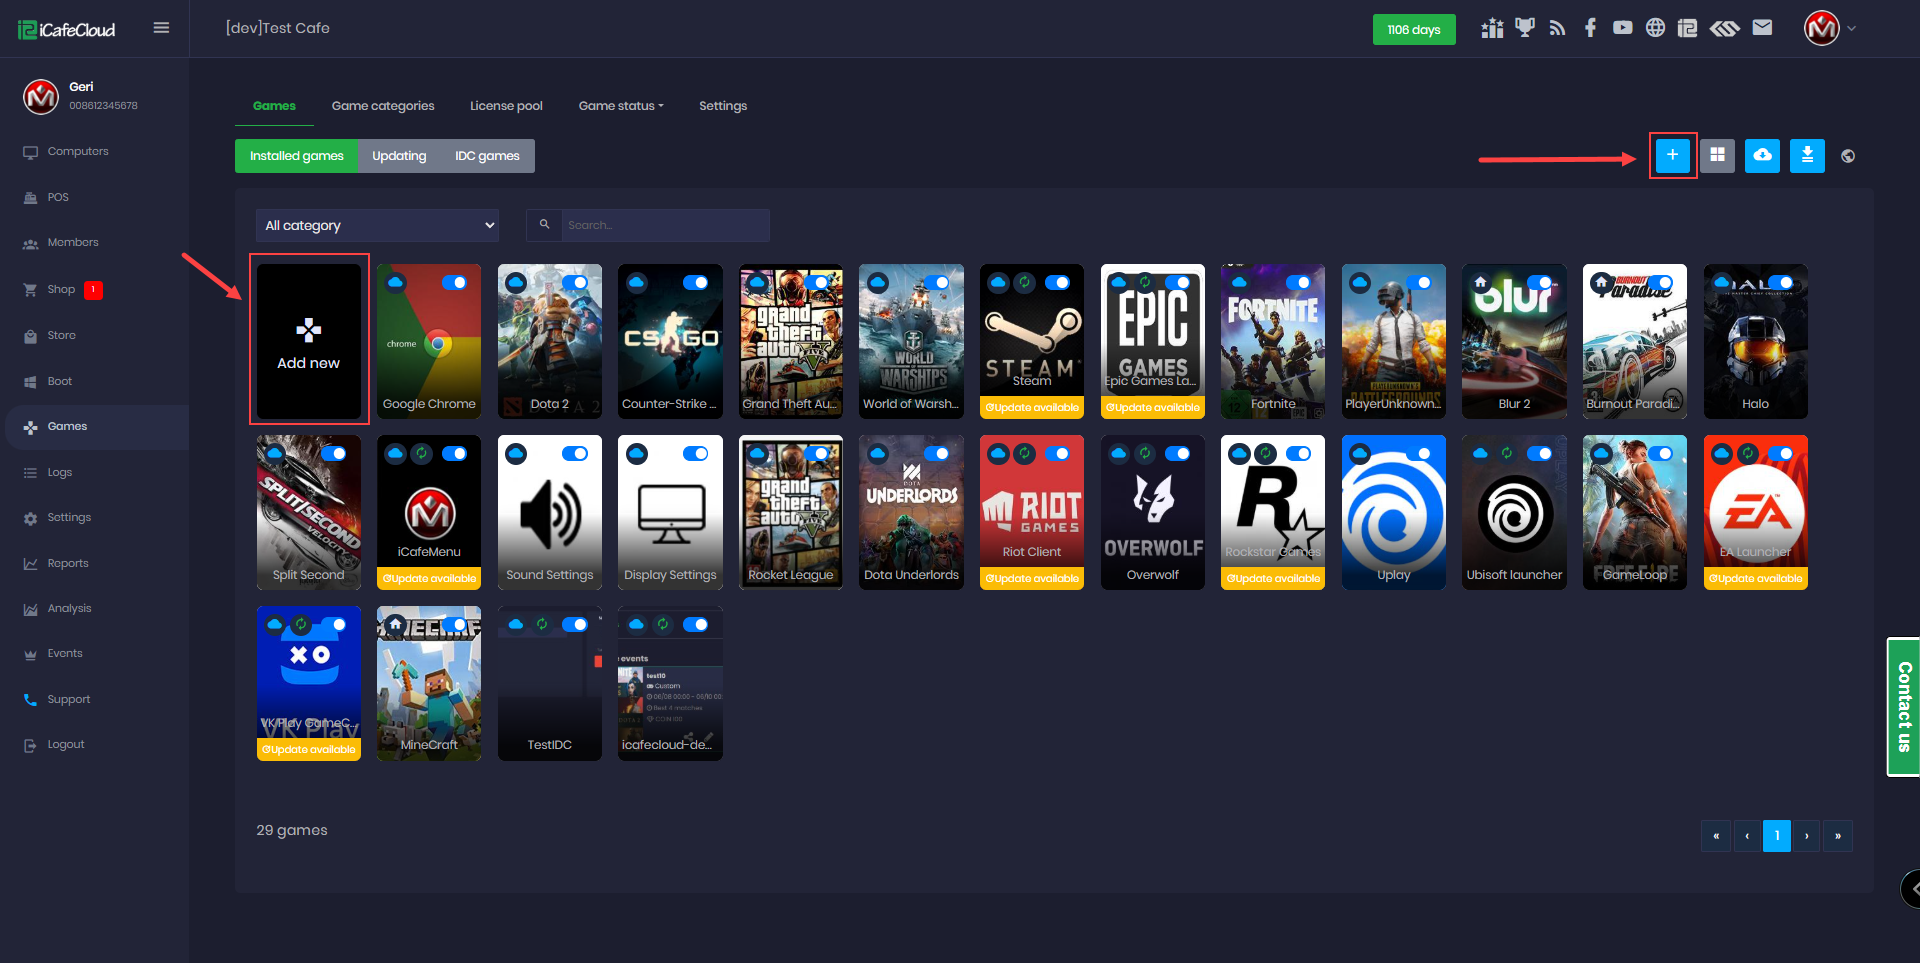
Figure 2
- Type the name of the game. If it is not found in the list, the Add Manual button will appear click it (Figure 3).

Figure 3
- In the Game modal, enter the game name, select the appropriate Category and Game Type, then choose the AppID by typing the game name (for Steam-based games or similar launchers).(Figure 4).
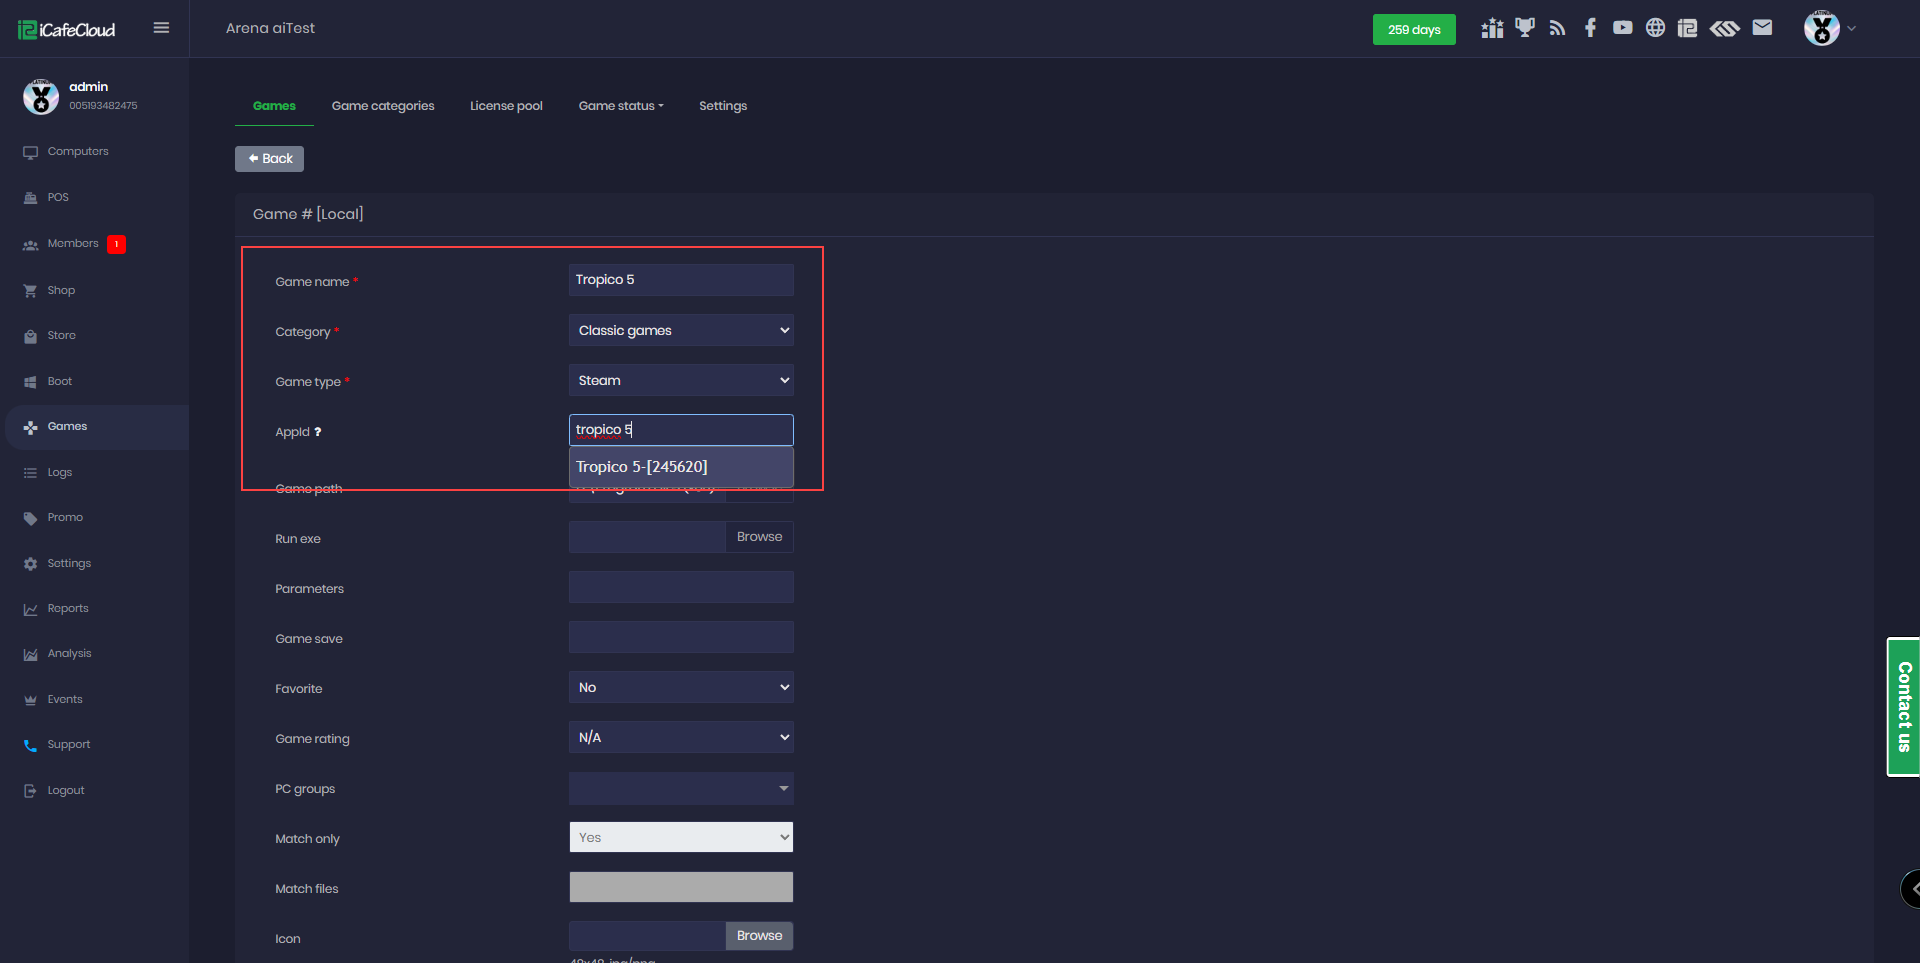
Figure 4
- Click the Browse button to select the correct game installation path and executable file.
- If the Run EXE path is incorrect, the game icon will not appear in the iCafeMenu taskbar. Always ensure that the correct executable file is selected. (Figure 5).
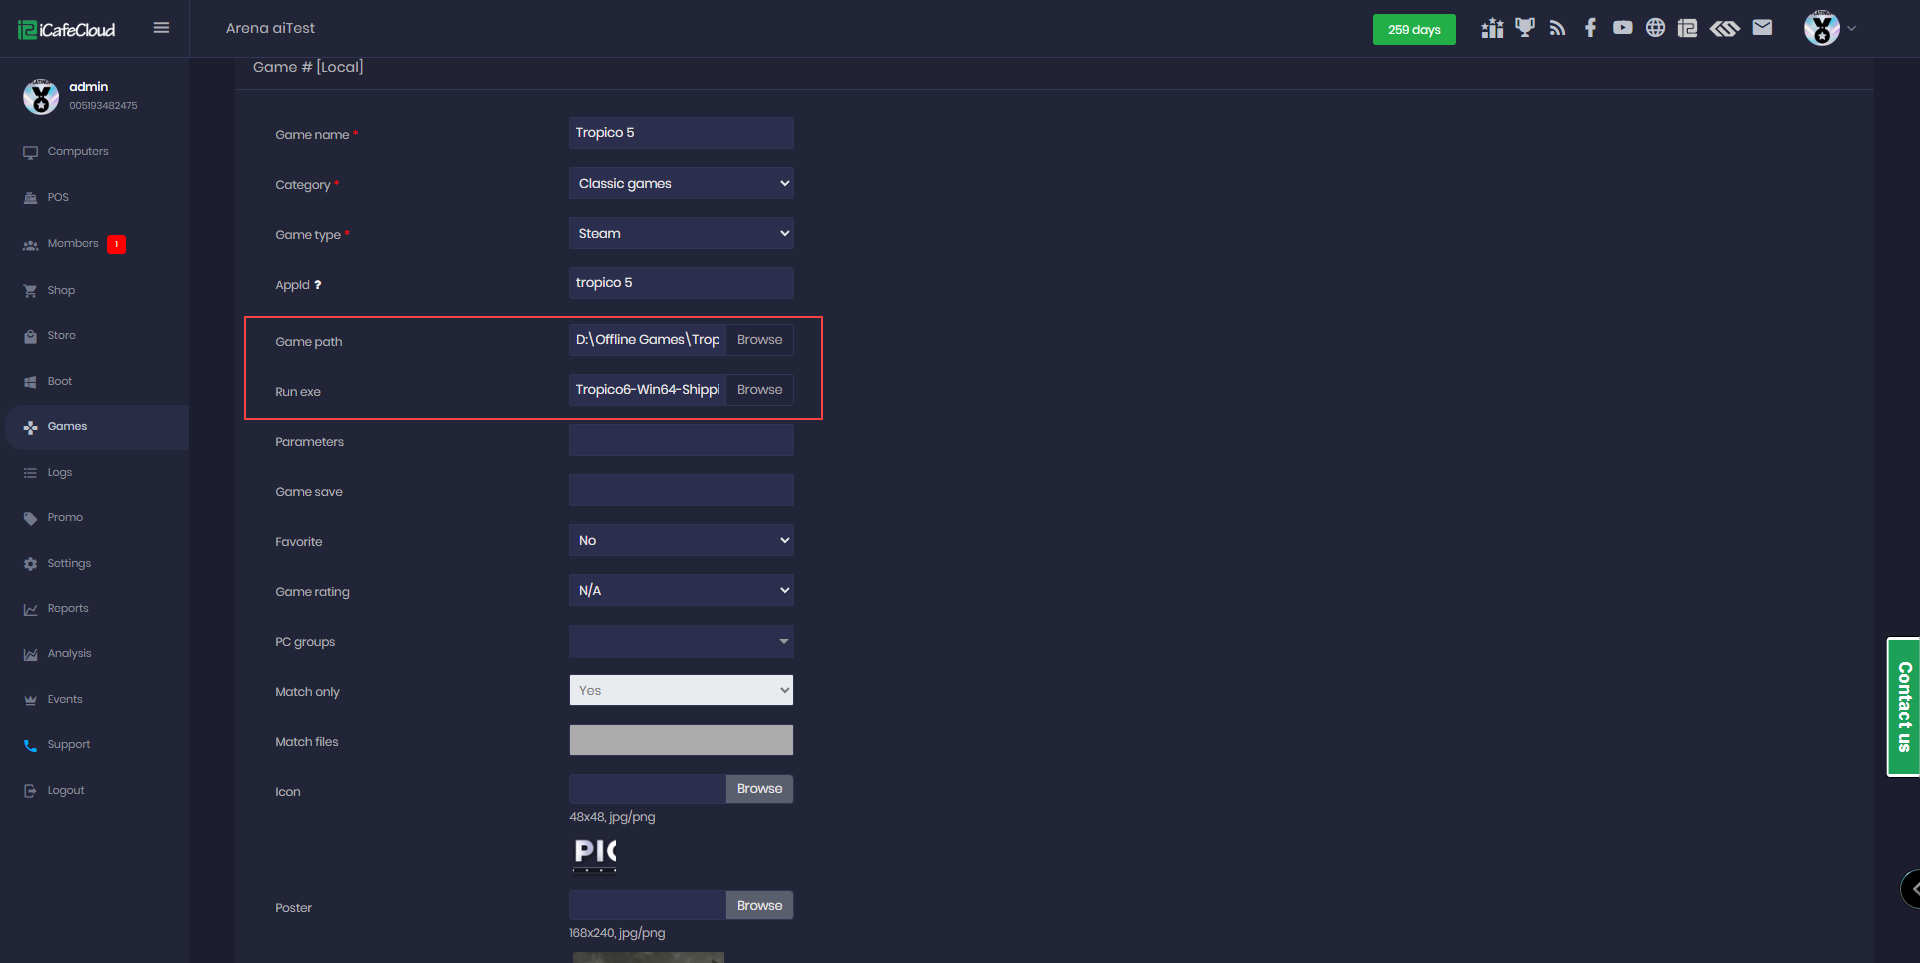
Figure 5
- Select the PC groups. The game will be available only on the selected PC groups.(Figure 6)
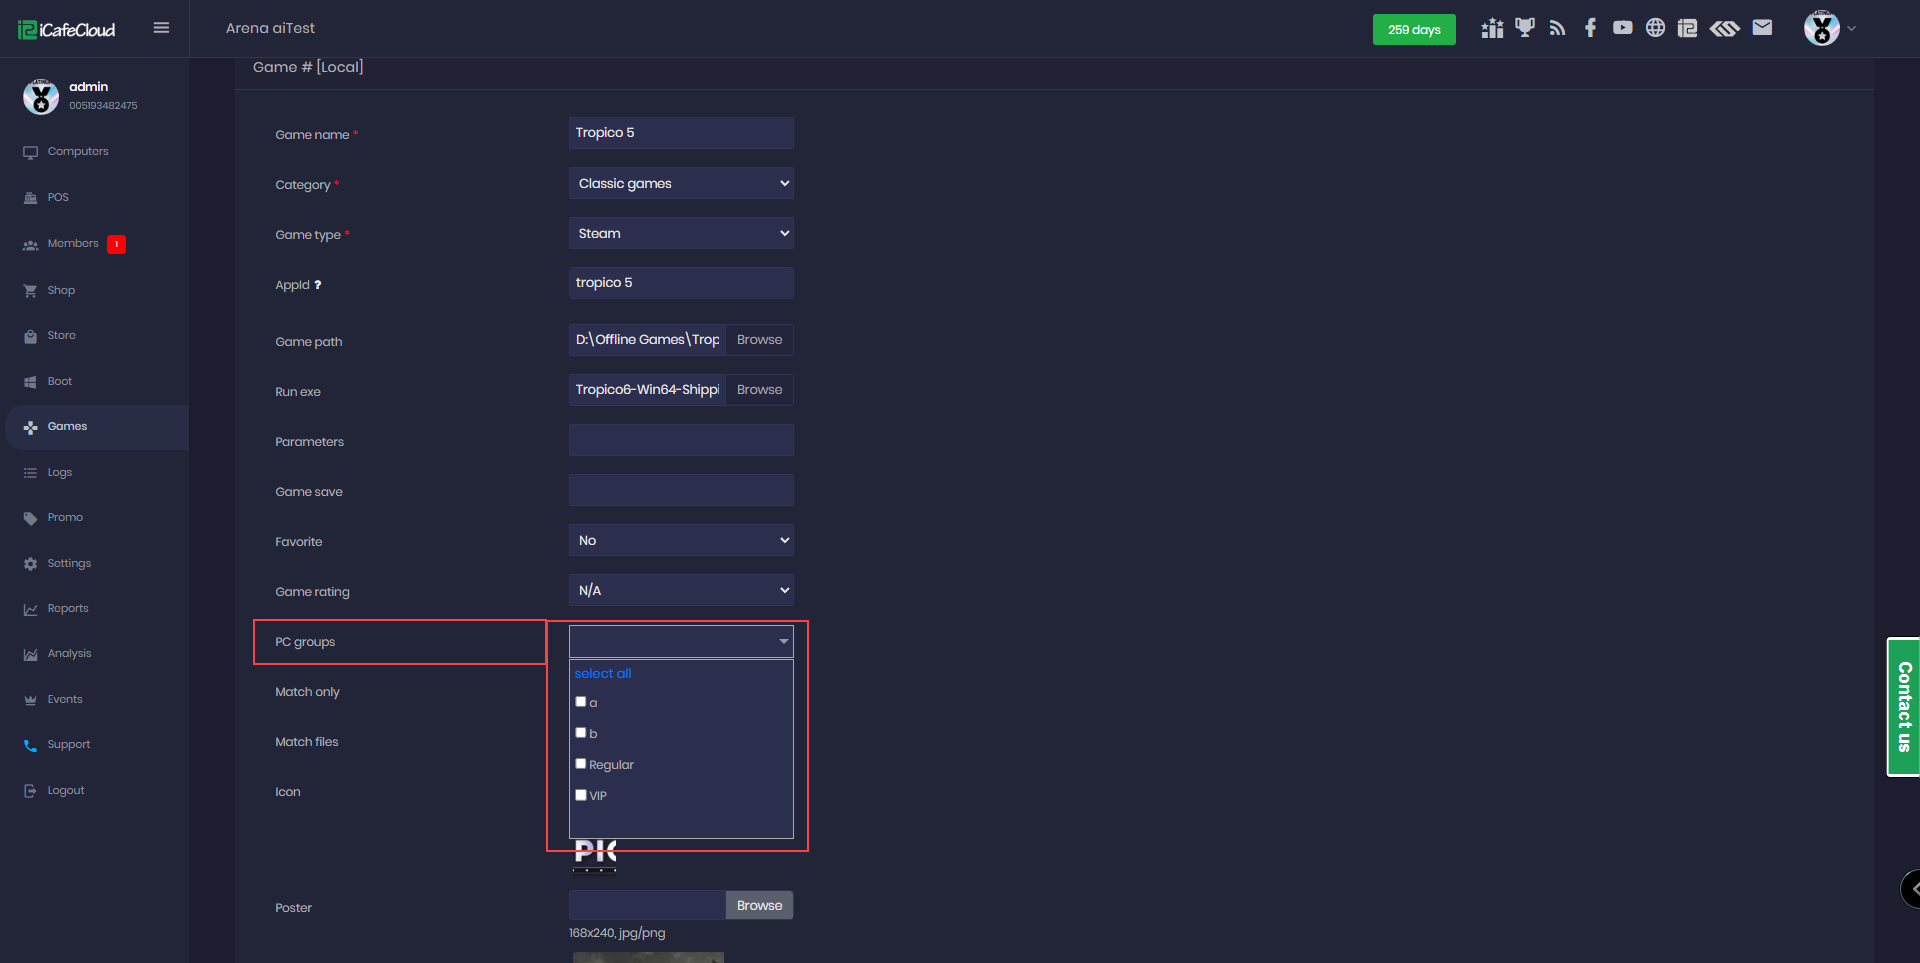
Figure 6
- The icon for the game will be auto generated when you select the game executable, however, you need to select the “Poster”. Click the “Choose file” button for Poster, select the poster file and click the “Open” button (Figure 7).
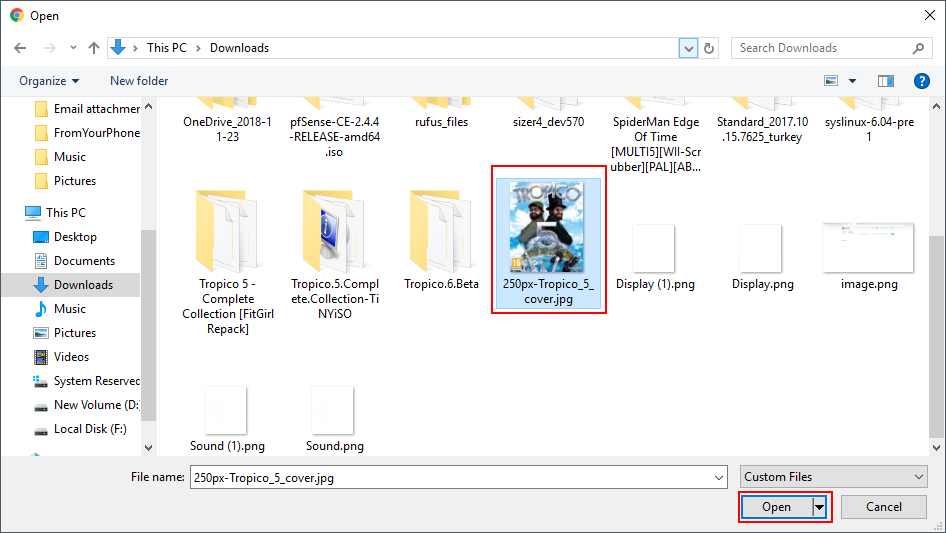
Figure 7
- Icon size is 48 x 48 and the poster size should be 168px by 240px (168x240 px). You can use JPEG or PNG posters
PNG is for high quality , the posters file size should be less than 64kb. - Previewing the selected poster or icon before saving allows users to ensure they've chosen the right one. (Figure 8)
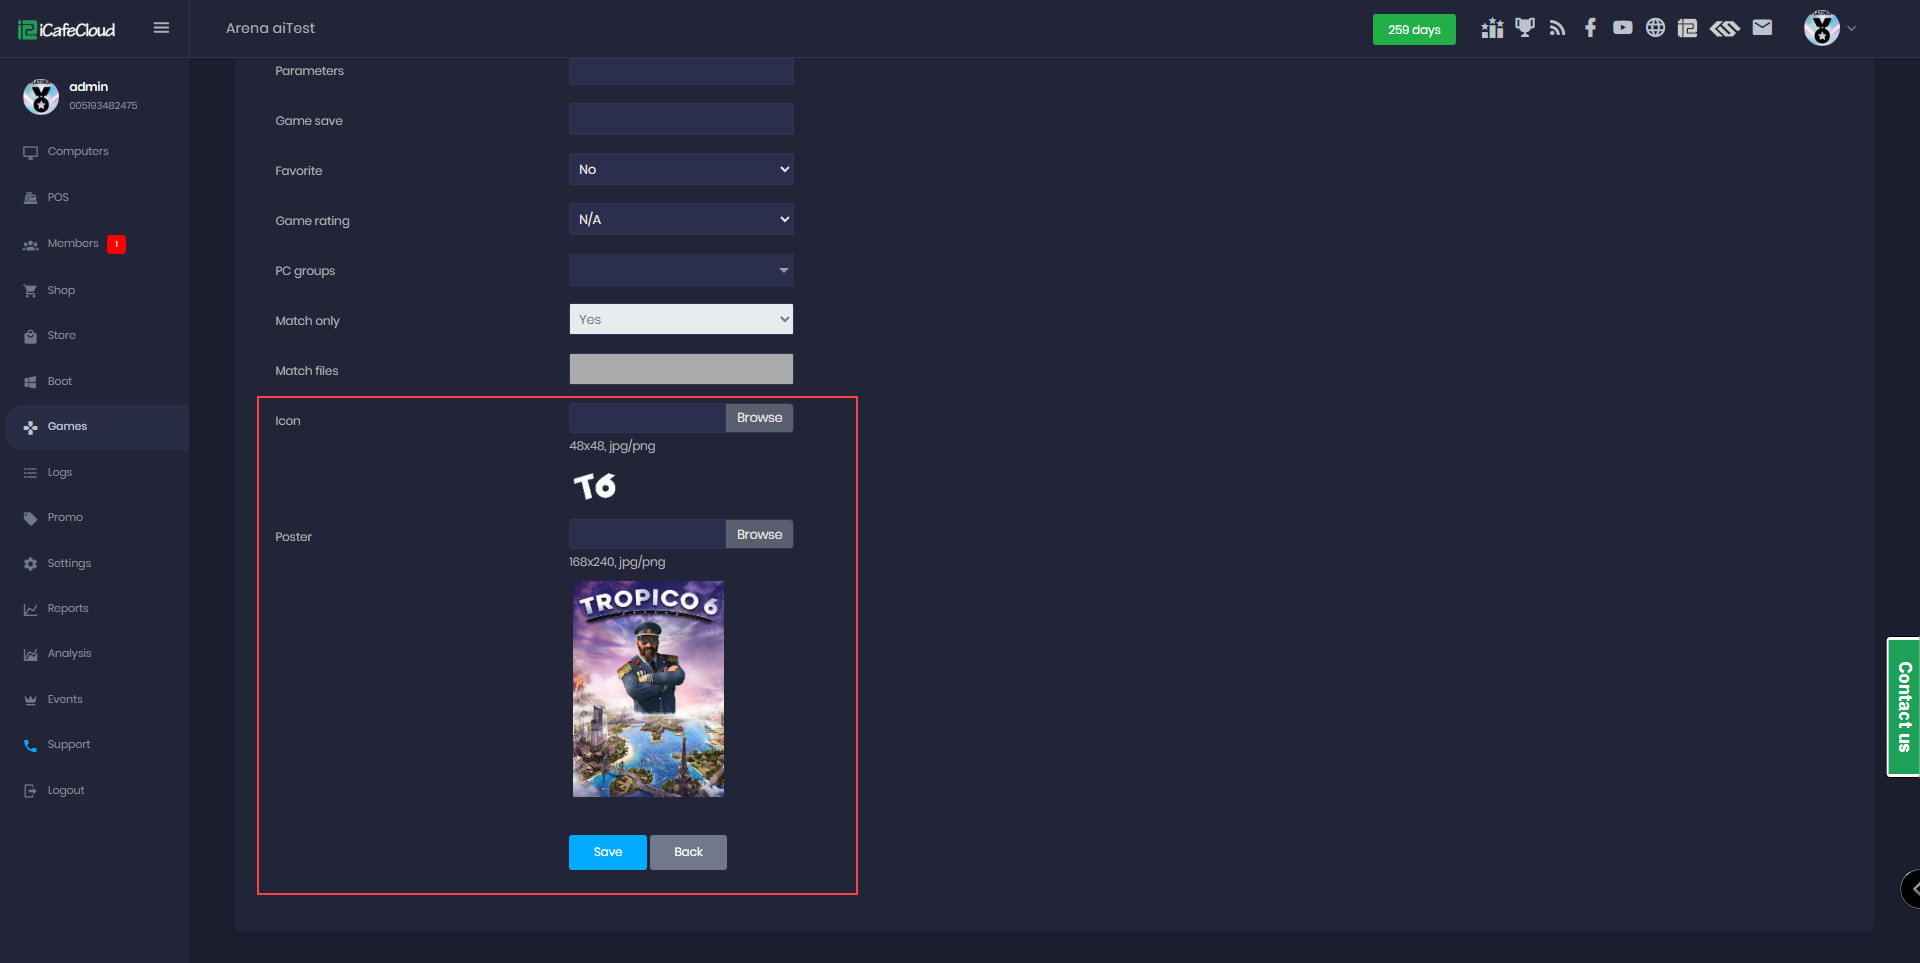
Figure 8
- Now, click the save button to add the game to the iCafeCloud.