2026-01-03
Computer, layout, room
The following explains how to use the layout and place PCs and consoles on the layout map by room, as well as how to add objects to create a clearer and more organized view of the center.
Edit layout
- Go to the Computers page, select the Layout tab, and click Edit Layout. (Figure 1).
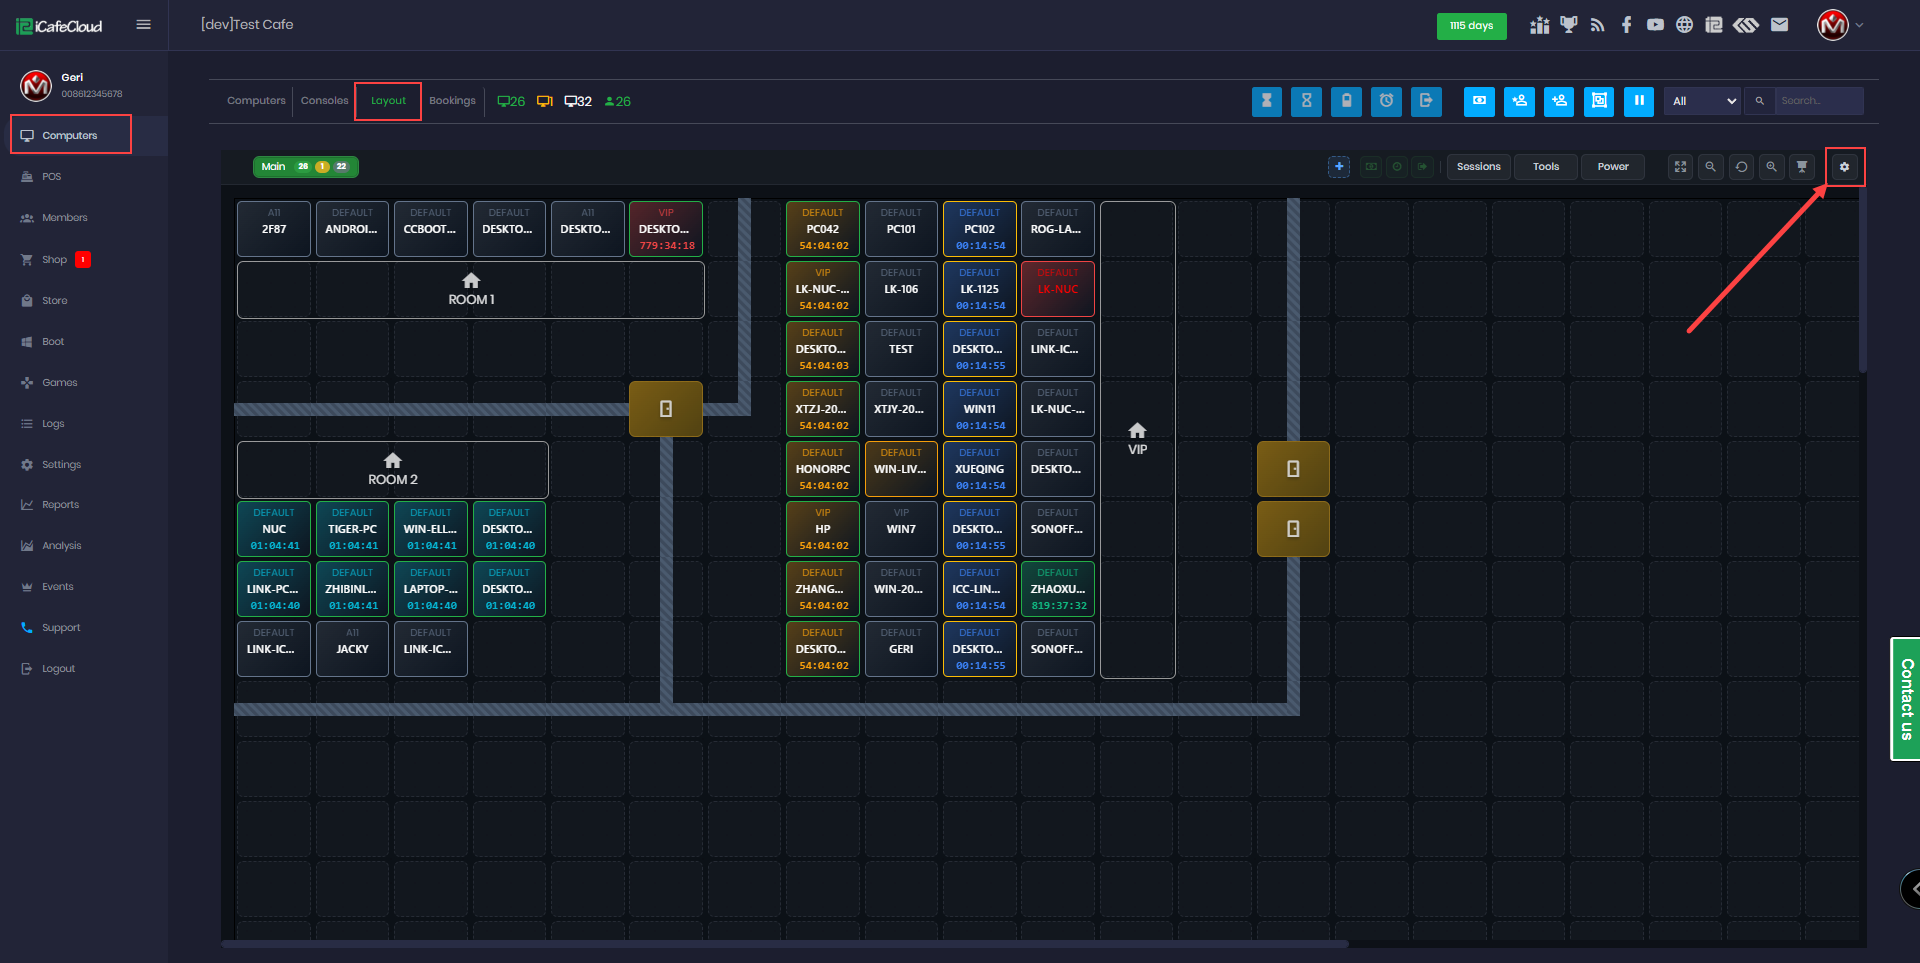
Figure 1
- The Room object option will be displayed.
For Walls, select the option and click on the layout to create your design.
All other objects can be added using drag and drop.(Figure 2).
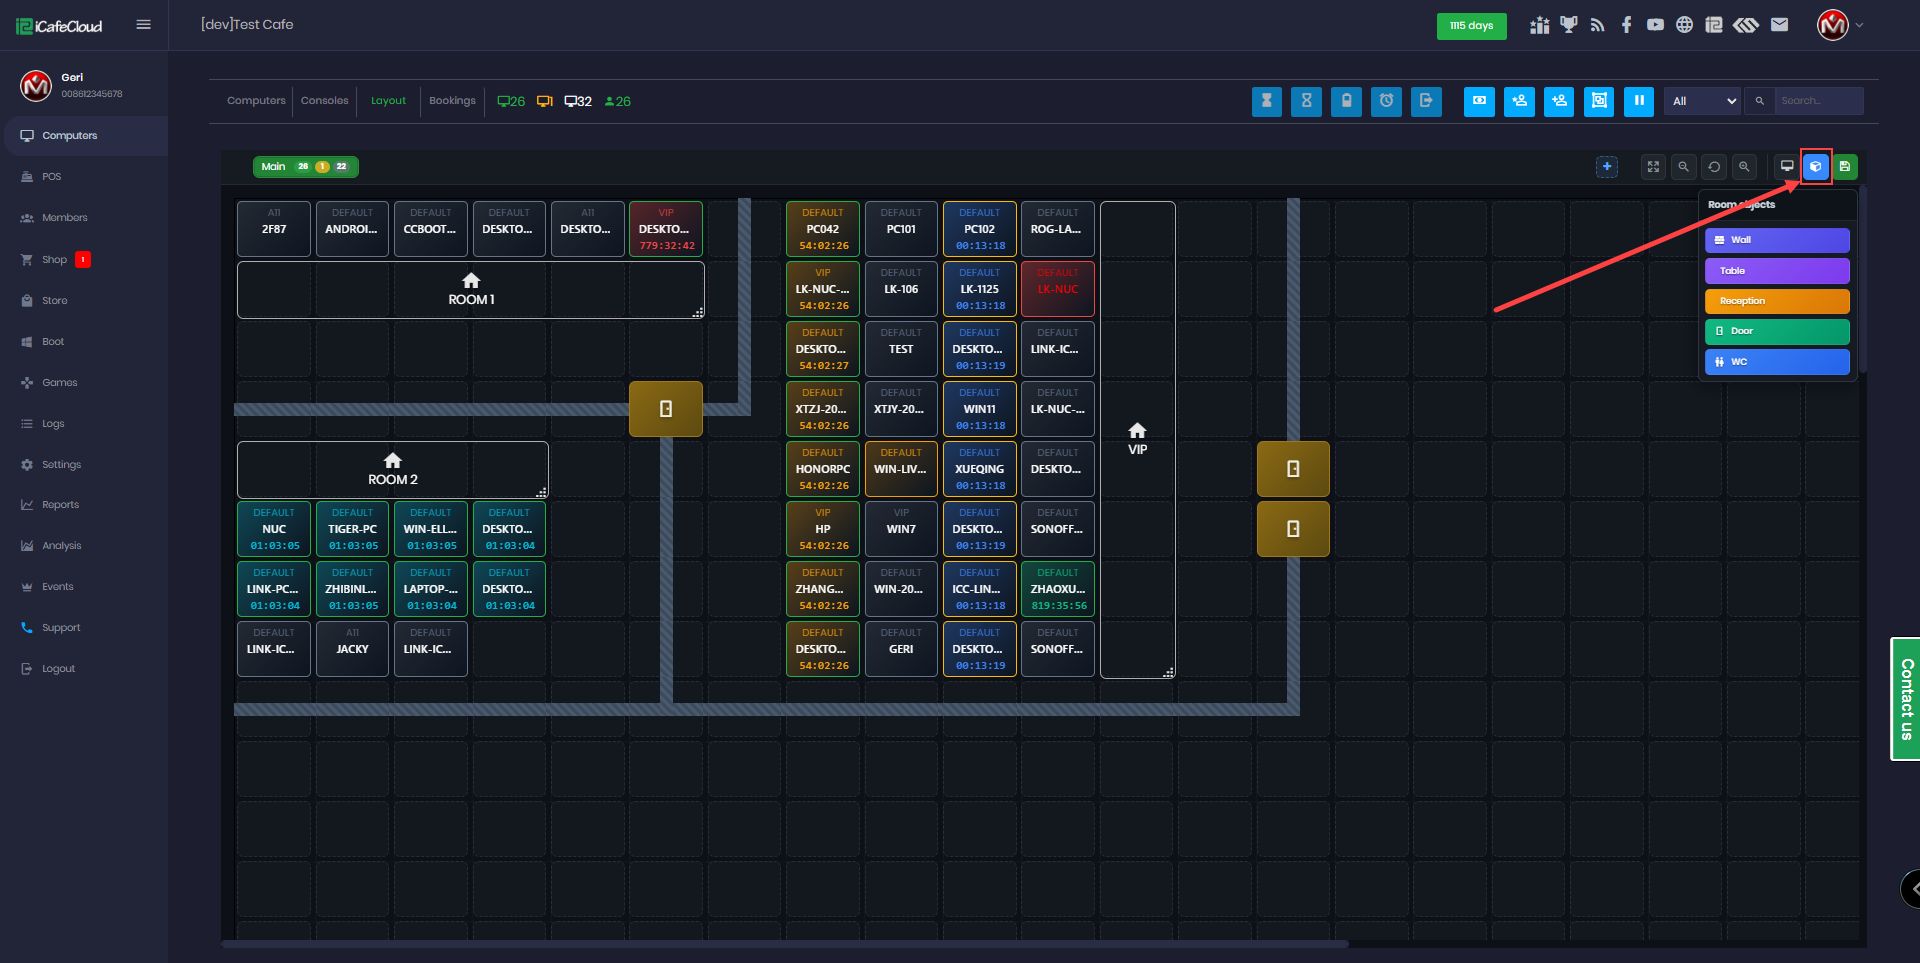
Figure 2
- If a notification appears on the PC icon, it indicates that some PCs have not yet been added to the layout. Click the icon and drag and drop the PCs onto the layout map.(Figure 3).
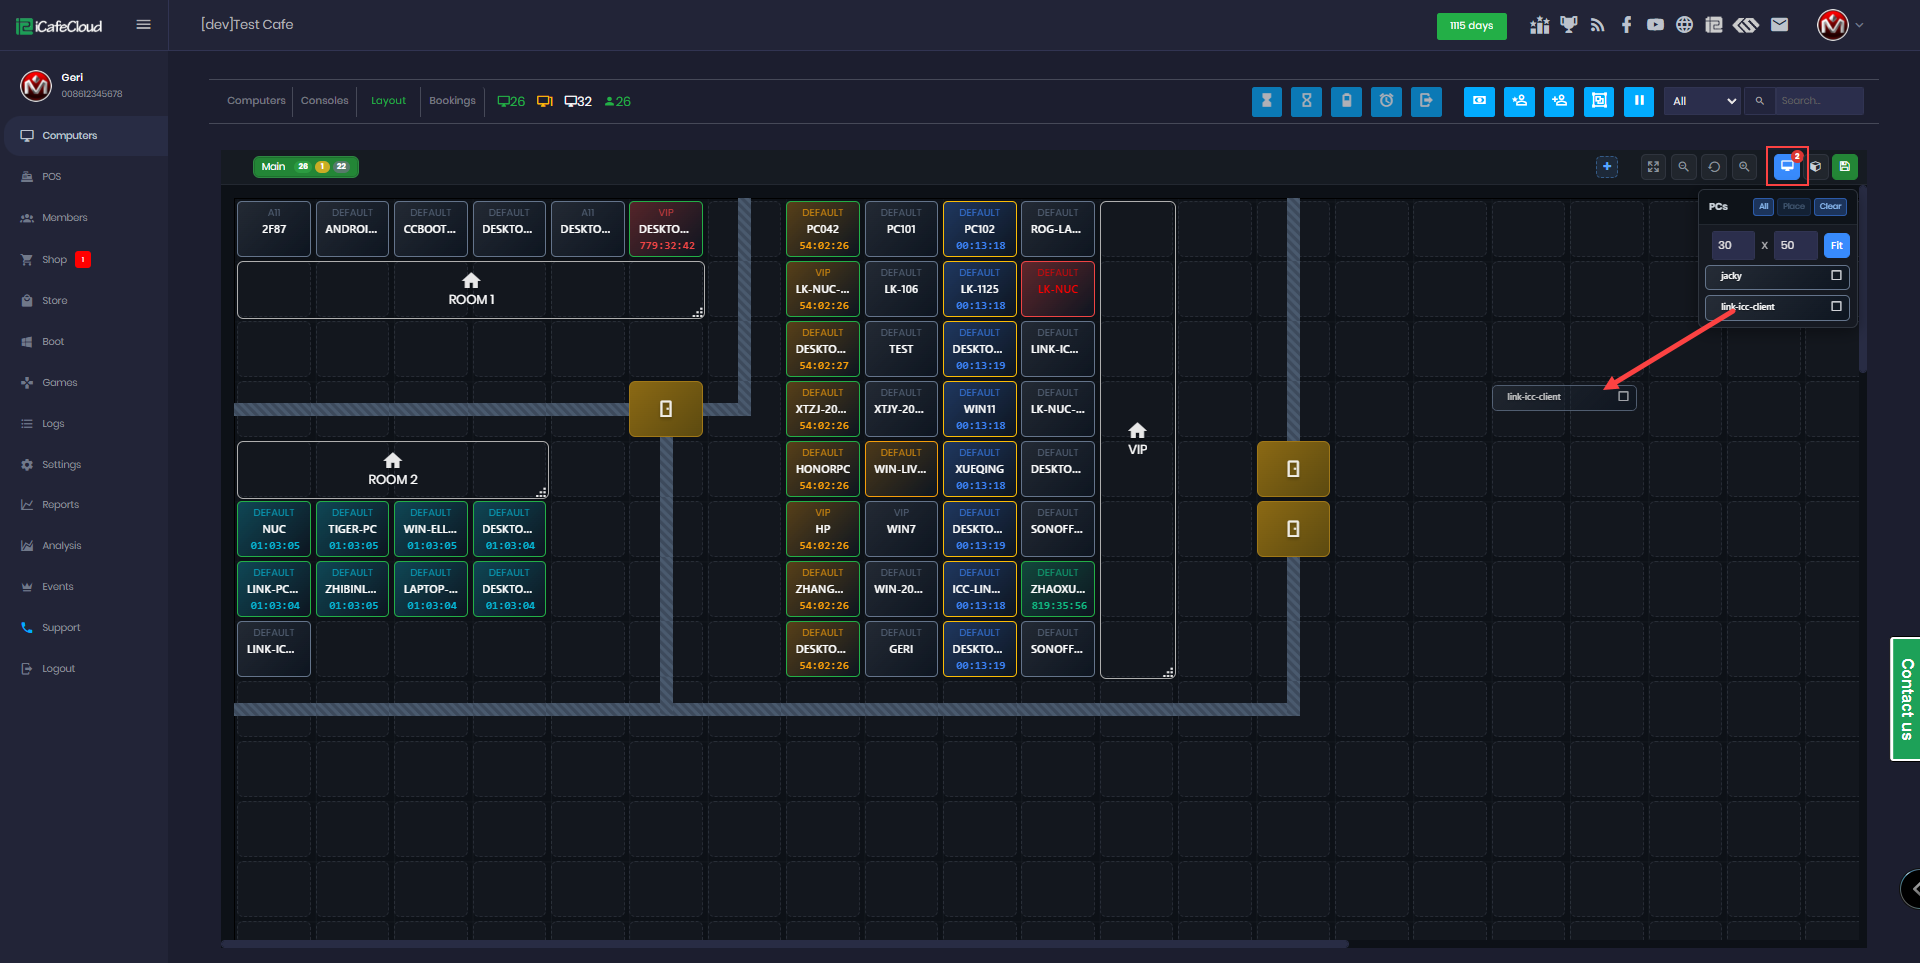
Figure 3
- You can click Clear to remove all PCs from the layout map, or click All to select all PCs that are not yet on the map and then click Place to automatically arrange them.(Figure 4).
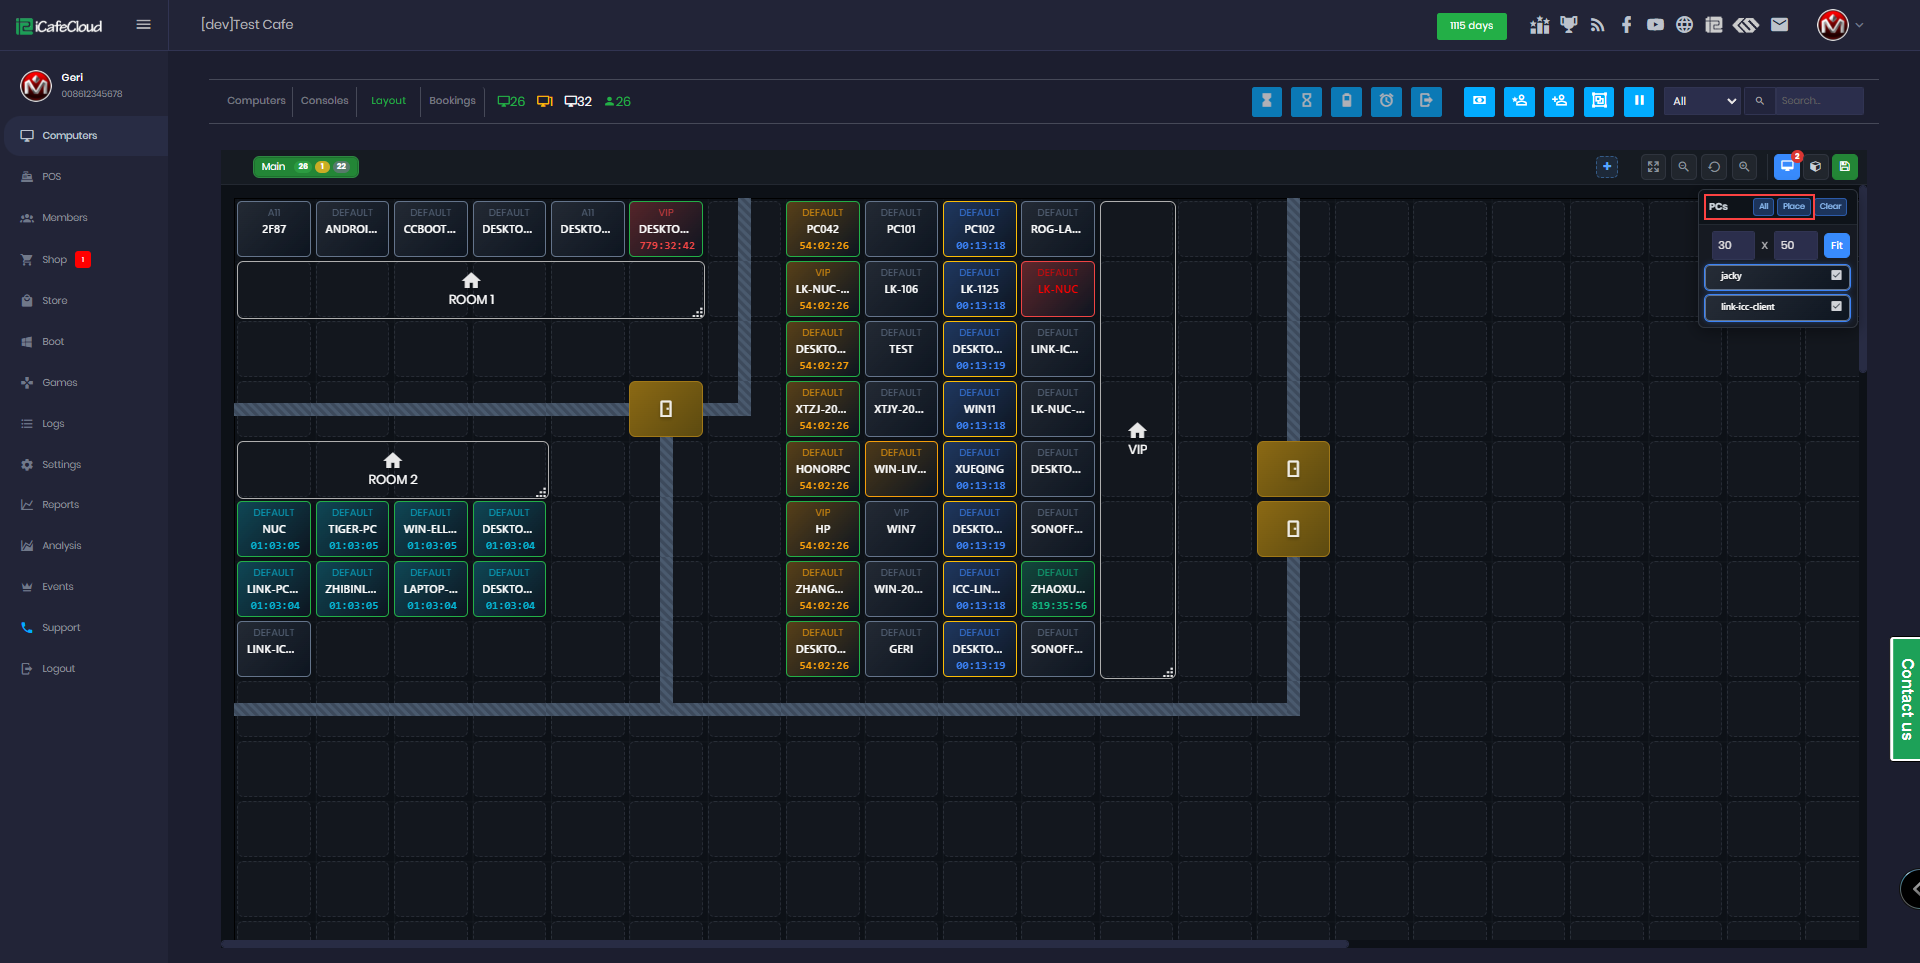
Figure 4
- Remove PCs by clicking on them and then clicking the X button. This action can be performed one PC at a time.(Figure 5).
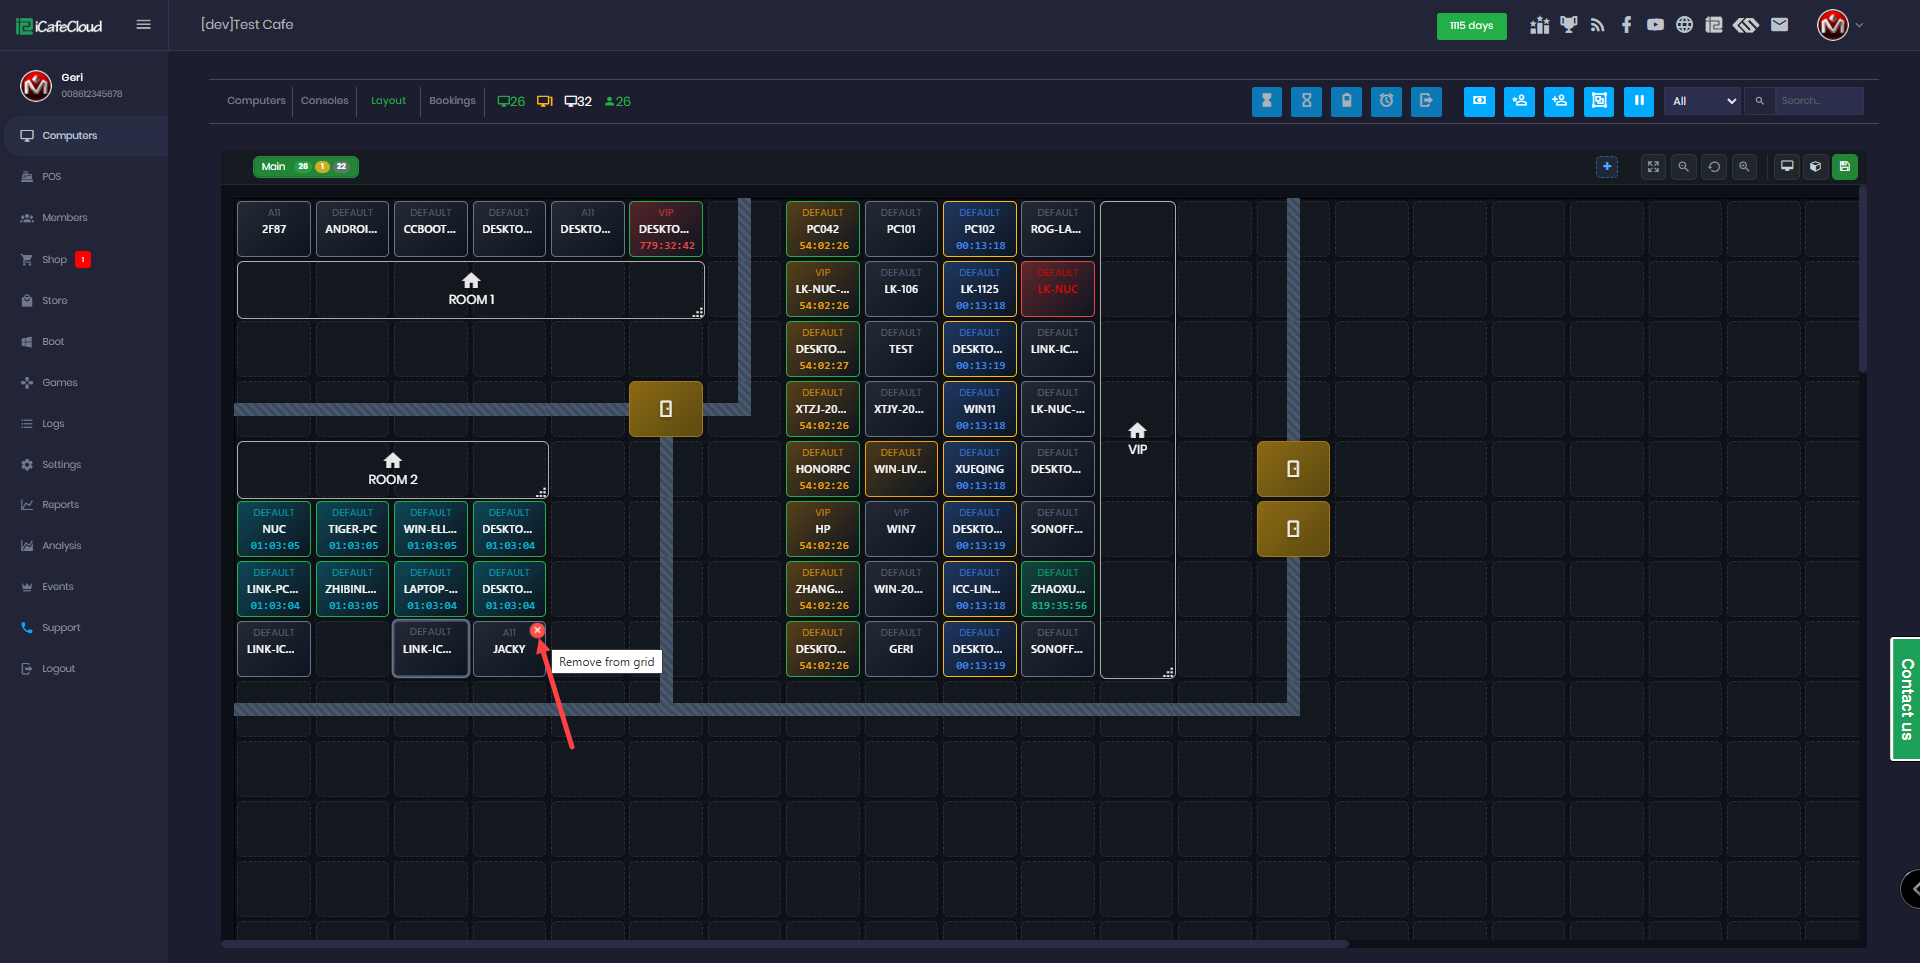
Figure 5
- You can set the layout grid by selecting the number of boxes vertically and horizontally (for example, 15 × 10). You can also upload a background image, which will automatically scale to fit the selected grid so the boxes and image pixels align correctly. (Figure 6)
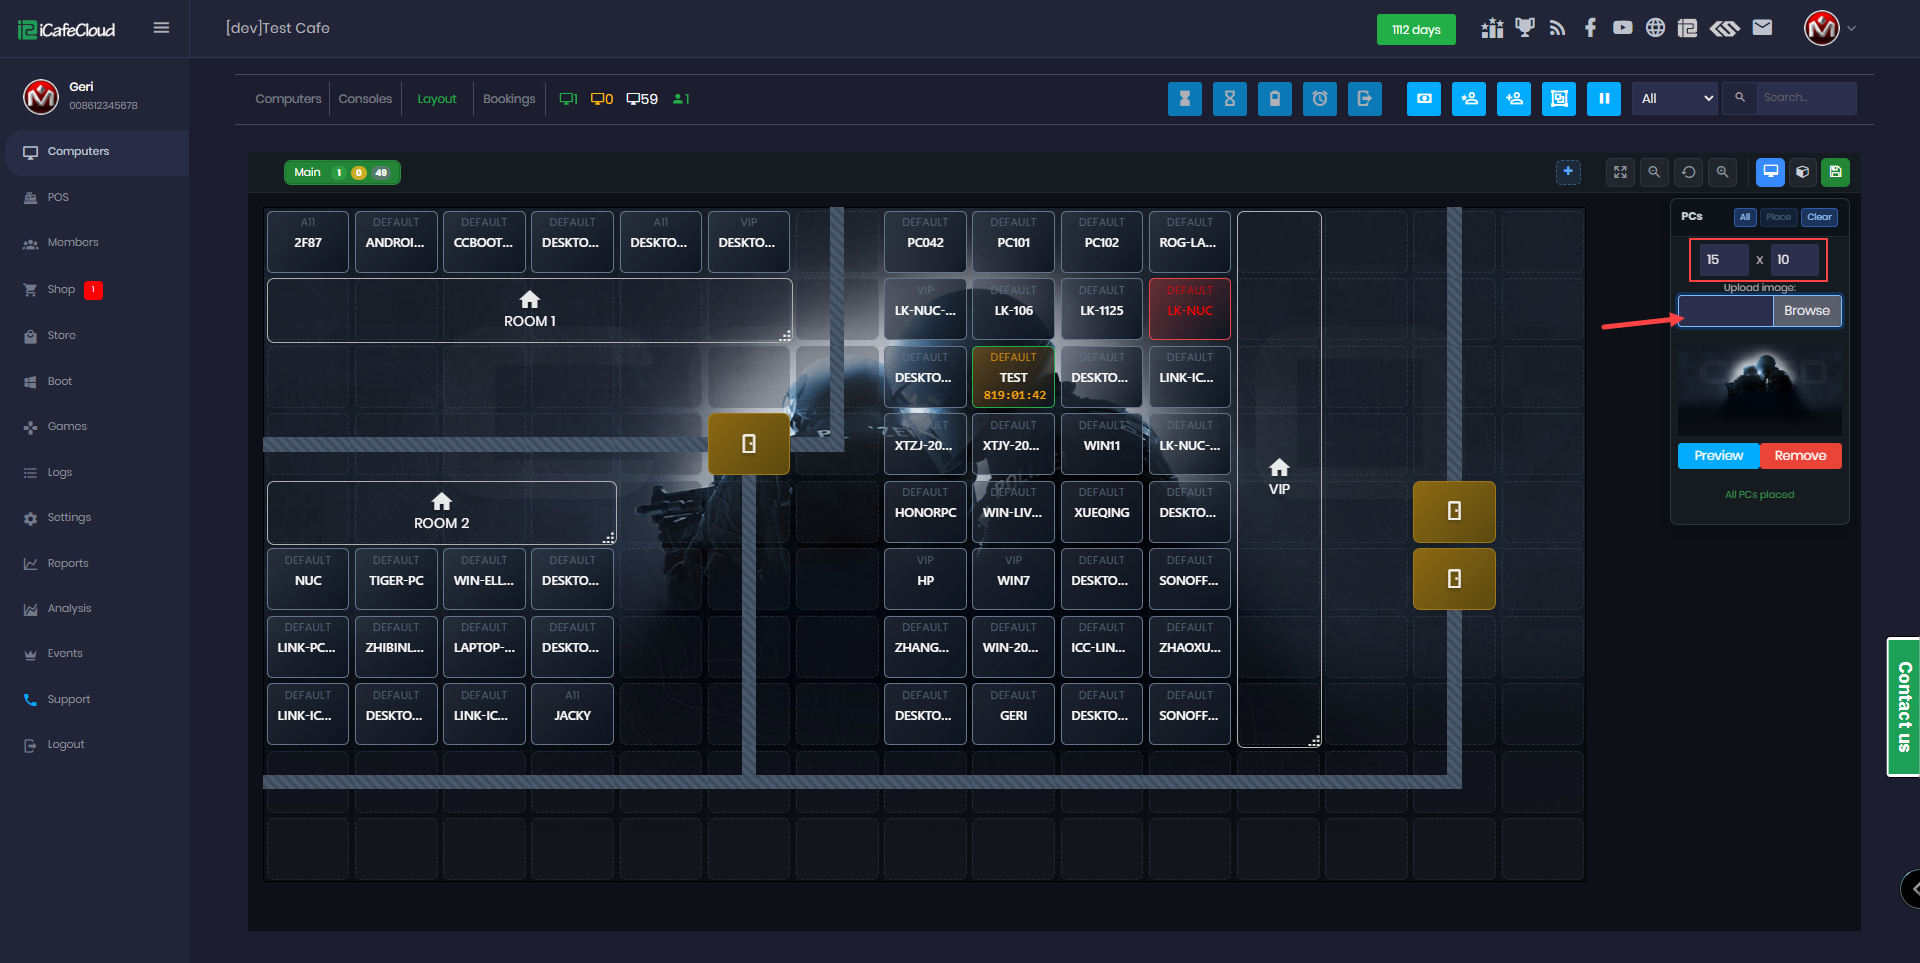
Figure 6
- Finally, click Save Layout. (Figure 7).
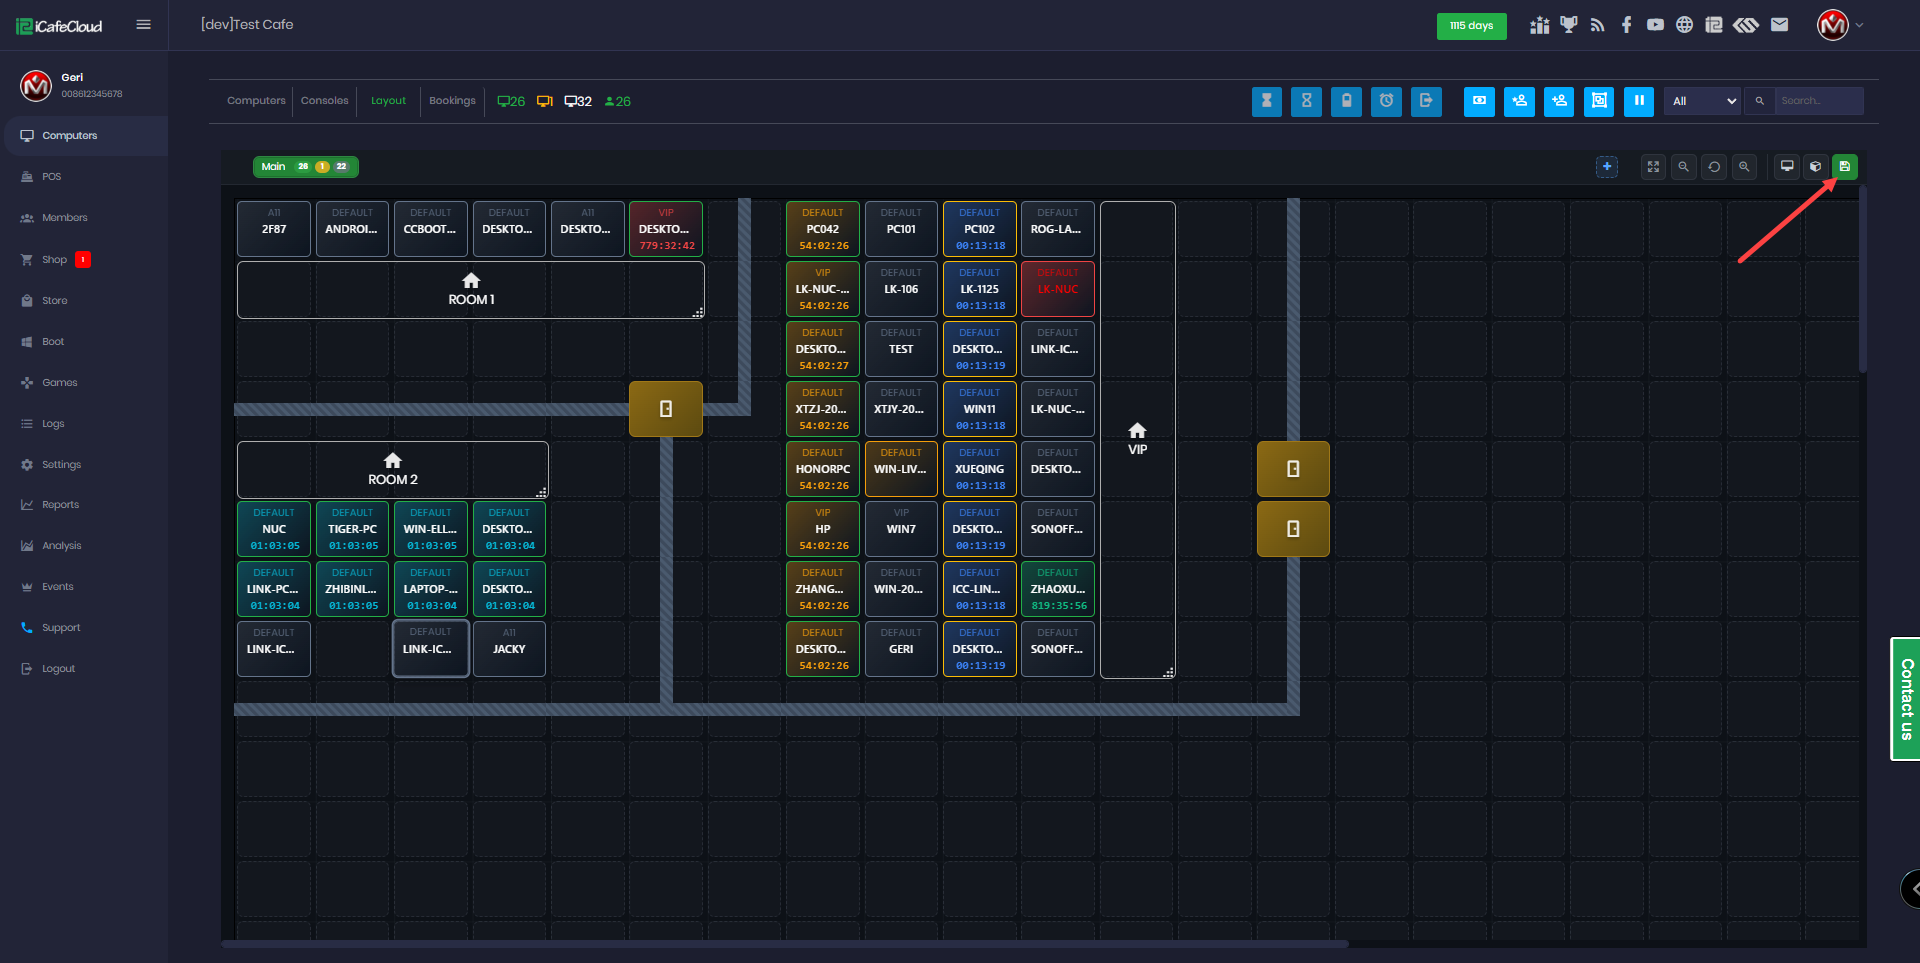
Figure 7
- You will be prompted with an option to (Yes) Save the changes or (NO) Cancel them. (Figure 8).
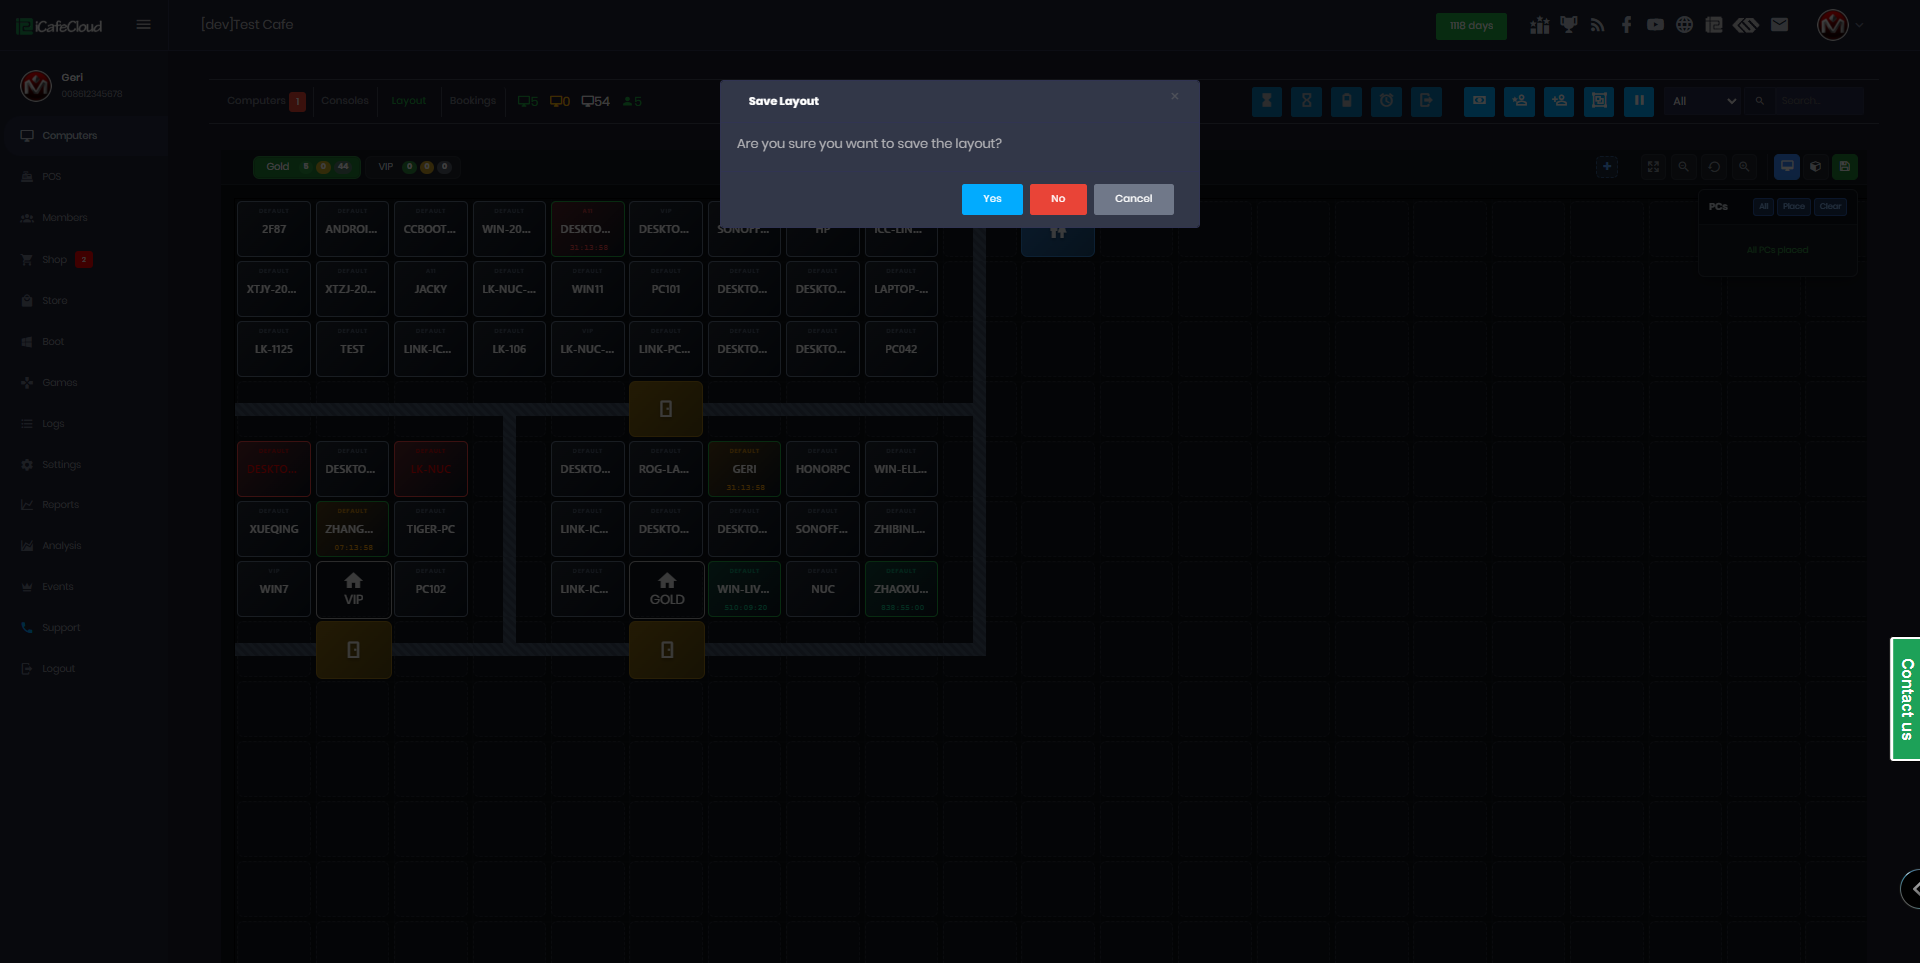
Figure 8
Add rooms
- Click the Plus (+) button to create a new room. (Figure 9).

Figure 9
- Select Add room (Figure 10).
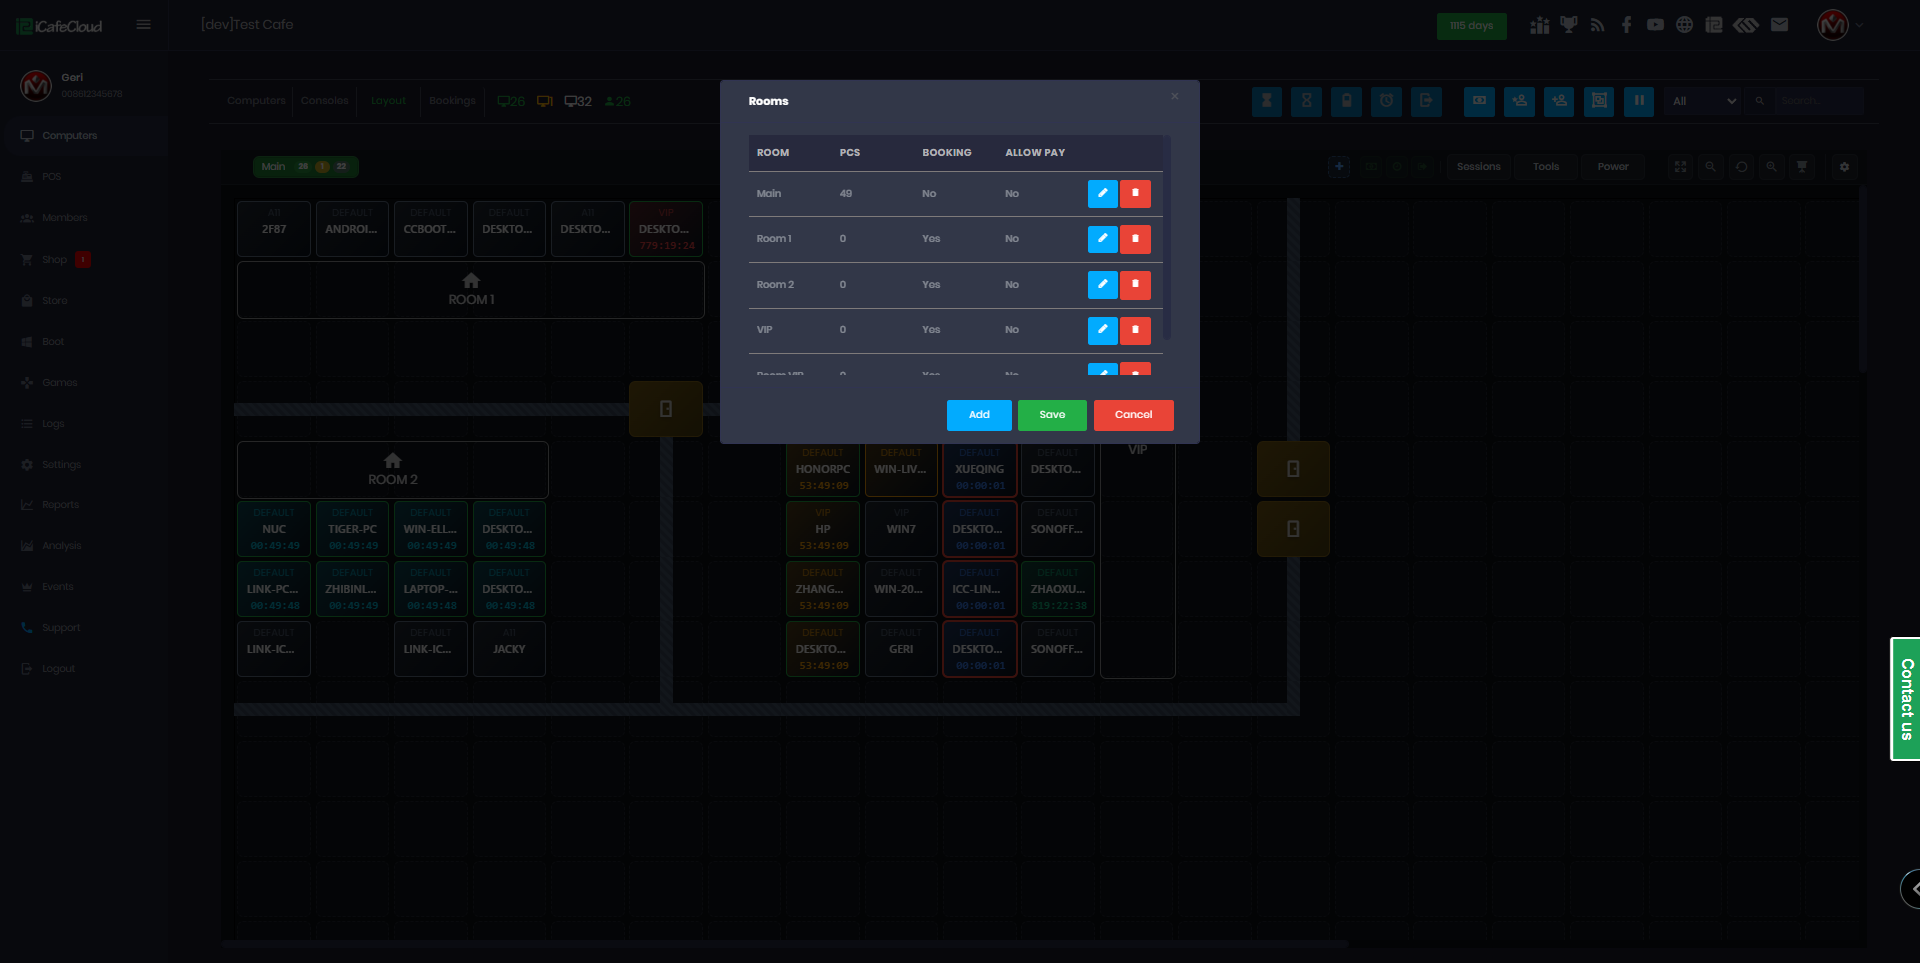
Figure 10
- Enter a name for the room, choose whether to allow Booking and enable Pay by Room if desired, then click OK and Save. (Figure 11).
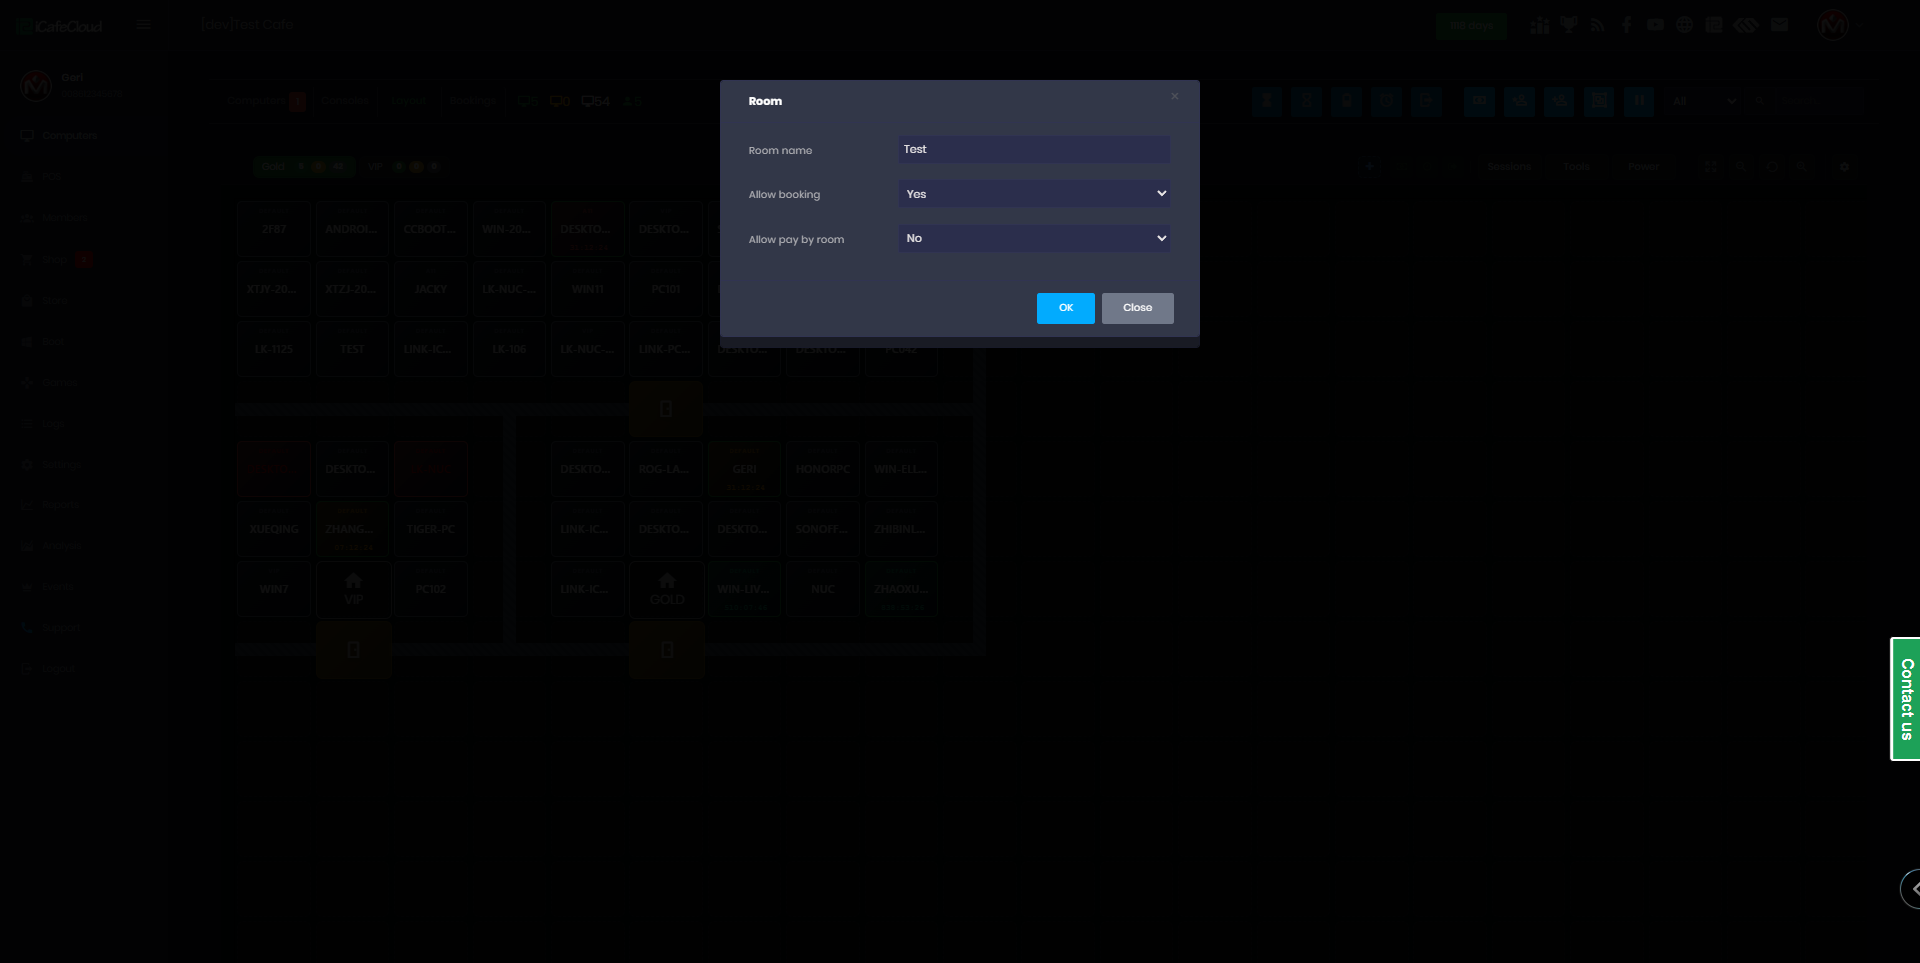
Figure 11
- Once the new room is created, go to Layout Objects. The room name will appear as an object, which you can drag and drop onto the layout map.(Figure 12).
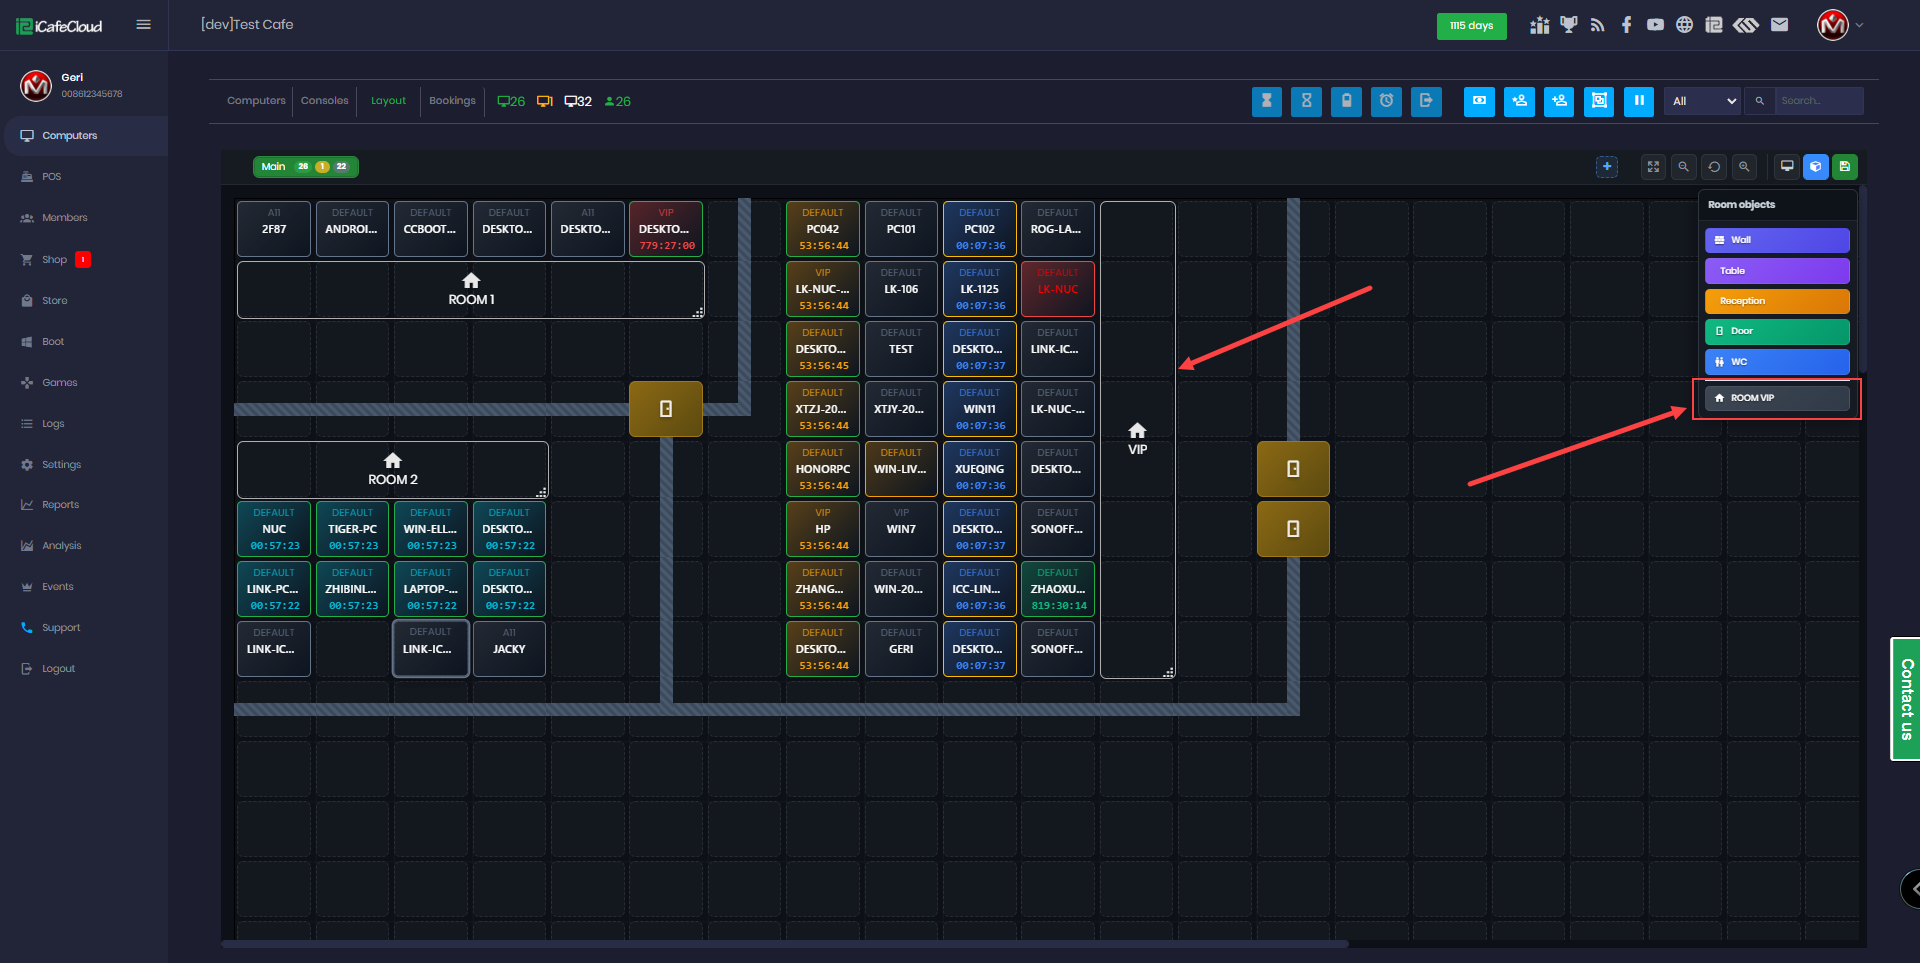
Figure 12
- To select the room for a PC, first select the PC you want to change, then click Manage and choose Edit. (Figure 13)
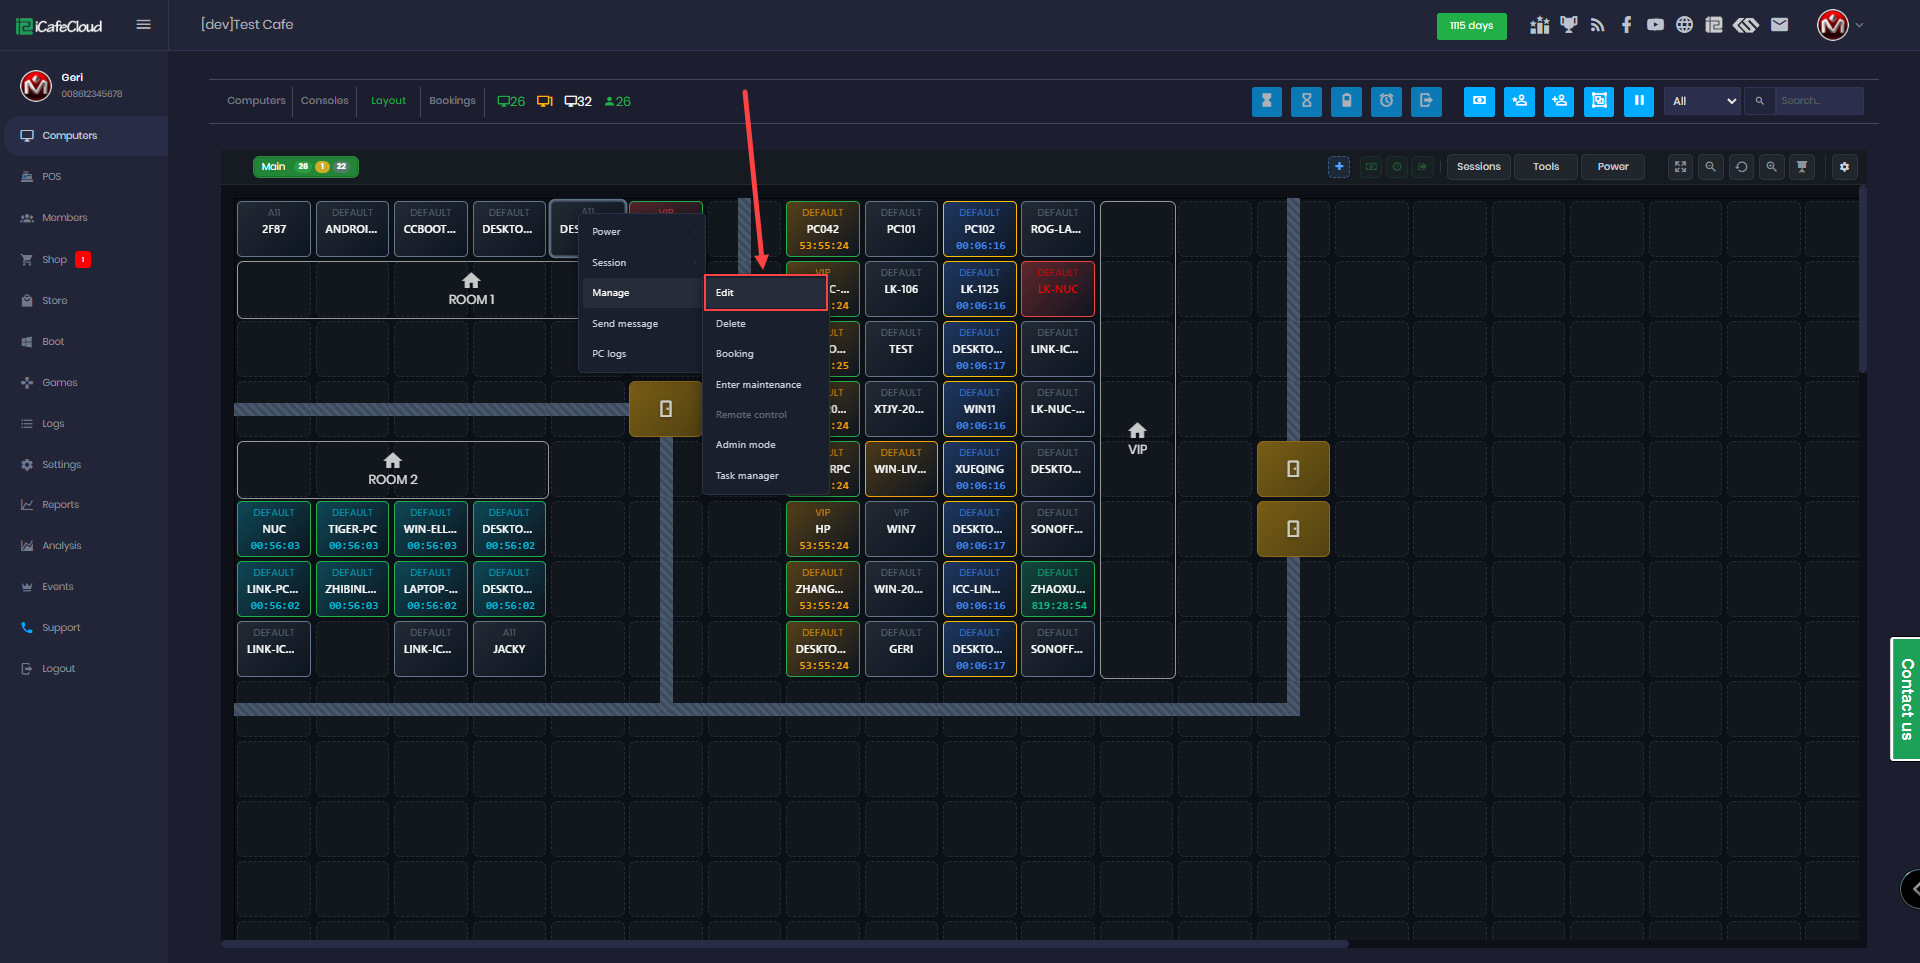
Figure 13
- Select one of the available rooms and click OK (Figure 14).
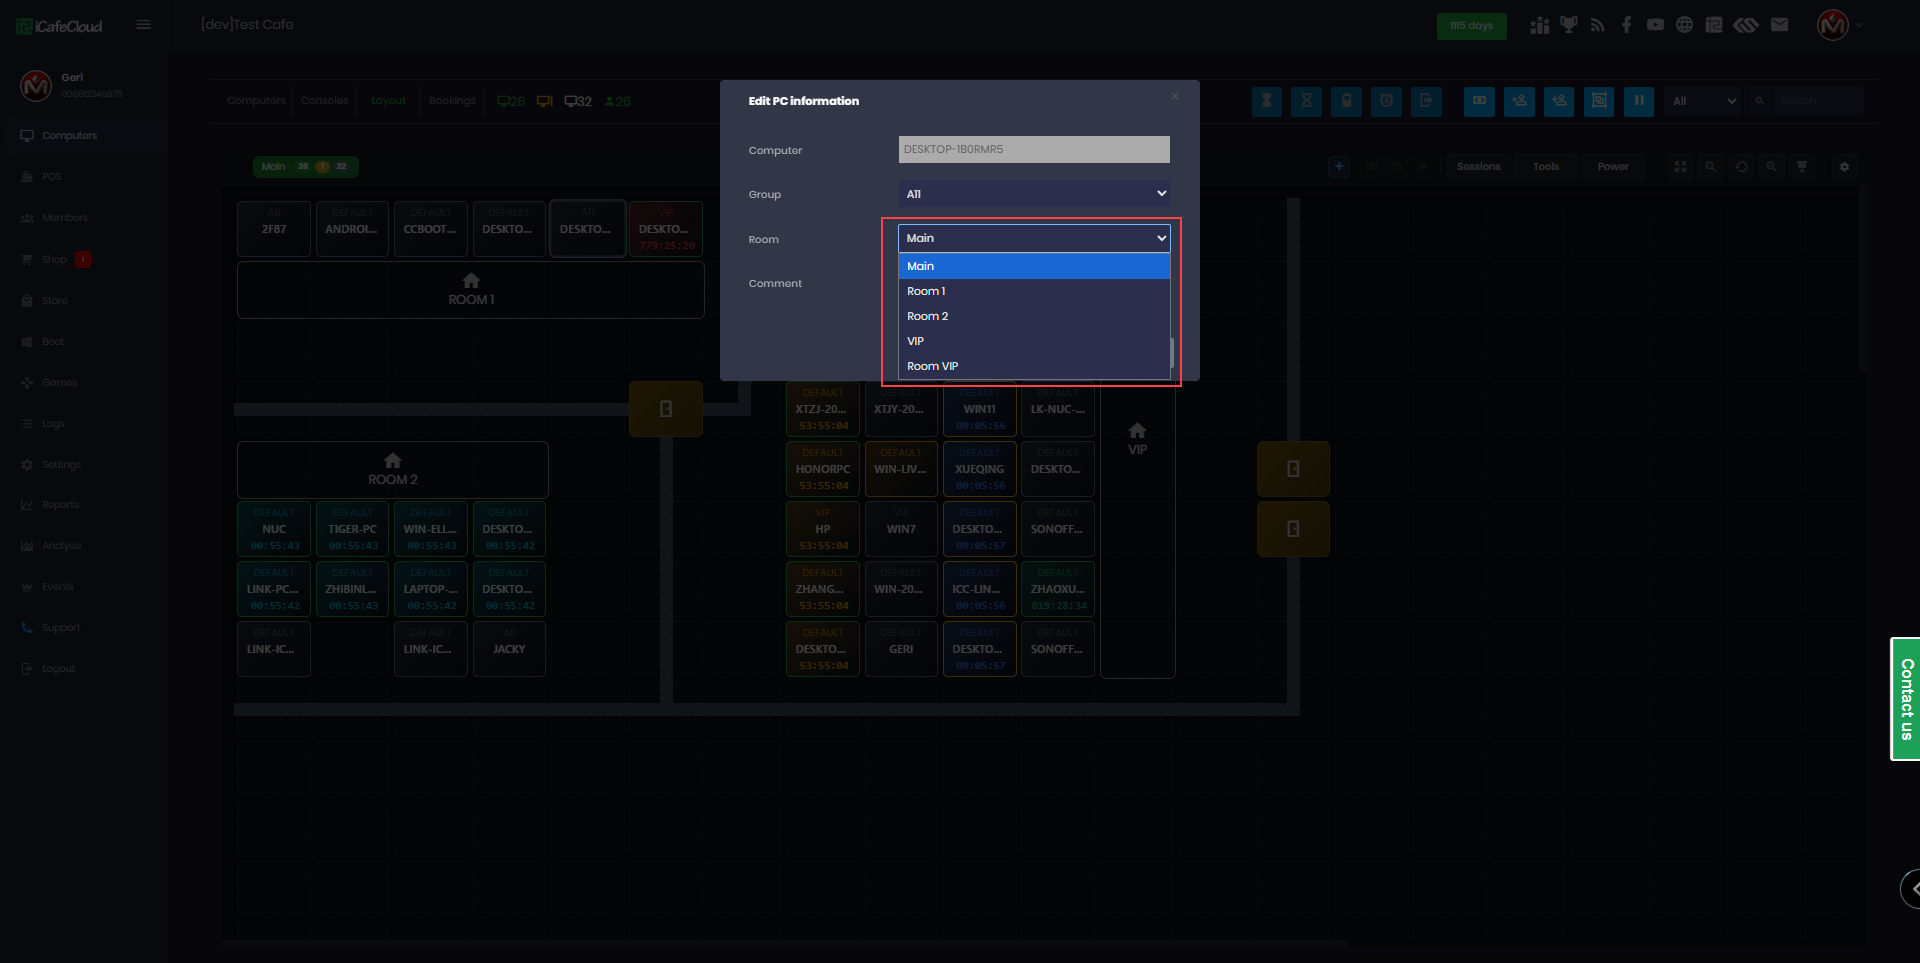
Figure 14
Manage layout PCs
- Click a PC object, and on the top toolbar you will see three green options, which are available based on the PC’s active session.
For member sessions, all three options are visible:
Top-up, Add Time, and Checkout.(Figure 15)
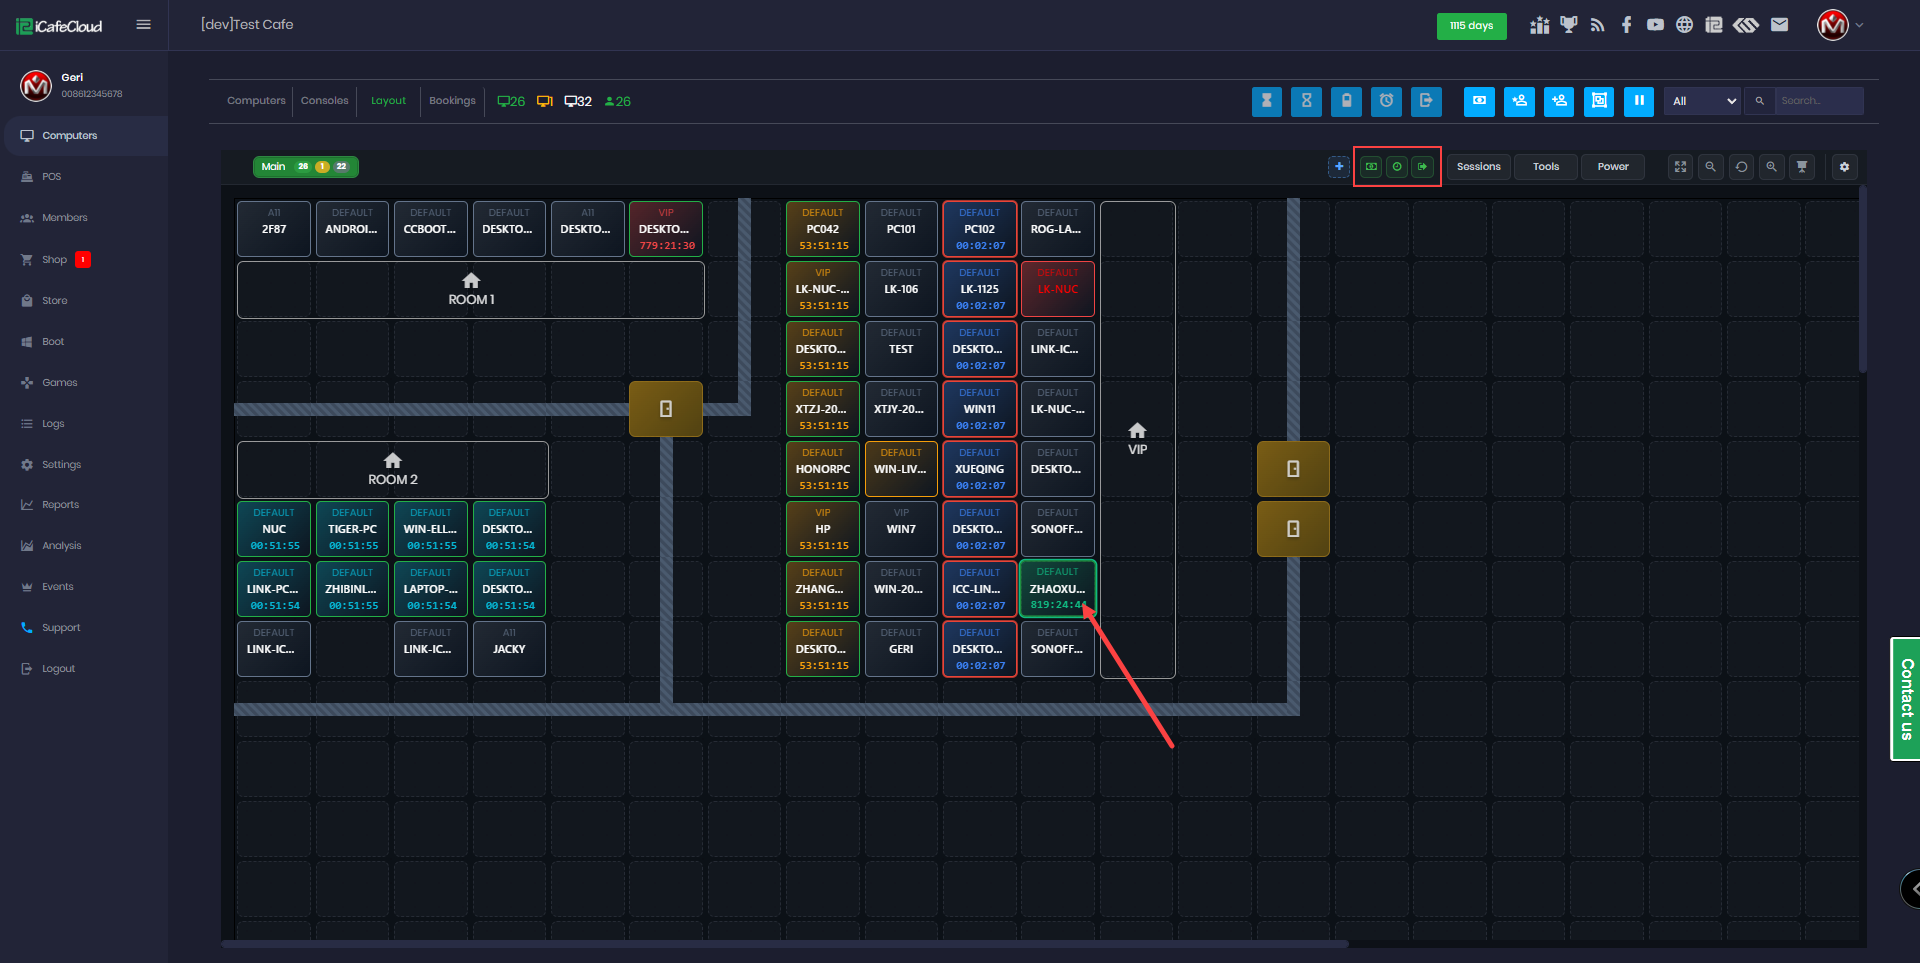
Figure 15
- To start a session, select one or more unused PCs by dragging the mouse over them the total number of selected PCs will be displayed. Then click Session on the top toolbar to view all available options. (Figure 16)
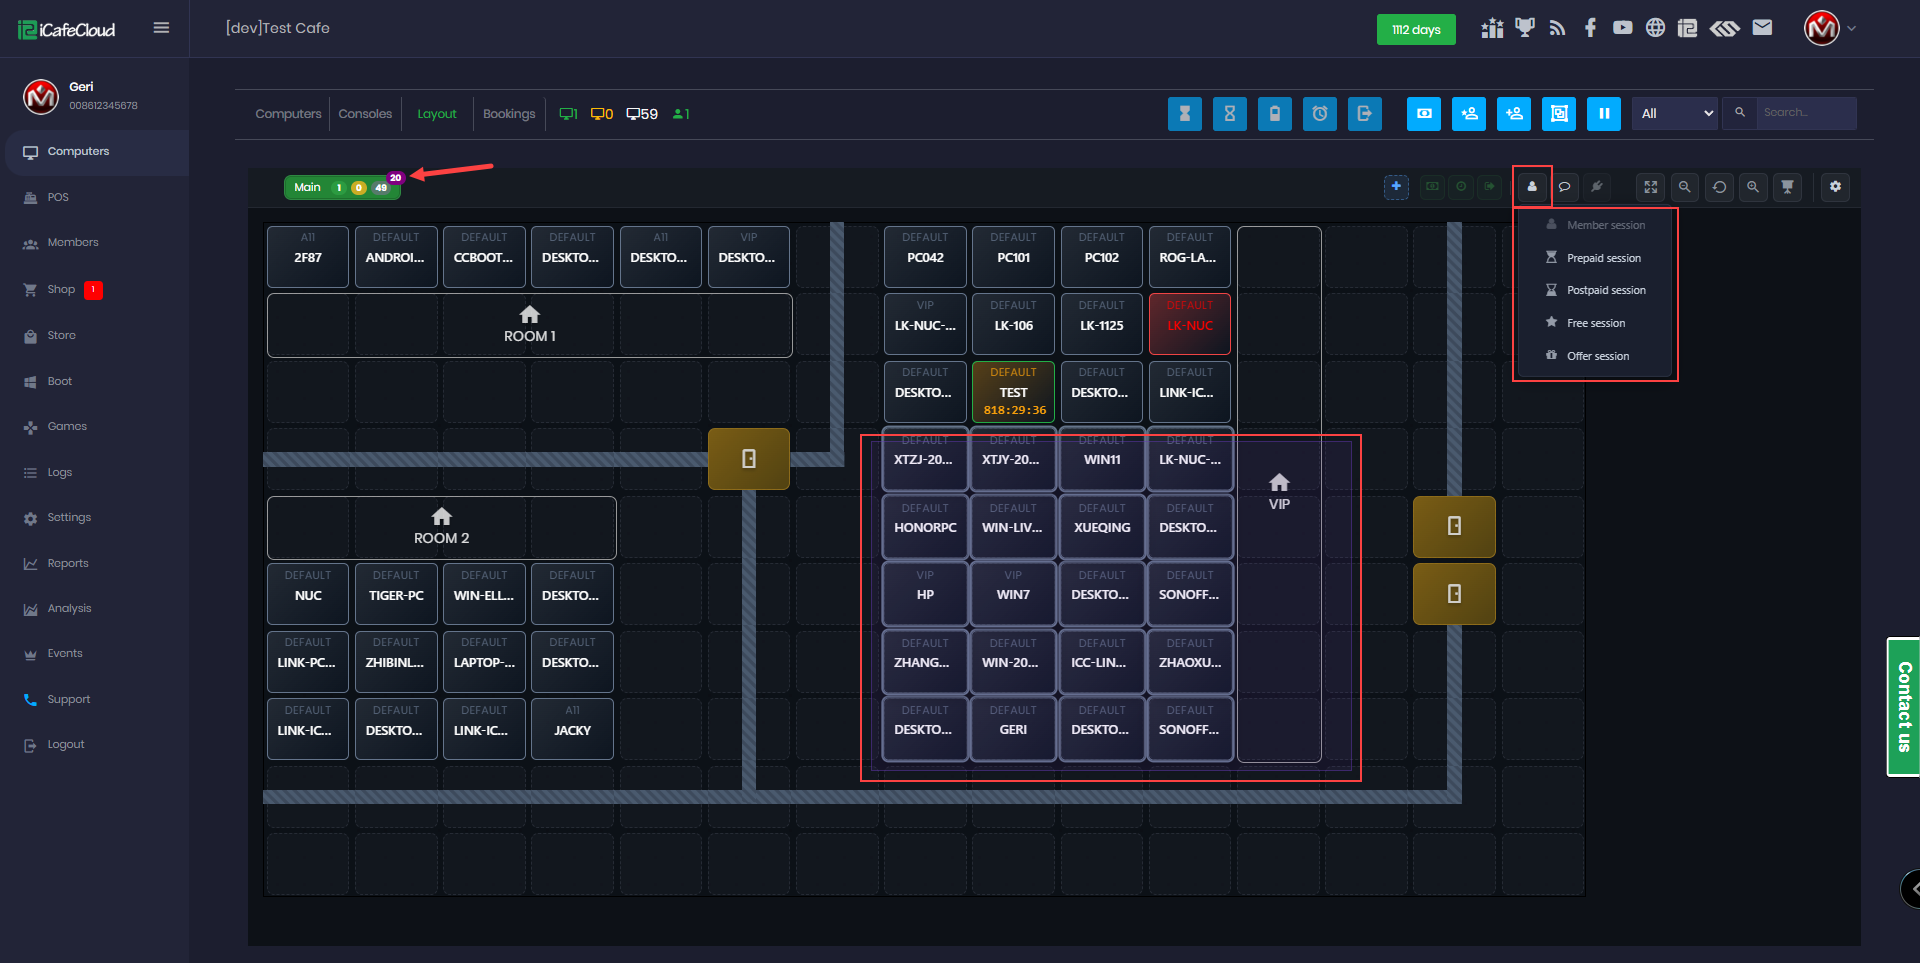
Figure 16
- Hover your mouse over an active session to view the remaining time, PC name, PC group, member name, member group, balance, bonus, and any active offers. (Figure 17)
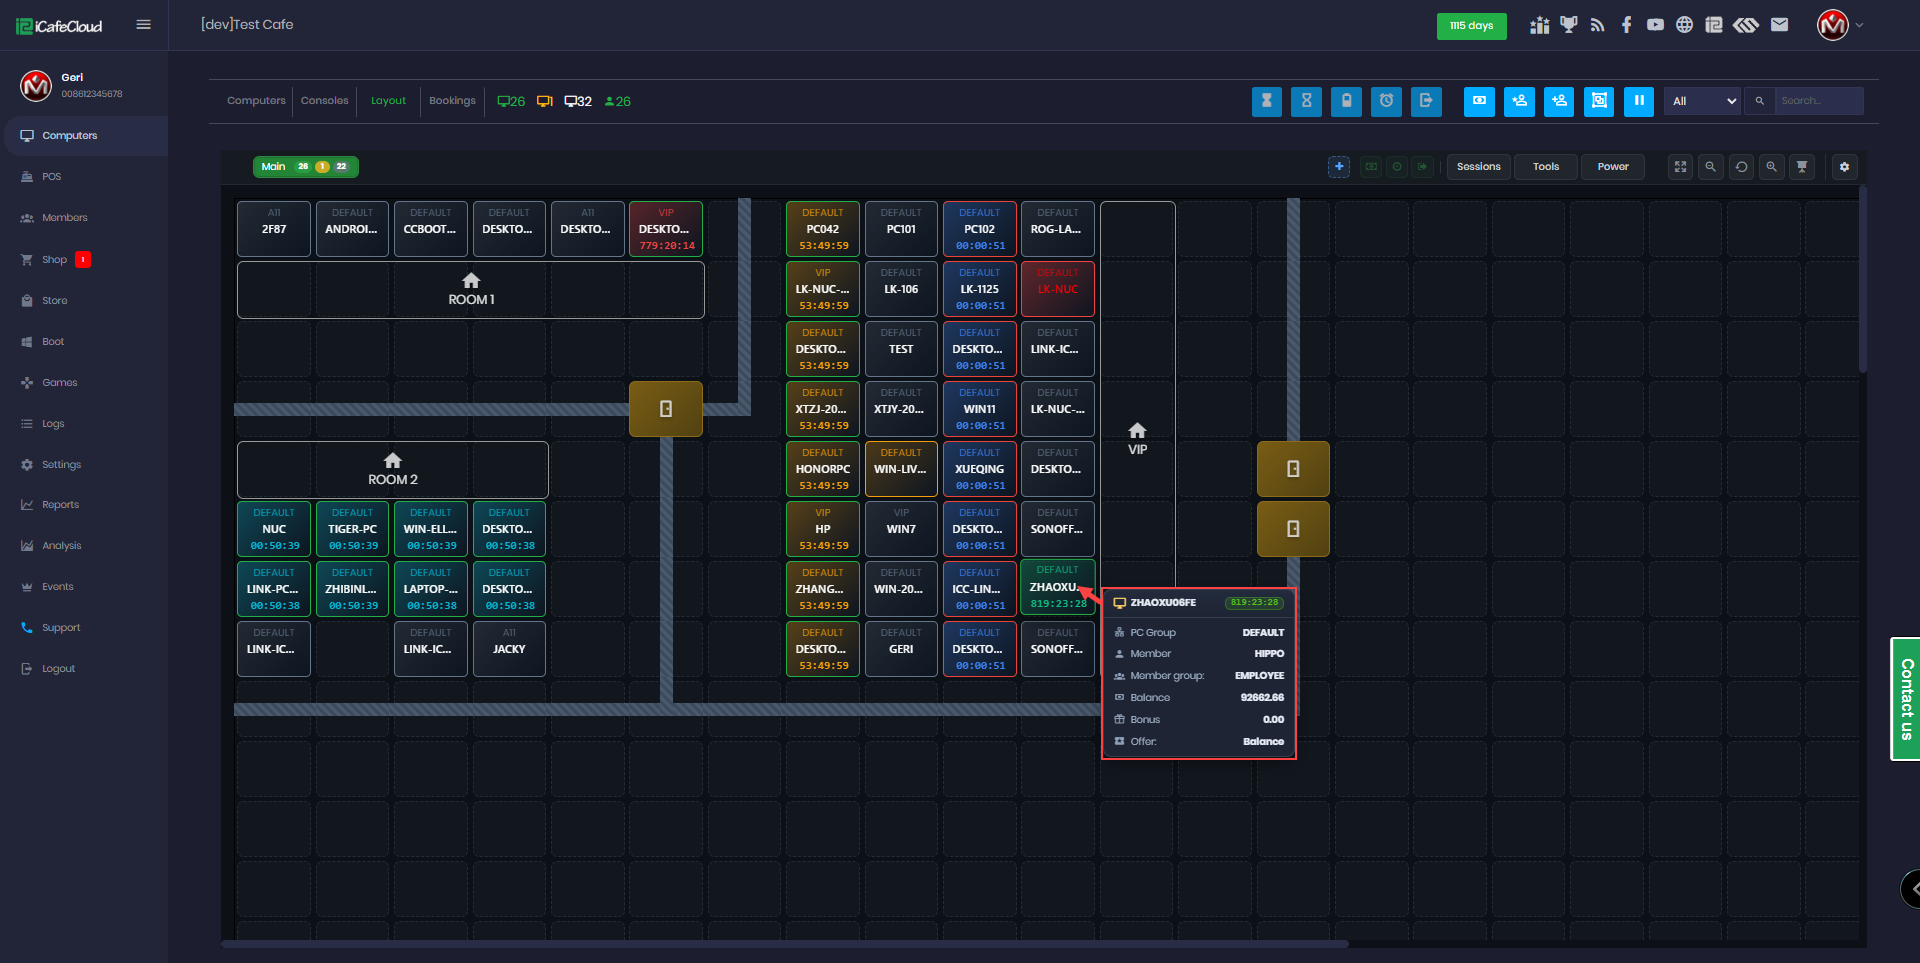
Figure 17
- If you want the layout to be visible to customers as well, you can use the second layout option from the top toolbar (Figure 18).
The Layout URL should follow this format: https://eu6.icafecloud.com/layout-screen.htm.
Replace eu6 with your own server address. Do not use cp.icafecloud.com/layout
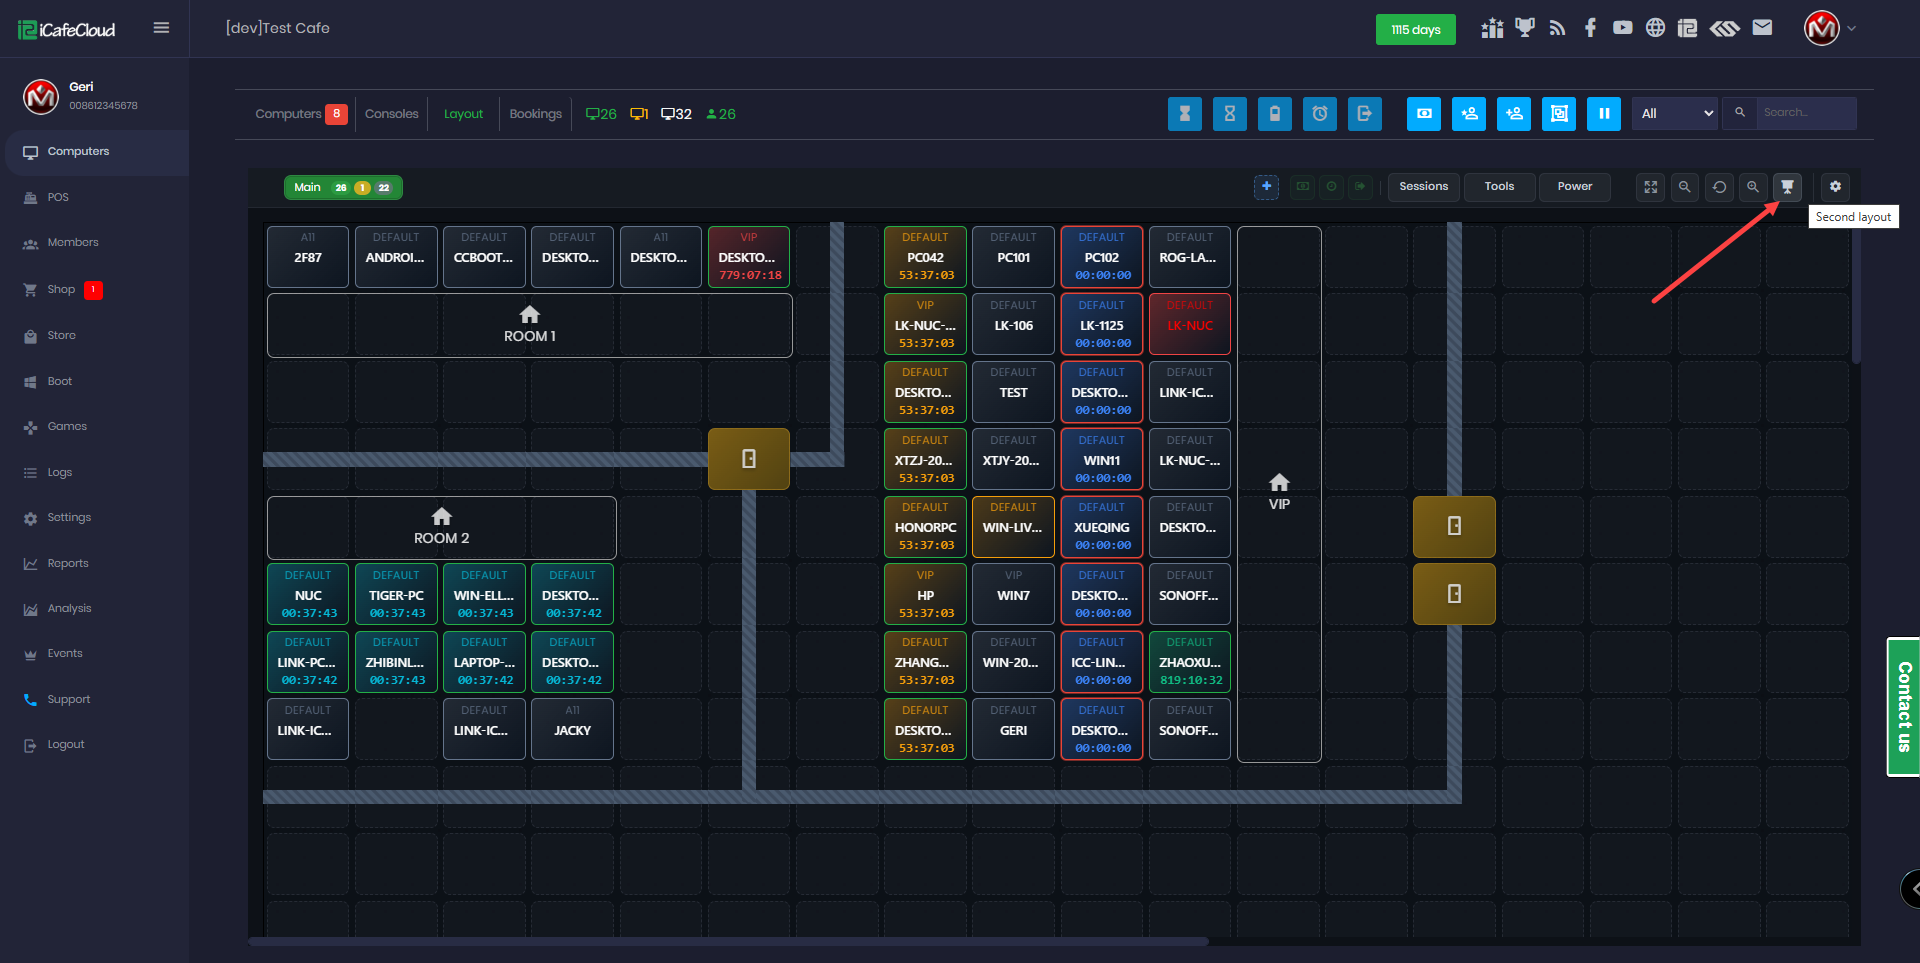
Figure 18
- It will open a new page displaying the layout in full screen, which you can use as a second-monitor view to show on a TV in the center. (Figure 19)
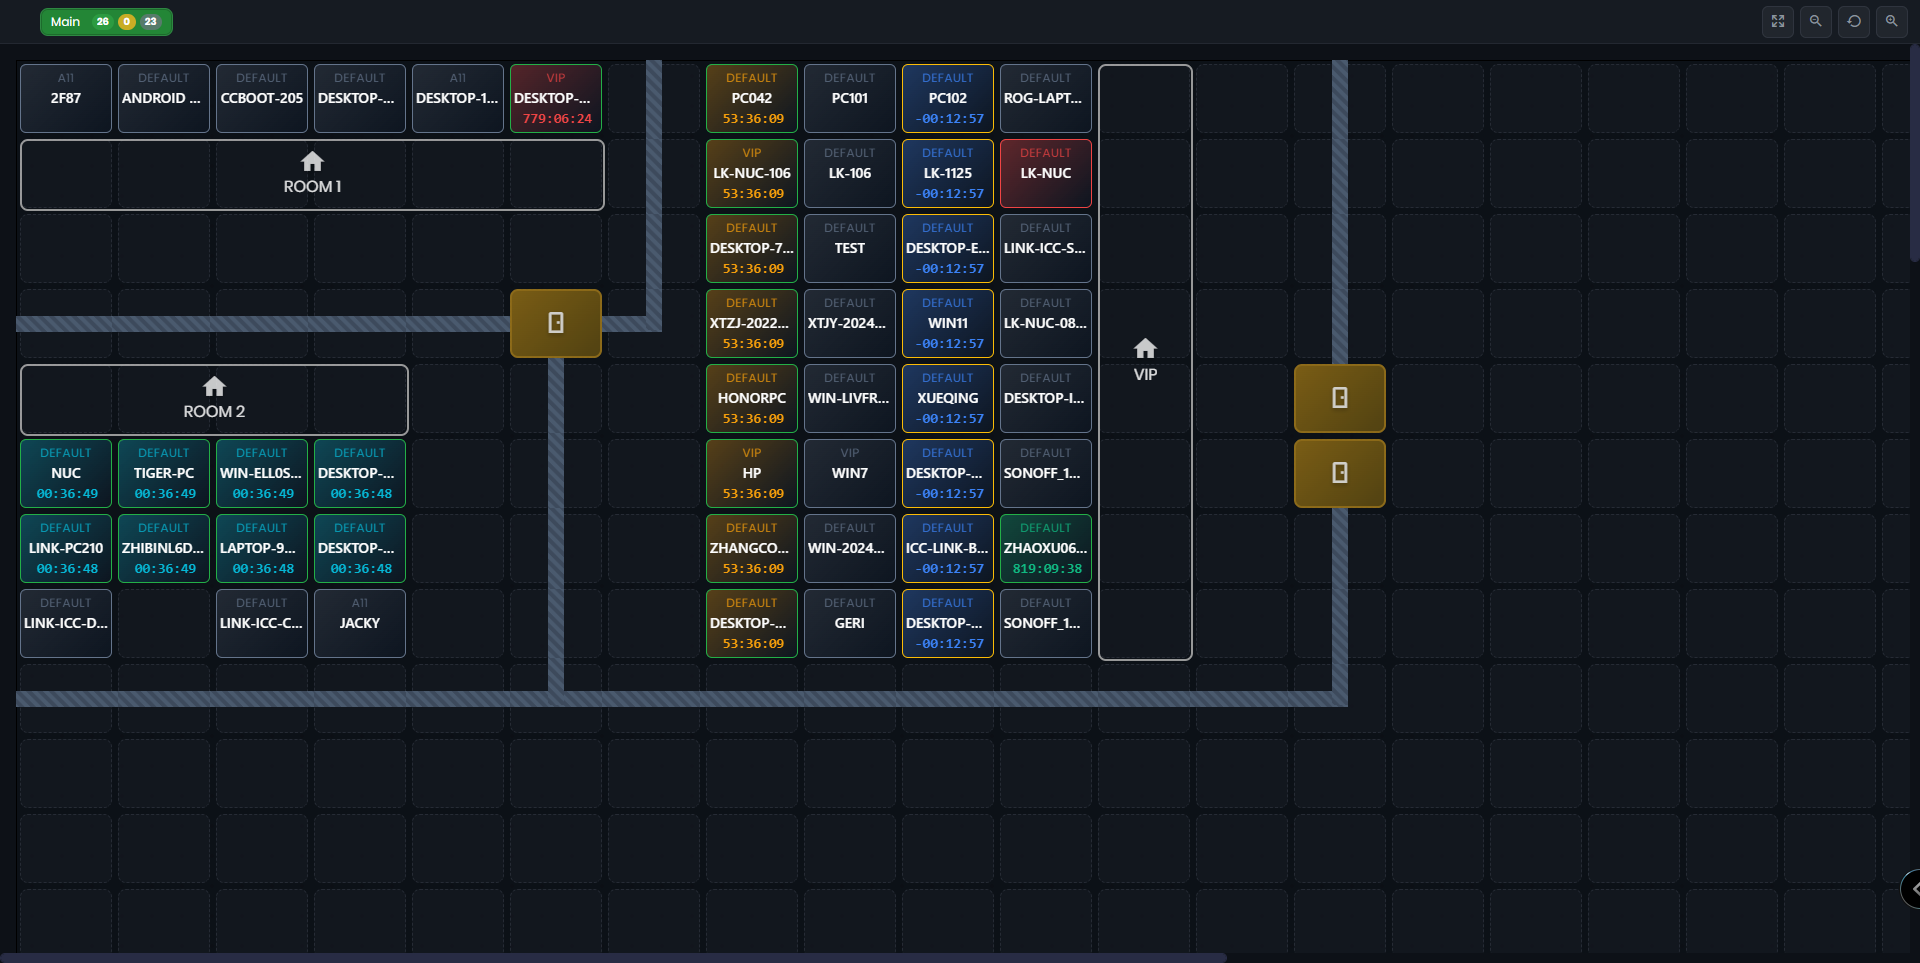
Figure 19