2023-04-05
postpaid, session, member, time
Here is an explanation of postpaid sessions in the following steps.
A postpaid session means the user can use the computer as long as they want and pay at the end of their session at the counter or reception. They can order food or drinks, and pay when they checkout. If the order is placed from iCafeMenu, it has to be approved by the shop. (Order from client)
To start a postpaid session, follow the steps below.
- Go to the 'Computers' page, right click on a client PC where the user will sit and choose “Start Postpaid Session” (Figure 1).
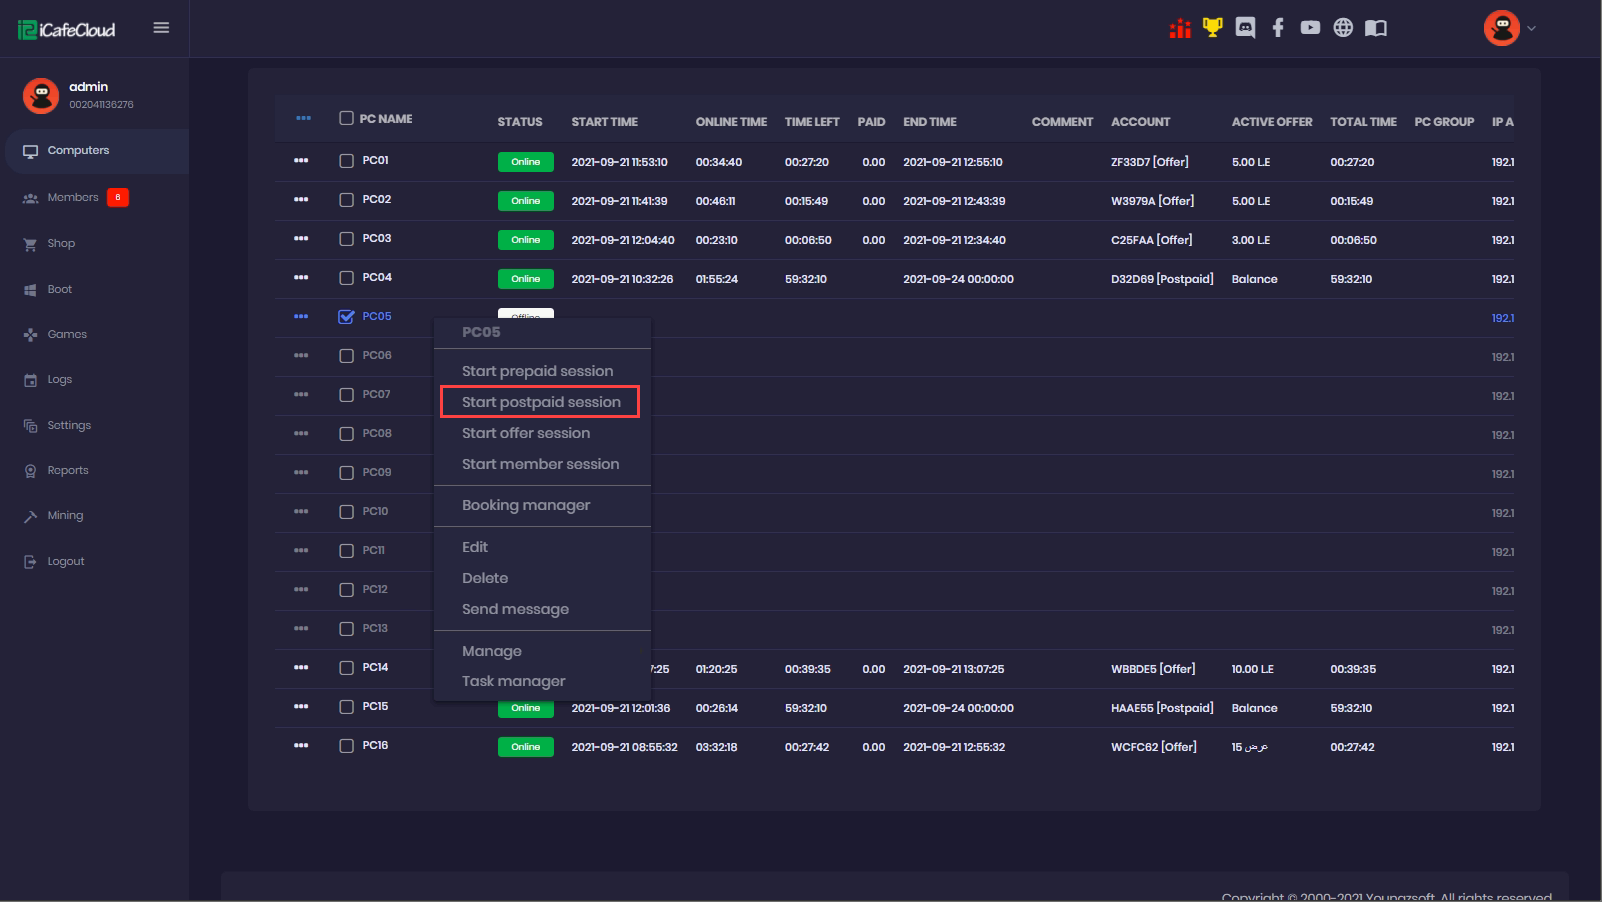
Figure 1
- It will prompt you if you want to start the postpaid session or now. Click on the “Start: button to start the postpaid session (Figure 2).
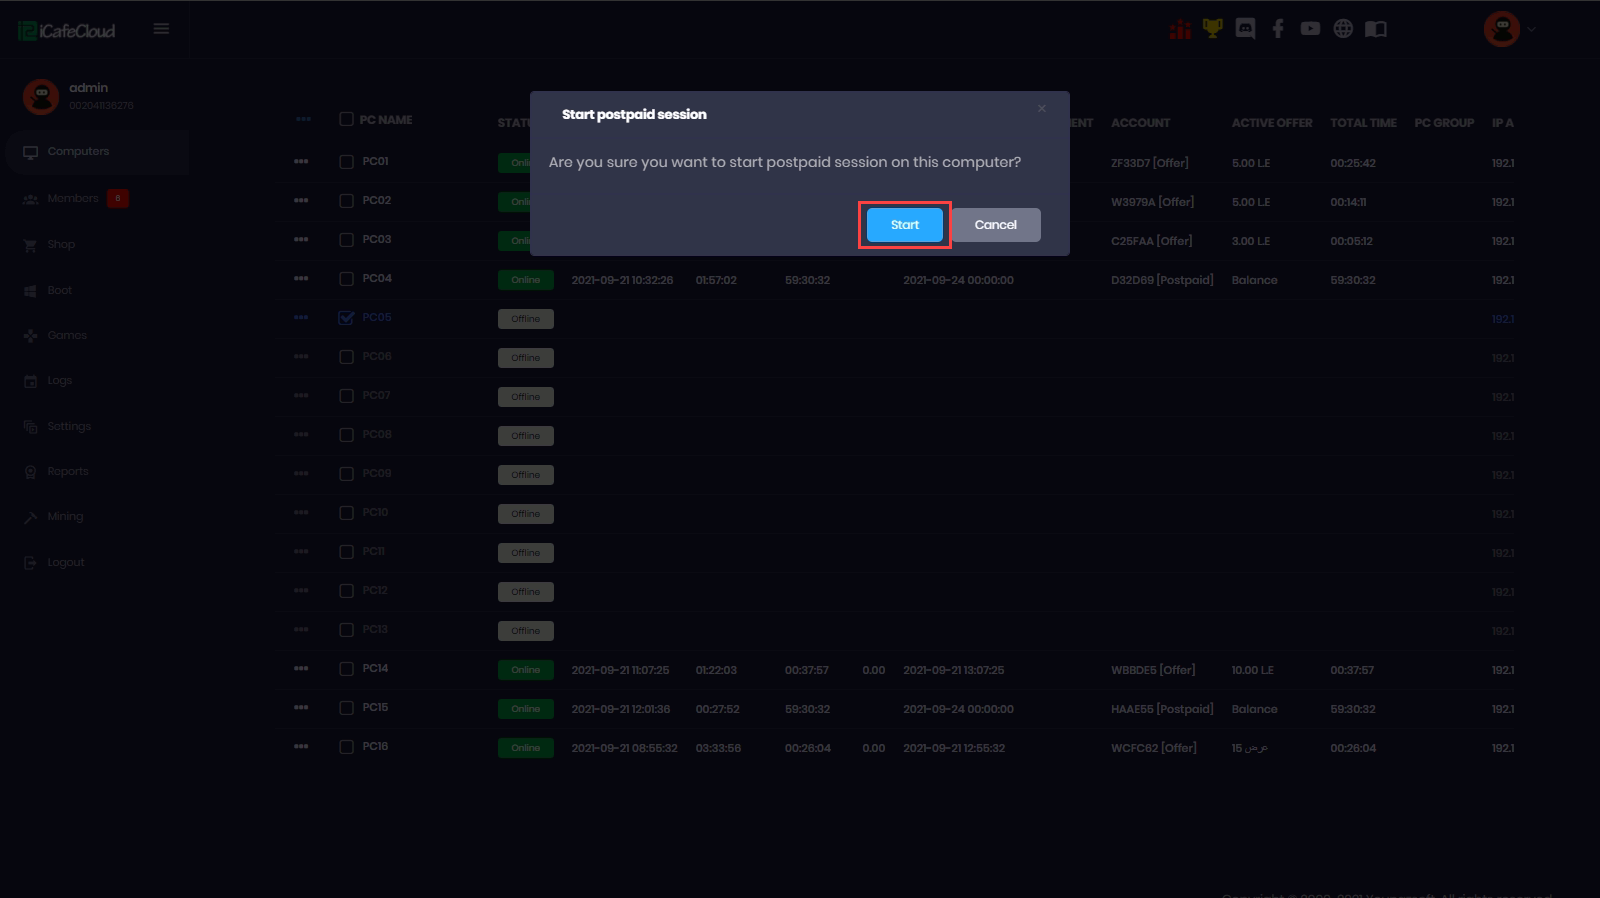
Figure 2
- This will start the postpaid session for the user (Figure 3).
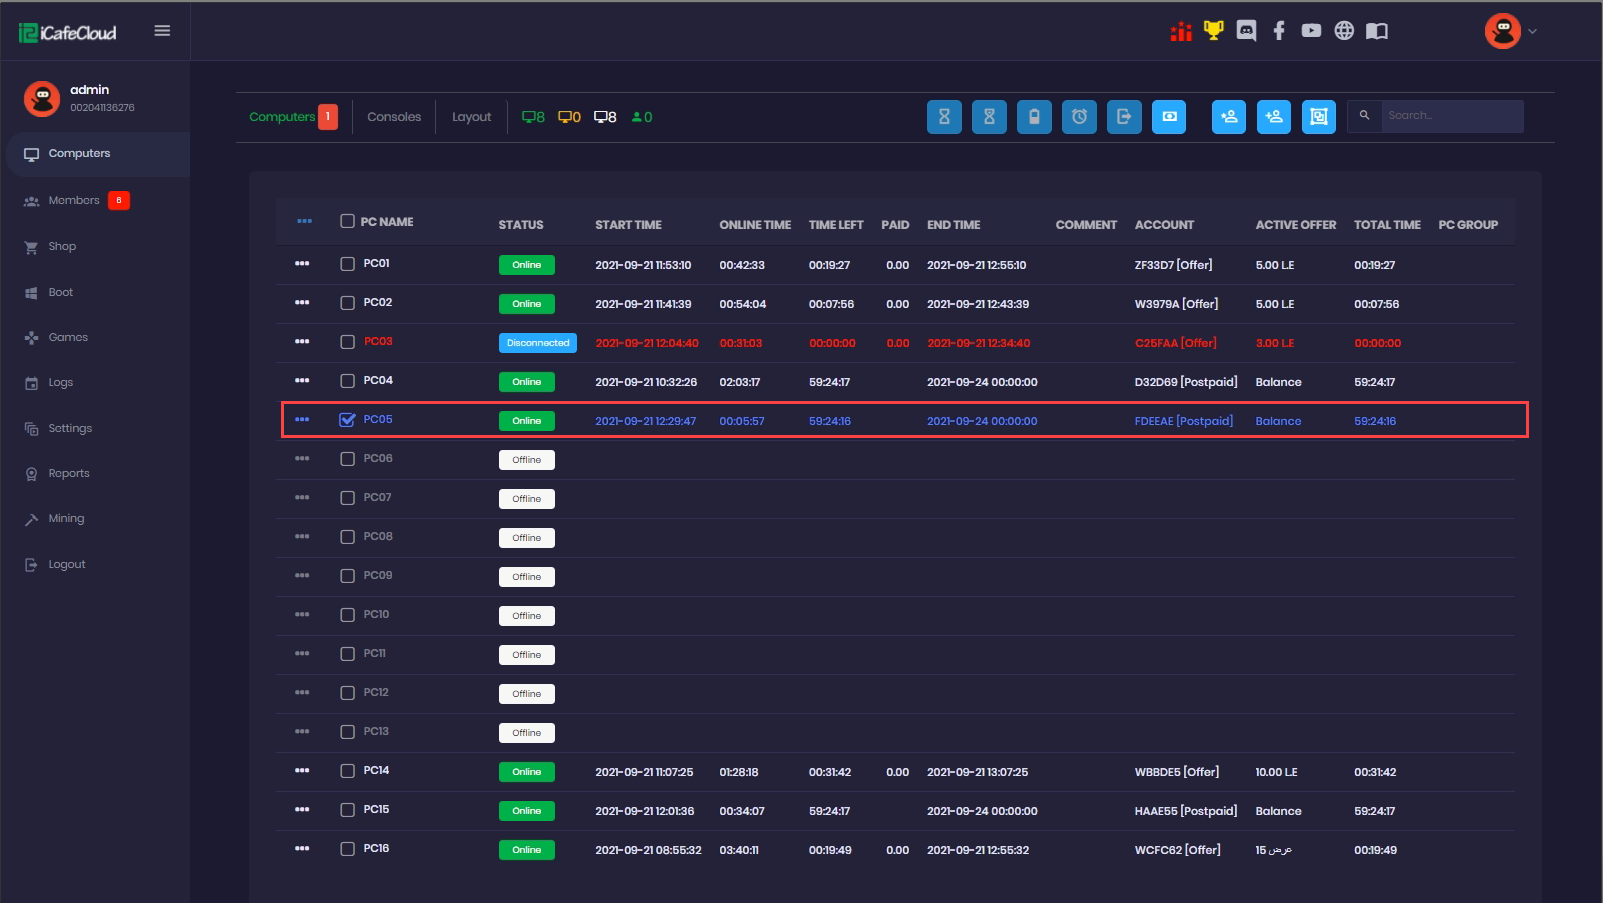
Figure 3
- Once the user is done with using the computer, he can check out from the iCafeMenu himself, or you can check him out from the web admin. To end the session and check him out, right click the client computer and choose the “Check Out” option (Figure 4).
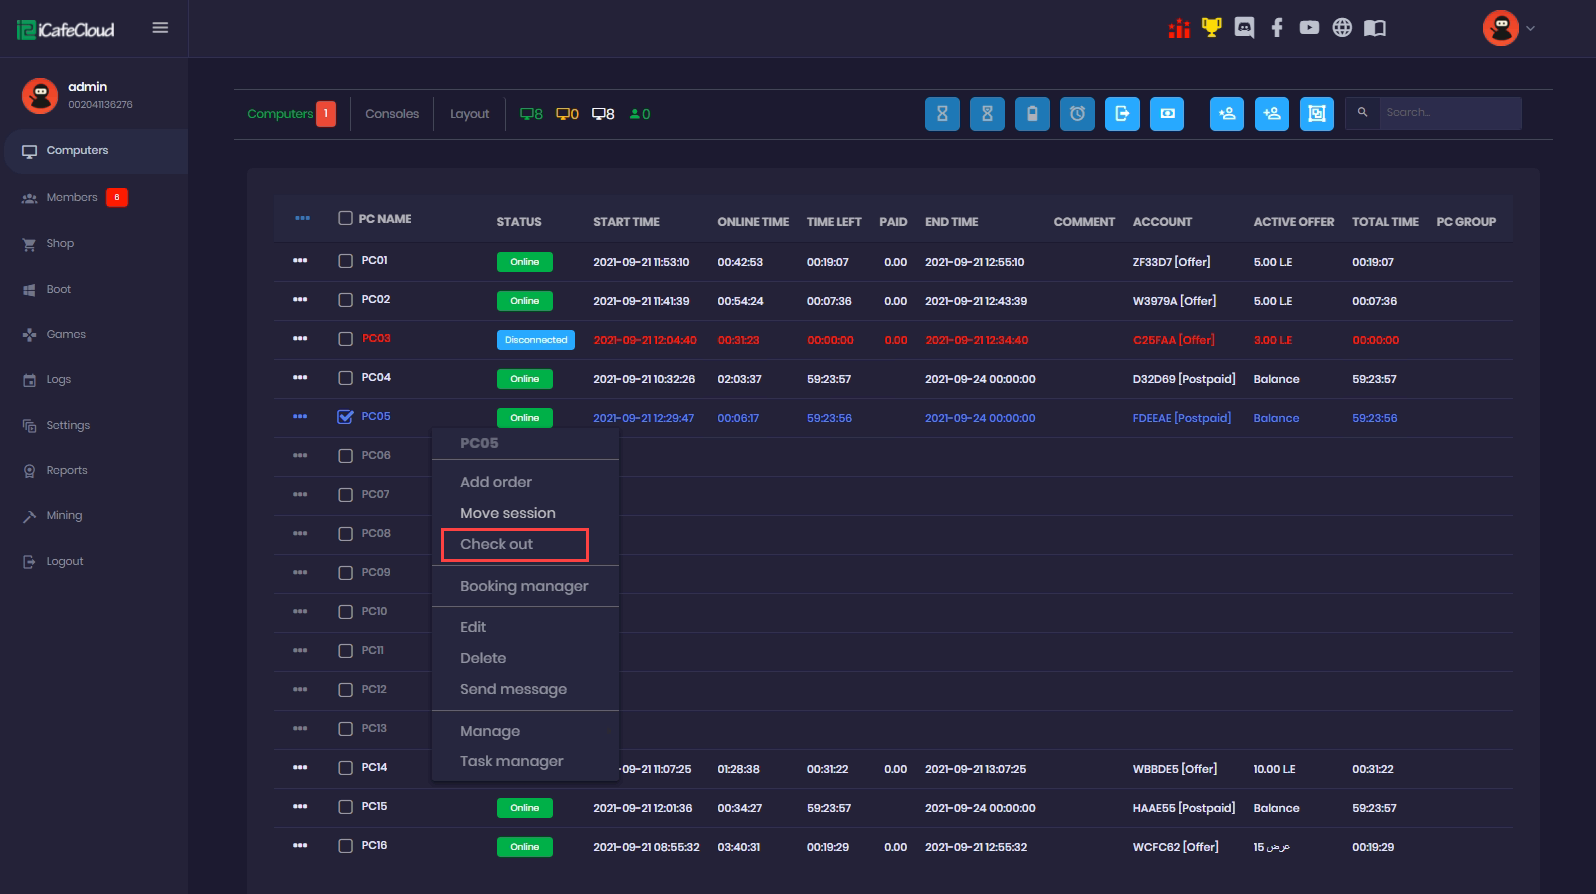
Figure 4
- Enter the amount needed to be paid, same as the “PC Time Amount” and click on the “Checkout” button (Figure 5). The cost includes the pc time amount used by the user.

Figure 5
- To print a recently checked-out prepaid order or review its details, navigate to the Shop and go to Transaction History. Click on the last order, and the Order Info tab will open, displaying details such as start time, end time, total hours used and more. (Figure 6).
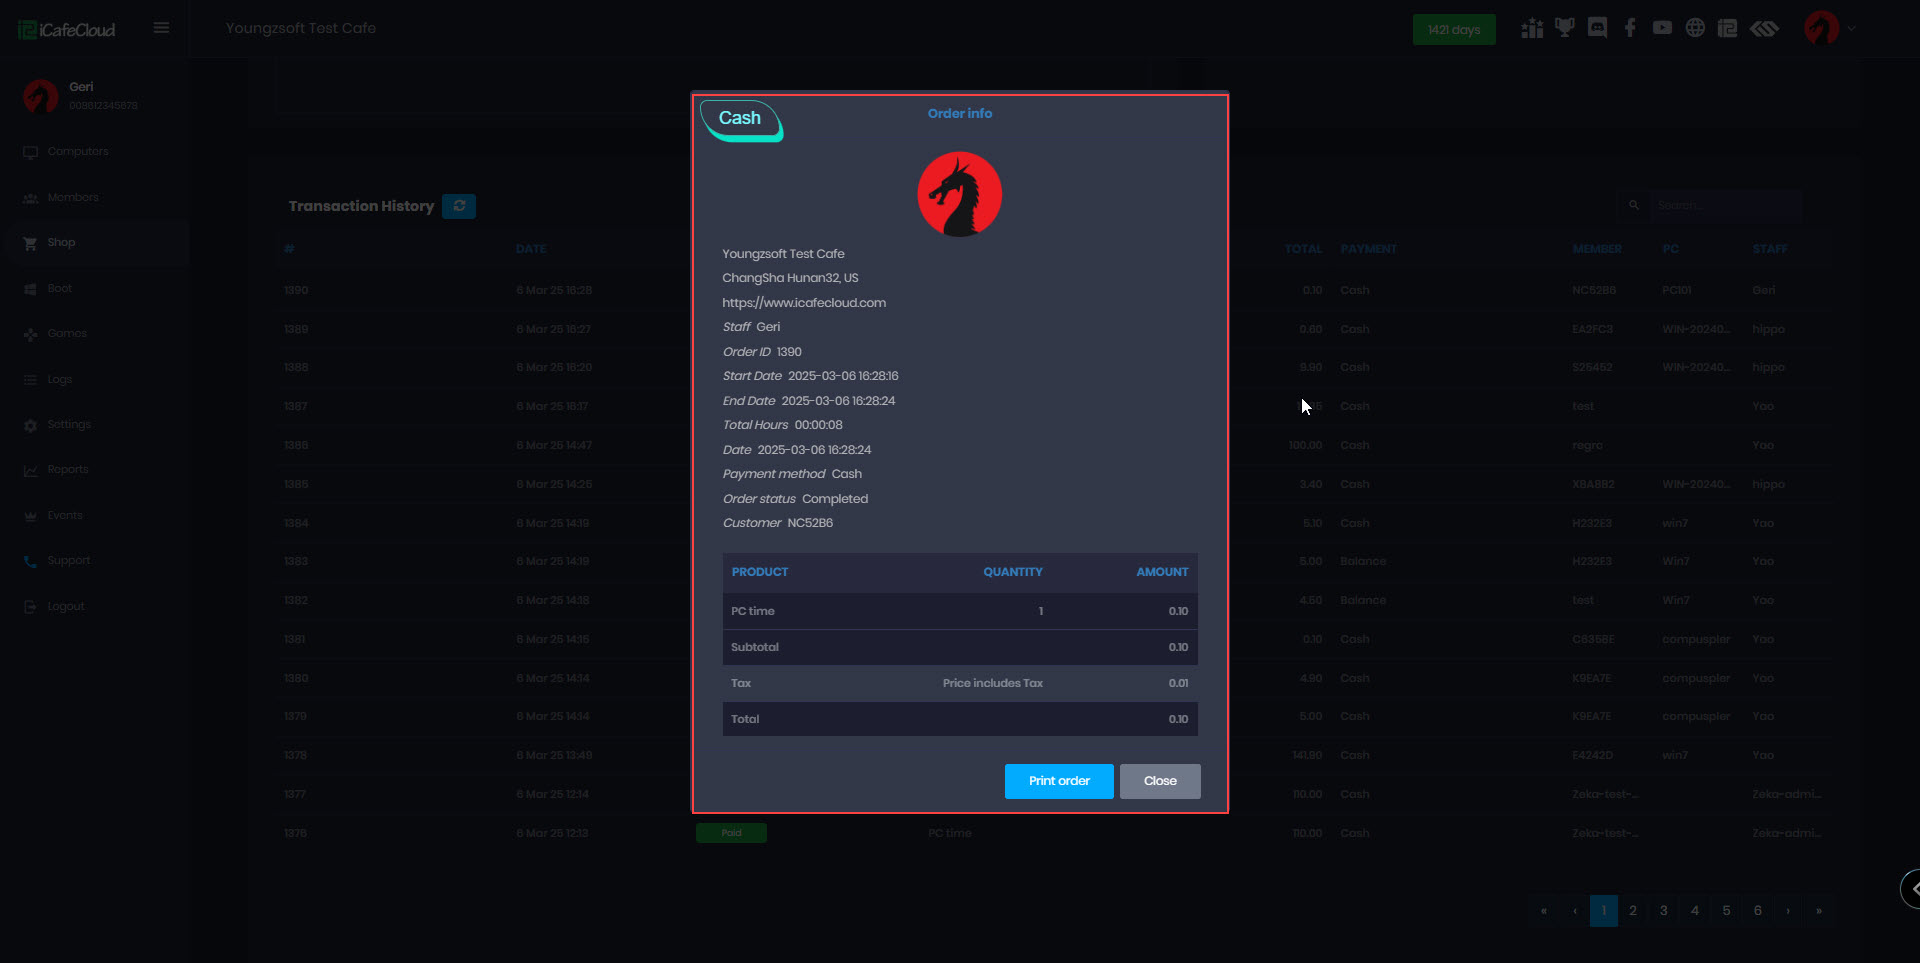
Figure 6
- Once the session ends, the iCafeMenu will lock the PC and show it as “Standby” in the “Computers” page (Figure 7) .
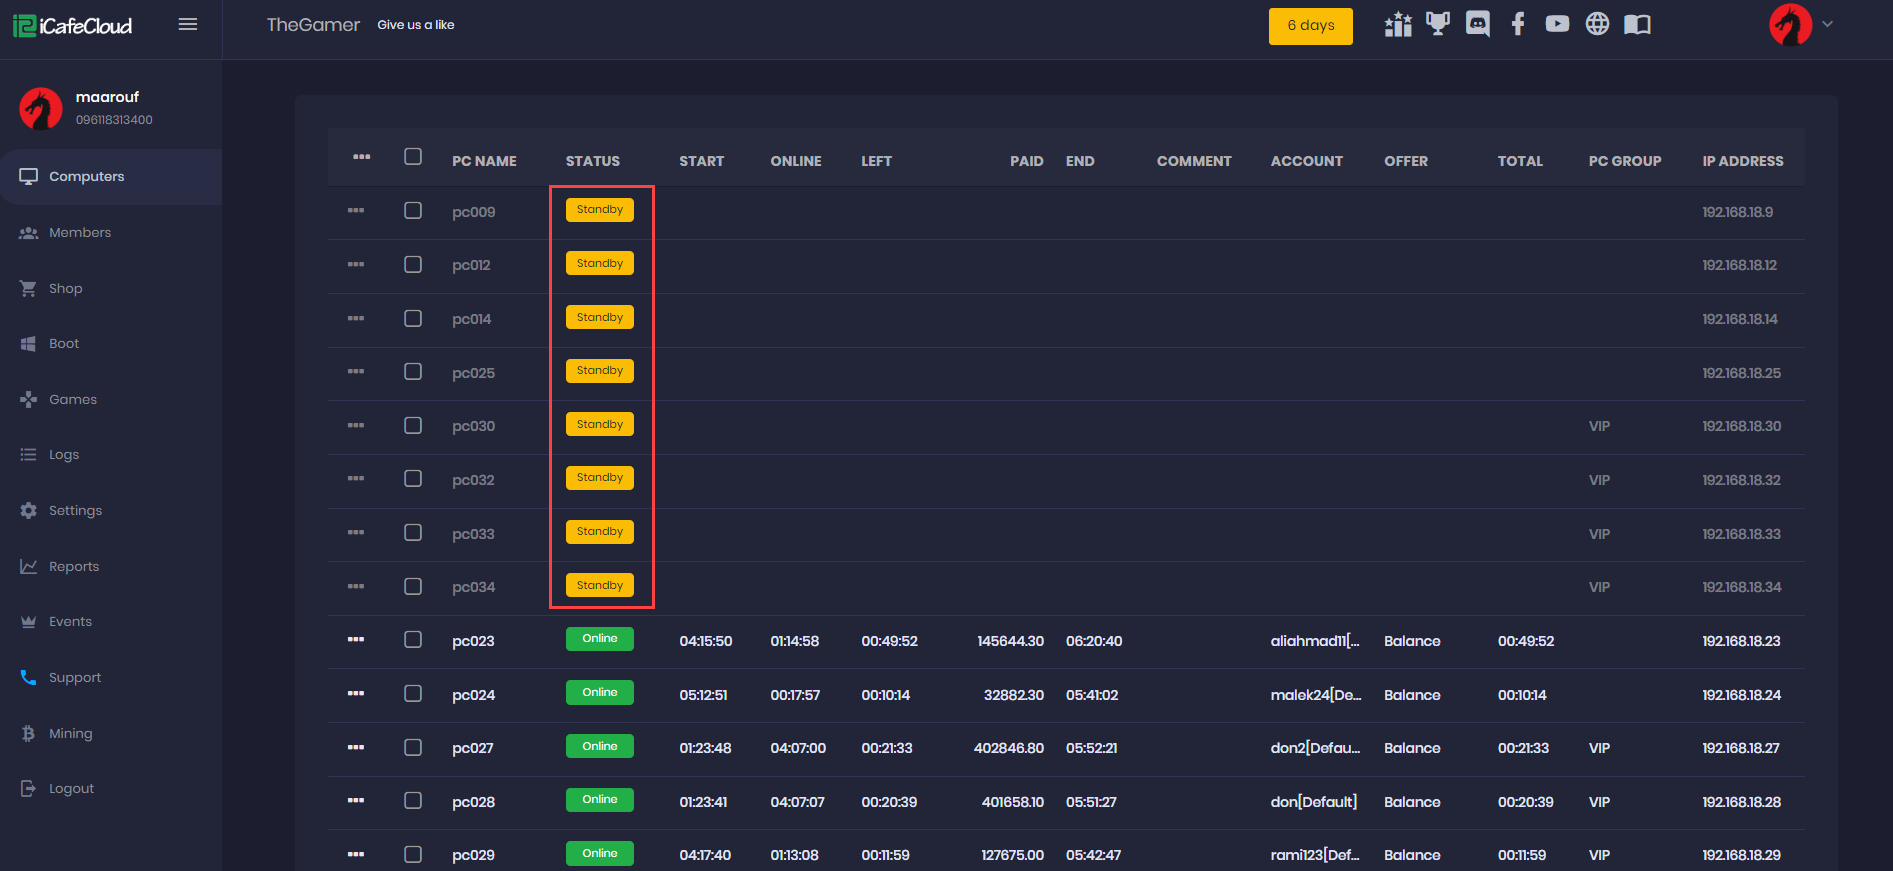
Figure 7
- We have added a pay later button that will show only on postpaid session that will add the amount to the total cost of pc while checking out client (Figure 8 & 9).
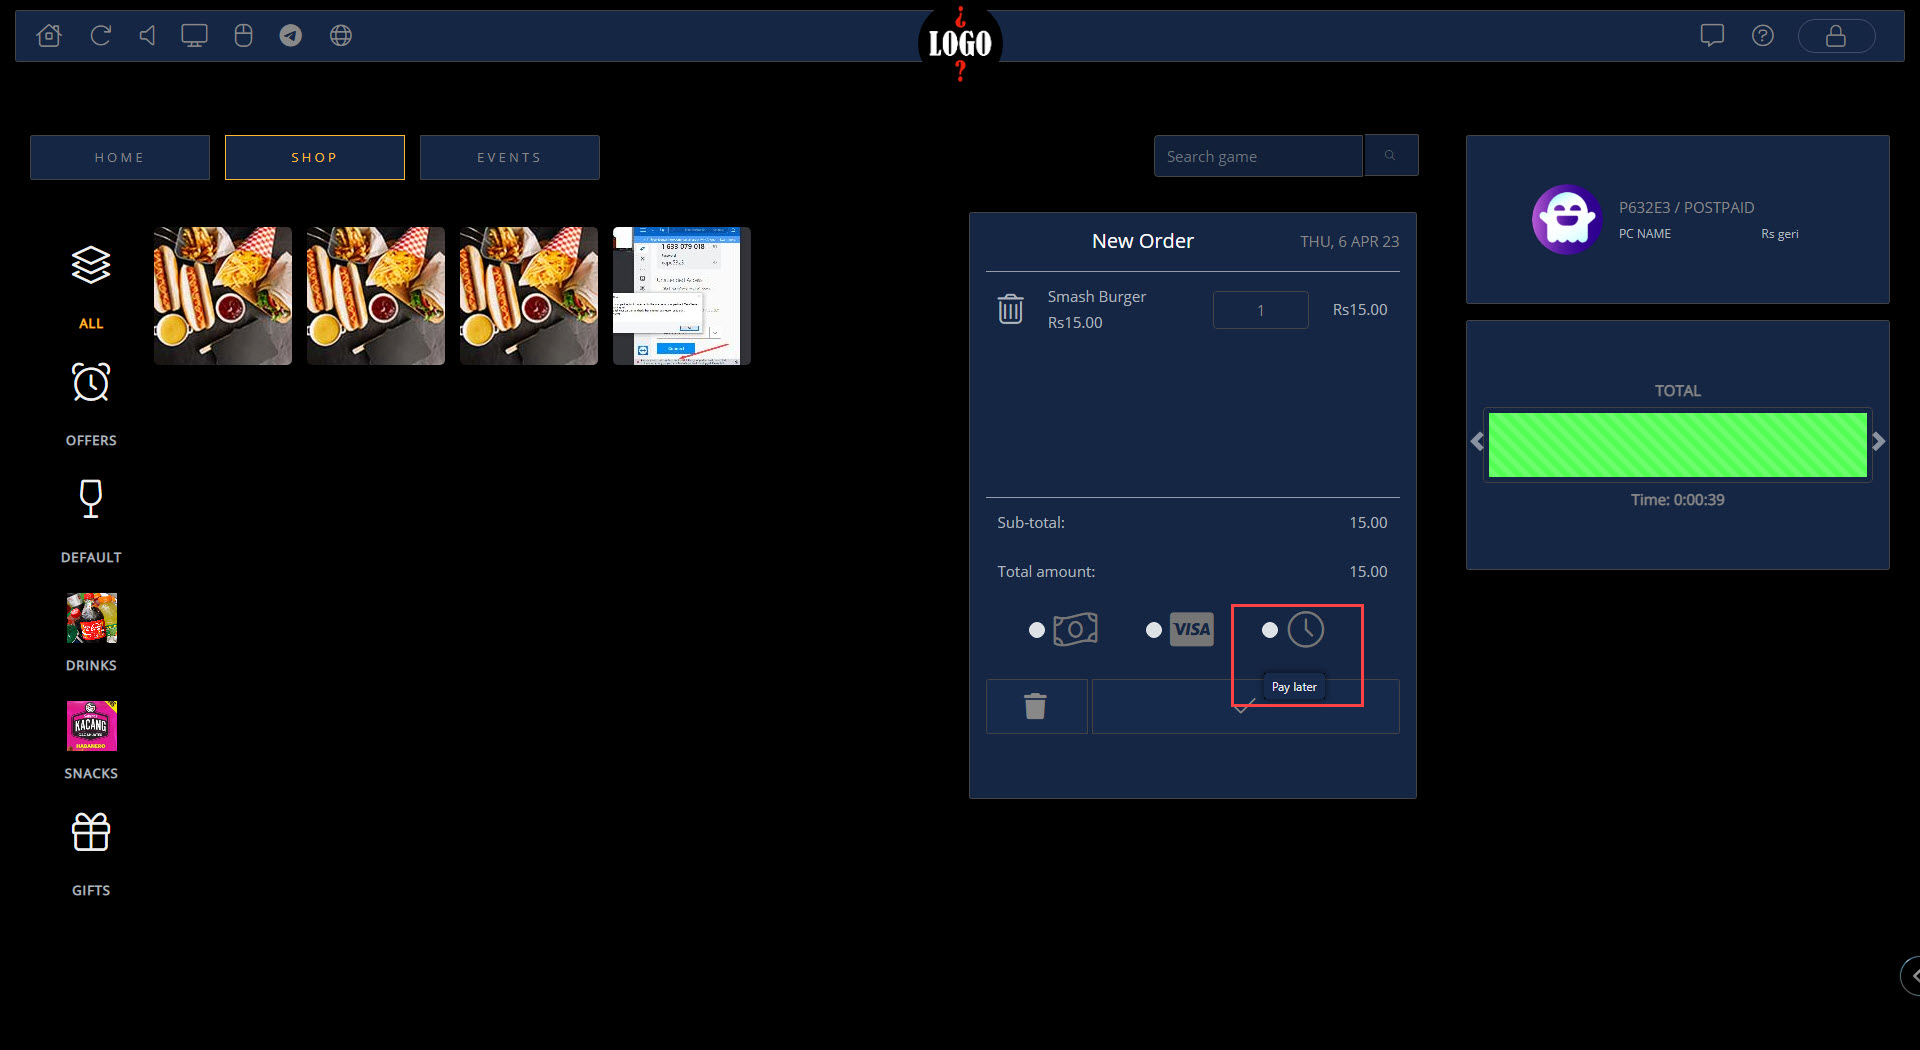
Figure 8
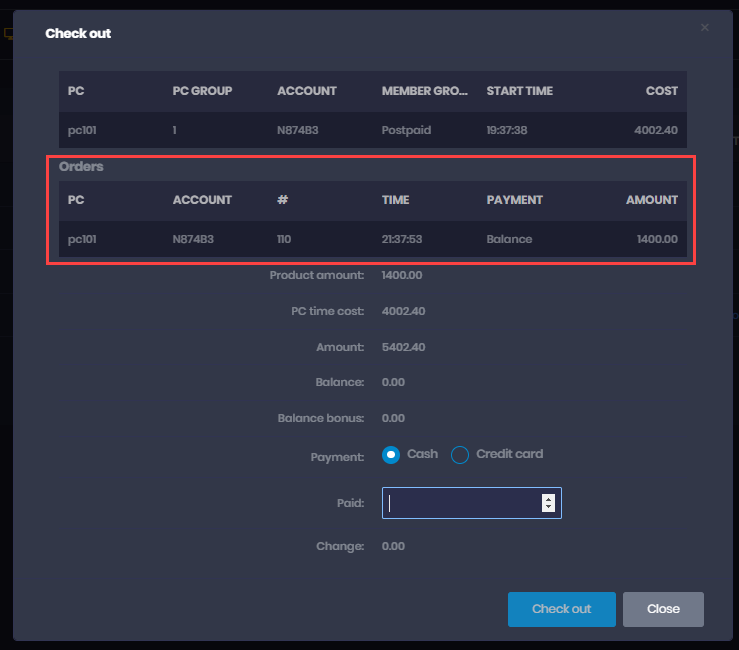
Figure 9