Wiki Home Settings page [API settings]
[API settings]
2024-04-26
api
- From the "Settings" page of the Cloud Panel, you can generate your API key by pressing the create button (Figure 1). The api key expiration time is one year.
Figure 1
- Once you create a new API key, the old API key will become invalid. We only support one API key at a time.
- Click the "Copy" button and save your api key. It's only shown once.
- API docs https://dev.icafecloud.com/docs/ (Figure 2).
Figure 2
- You need to add a http header with the "Authorization: Bearer api_key" to authenticate the API access.
- To add parameters on the API use Body and not Headers.[On postman can use Body , Form-data and add parameters. [Figure 3]
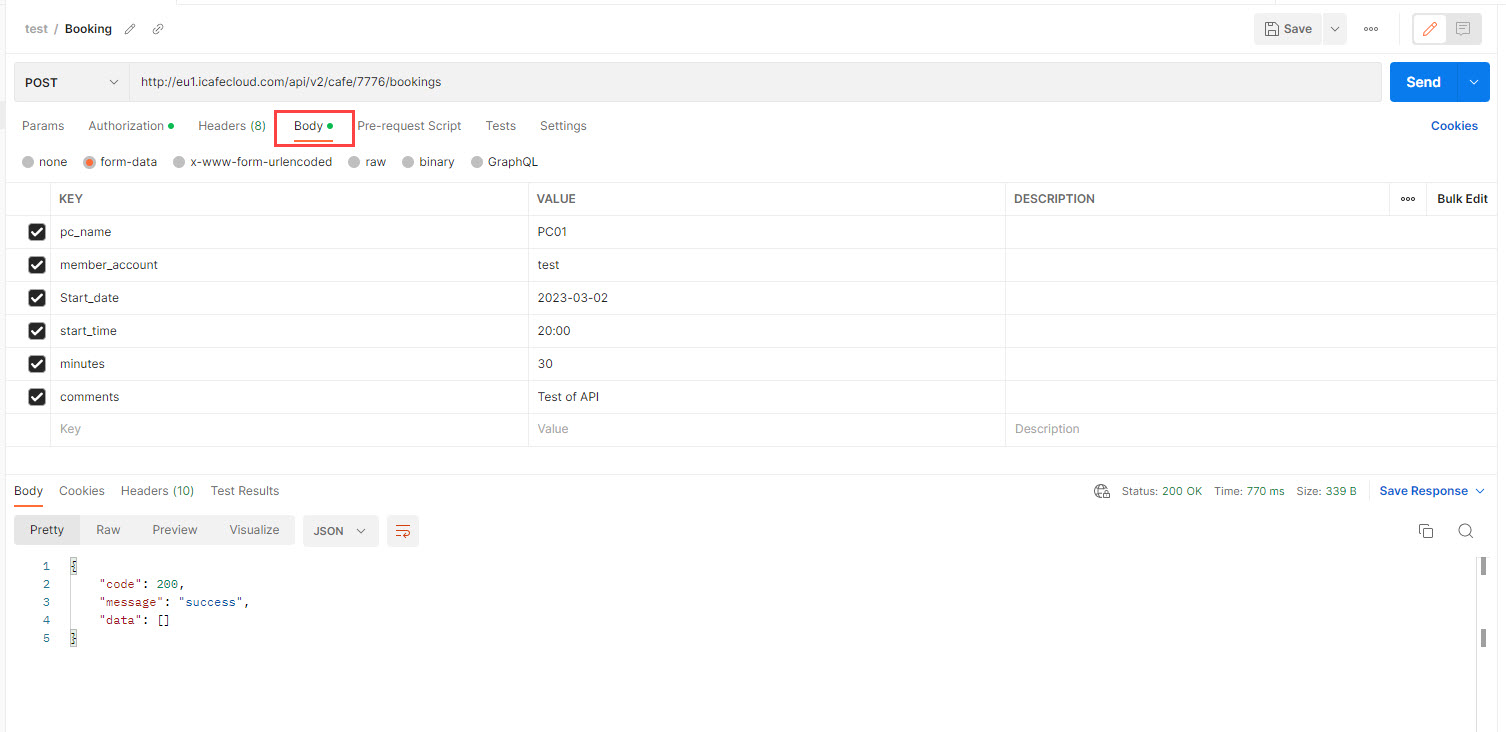
Figure 3
- The API endpoint URL should always use HTTPS not HTTP. First you need to use https://cp.icafecloud.com/api/v2/auth/serverCode?licenseName=xxxx to get server code, then your endpoint is "https://" + serverCode + "/icafecloud.com/".
Figure 4
- Notify balance changes to client PC. Once you've initiated the top-up API call, the next step would be to call the pushClientstatus API. This step is crucial as it ensures that the client's PC is notified of the update.
- For the API to auto add bonus on topup use:
To get the bonus = POST api/v2/cafe/{cafeId}/members/action/fetchBonus
And use it as parameter at = POST api/v2/cafe/{cafeId}/members/action/topup -> topup_balance_bonus (Figure 5)
Figure 5