2026-05-14
set, tax, time
The following explains how to configure the tax system and apply additional tax percentages based on your governmental regulations for products and offers available in the system.
- Navigate to POS → Settings and scroll down to ‘Tax Printer’. Choose one of the available printer options in Center Settings, as each printer option uses a different tax system. (Figure 1)
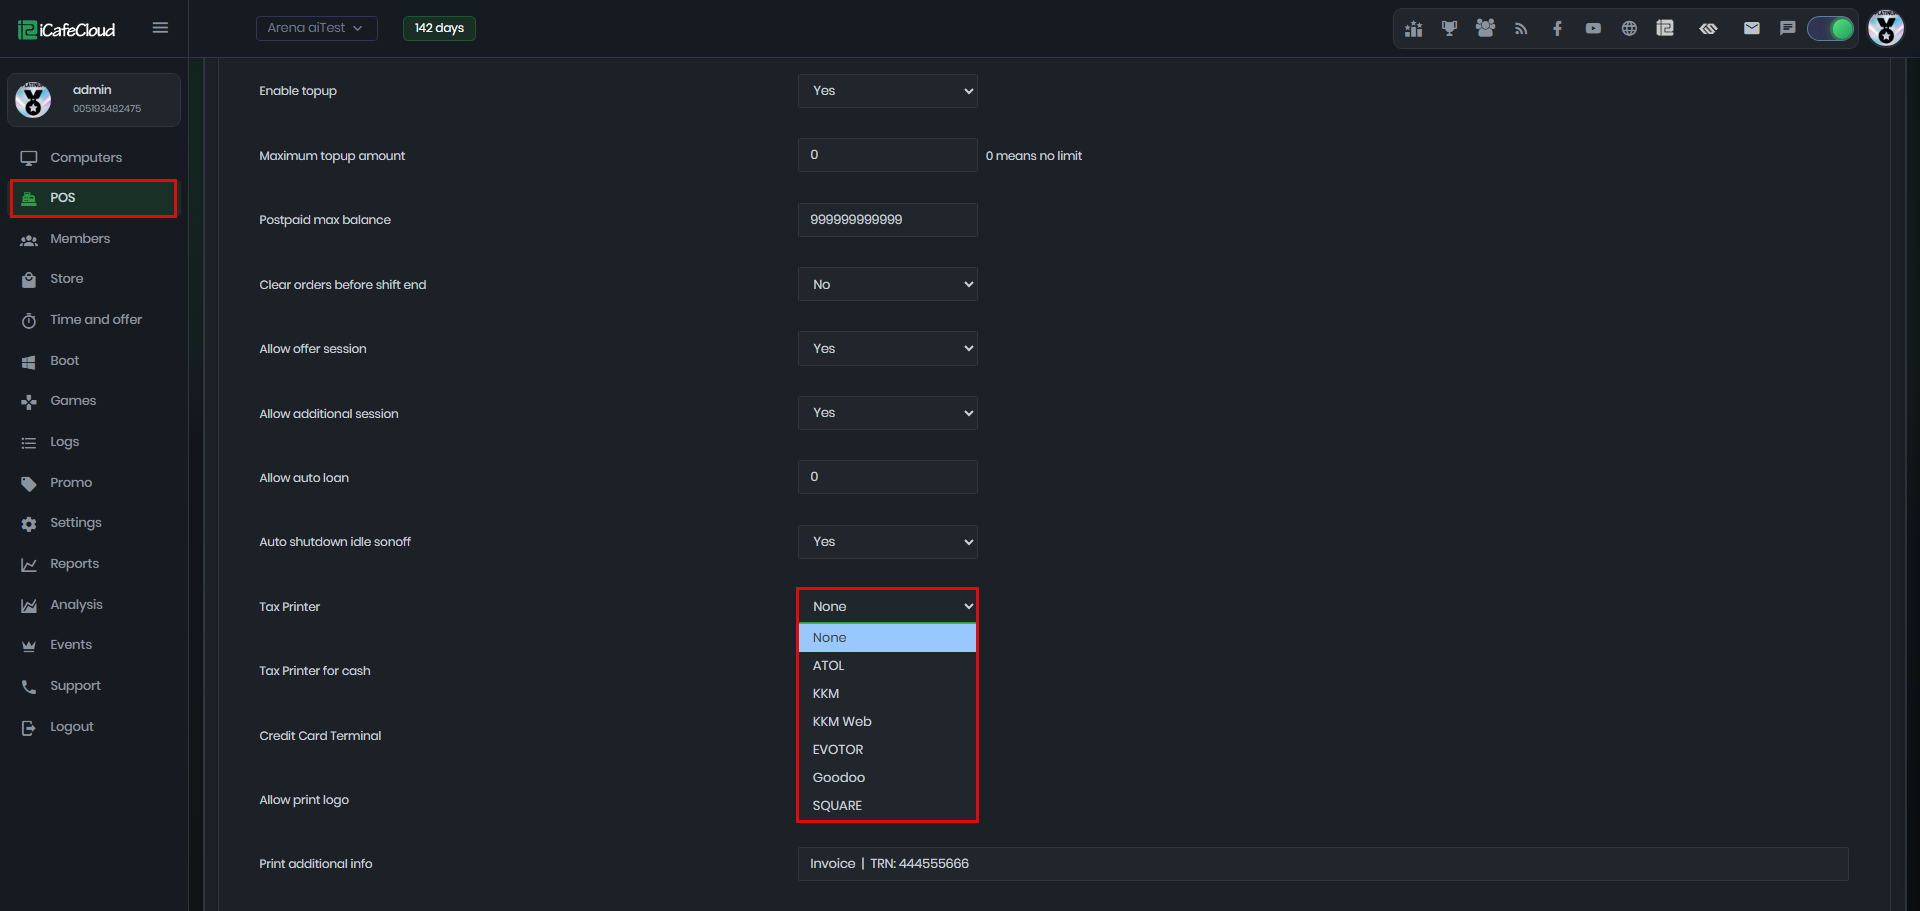
Figure 1
- If ‘None’ is selected as the Tax Printer (default option), you can freely rename all 3 tax options based on your preference, and the tax percentage values will also be fully editable. (Figure 2)
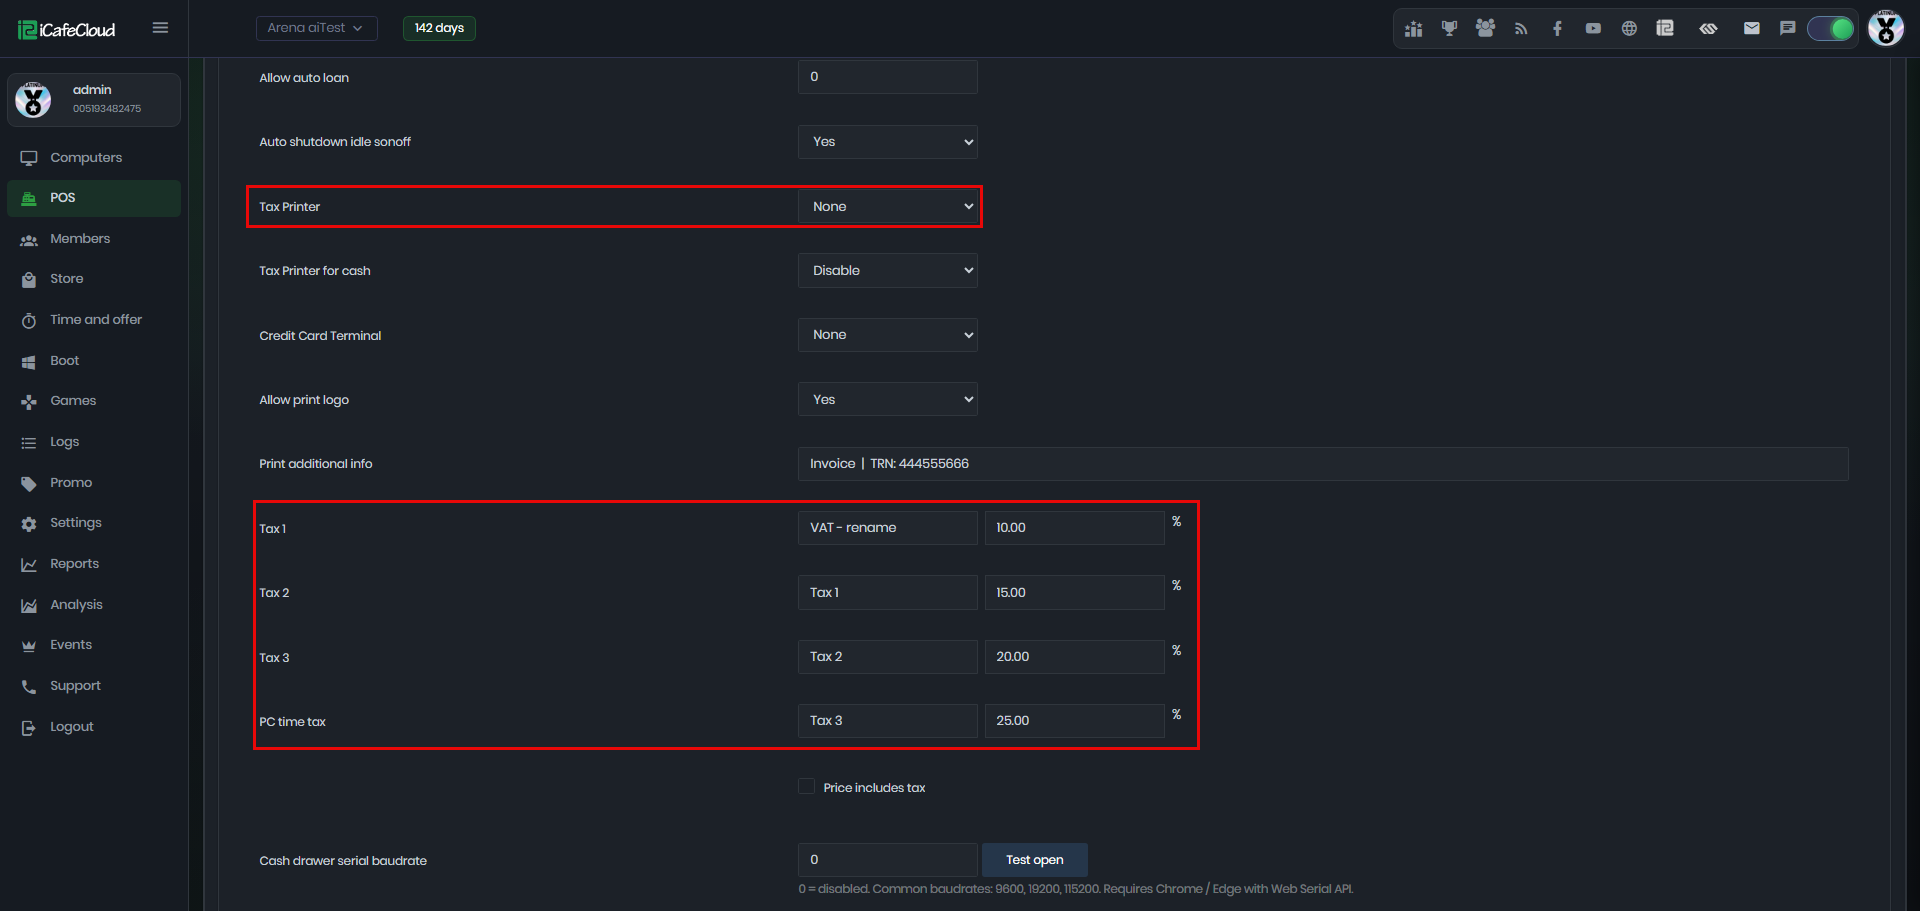
Figure 2
- You can set a tax for PC Time using the ‘PC Time Tax’ option.If the product price already includes tax, enable ‘Tax Calculation Included in Price’. Otherwise, the tax will be added separately to the final price. (Figure 3)
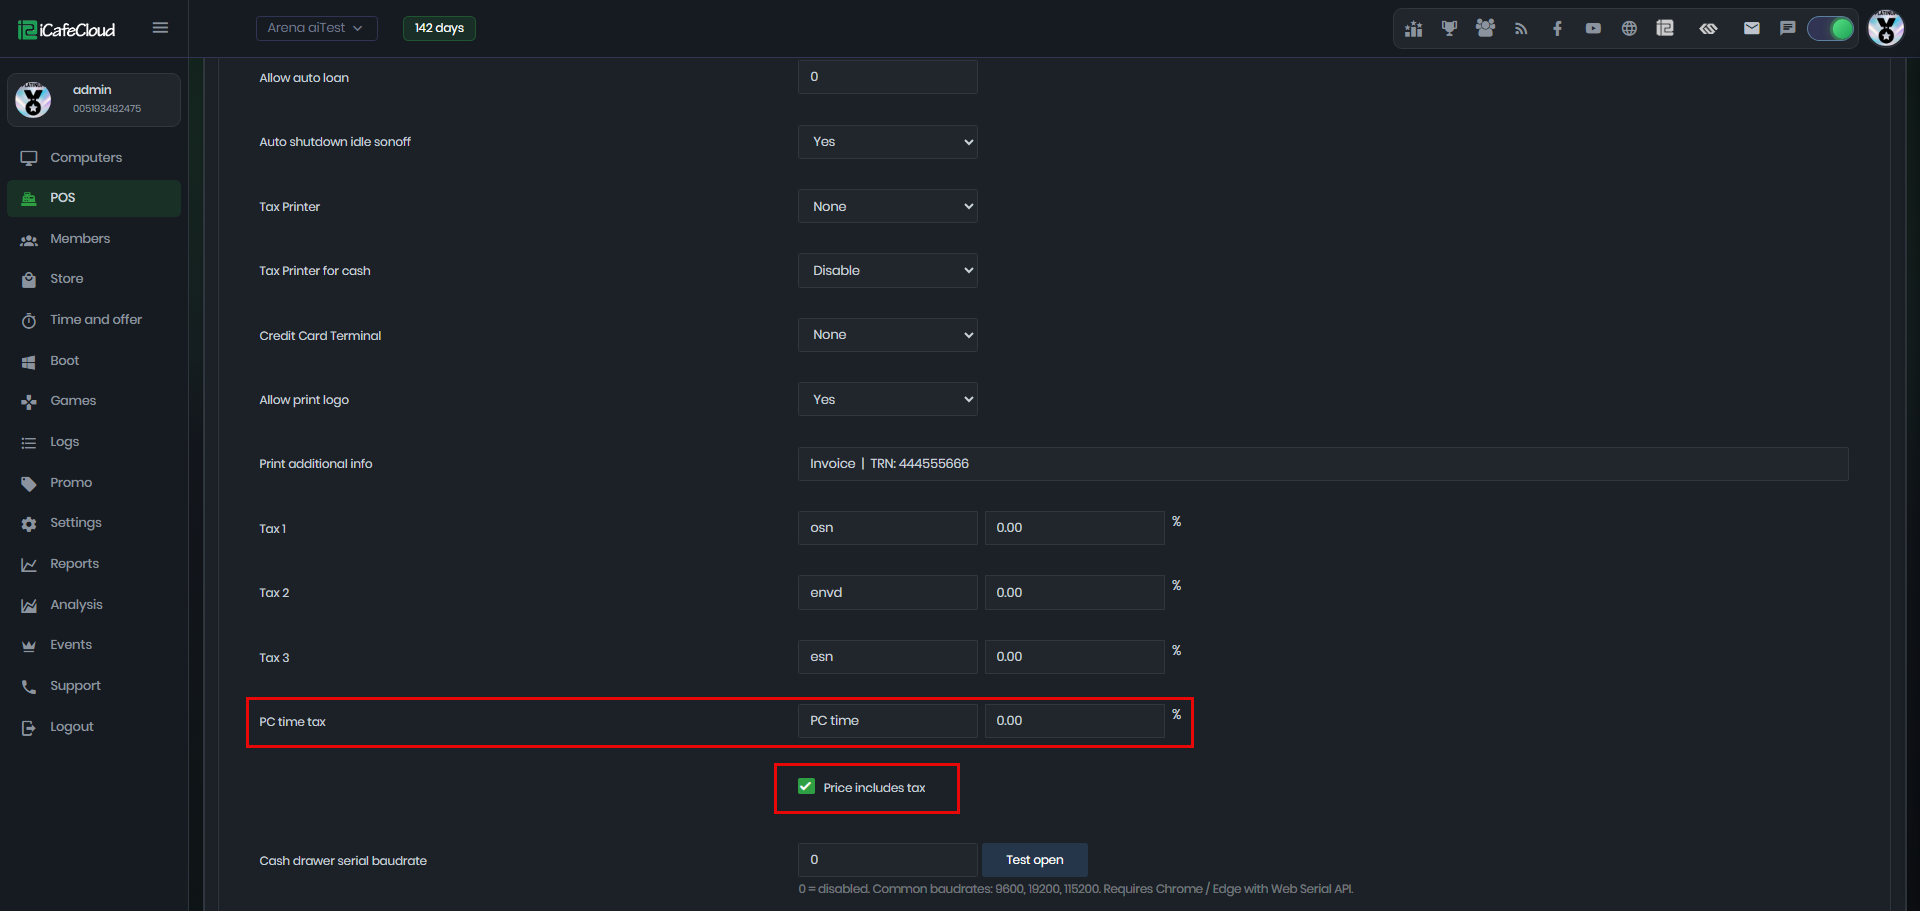
Figure 3
- Some other Tax Printer options, such as KKM Server, use predefined tax lists based on government tax regulations. In these cases, the tax values cannot be edited manually, but you can choose from the available tax options. (Figure 4)
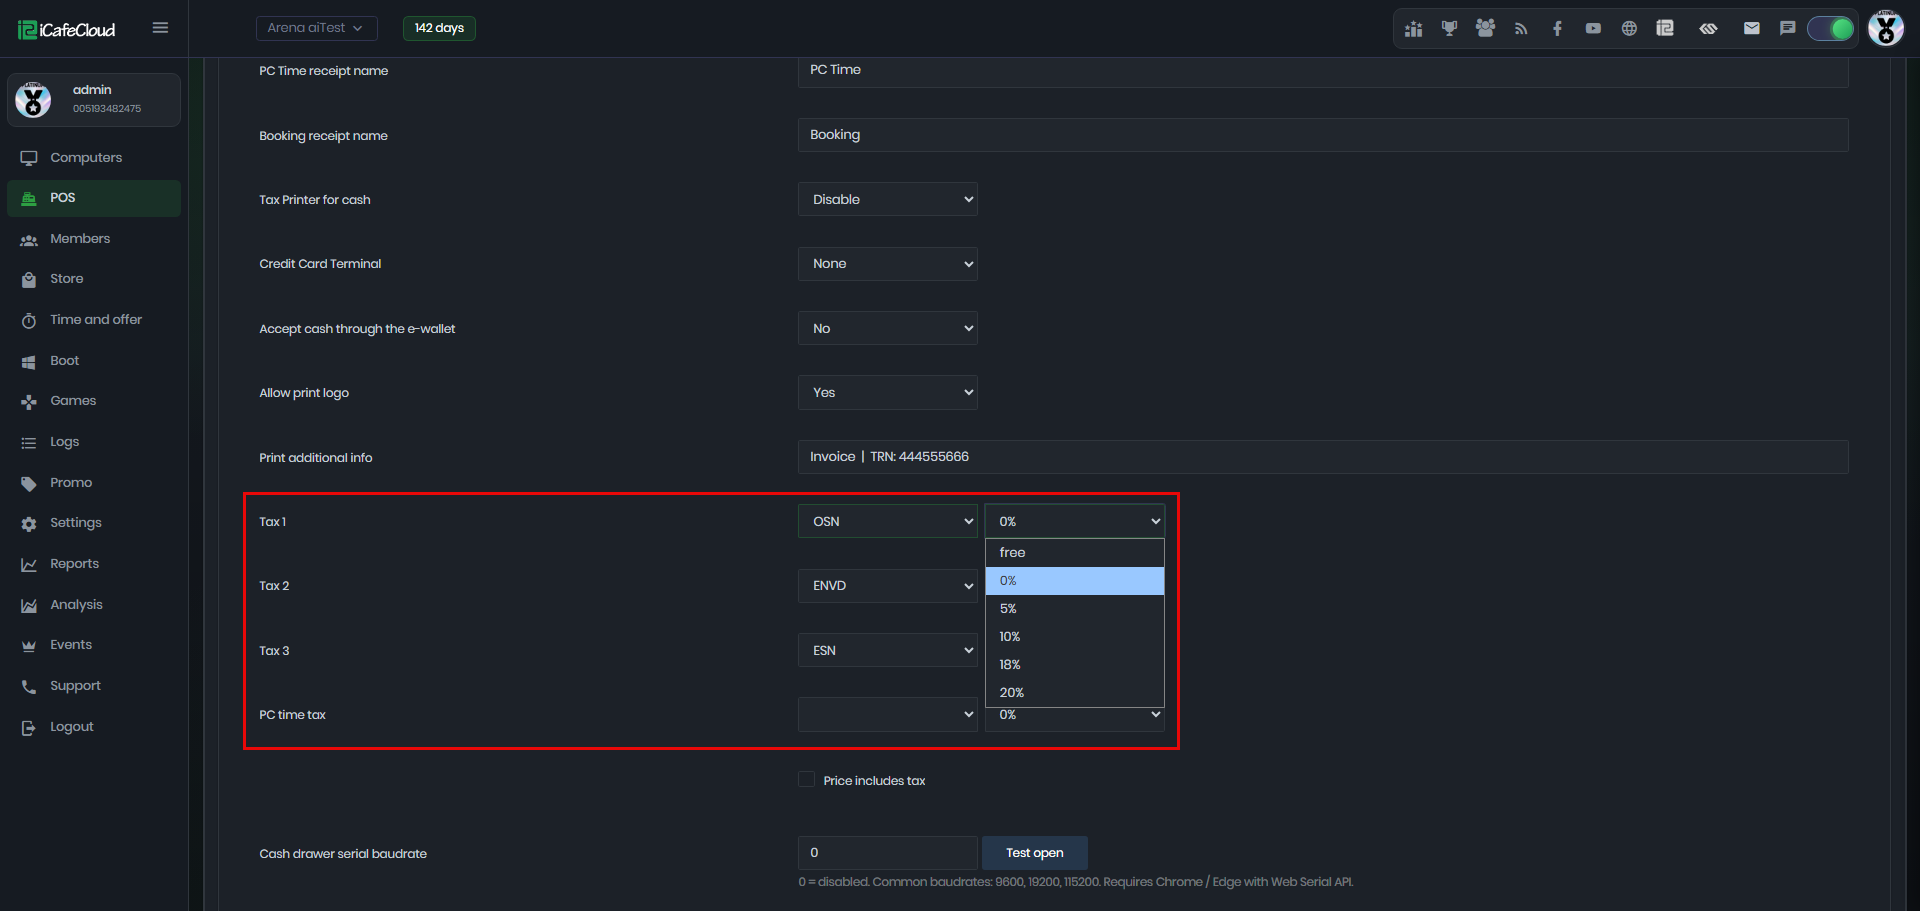
Figure 4
- When creating products, a tax option is required. If no tax applies, you can create a tax option with a value of 0% and select it when adding a new product or offer.