2025-09-12
pc, computer, booking, console
The following allows cashiers to reserve PCs and devices for members, ensuring exclusive use during the booking period with bookings created via the iCafeCloud web interface.
Booking for members
- Go to the Computer page on iCafeCloud Web click to the Bookings and then click Book .(Figure 1)
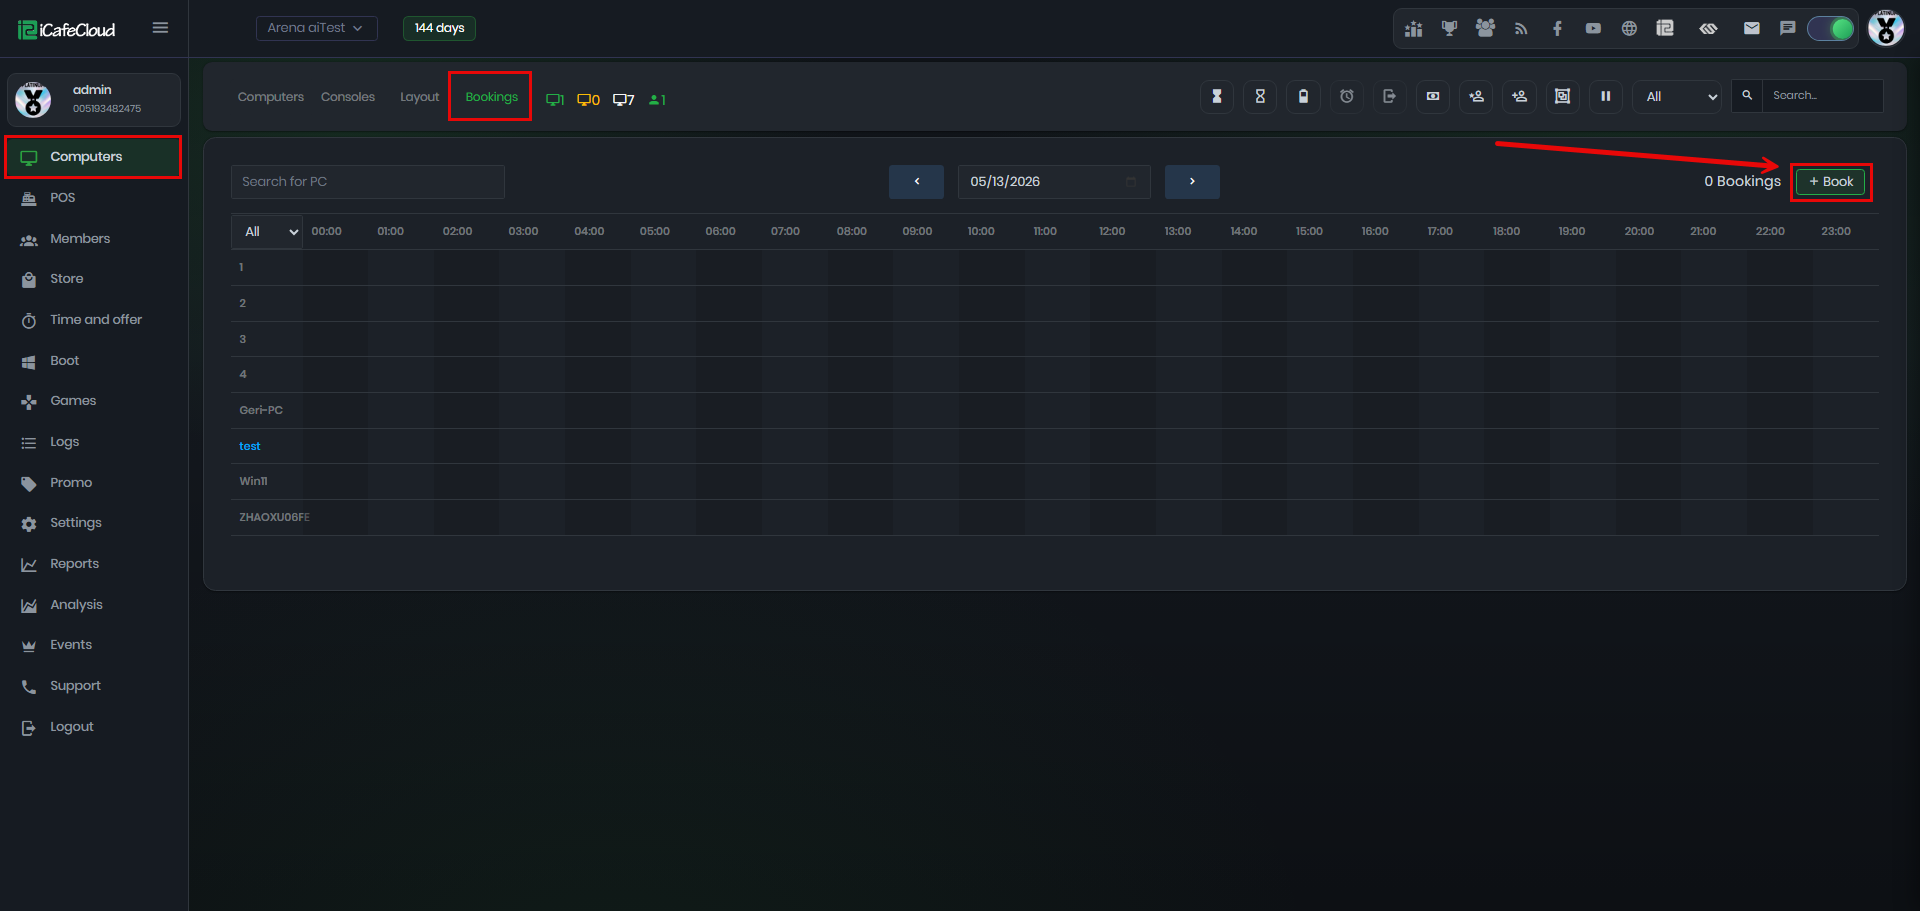
Figure 1
- You can choose which group you want to display(Figure 2).
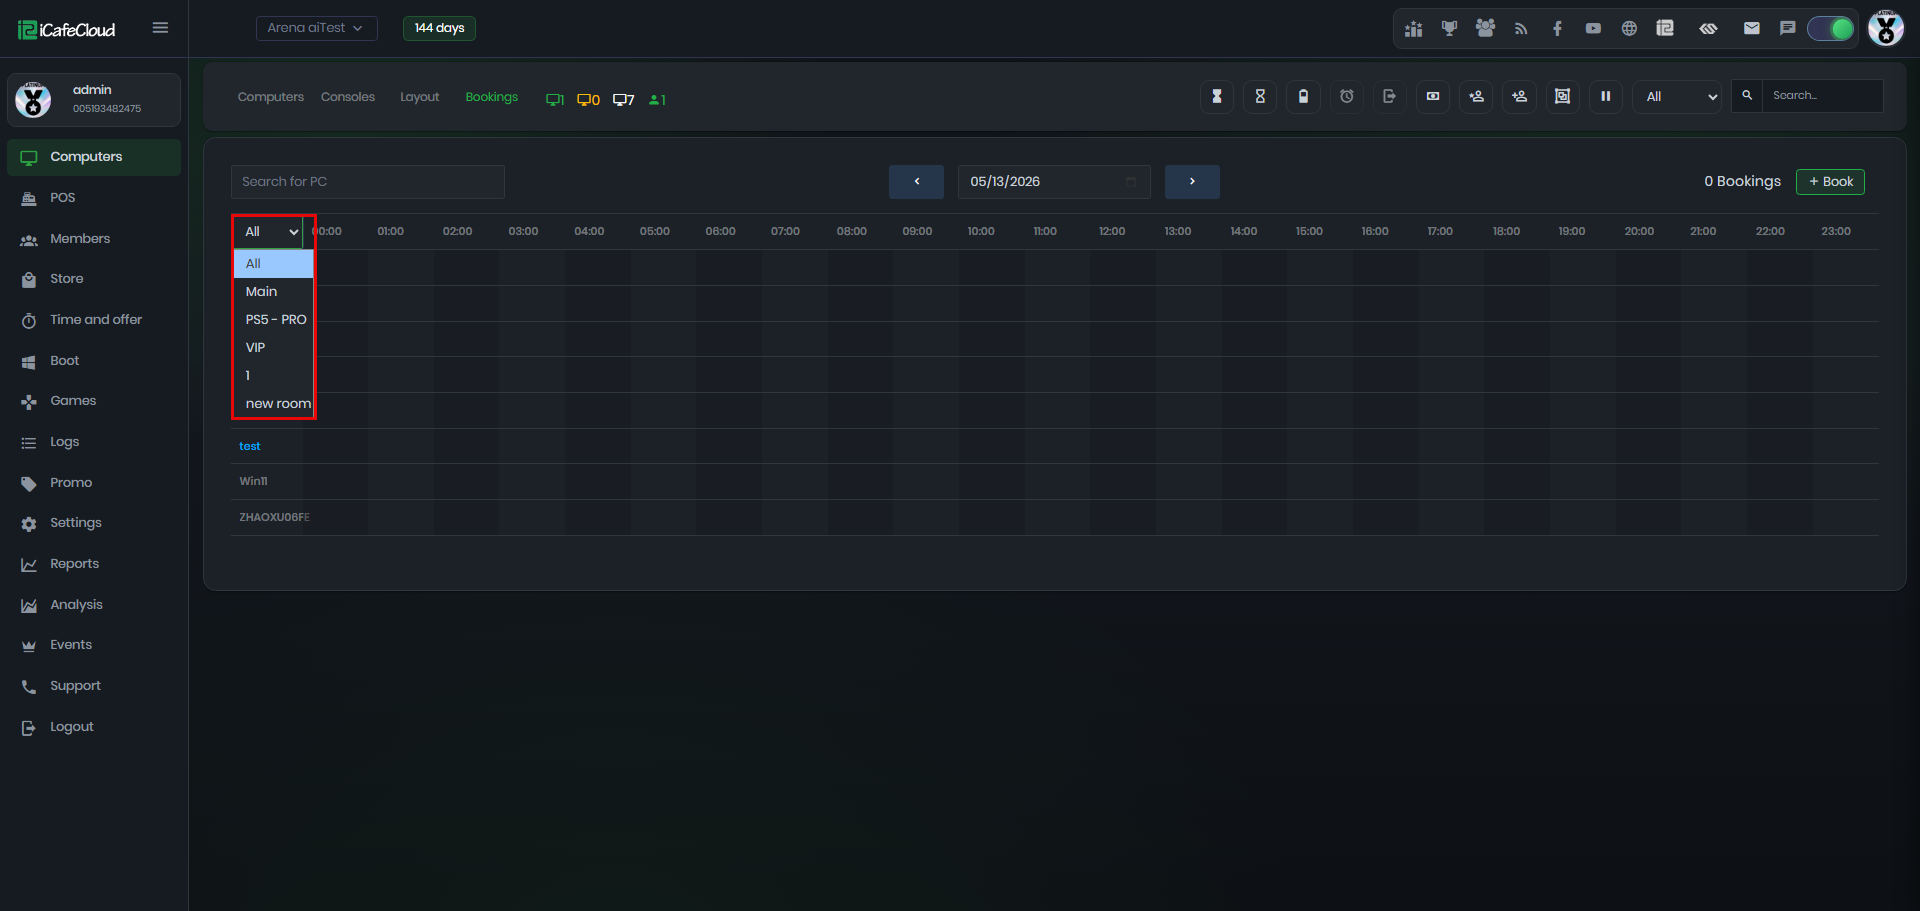
Figure 2
- In Create Booking, you can choose between three options: Hold Only, Time Booking, and Offer Booking. These options can be configured in Booking Settings.(Figure 3)
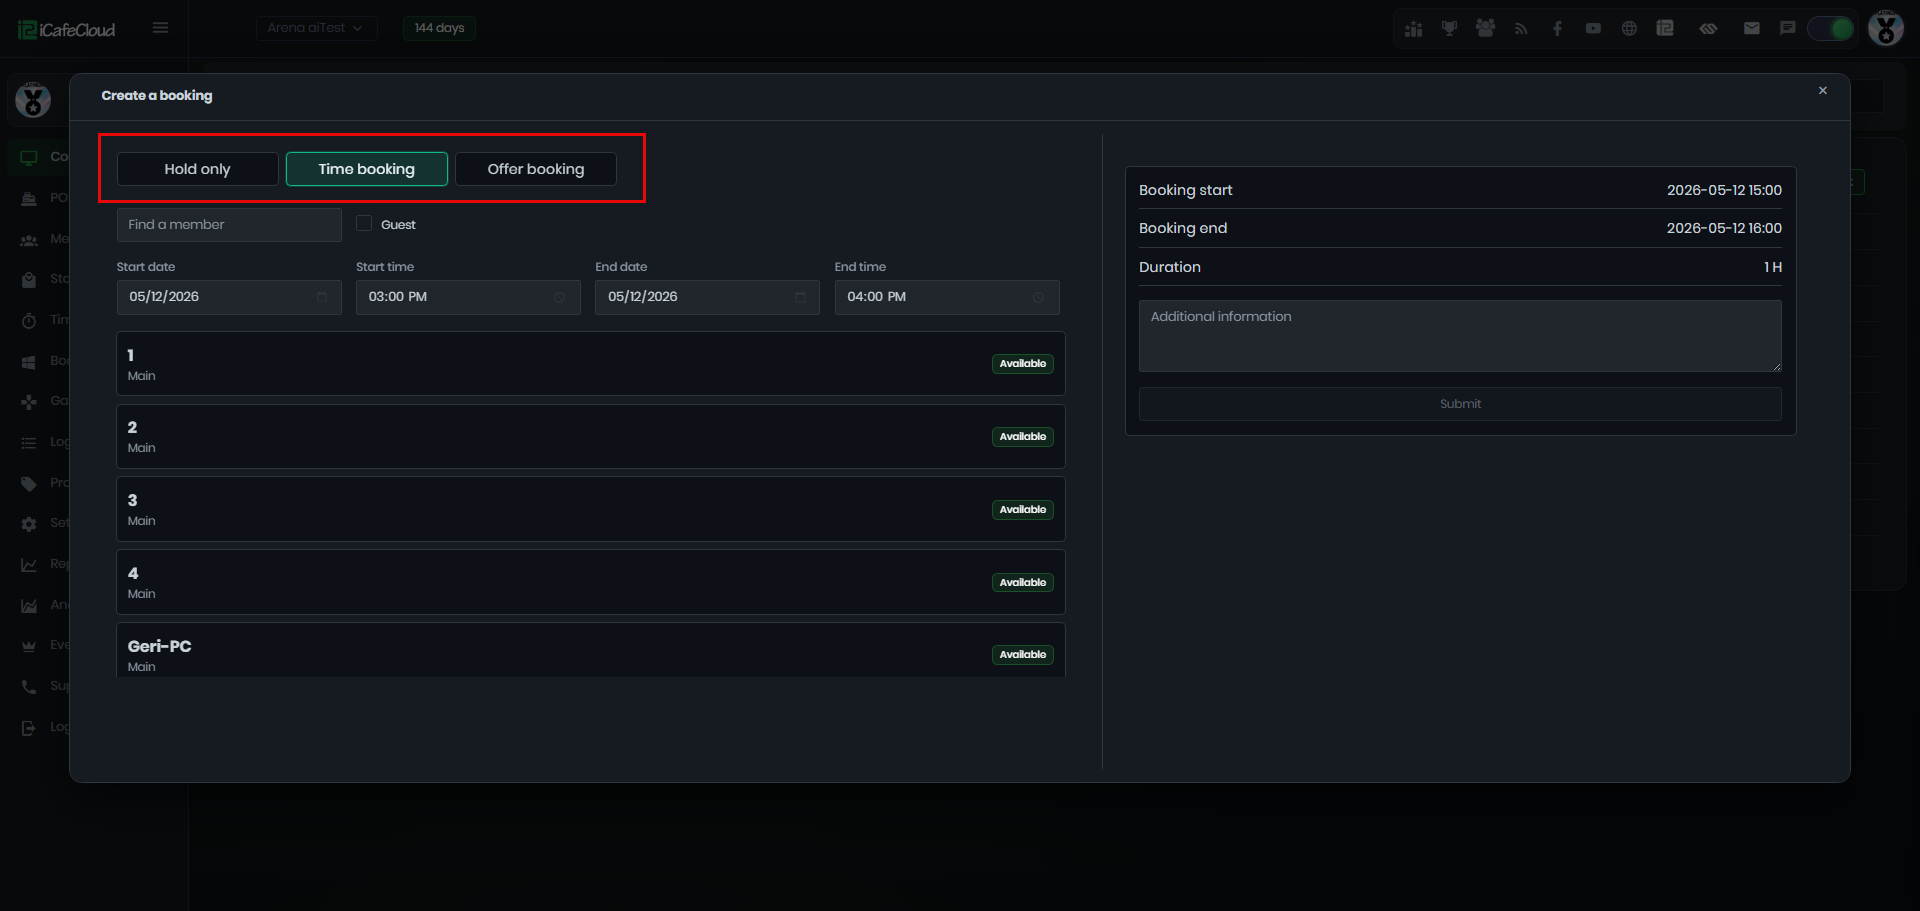
Figure 3
- Find a member: Start typing the member’s name, and suggestions will automatically appear based on the entered letters.
Reservation date: Choose the date of the booking
Start Time: Choose the time when the booking should begin.
End time: Choose the time when the booking should end.
Choose PCs: Choose a PC or many PCs to book (Figure 4)
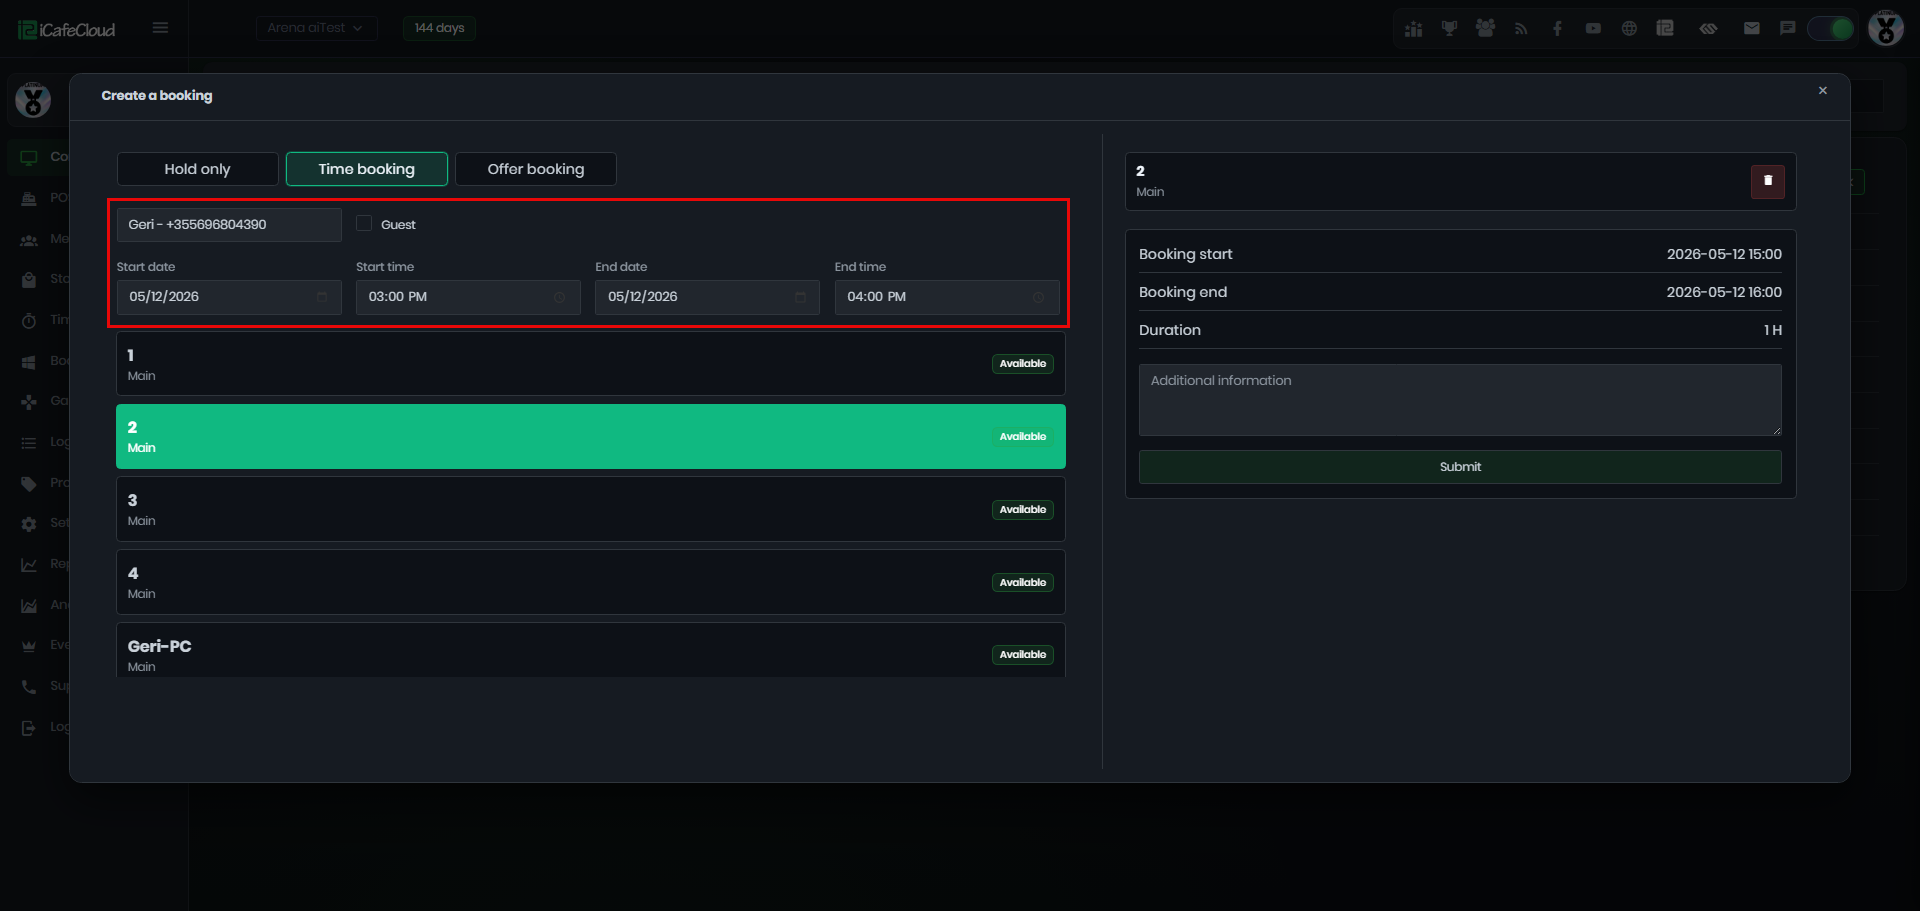
Figure 4
- Booking can be canceled.
- If allow booking when the pc is online is enabled:
a) Booking PC CP will show In use (Bookable) (Figure 5)
b) Booking a PC from Portal members can only book an online pc after 12 hours.
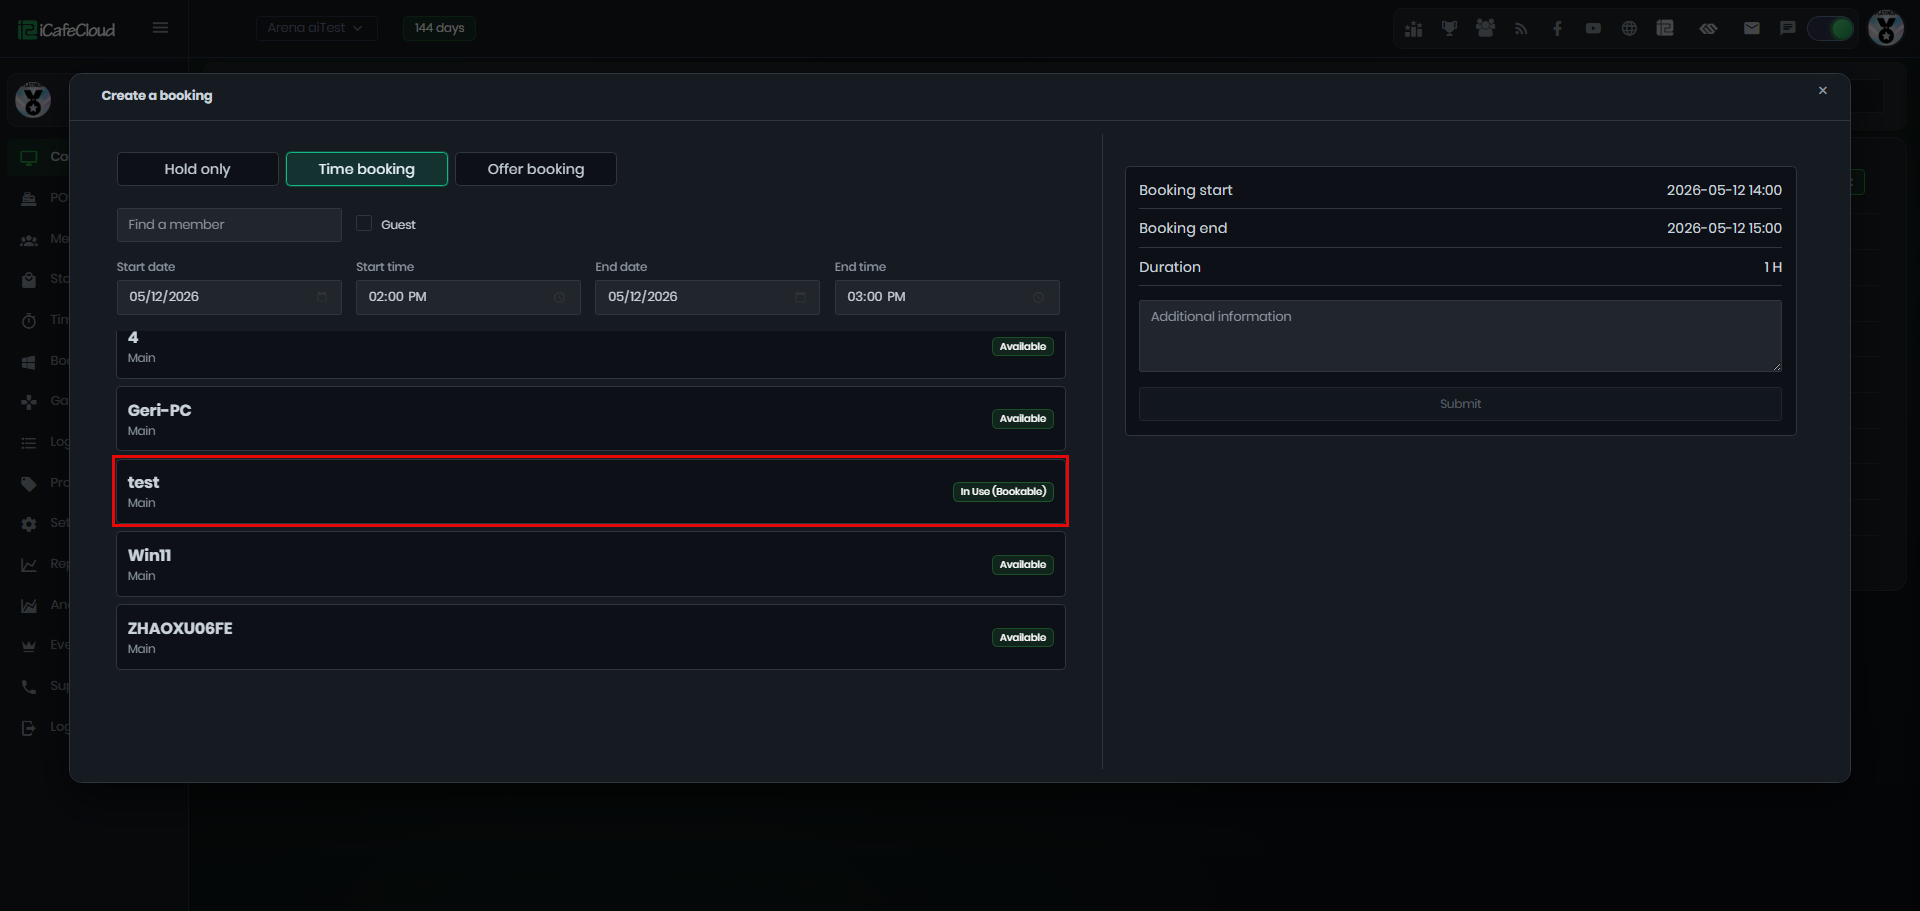
Figure 5
- The system displays the Booked PC, Reservation start time, Reservation end time, Duration of booking and the additional info. (Figure 6)
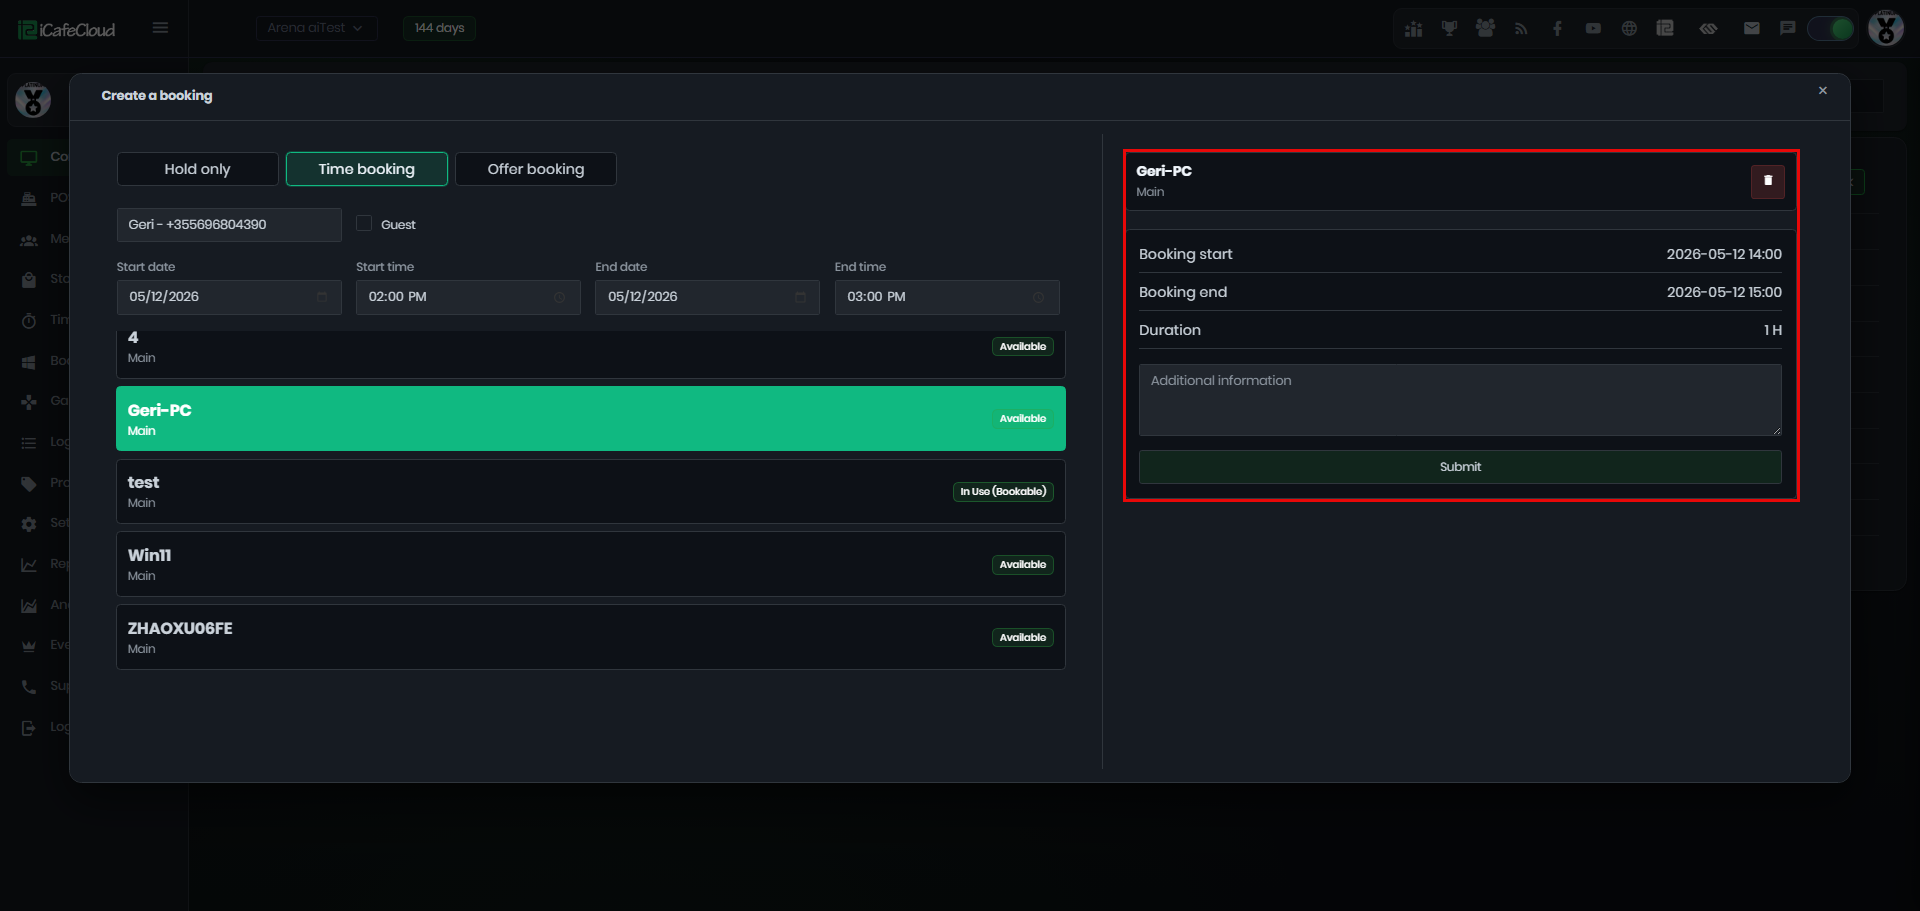
Figure 6
- You can also use batch booking, which allows you to select multiple PCs at once and book them under the same member or guest. (Figure 7)
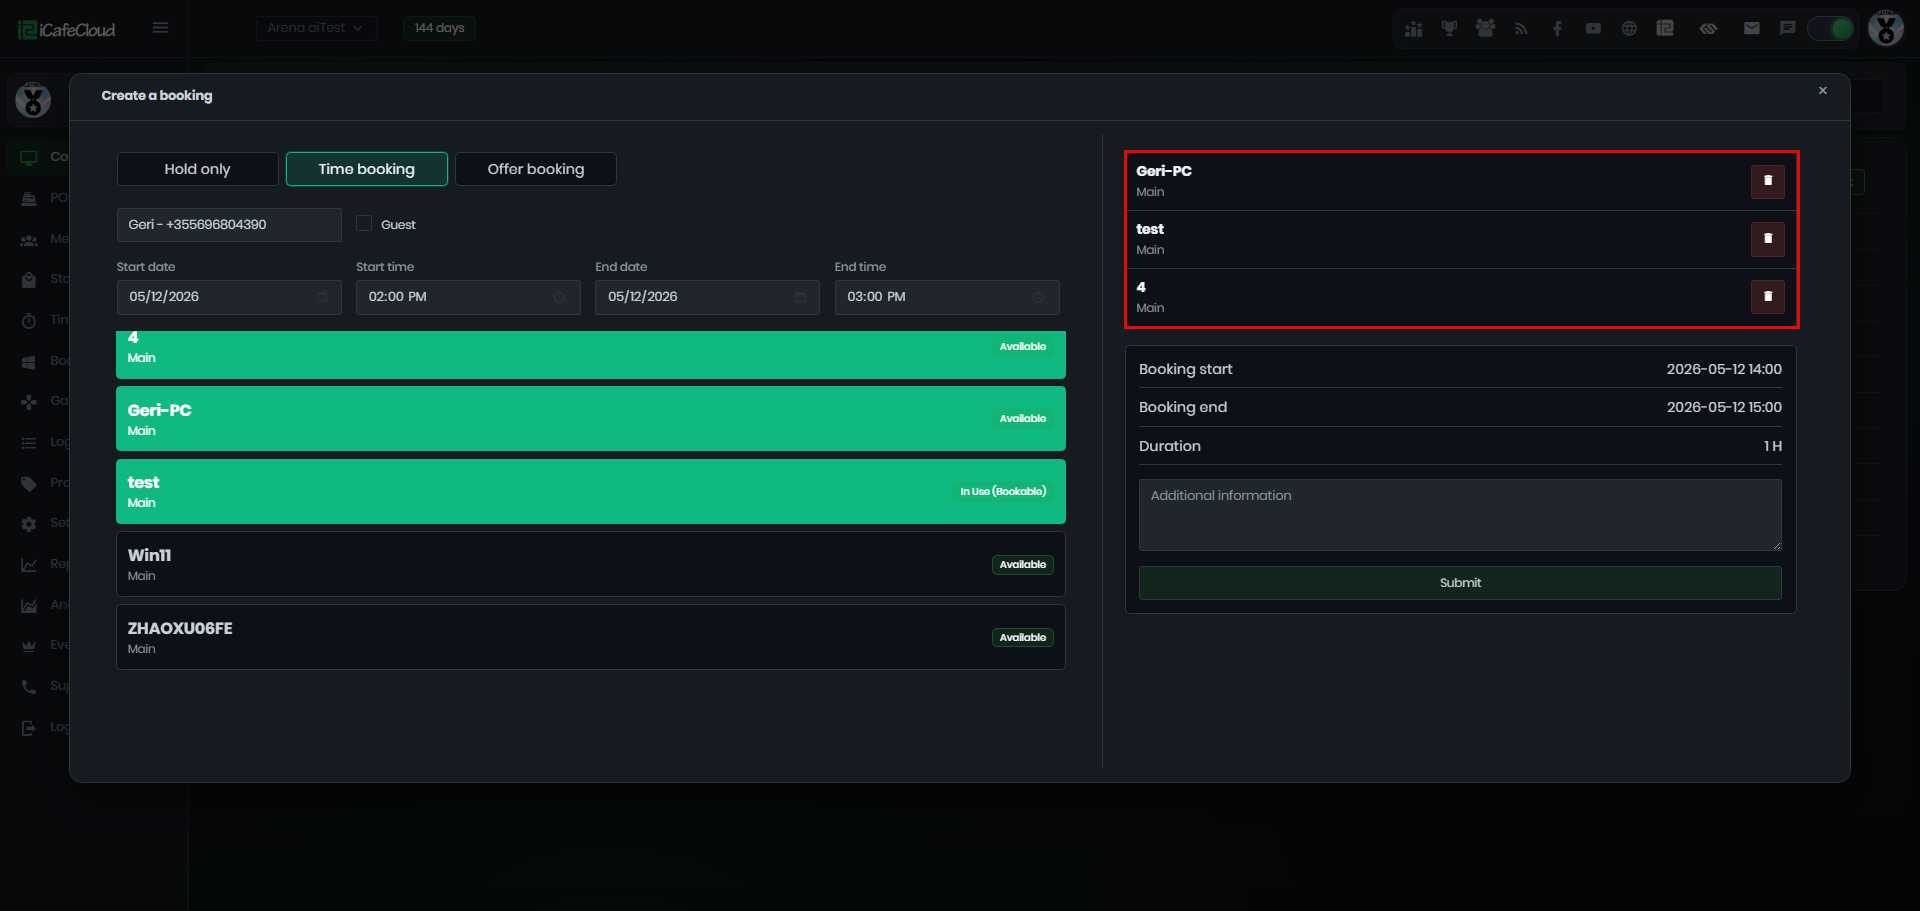
Figure 7
- If some of the selected PCs are already booked, the system will perform a partial booking by reserving only the available PCs and displaying a notification message. (Figure 8)
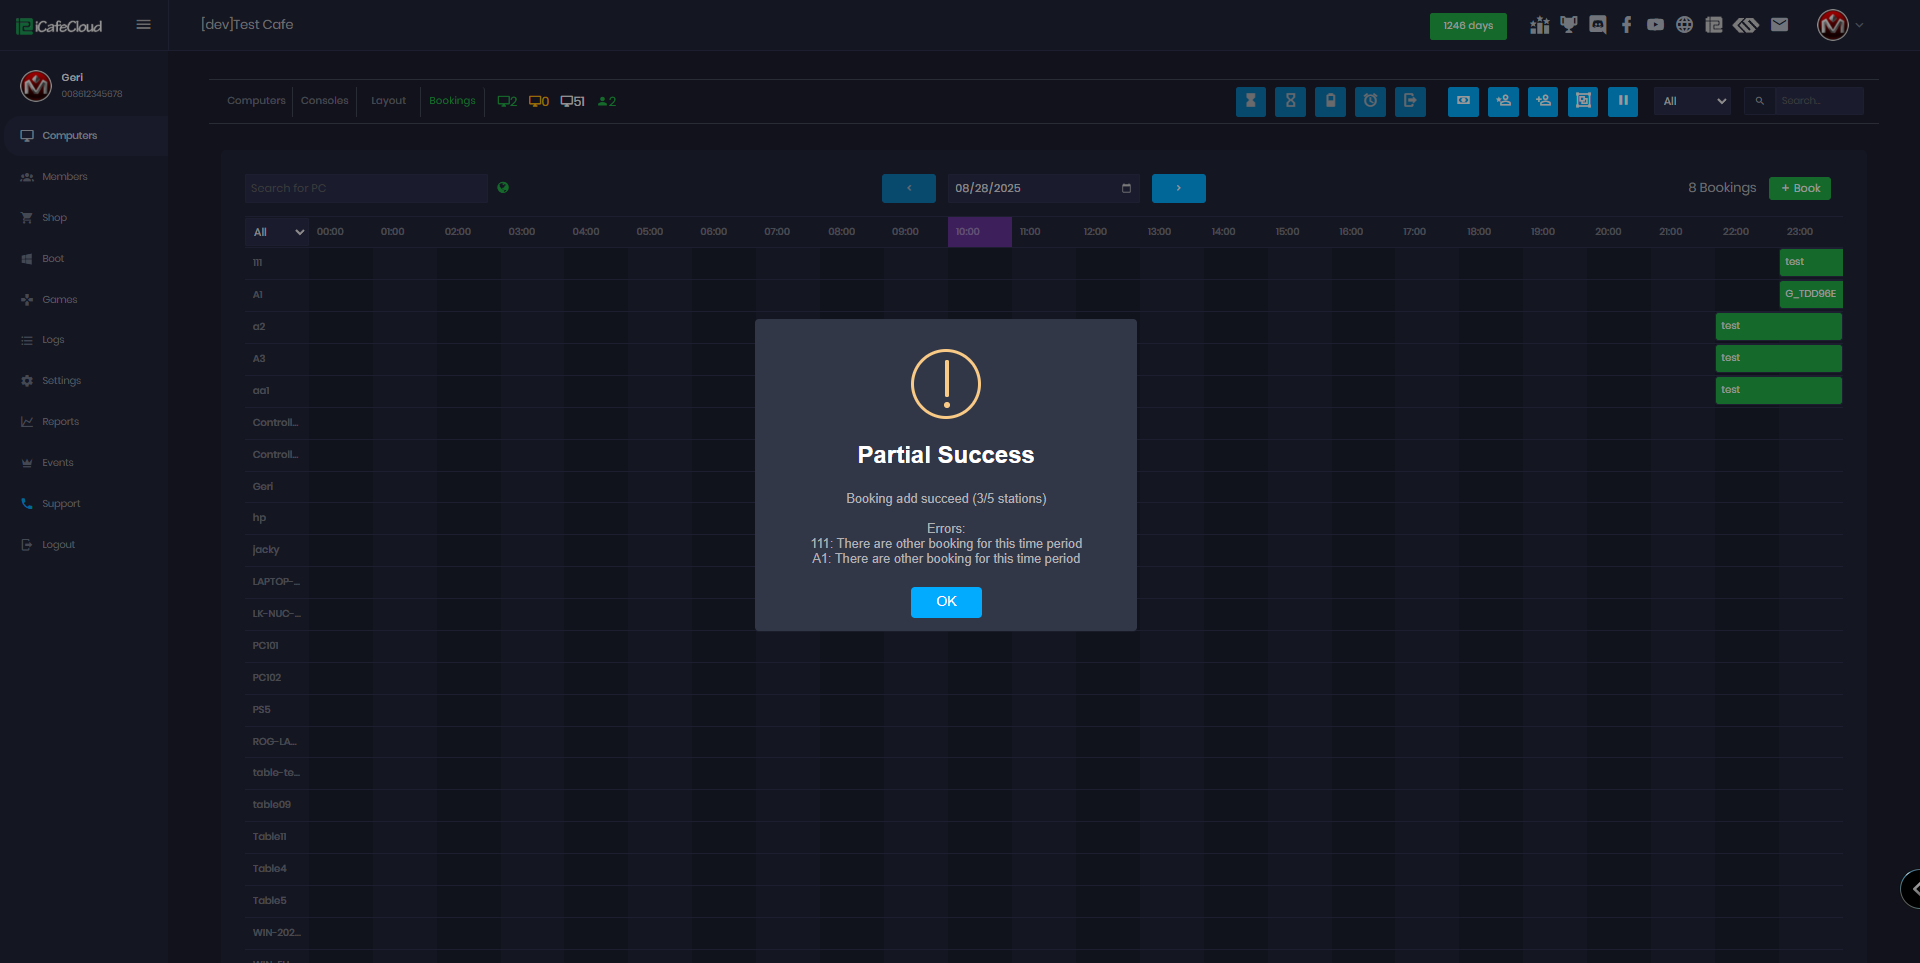
Figure 8
- All bookings will be listed in this illustration, with the X-axis representing time and the Y-axis representing the PC name. (Figure 9)
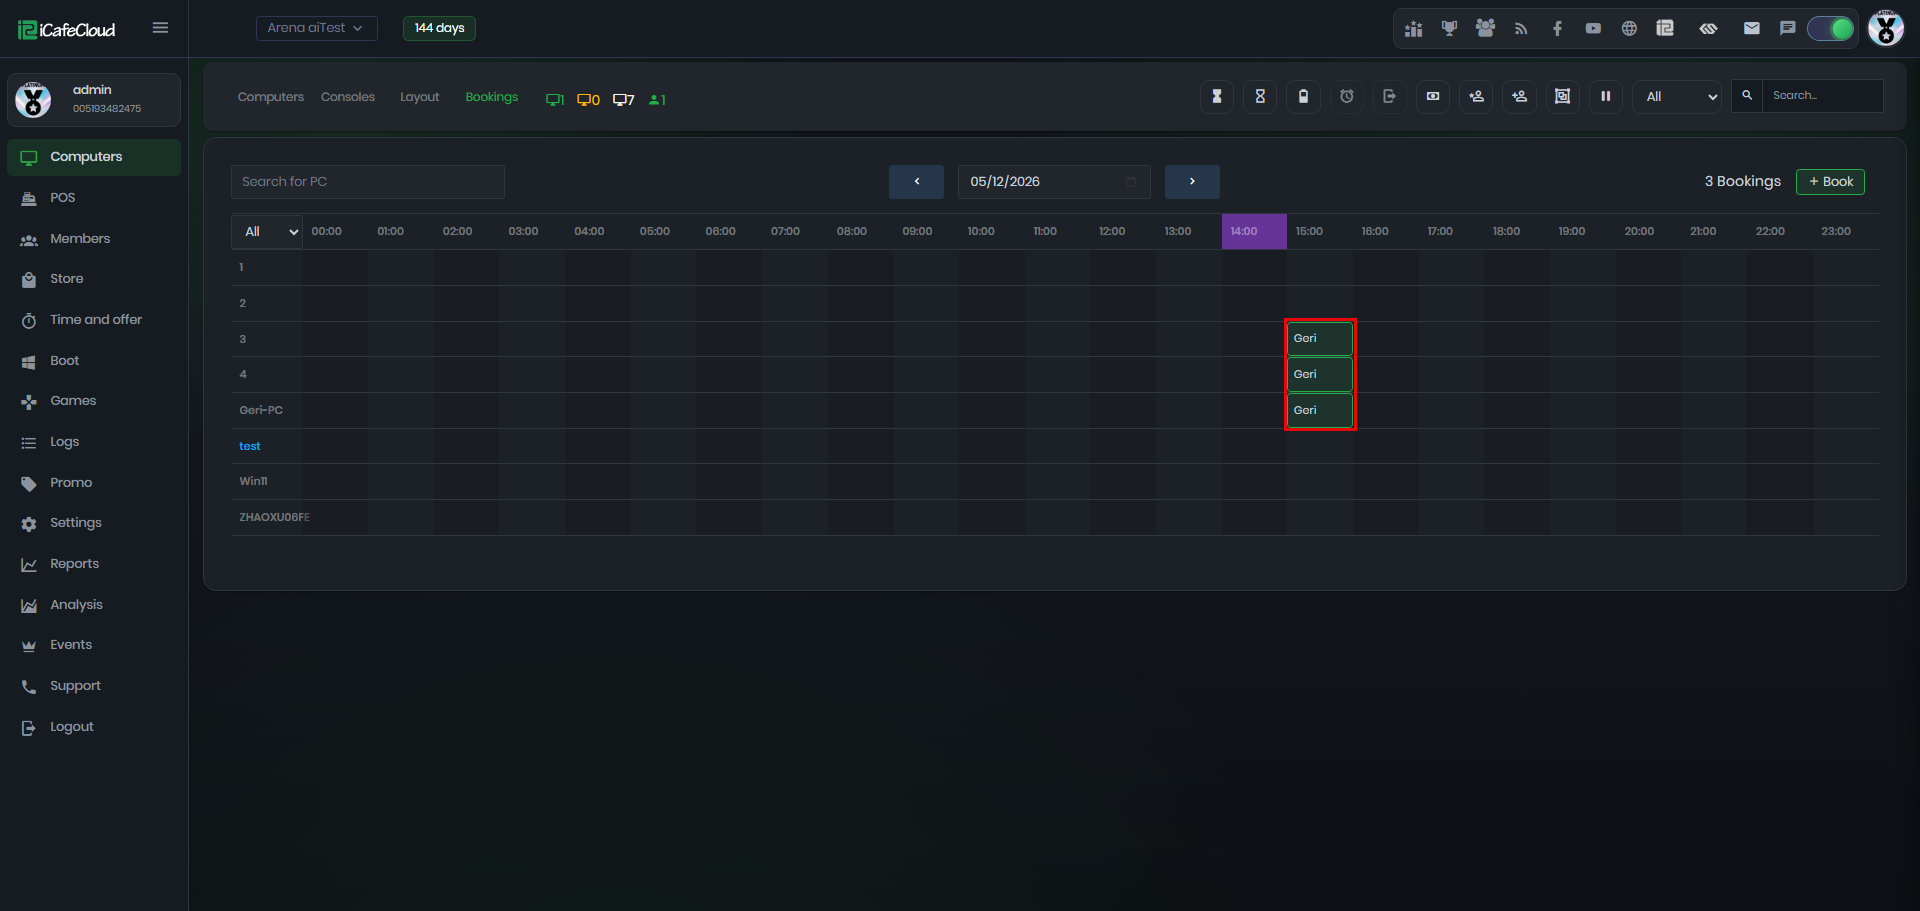
Figure 9
- Batch-booked PCs will appear in the list with an assigned password. Since they may be booked under the same account, only one PC can log in using the member account. The remaining PCs must use the provided password, which can be found in the 'Password' field of the booked PCs.(Figure 10)
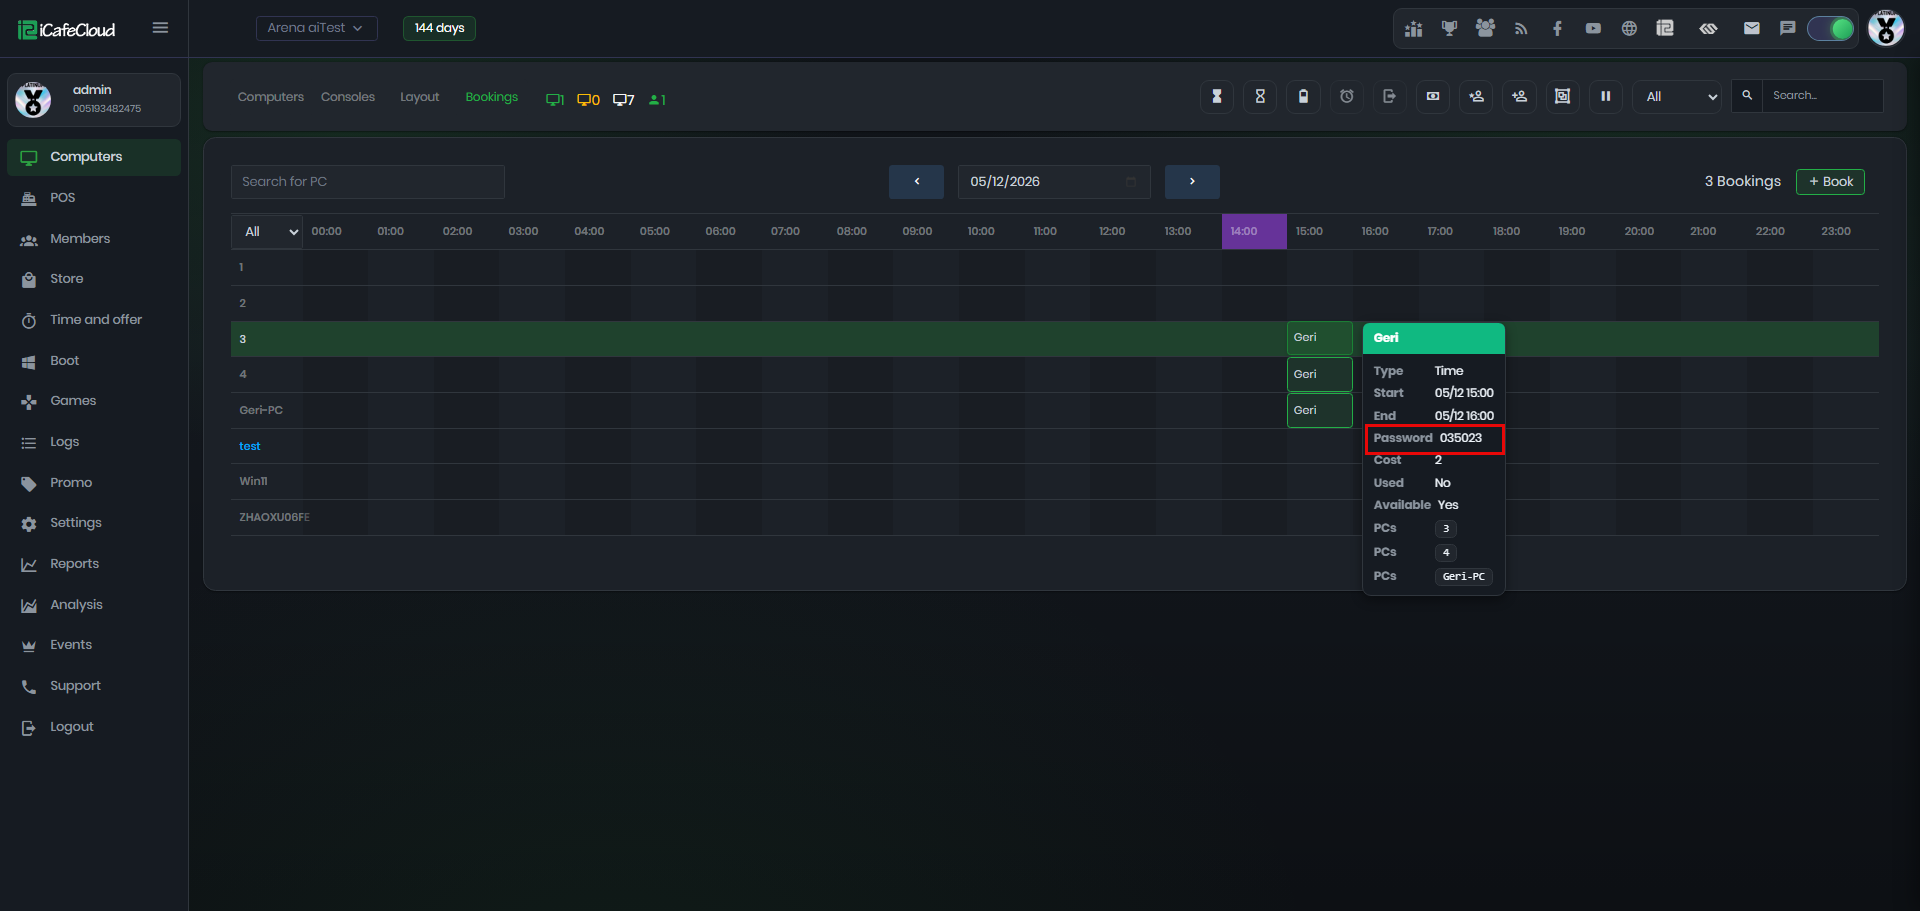
Figure 10
- The password will be sent via SMS to the mobile phone of the member who booked the PCs by configure SMS provider settings
- On the Computer page, the PC will be marked as 'Booked' and will also display a comment with the booking time.(Figure 11)
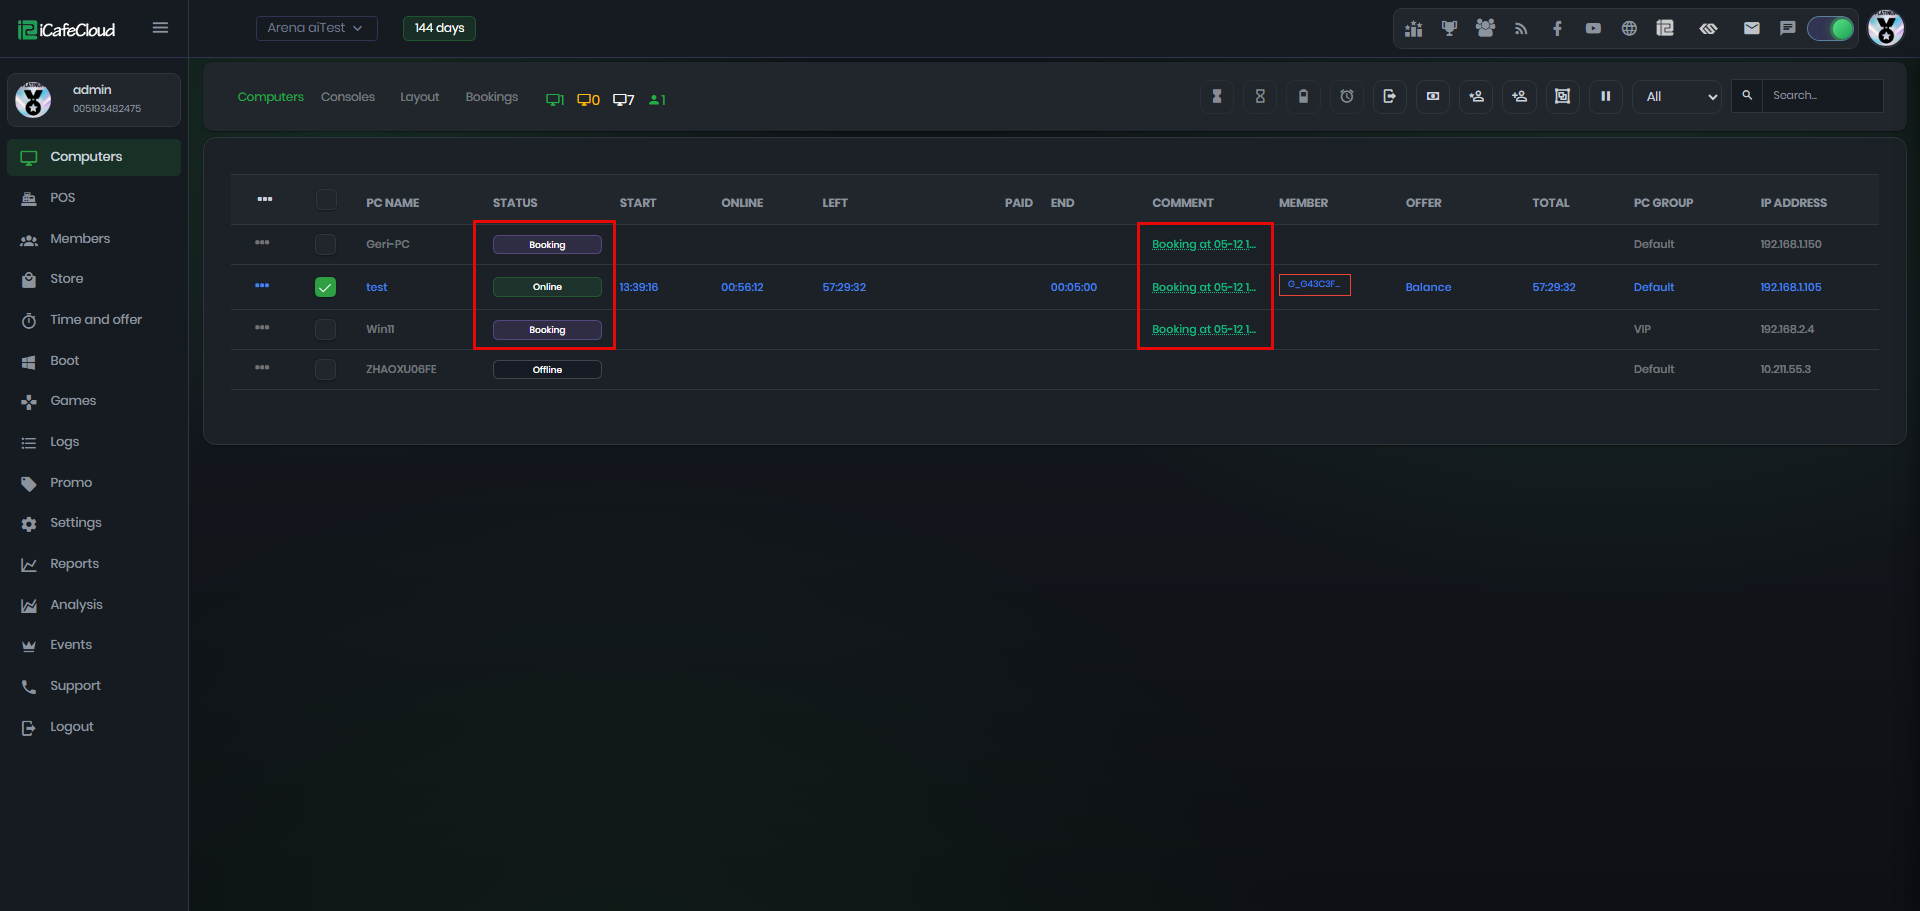
Figure 11
- If a PC is already booked and a session is started that could affect the booking time, a notification will appear and the session will not be allowed to start. (Figure 12)
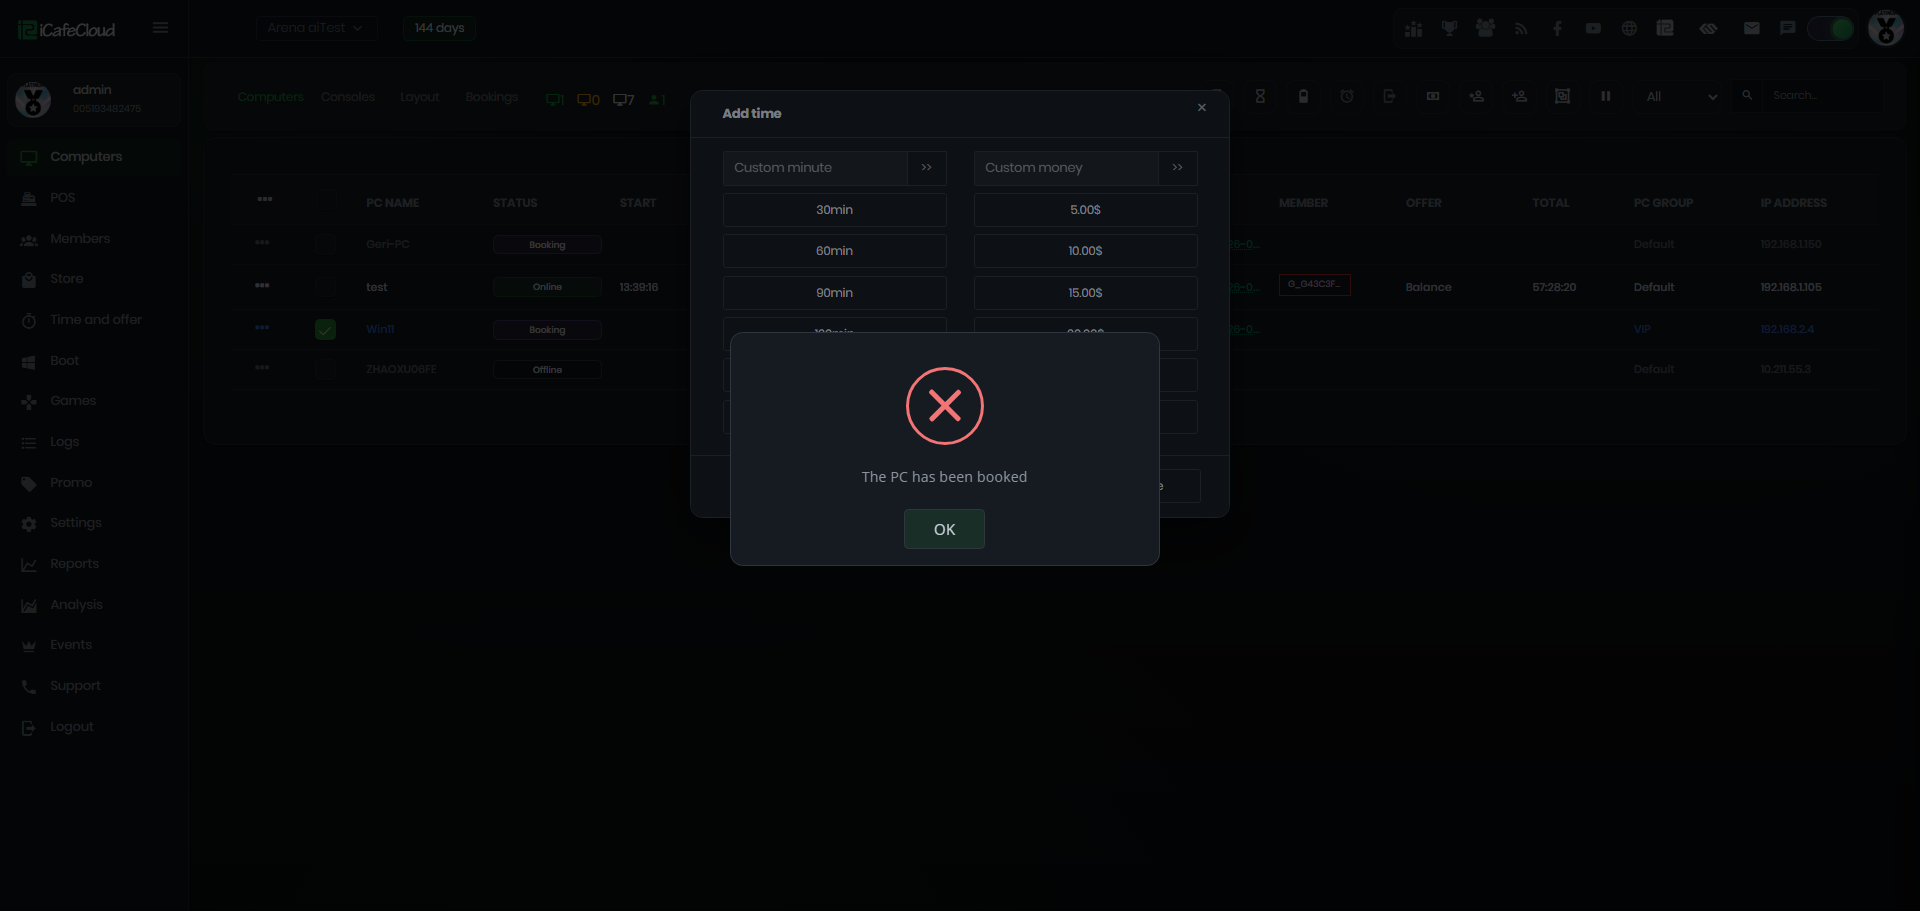
Figure 12
- Booking cannot be initiated if the booking time is outside the center's opening time.
- On the client login page, a notification will be displayed indicating that the PC is reserved, along with the remaining booking time and the booking status. The member account that made the booking can log in directly using their credentials. (Figure 13)
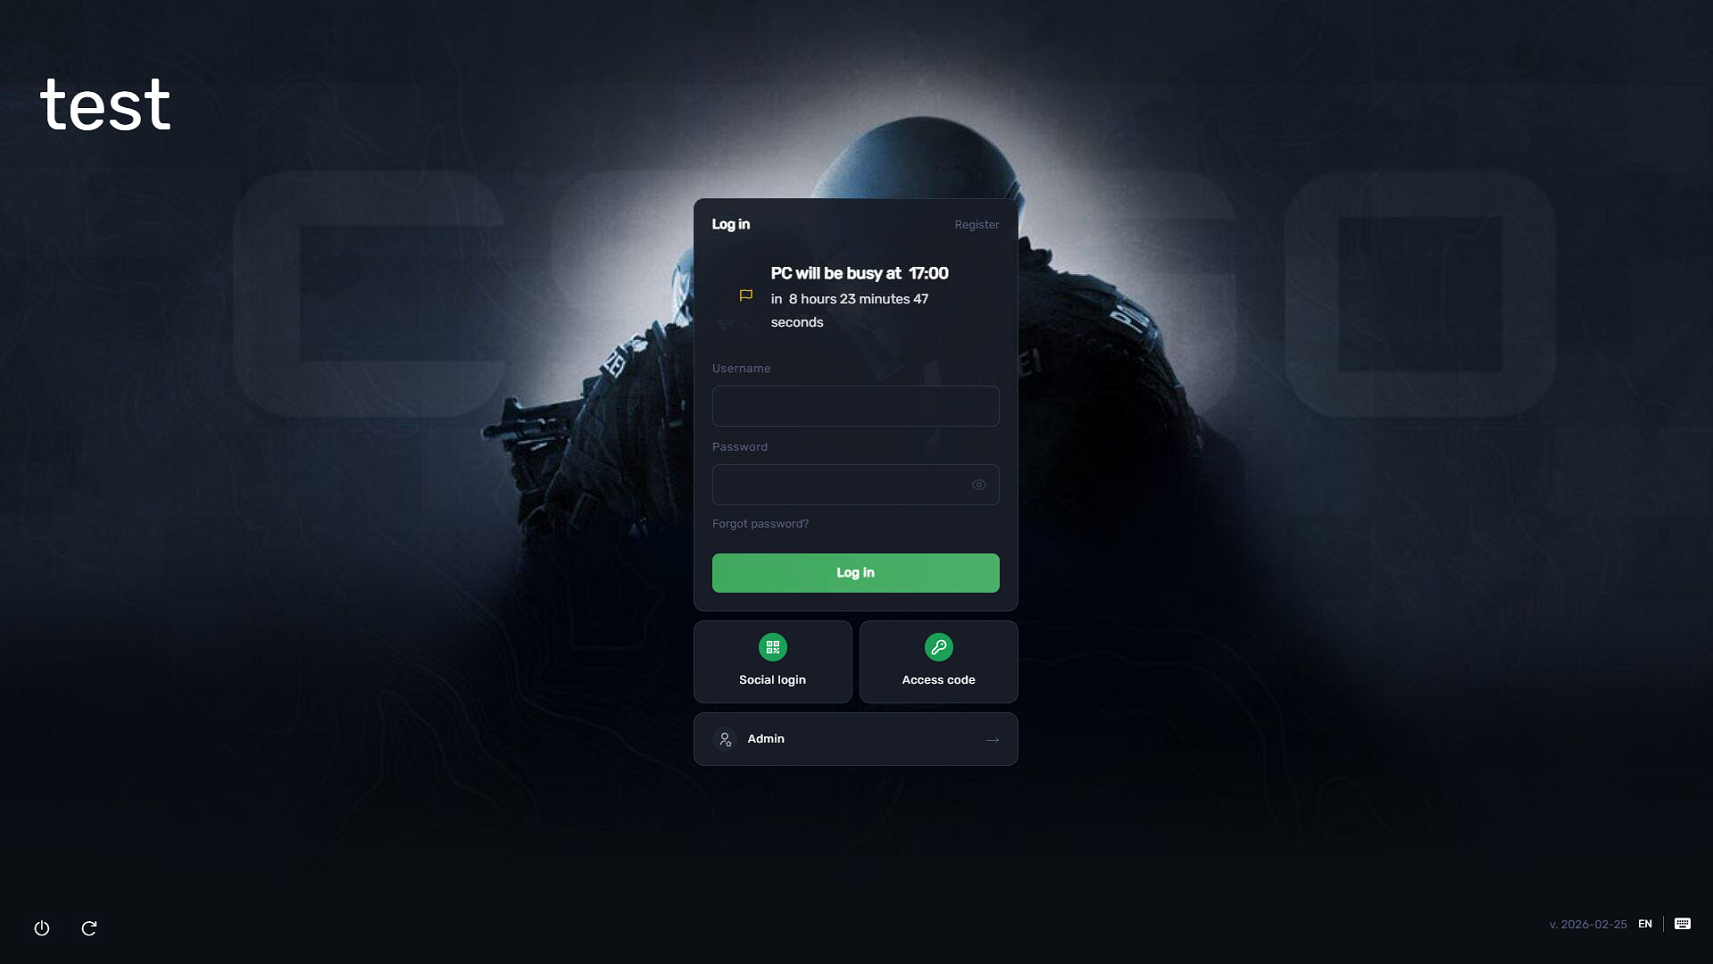
Figure 13
- Other PCs in the batch booking must use their own accounts. When they attempt to log in, a window will appear showing the booking details and prompting for the password, which can be found in the comments. (Figure 14)
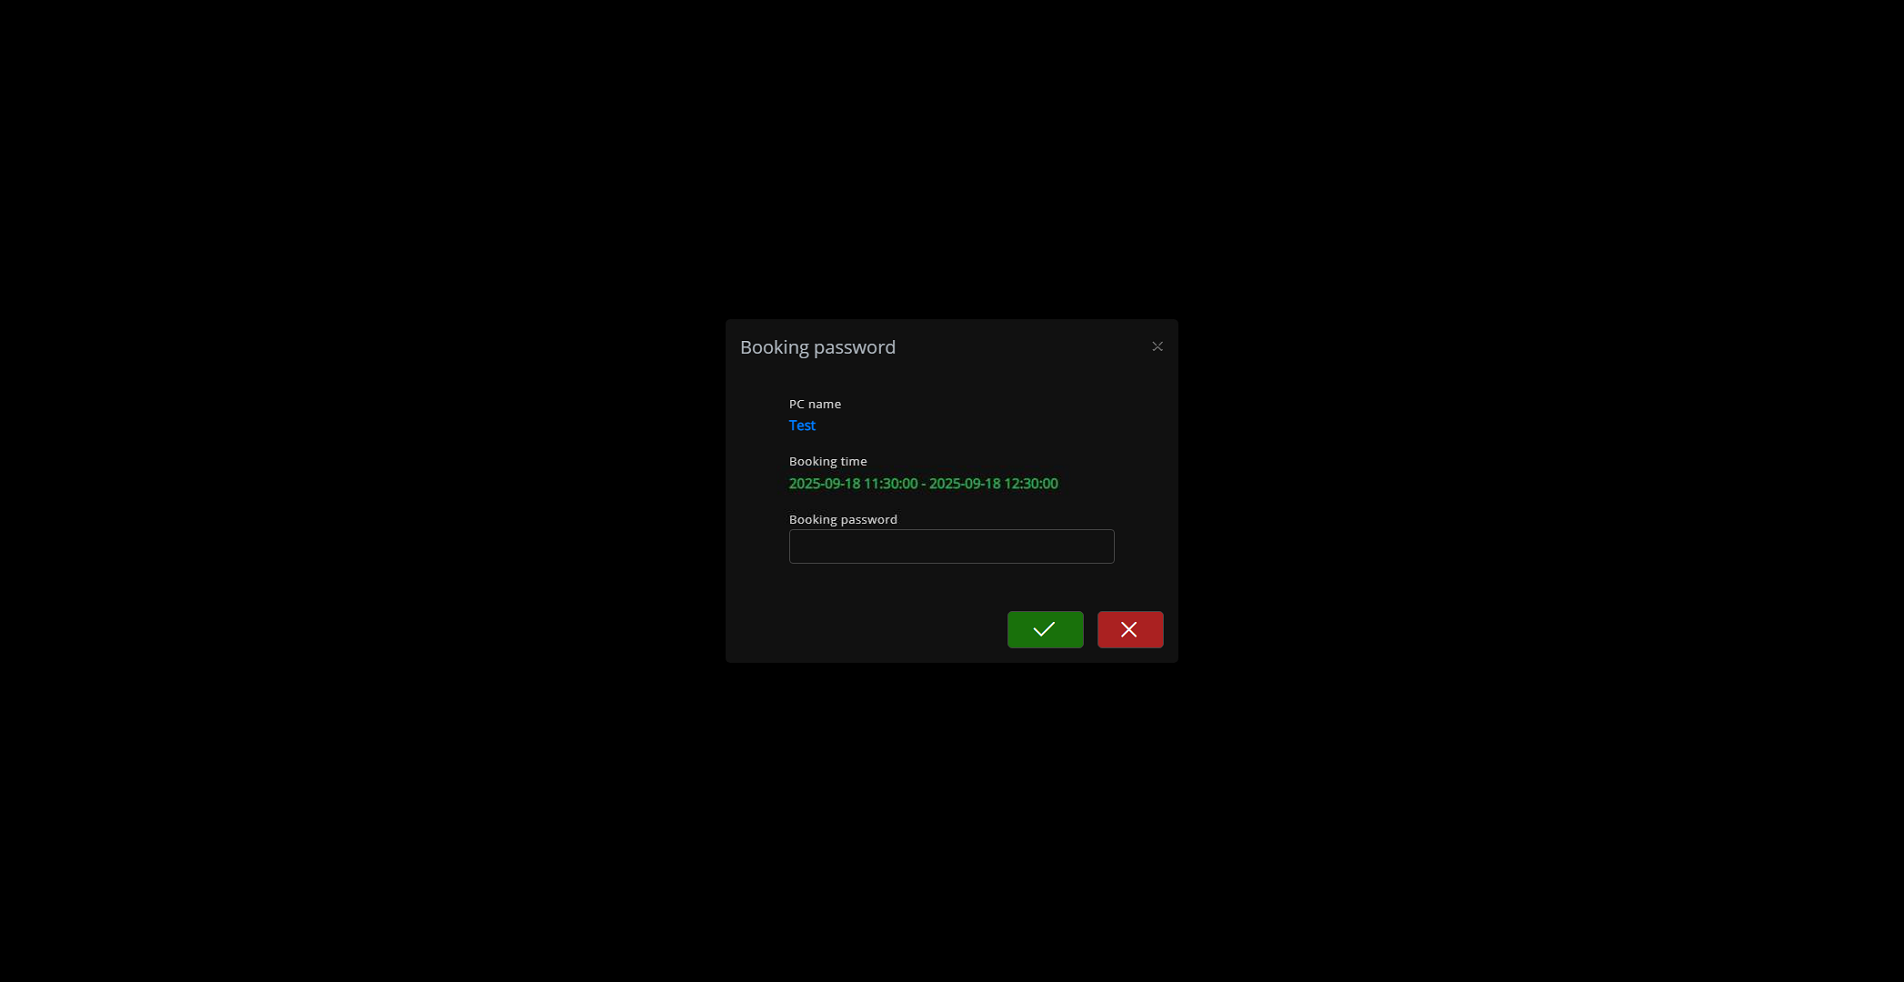
Figure 14
- Once the password is entered, the PC will log in and the member’s session will start.
Booking for guests
- To indicate someone as a guest, click the guest box and if needed, you can manually add the person’s name in the additional info for reference. (Figure 1)
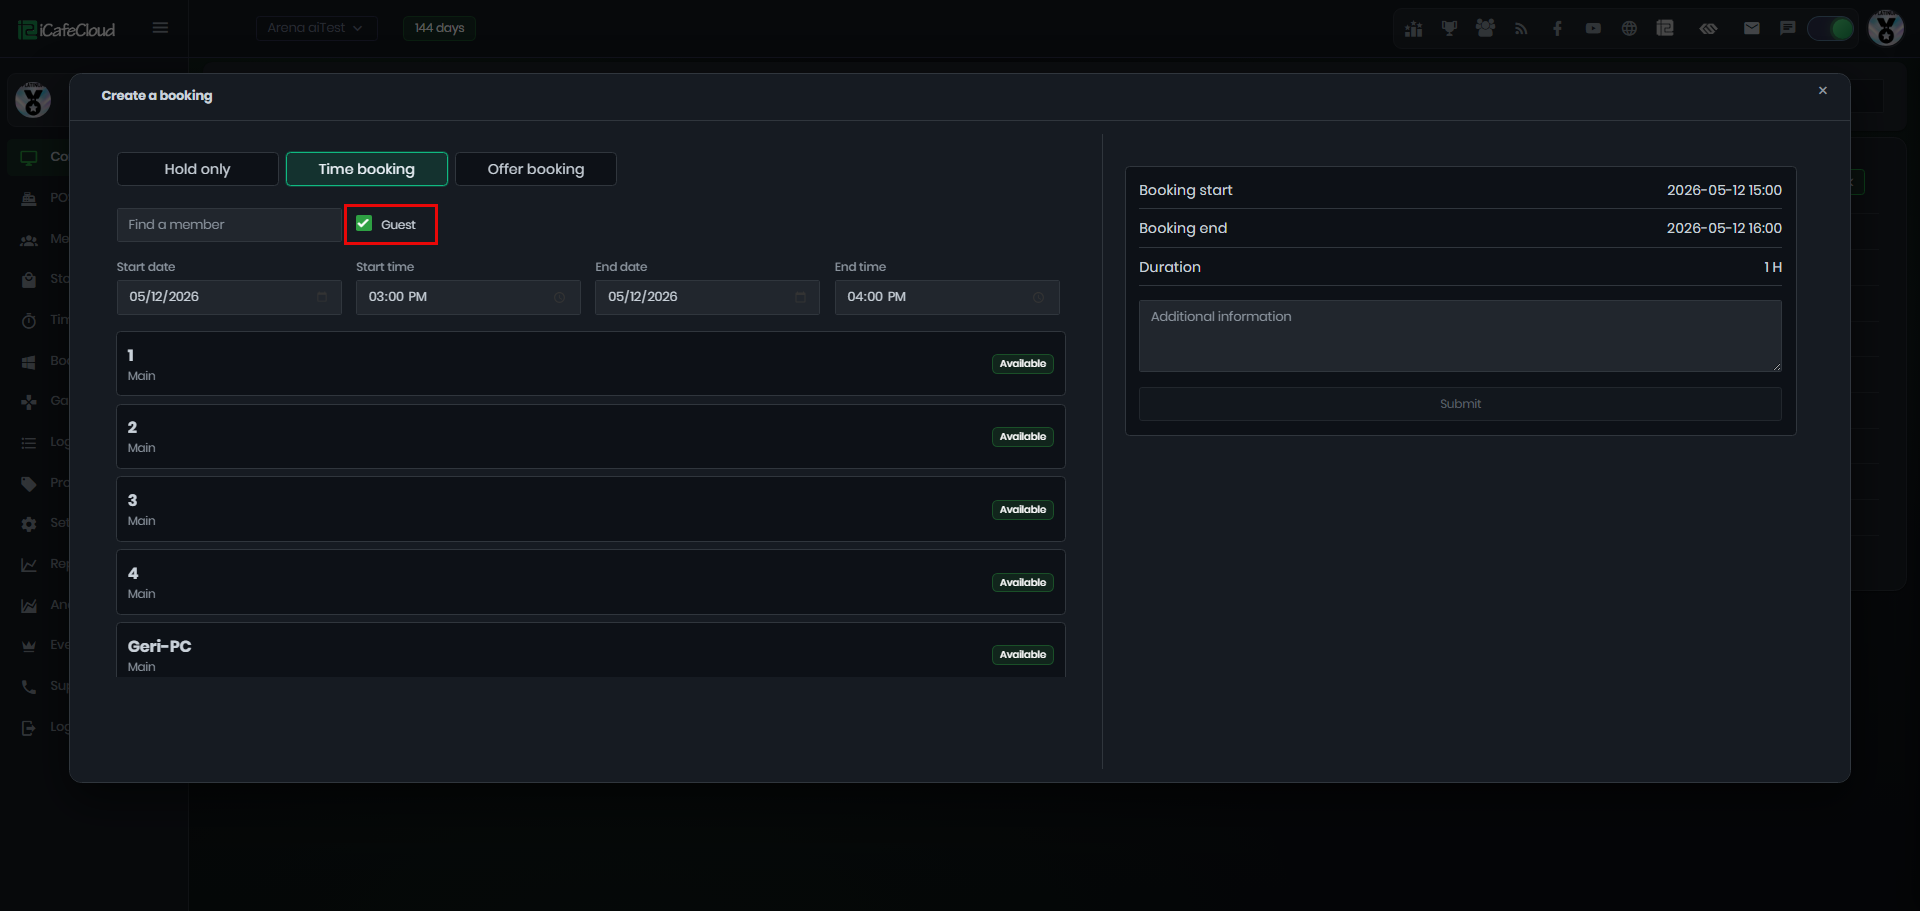
Figure 1
- Once booked successfully it will display a Booking password (Figure 2)
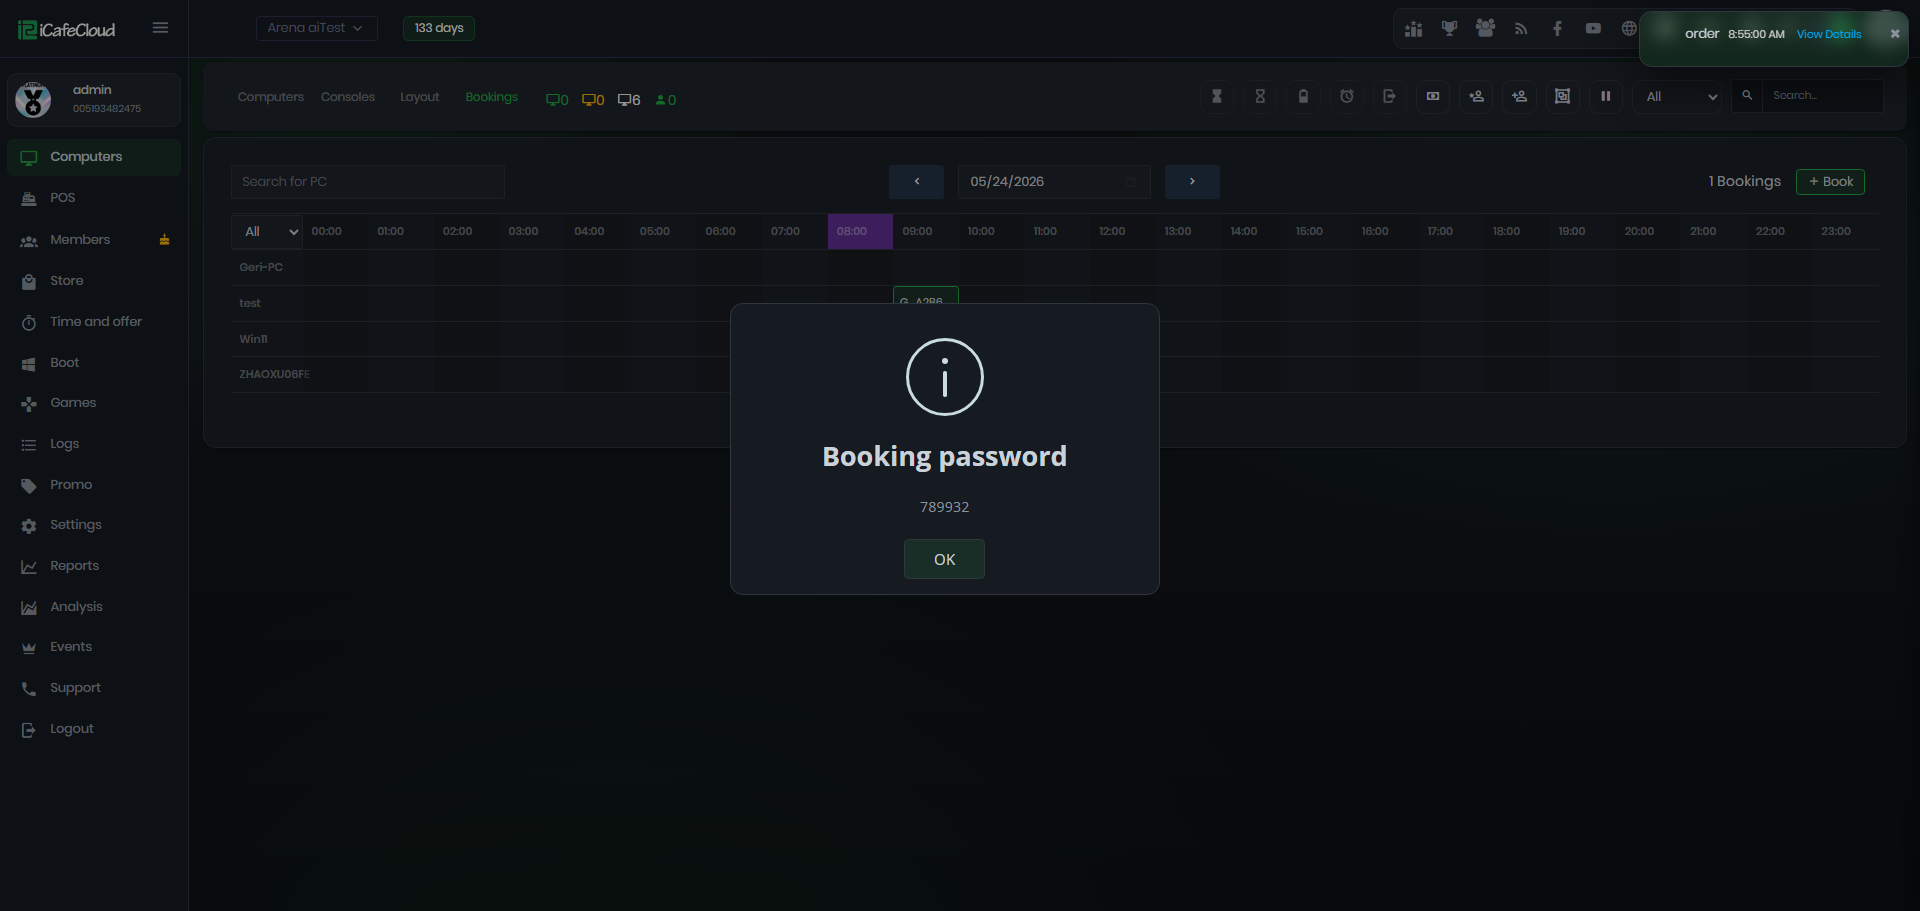
Figure 2
- On the Booking page, hovering the mouse over a booking will display the guest’s name, start time, end time, and PC name and password.(Figure 3)
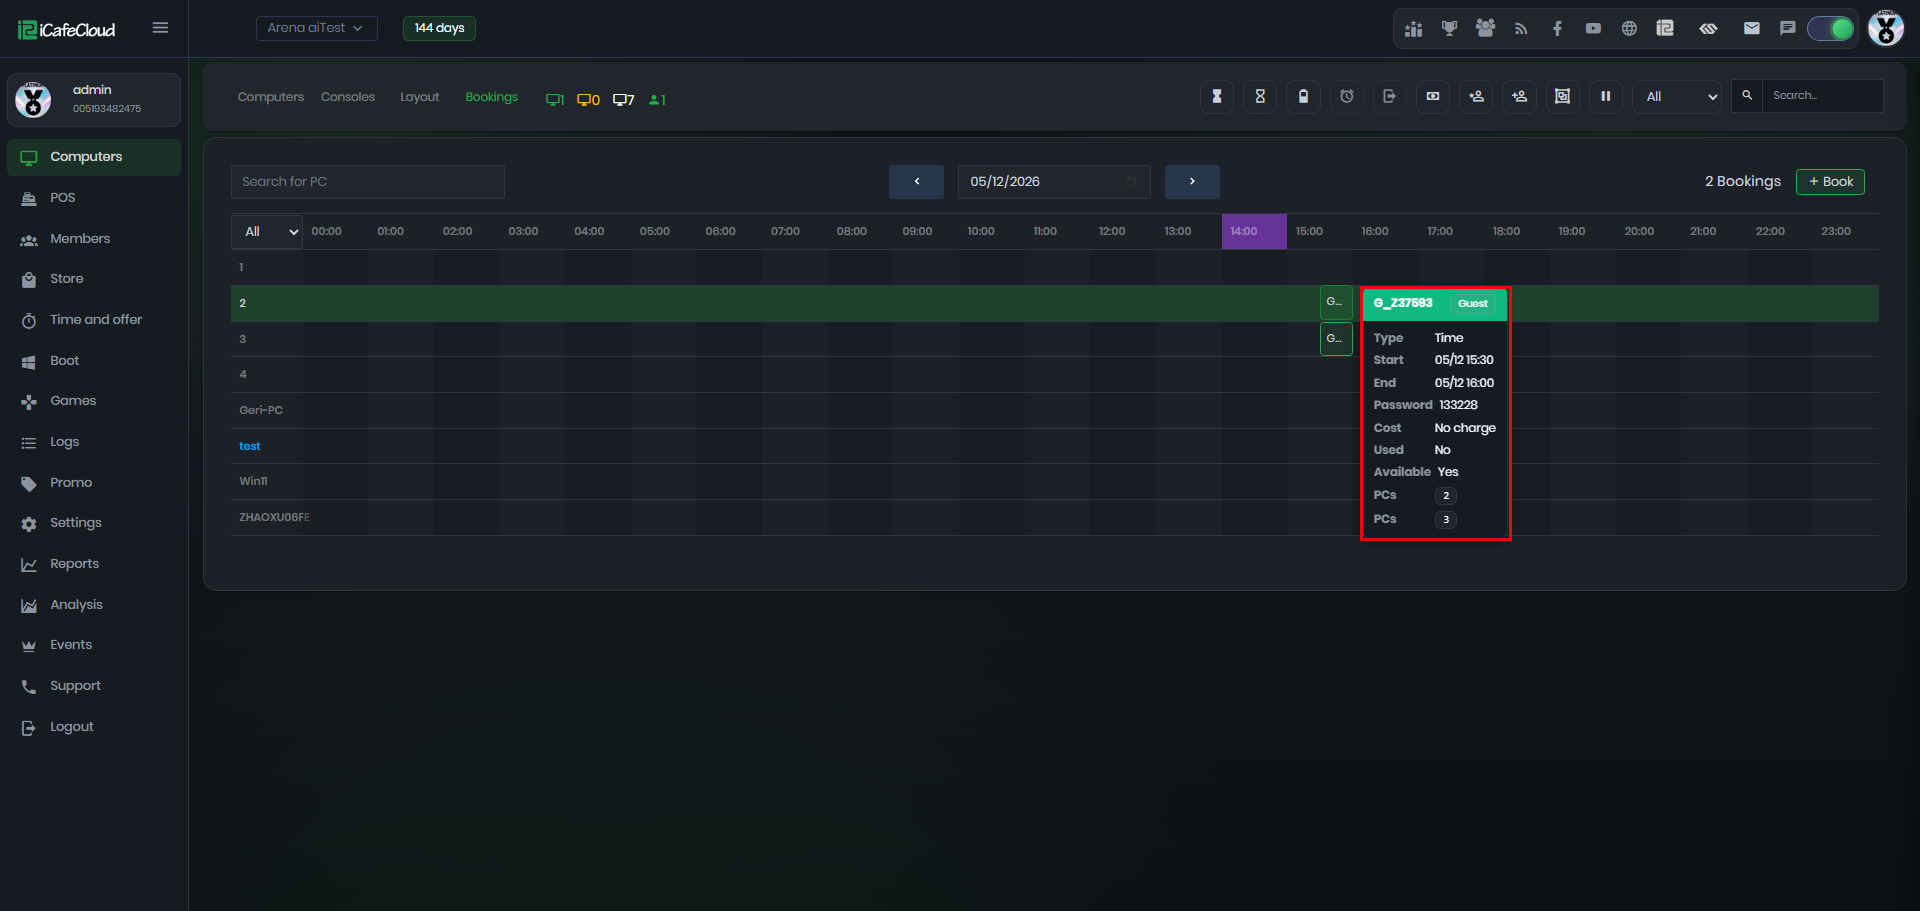
Figure 3
- Share the guest account username and password with the guest so they can log in.
- The guest can then use the PC that has been reserved for them.
- At the client login, a notification will appear about recent booking when booking is added (Figure 4).
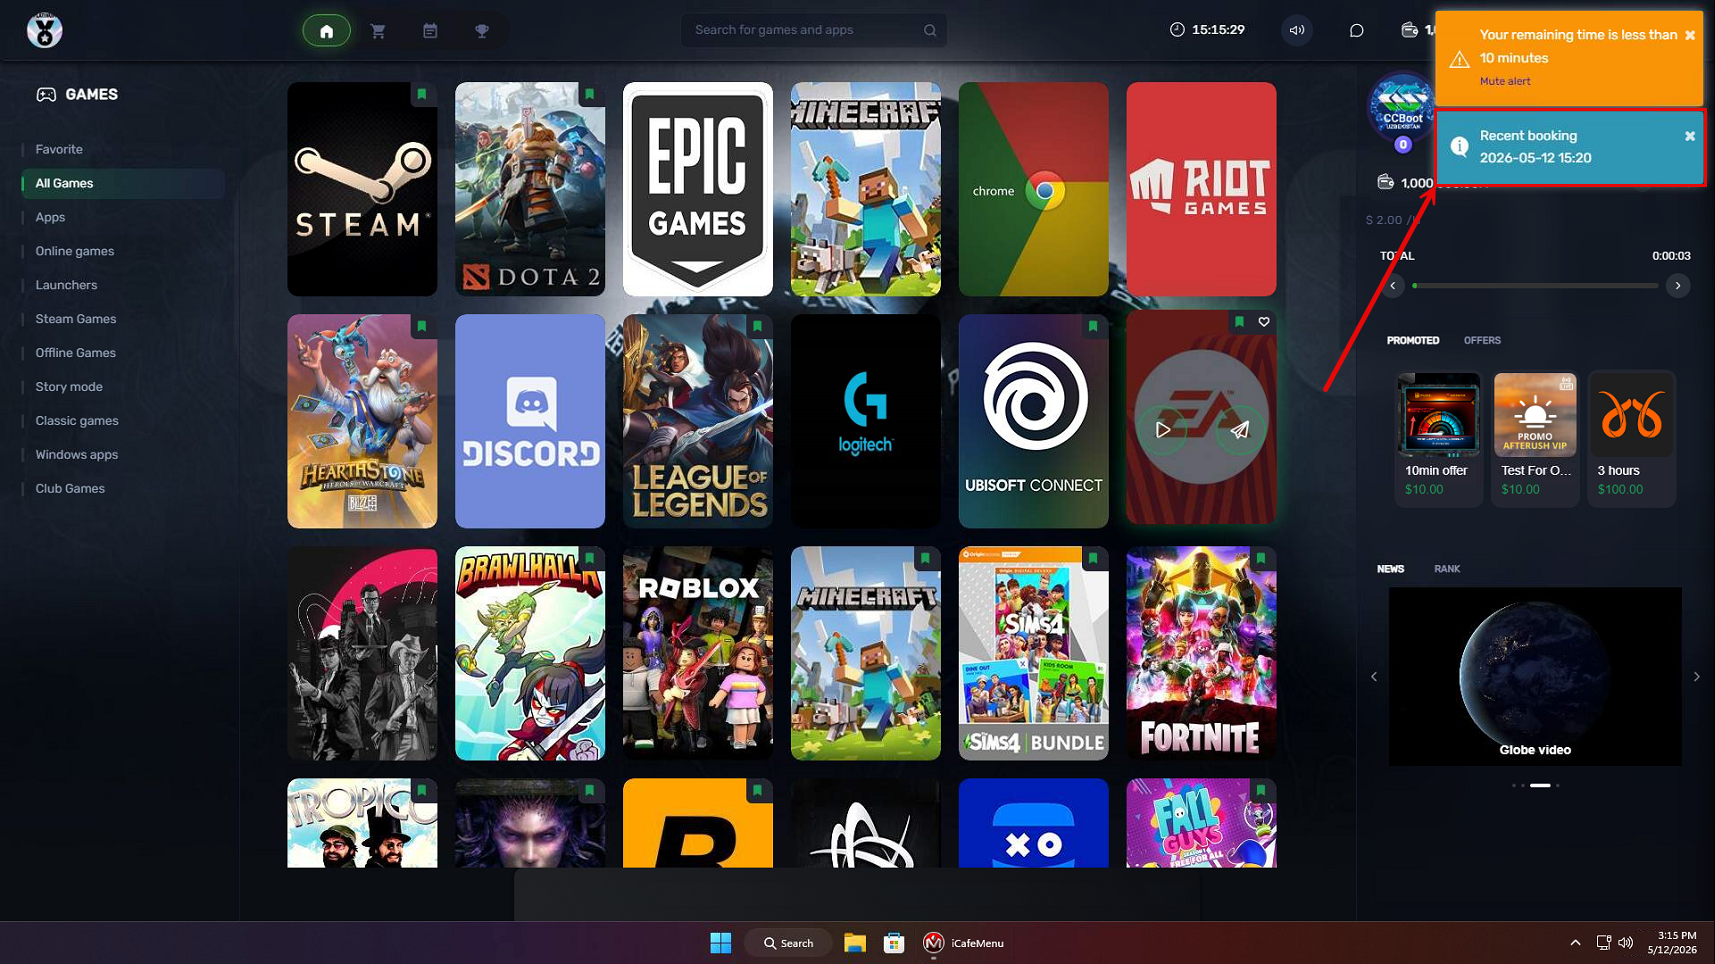
Figure 4
- If there is a member logged on before booking time, booking auto checkout members now when the booking time starts. (and notification will appear before 5 minutes from booking time to notice that the member will be logged out) (Figure 5).
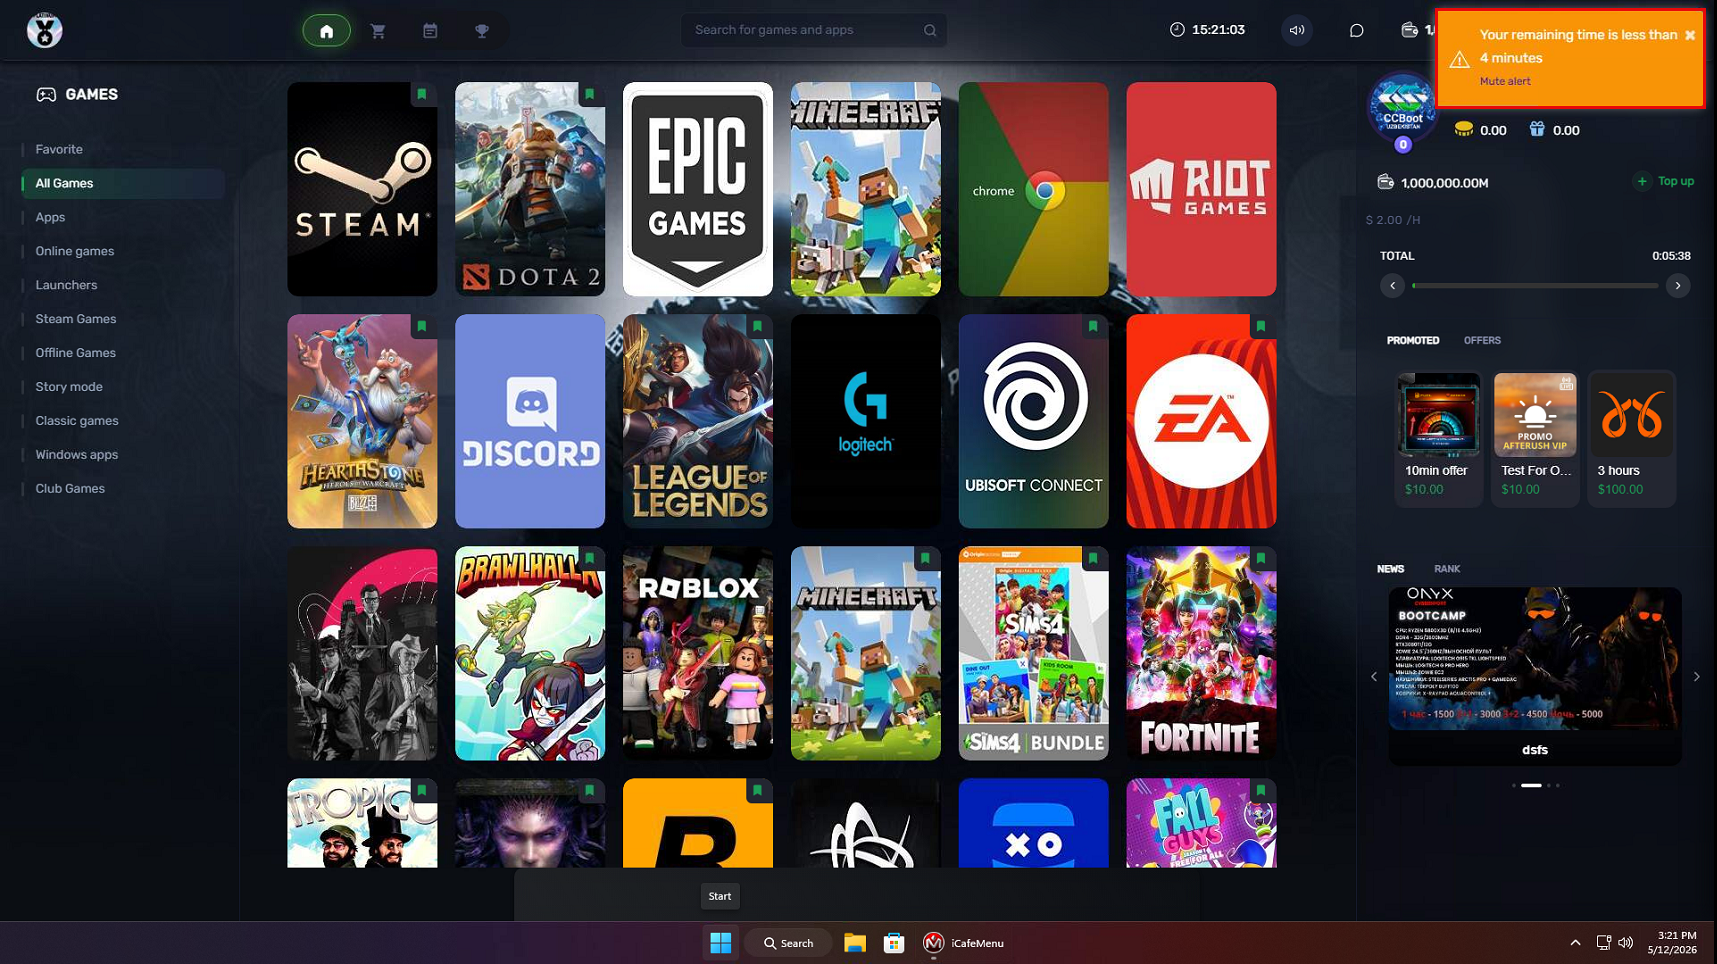
Figure 5