2026-02-12
sonoff, basicr4
The following explains how to detect and add a Sonoff R4 device in iCafeCloud that allows the device to turn on automatically when a session starts and turn off automatically when checkout occurs.
Prerequisites:
- iCafeCloud Server is running on a PC, and you can log in to the iCafeCloud Admin Panel.
- Sonoff R4 device is powered on and online.
- An Android phone with the eWeLink app installed (https://play.google.com/store/apps/details?id=com.coolkit).
- Both the PC and the Android phone are connected to the same local Wi‑Fi network, and the Wi‑Fi must be 2.4 GHz (5 GHz is not supported).
Setup:
- Remove auto-detected Sonoff devices (if any)
Log in to the iCafeCloud Admin Panel and go to the Computers/Consoles page.
If there are already devices whose names start with SONOFF_ (Sonoff devices automatically detected by the system), delete them first.
- Create an API key in iCafeCloud
Go to Settings / API settings and create a new API key. - For API access IP, enter the public IP address of the machine running iCafeCloud Server.
- If you do not know your public IP address, you can use websites such as https://whatismyipaddress.com/ to look it up. (Figure 1 & 2)
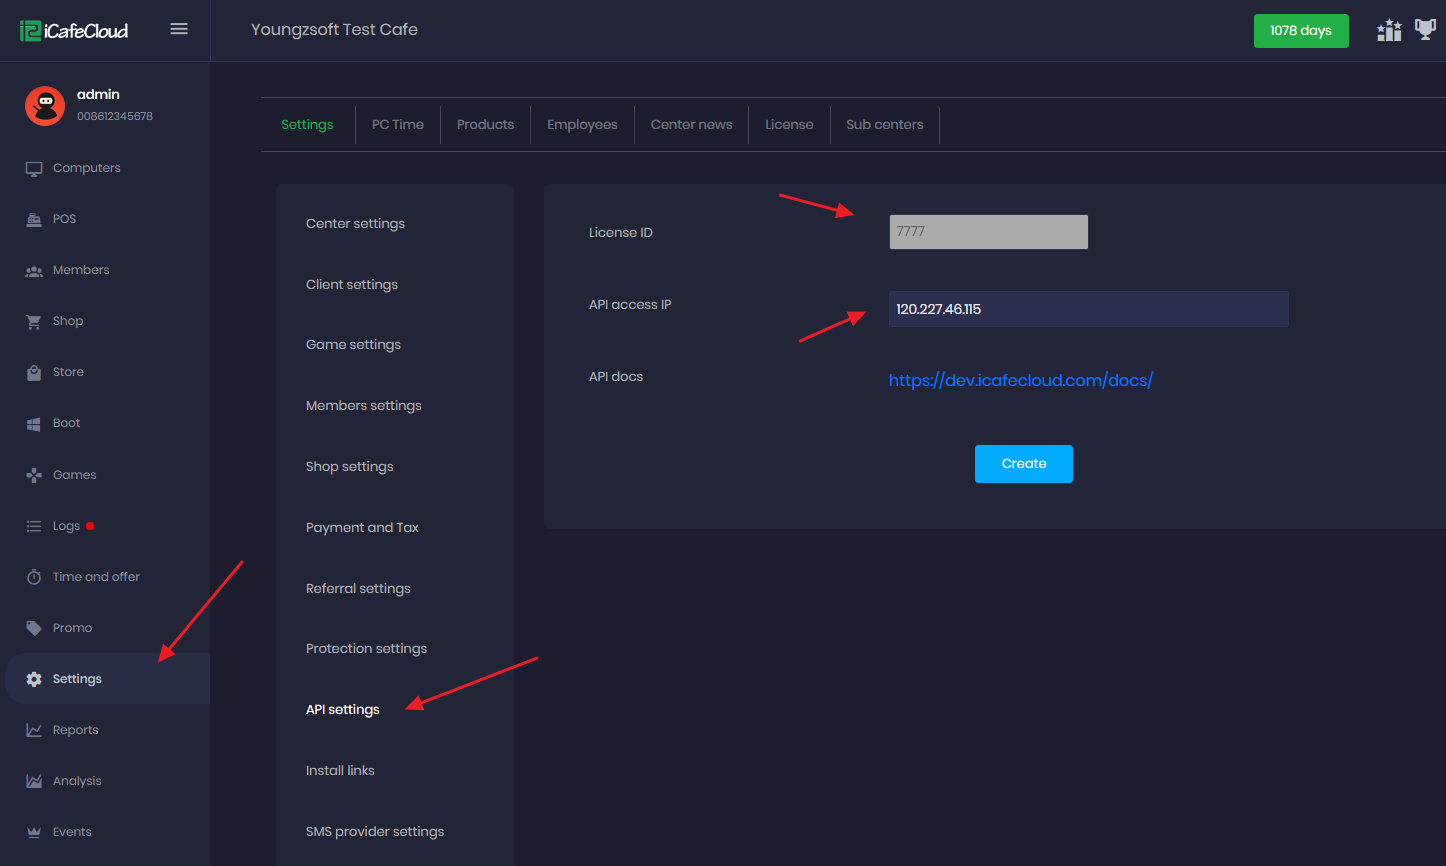
Figure 1
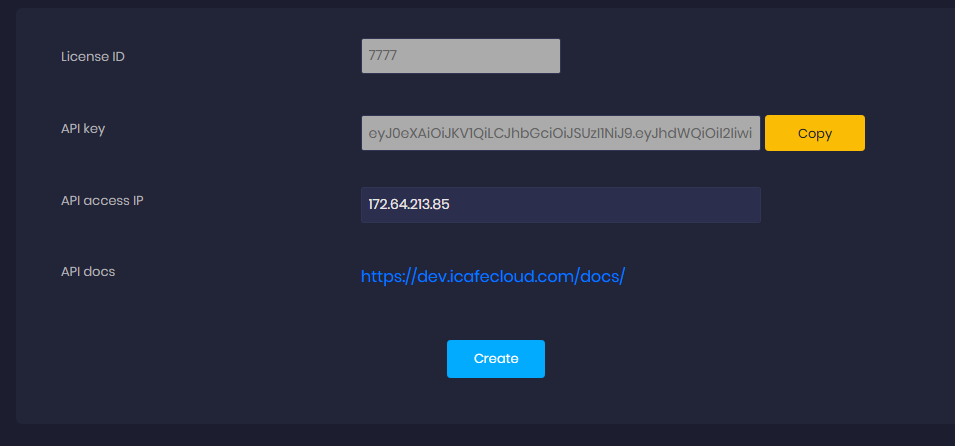
Figure 2
- Download SonoffDevice.exe and run it on the iCafeCloud Server machine
- In the iCafeCloud Server installation directory, run SonoffDevice.exe.
- Enter the API key you just created.
- Enter your License ID (Cafe ID). (Figure 3)
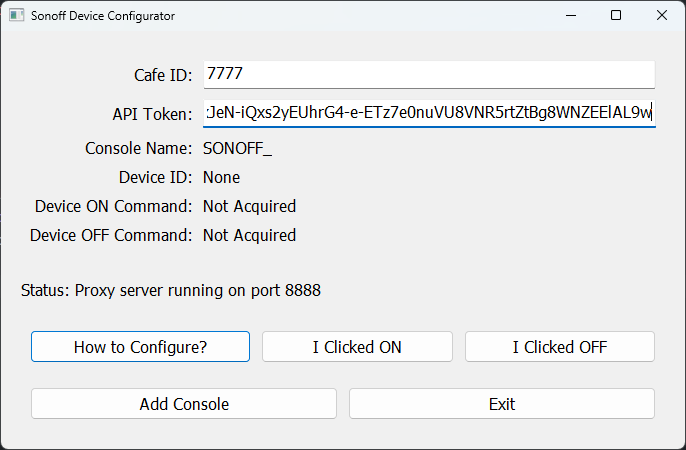
Figure 3
- Add the Sonoff R4 device in the eWeLink app
- On your Android phone, open the eWeLink app and add the Sonoff R4 device as follows:
- Put the Sonoff R4 into pairing mode, Quickly press the button on the Sonoff R4 five times in a row or follow the official device manual to enter pairing mode.
- Turn on Bluetooth on your phone and bring it close to the device.
- Click Add (Figure 4)
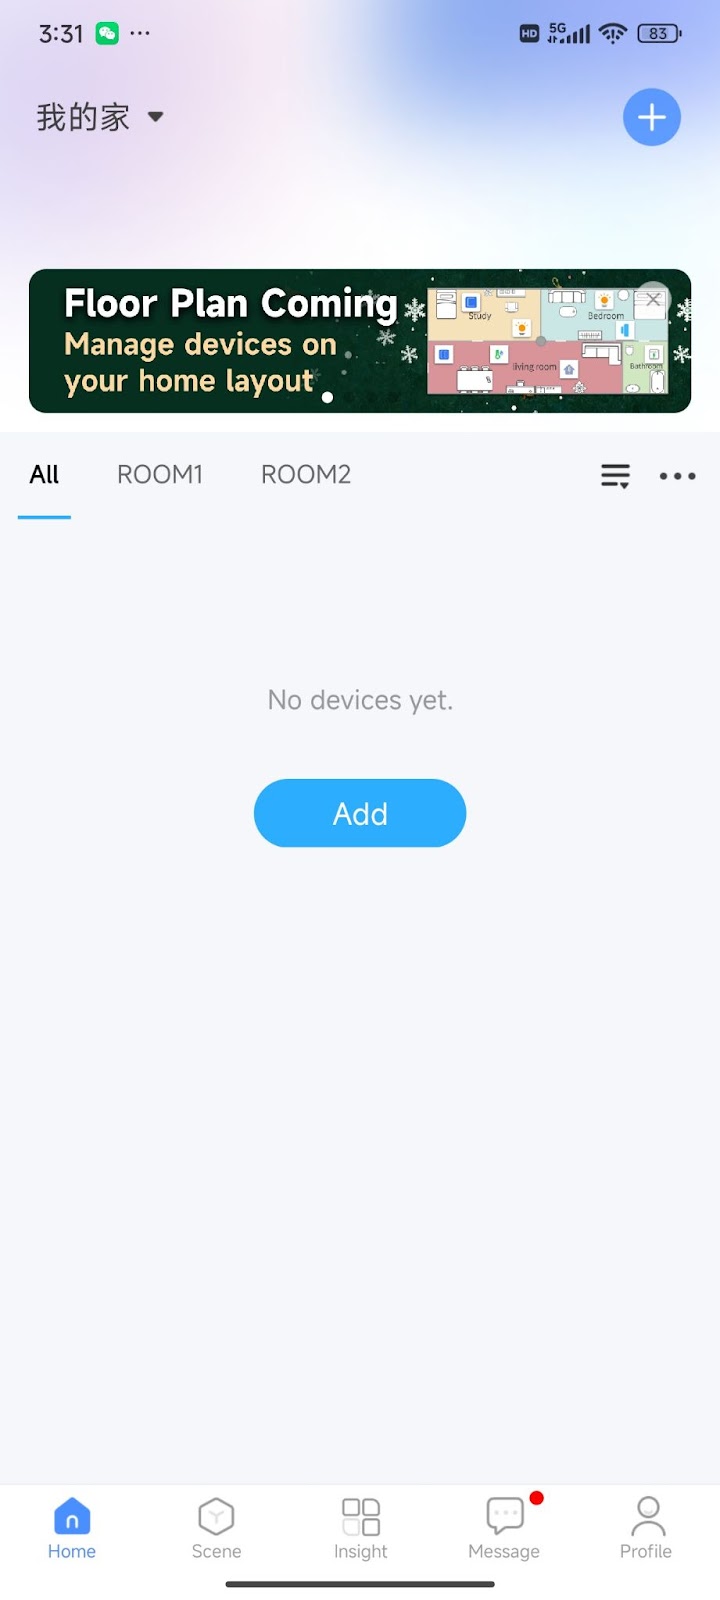
Figure 4
- Click Next (Figure 5)
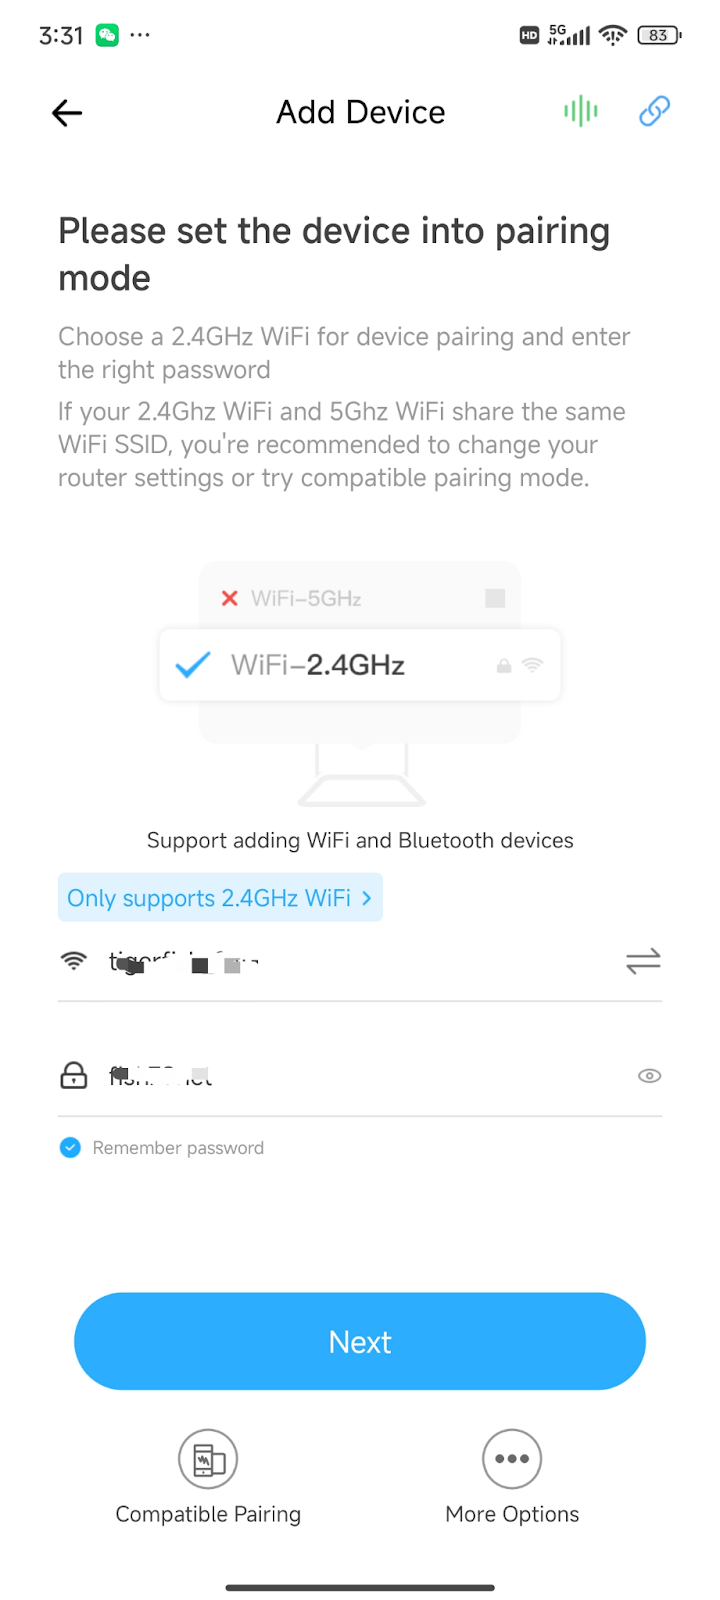
Figure 5
- After the device is discovered, tap the “+” icon next to it. (Figure 6)

Figure 6
- Enter the device control page, then tap the settings icon in the top-right corner to open the device settings page. (Figure 7)
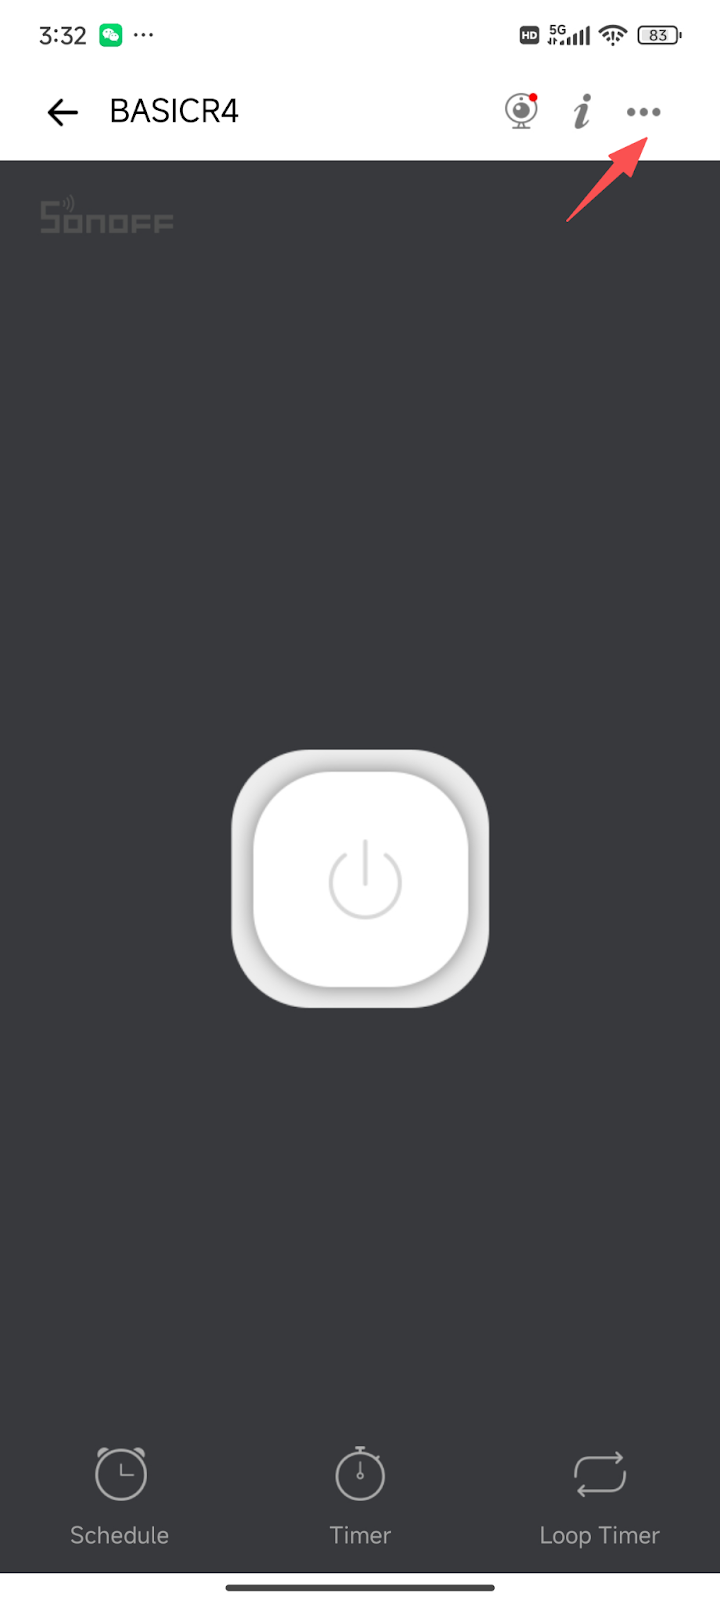
Figure 7
- Make sure LAN control is enabled. (Figure 8)
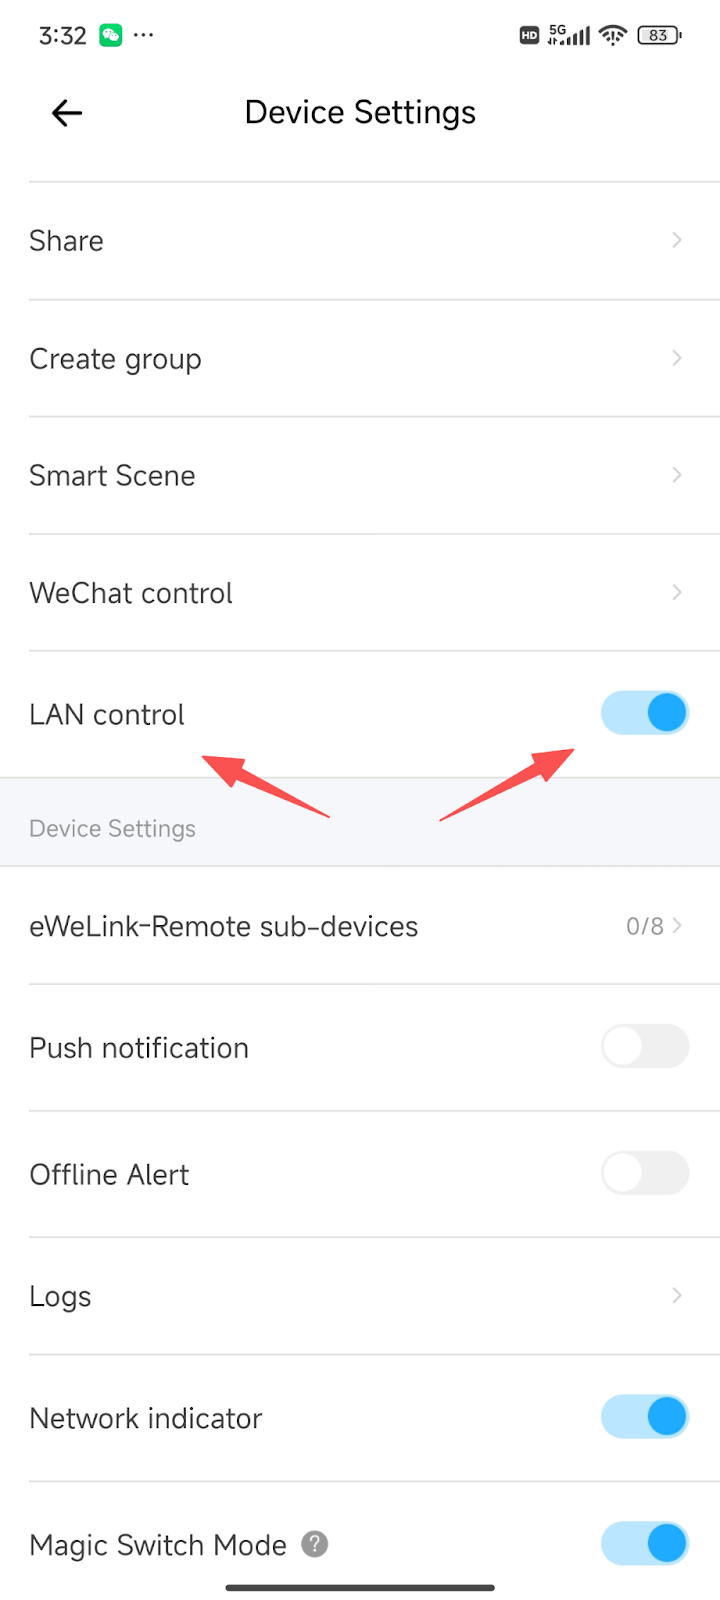
Figure 8
- Configure Wi‑Fi proxy on the phone
- Set the Wi‑Fi proxy on the phone to point to the machine running iCafeCloud Server.
For example, if the internal IP of the PC is 192.168.0.104, then:
Set the phone’s Wi‑Fi proxy host to 192.168.0.104
Set the proxy port to 8888 - If you do not know the internal IP of your PC, you can refer to this video: https://www.youtube.com/watch?v=goTdaCFog3U. (Figure 9)
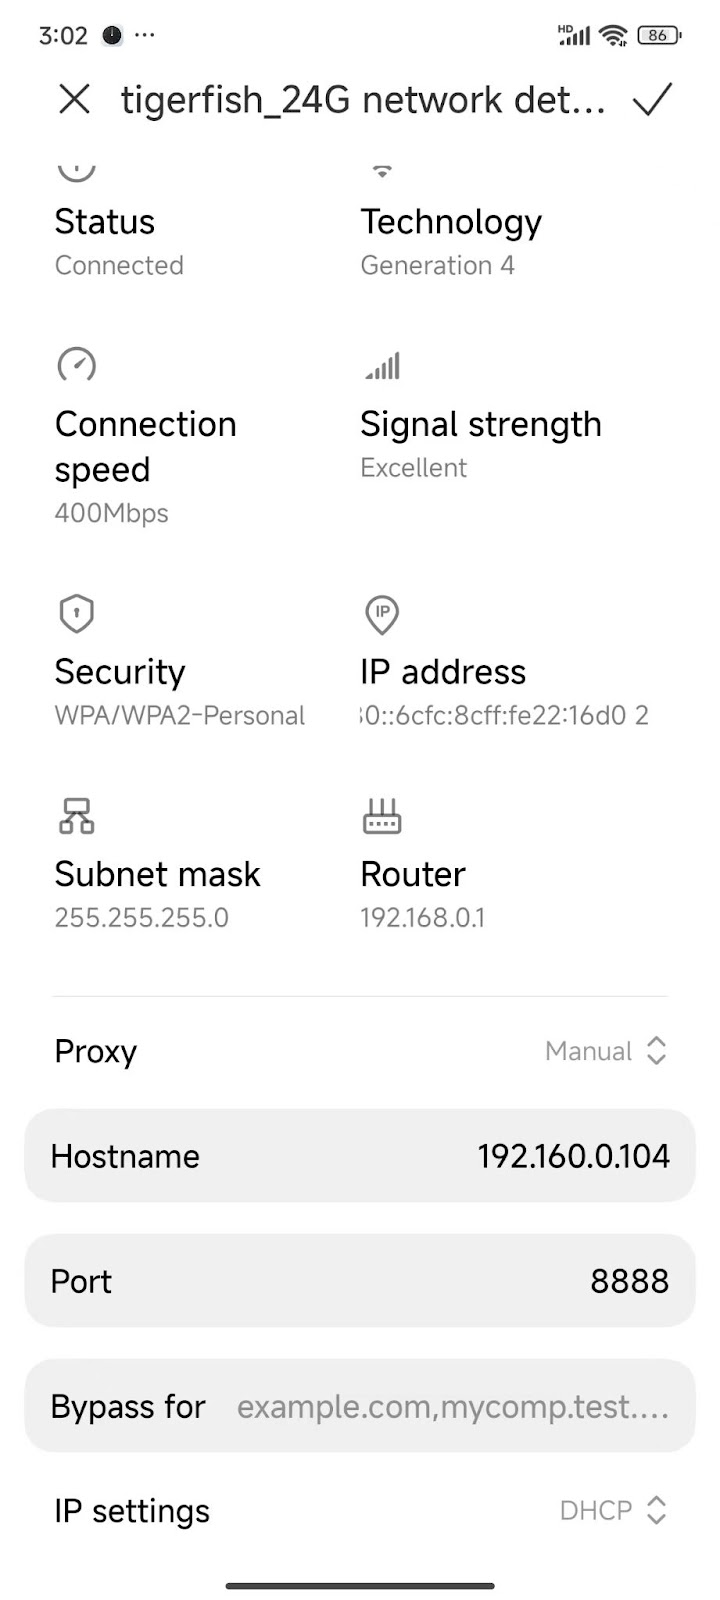
Figure 9
- Capture ON/OFF commands in SonoffDevice.exe
- In the eWeLink app, operate the device and let SonoffDevice capture the control commands:
- Turn the device ON in the eWeLink app.
- After the device is successfully turned on, go to the SonoffDevice window on the PC and click I Clicked ON. If successful, you will see: Device ON Command: Acquired, which means SonoffDevice has detected and recognized your ON action.
- Then turn the device OFF in the eWeLink app.
- After the device is successfully turned off, in SonoffDevice click I Clicked OFF. If successful, you will see: Device OFF Command: Acquired, which means SonoffDevice has detected and recognized your OFF action.
- Click Add Console to add the current device into iCafeCloud. (Figure 10)
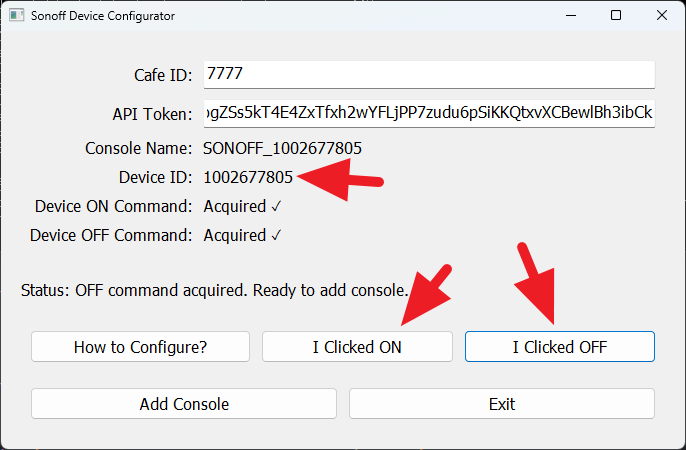
Figure 10
- Verify the device in iCafeCloud
- Switch back to the iCafeCloud Admin Panel and go to the Computers/Consoles page.
You should now see that the device has been added. - If the list does not update, press F5 to refresh the page.
- After a short while, iCafeCloud Server will automatically detect the device and show a log entry similar to: SONOFF R4 device [SONOFF_XXXX] ip change to xxx.xxx.xxx.xxx
- You can also click the Refresh button under the list to force iCafeCloud Server to scan devices.(Figure 11)

Figure 11
- You can check the SONOFF device in iCafeCloud server logs (Figure 12)
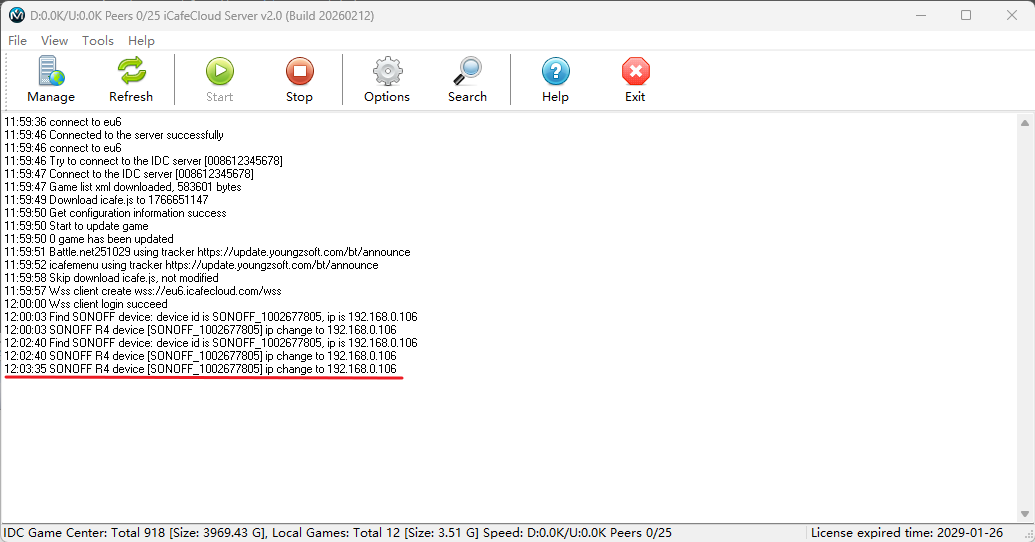
Figure 12
- (Optional)Rename the device
After completing the steps above, you can rename the device in iCafeCloud to any name you prefer.
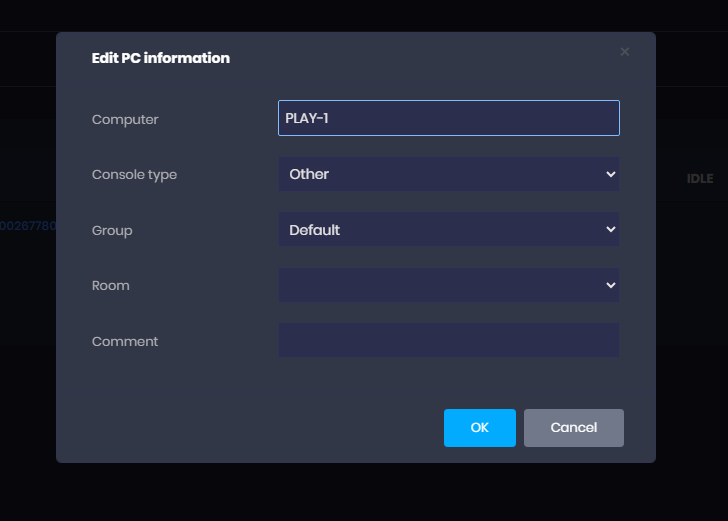
Figure 13