2026-02-04
billing, service
The following explains how to use the Billing Service and the differences between enabled and disabled billing modes.
- Go to Settings → Center Settings and set Billing Service to Enabled. (Figure 1)
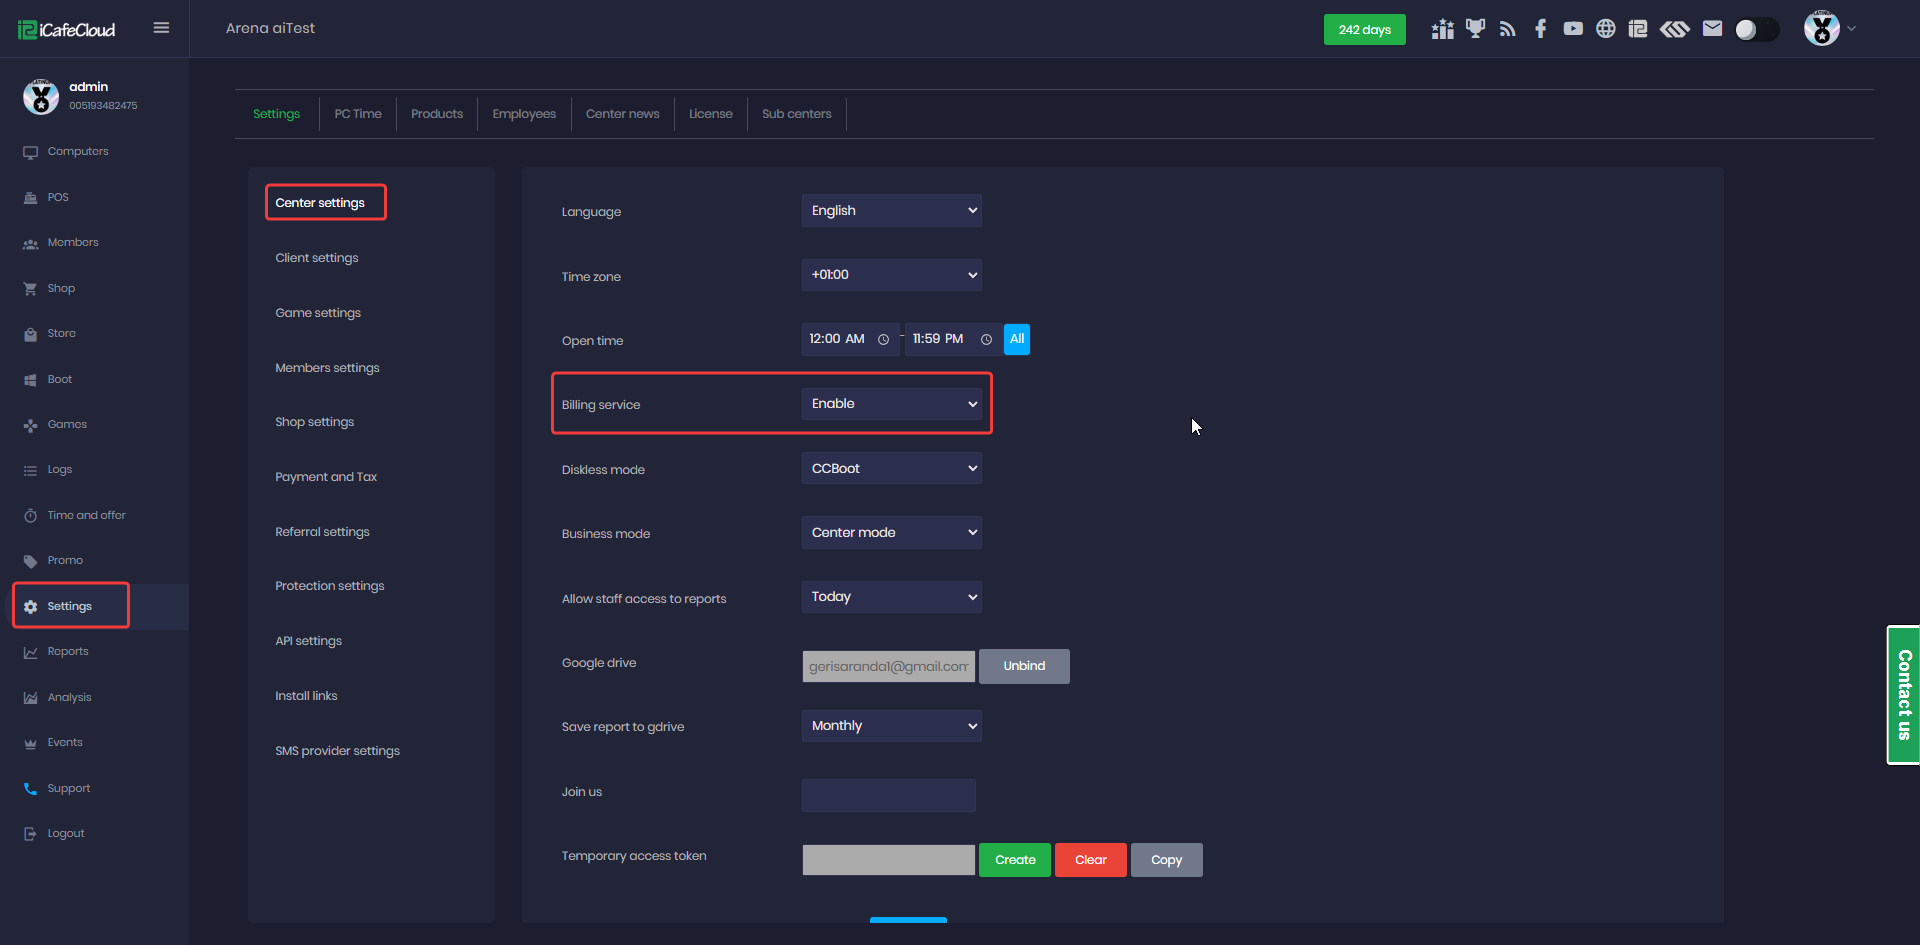
Figure 1
- Billing enabled means you can use sessions and keep track of their spending and in general use all the functions related with billing and payments.
- If the billing service is disabled, the system will automatically create a guest account and start a session with unlimited time. When the client PC boots and reaches the iCafeMenu login screen, the session will start automatically with no time limit. (Figure 2)
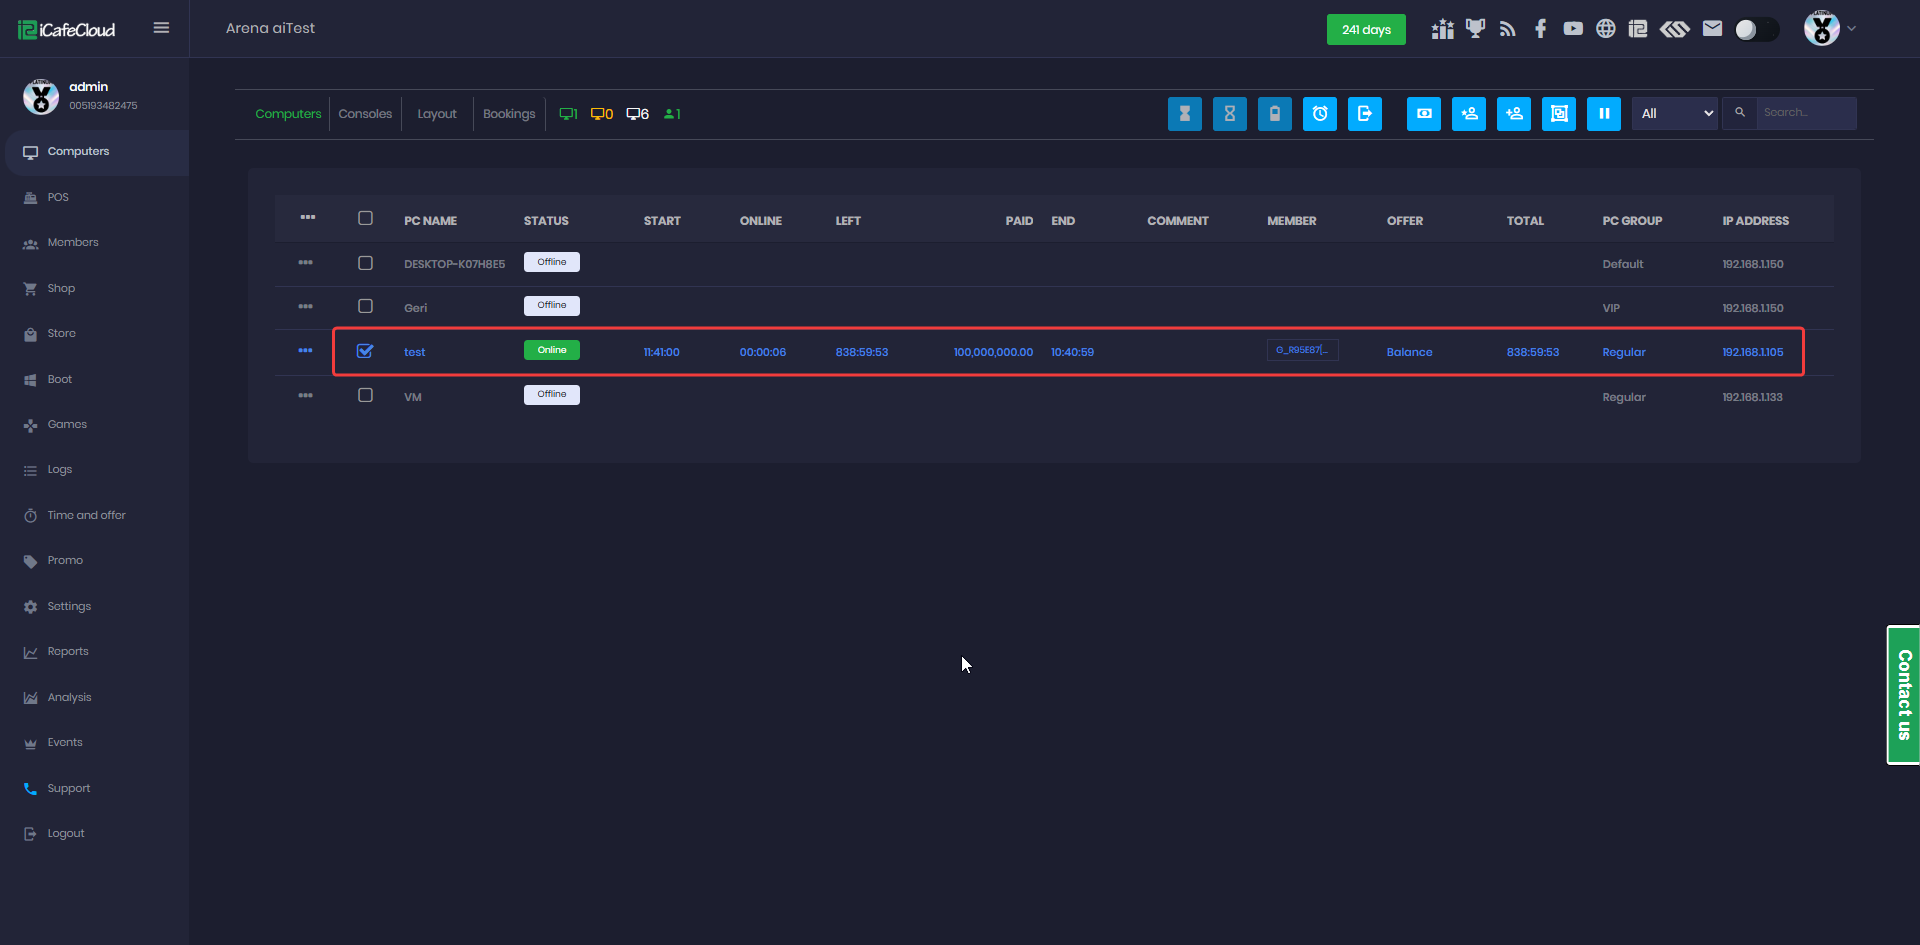
Figure 2
- The actions will appear in the logs, but they will not affect the balance, and the reports will show a value of 0. (Figure 3)
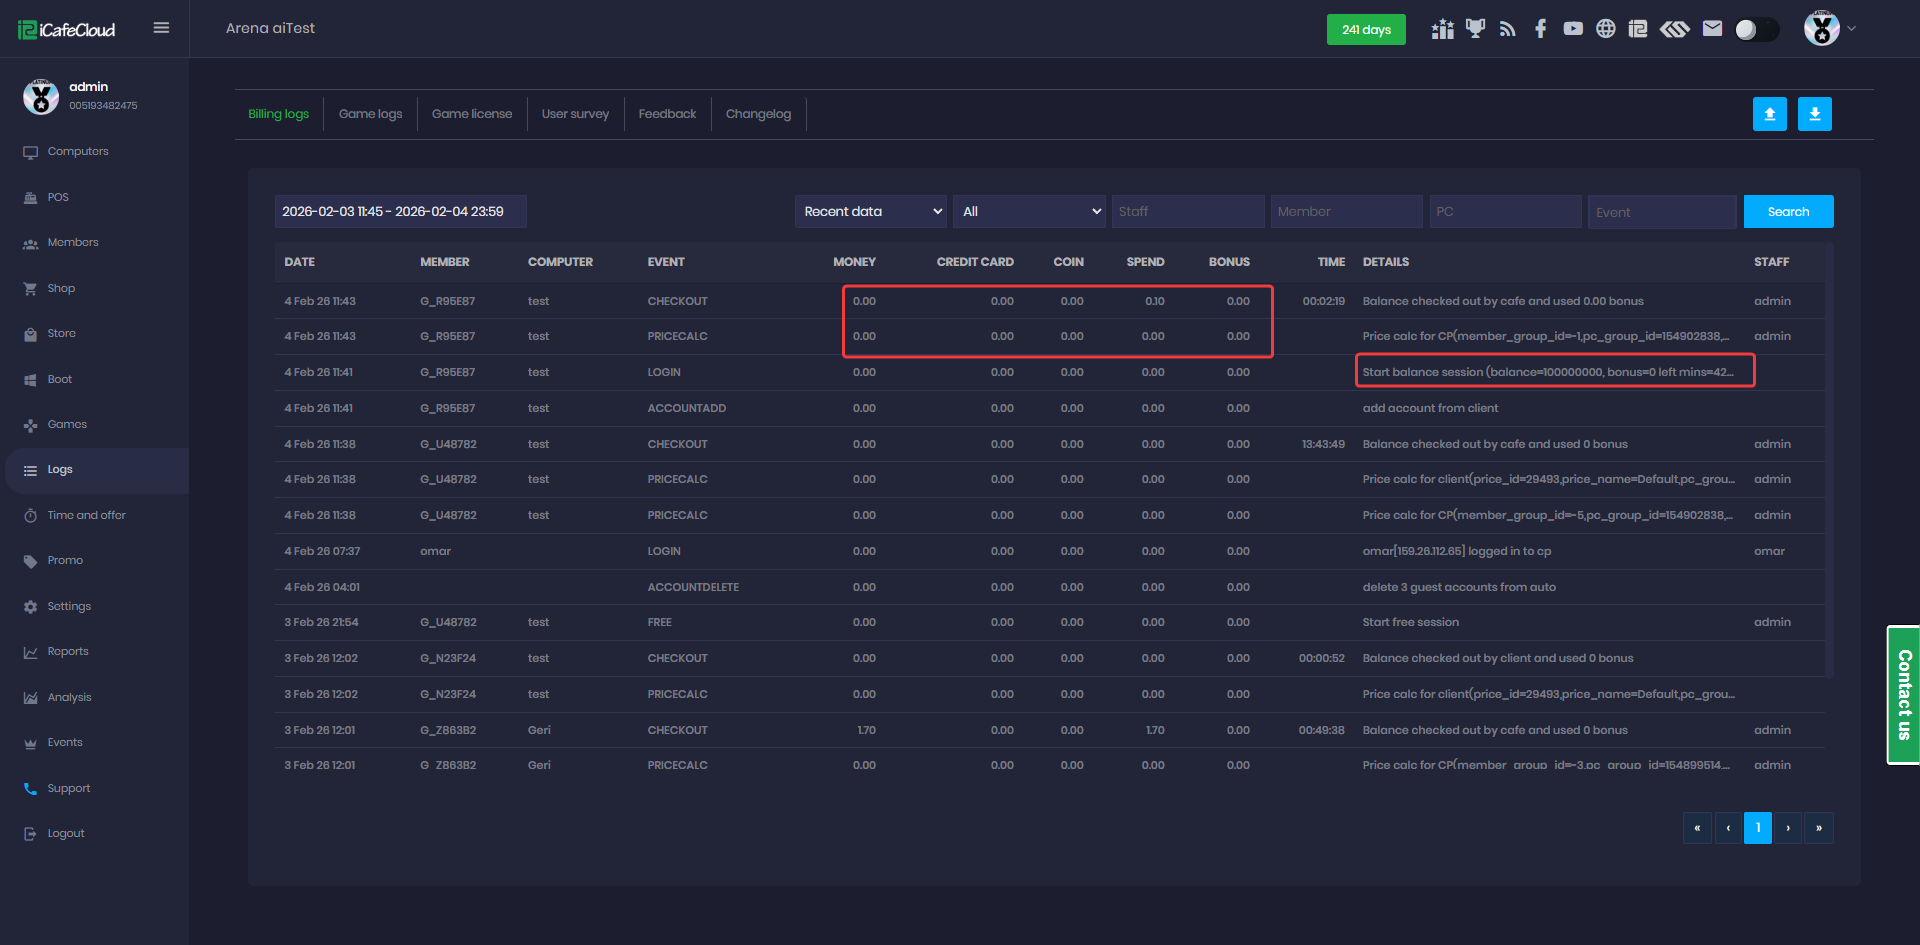
Figure 3
- If you start a session with a member account while the billing service is disabled, the account will be assigned a very large number of hours when the session starts. (Figure 4)
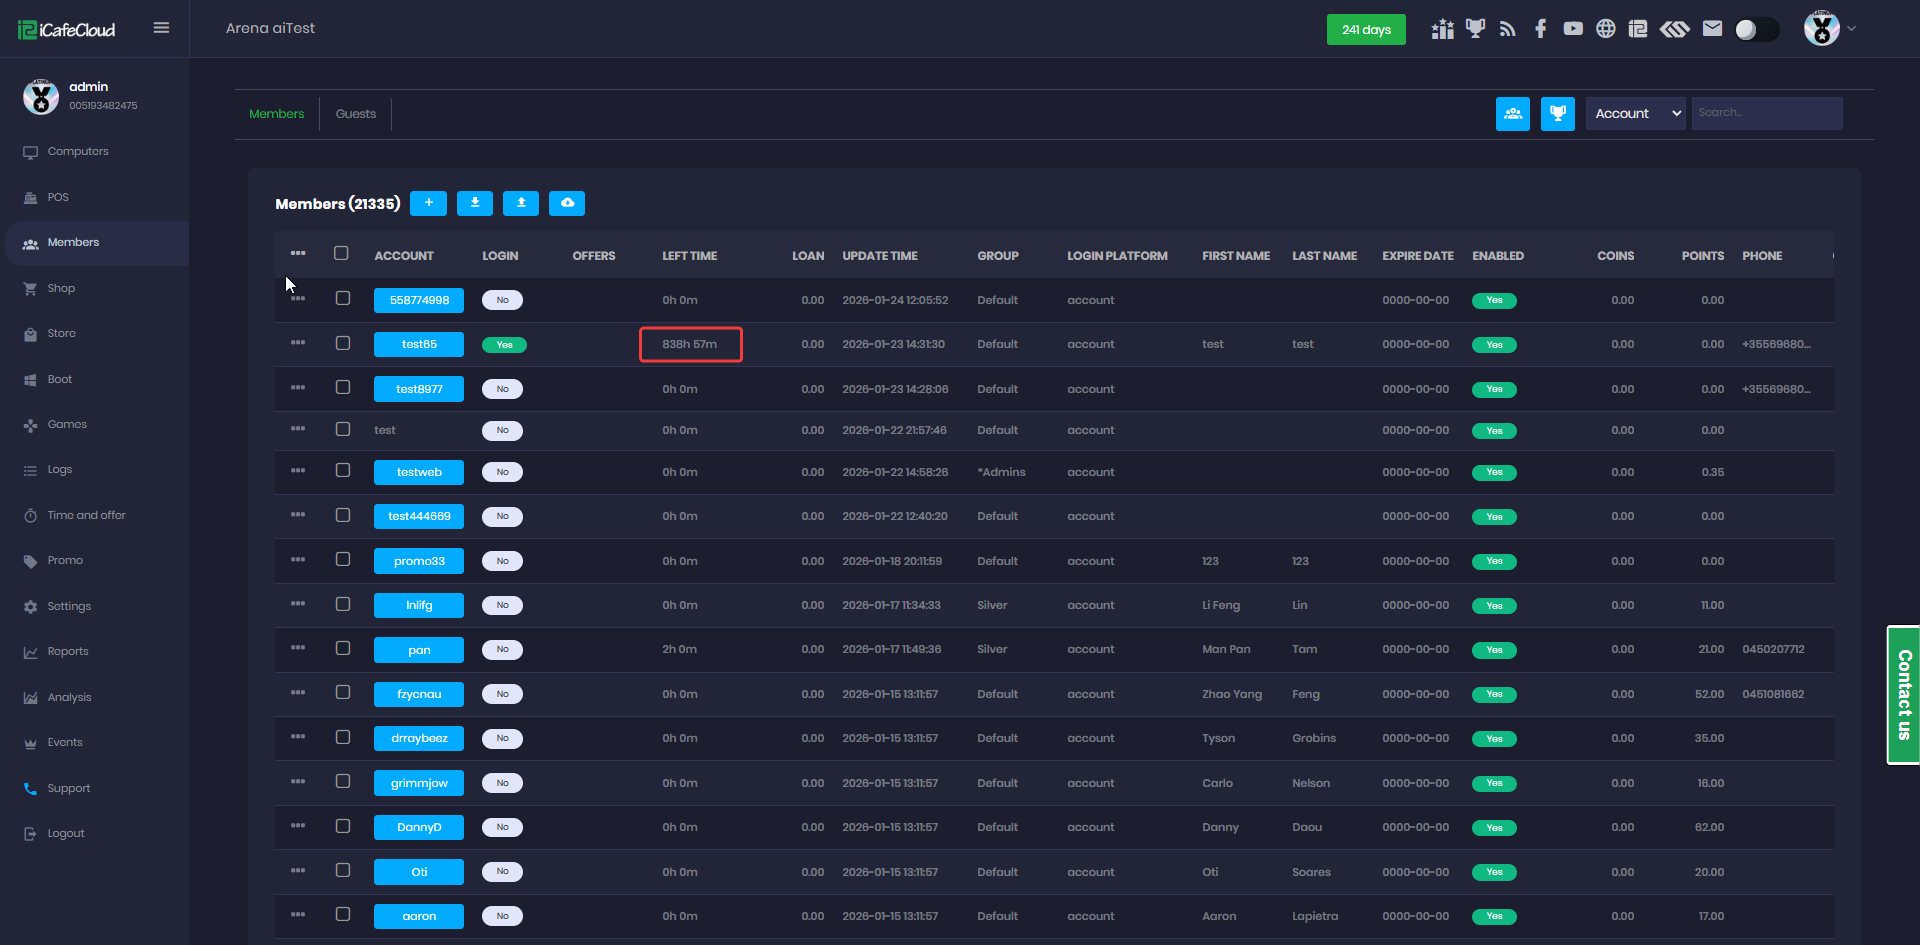
Figure 4
- If you later enable the billing service again, the same member account will retain a large remaining balance from the actions performed previously (Figure 5).
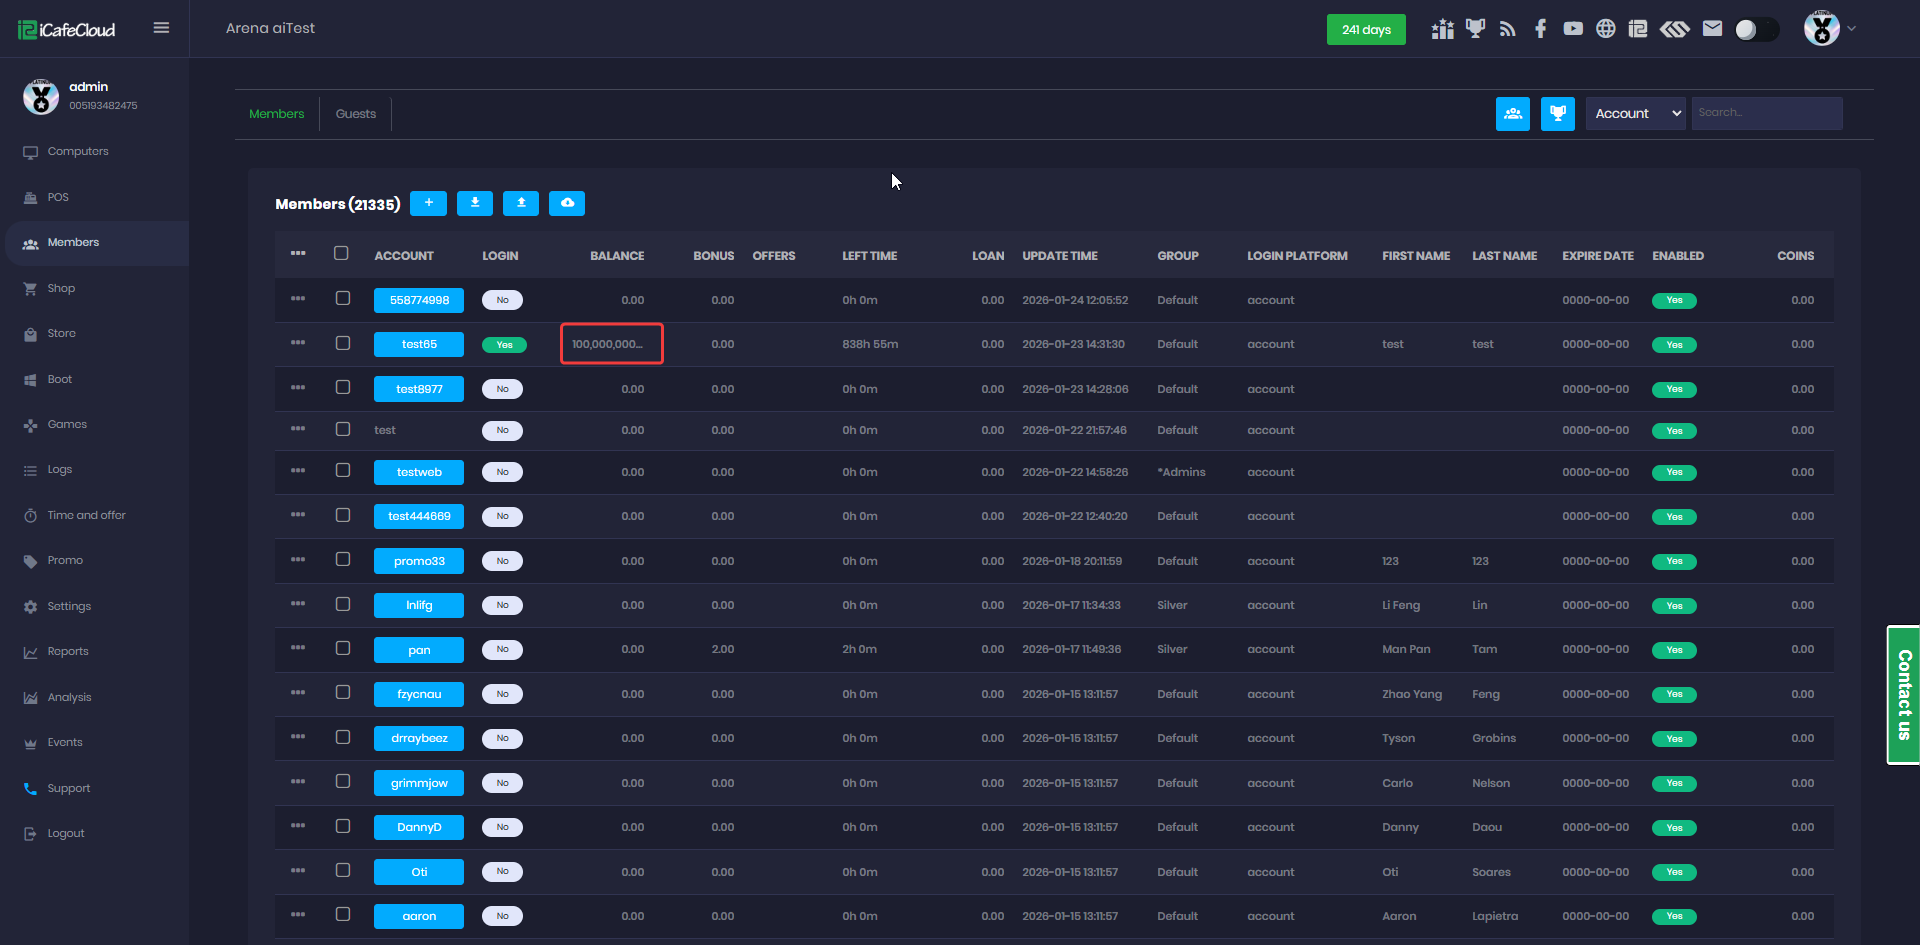
Figure 5
- In this case, you can manually refund the balance for each affected account.
- Therefore, it is recommended not to use member accounts if you plan to switch between enabled and disabled billing services.