2025-12-27
Pay, later
The following explains how to configure the Pay Later function, which allows customers to pay for all purchases and session time costs together at the end of their session.
- Navigate to Settings → Payment and Tax.
- In the Payment Methods section, check the Pay Later option (Figure 1).
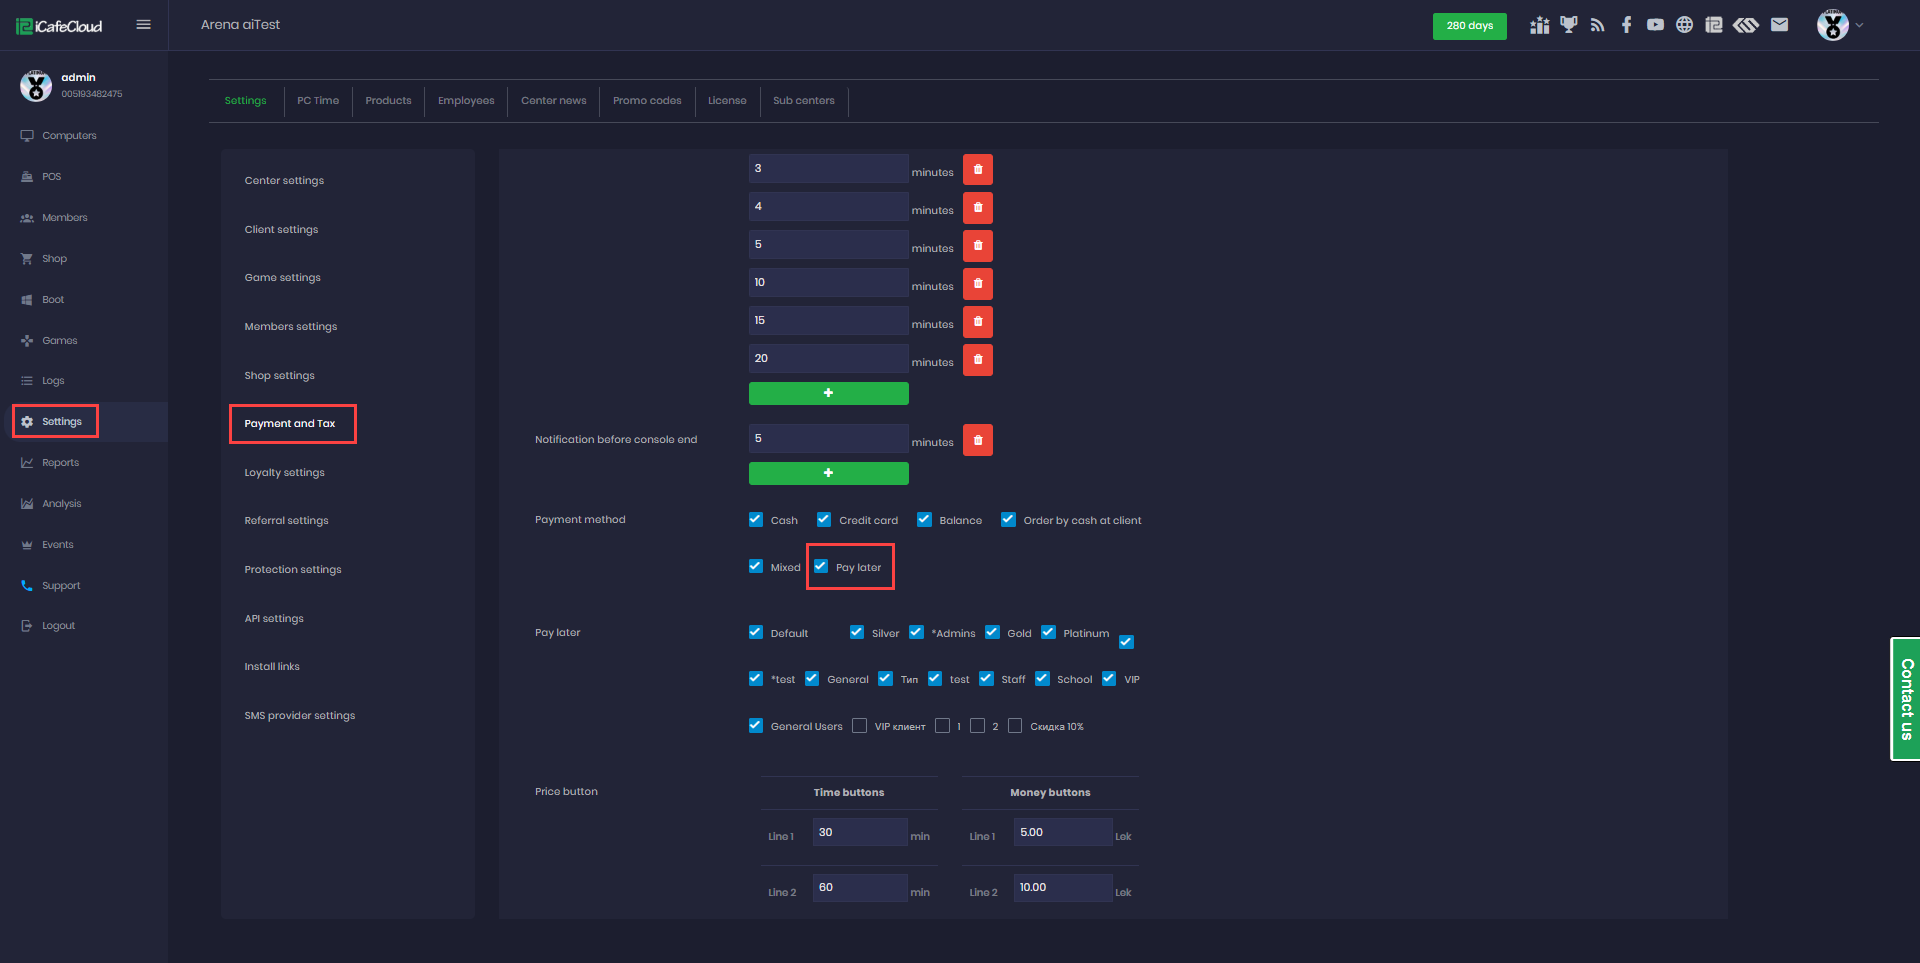
Figure 2
- Under the Pay Later option, select the PC groups that you want to allow to use this payment method. (Figure 2)
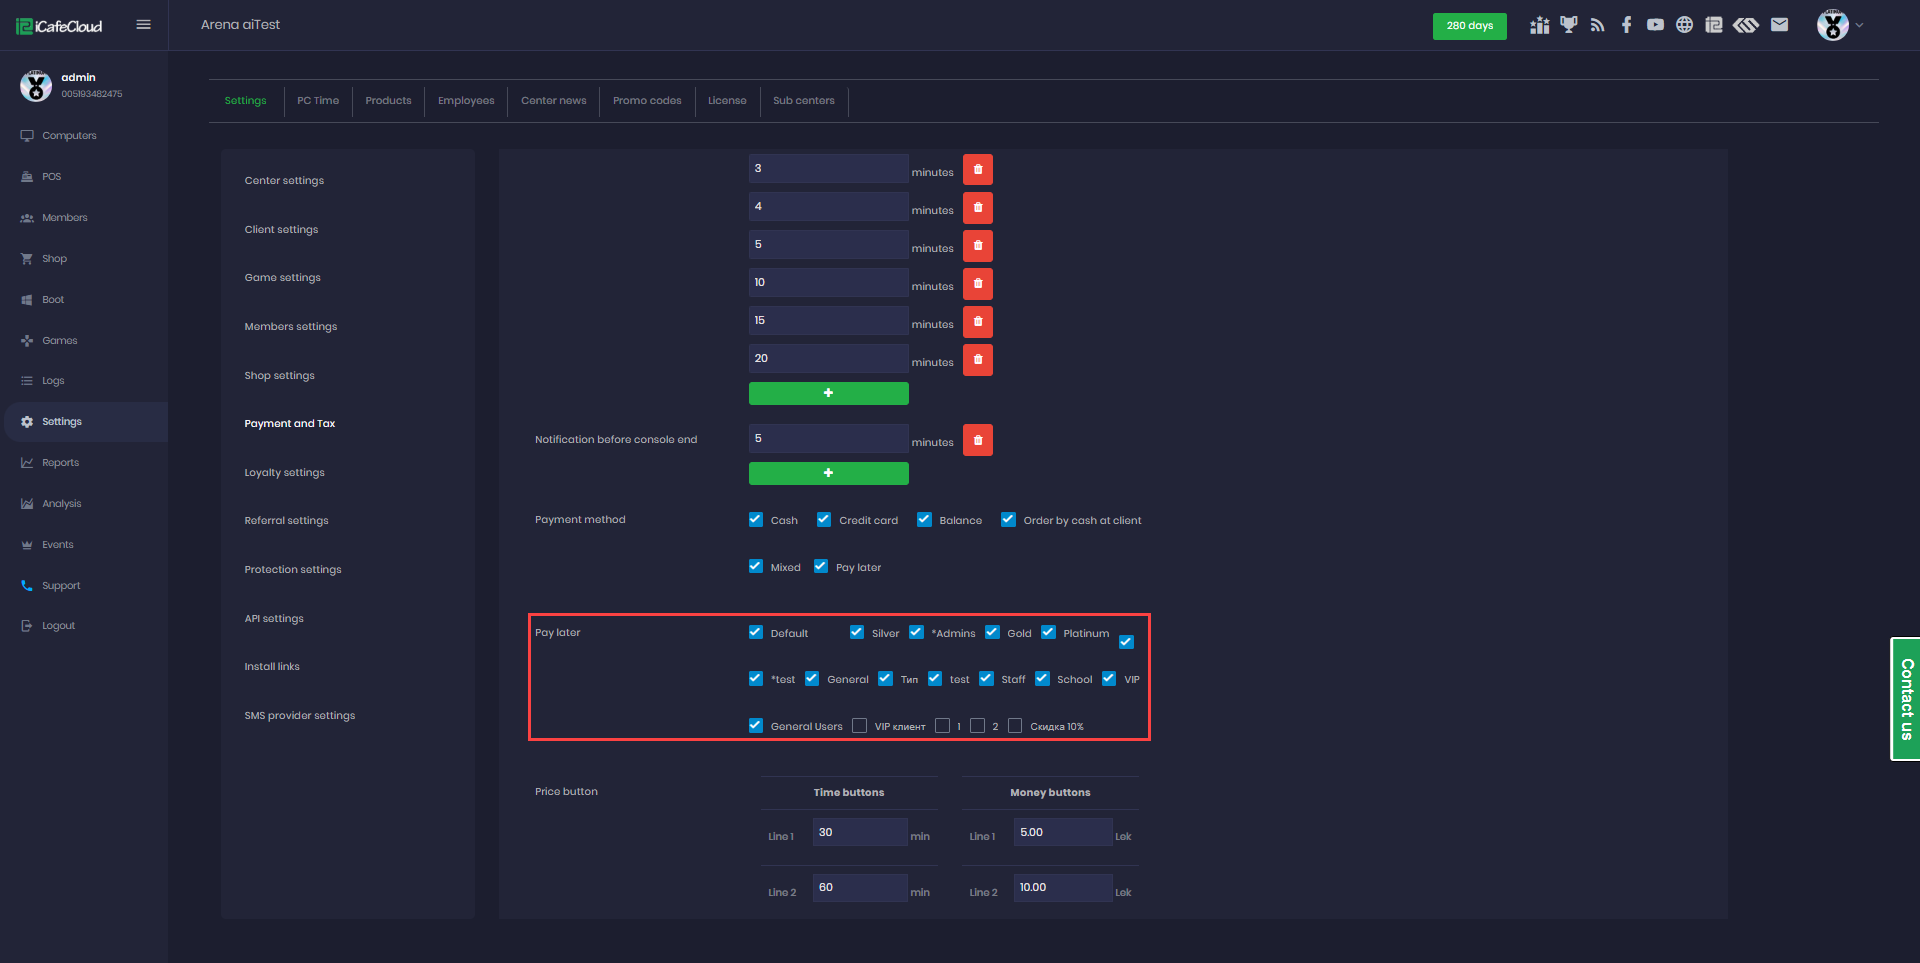
Figure 2
- To purchase a product on the POS Shop page, add the product, enter the member account, click the Enter button next to it, select Pay Later at checkout, and complete the order. (Figure 3)
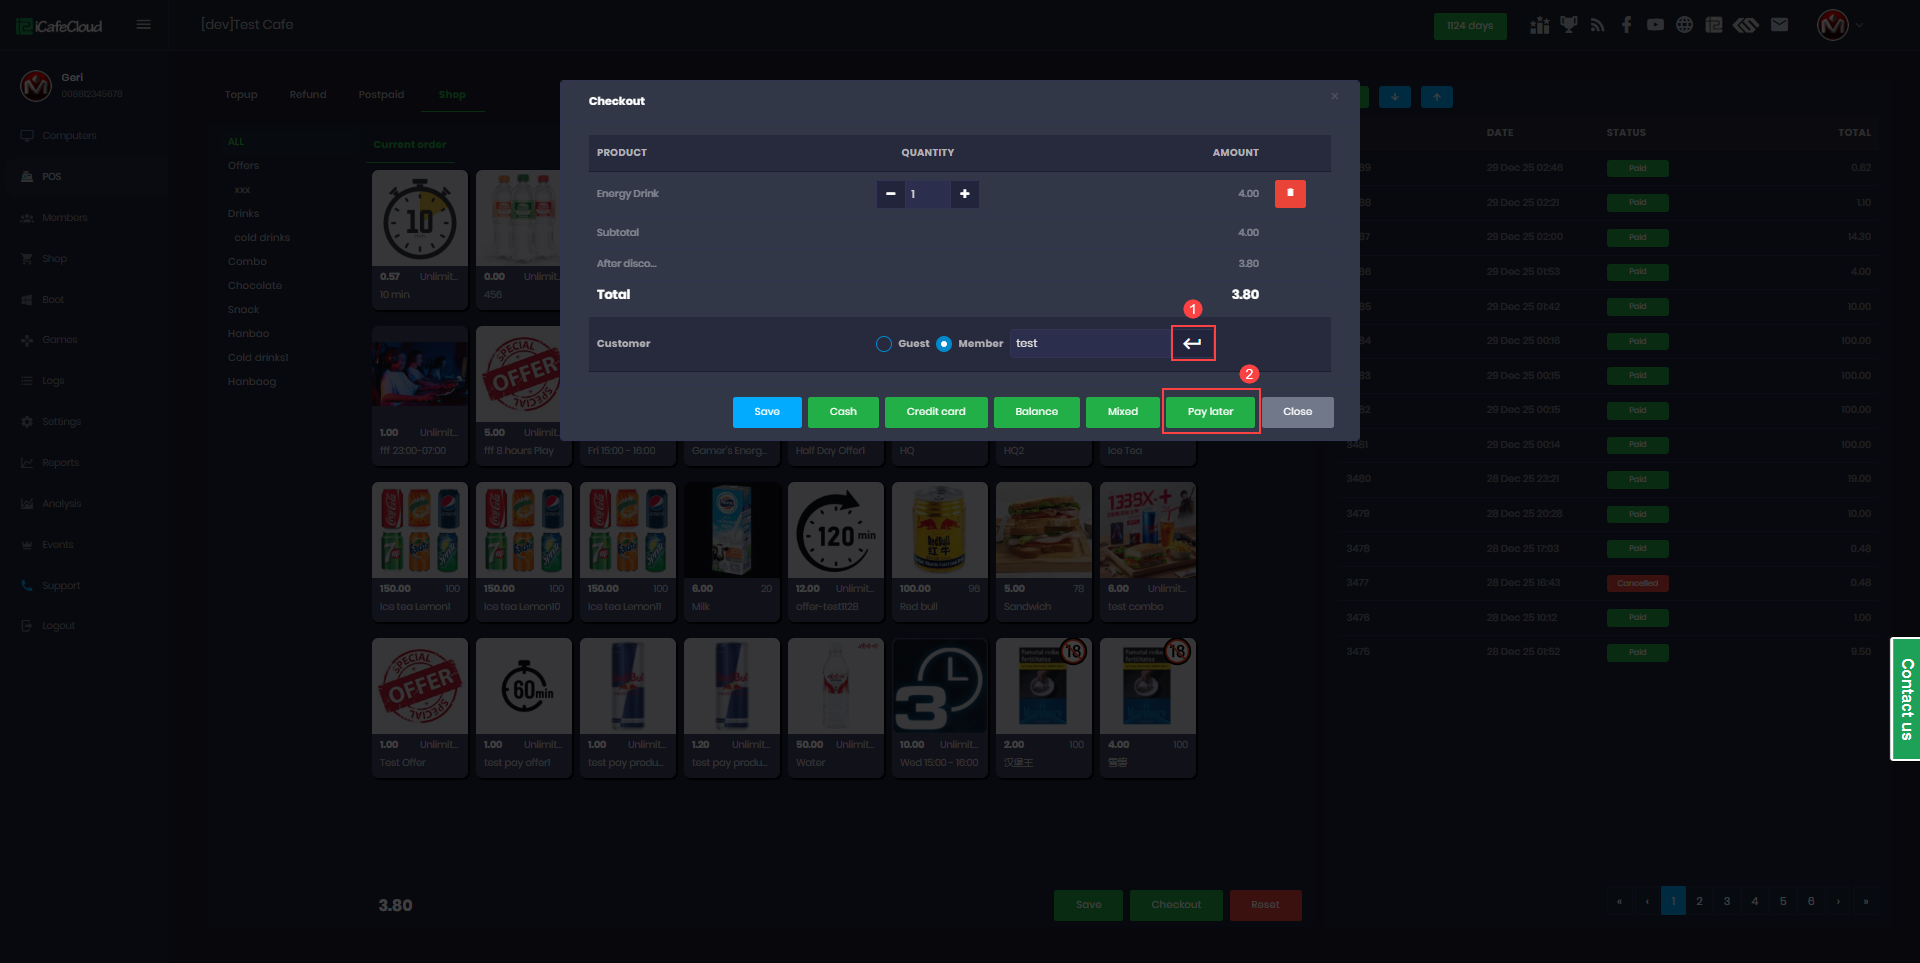
Figure 3
- In the transaction history, the order will appear with the status PAID and be tagged as "Balance Payment." However, this is actually recorded as a loan.
- On the Members page, a notification will show the number of members with unpaid loans (e.g., "1"). You can also view the specific loan amount for each member (Figure 3).

Figure 3
- On the POS page, after entering a member account, the system will also display any existing Loan Balance. You can also top up and choose Pay Later, which will add the top-up amount to the member's loan. (Figure 4).
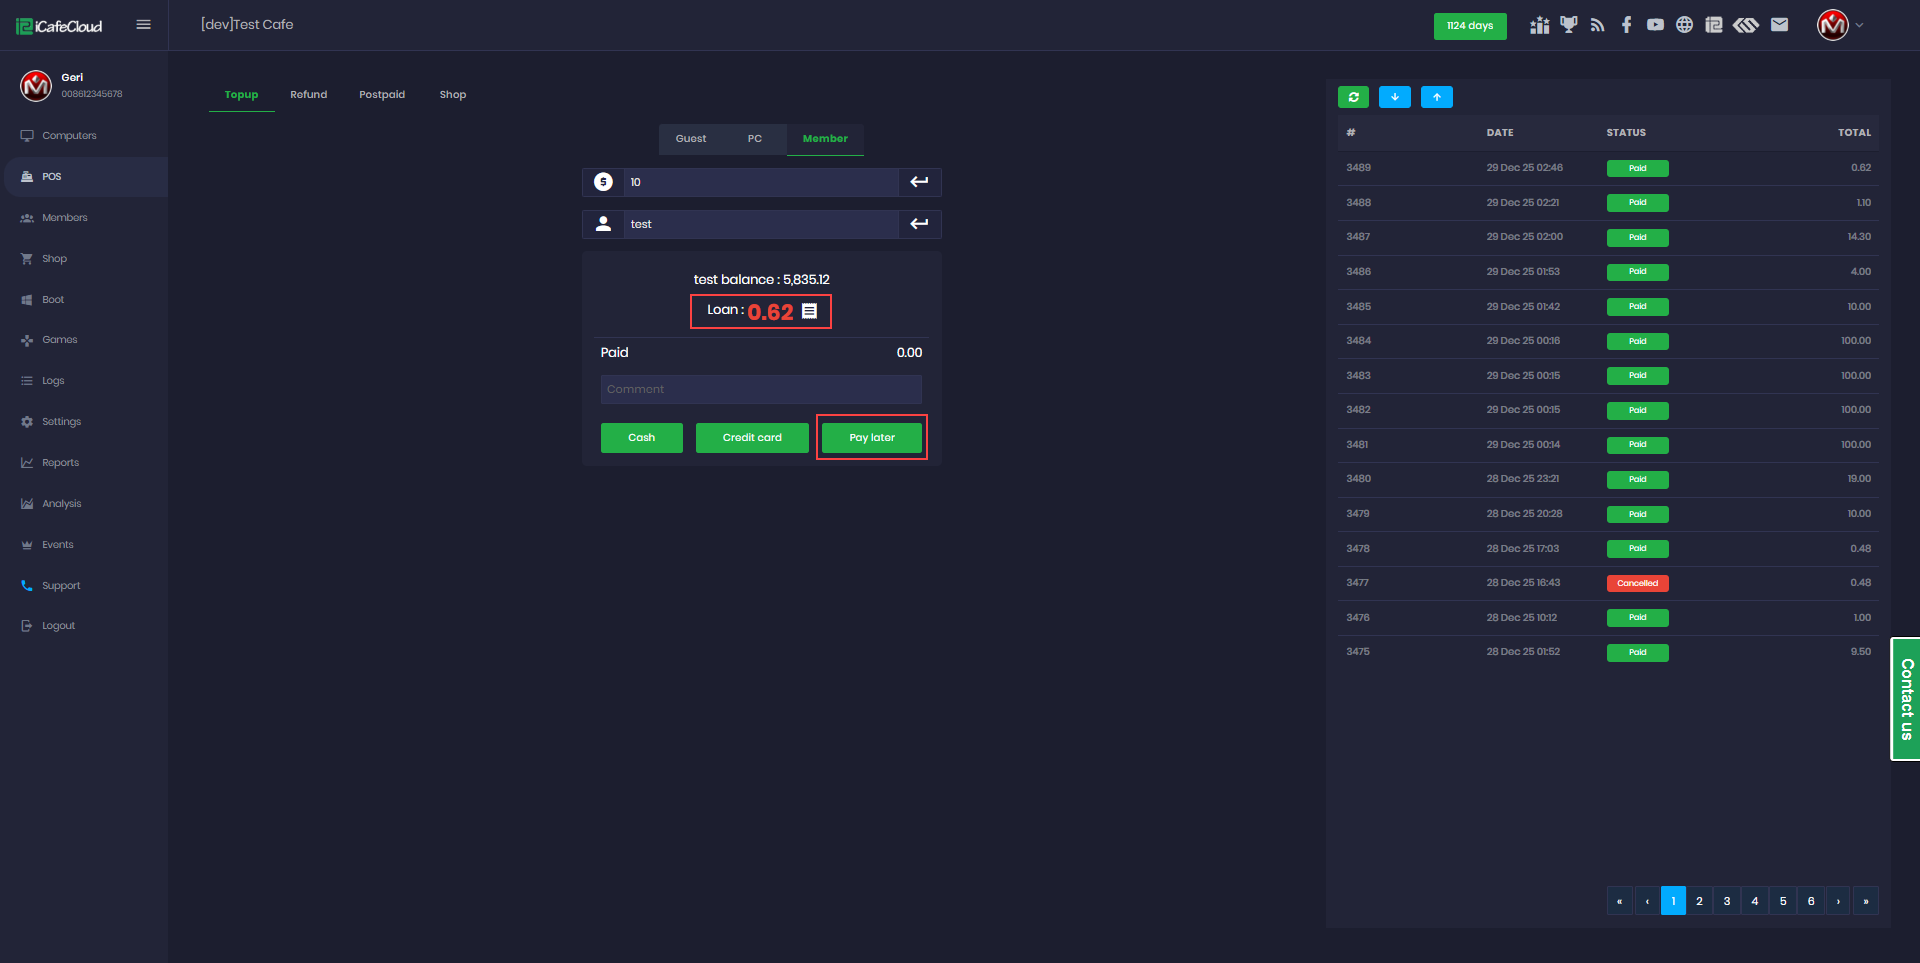
Figure 4
- To allow the client side to use Pay Later, navigate to Settings → Product → Product Groups and enable the Pay Later option for the desired group. (Figure 5)
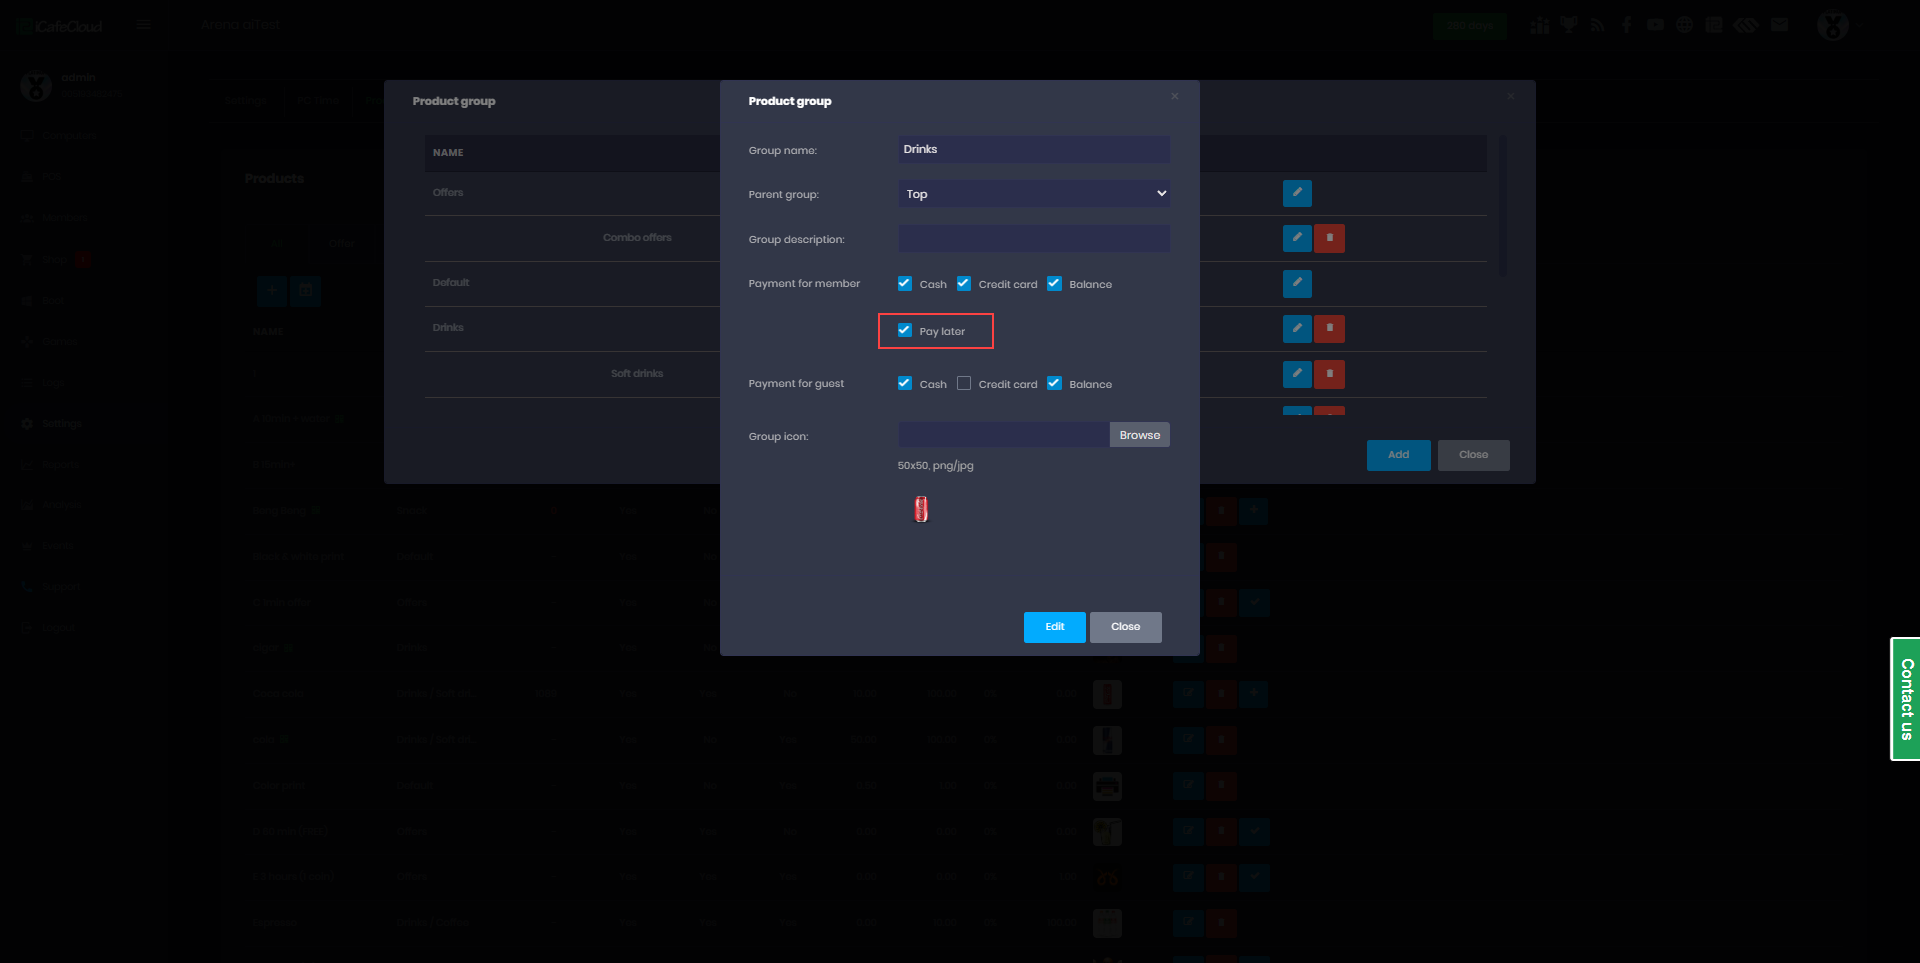
Figure 5
- On the client side, the Pay Later option will also be available among the payment choices. (Figure 6)
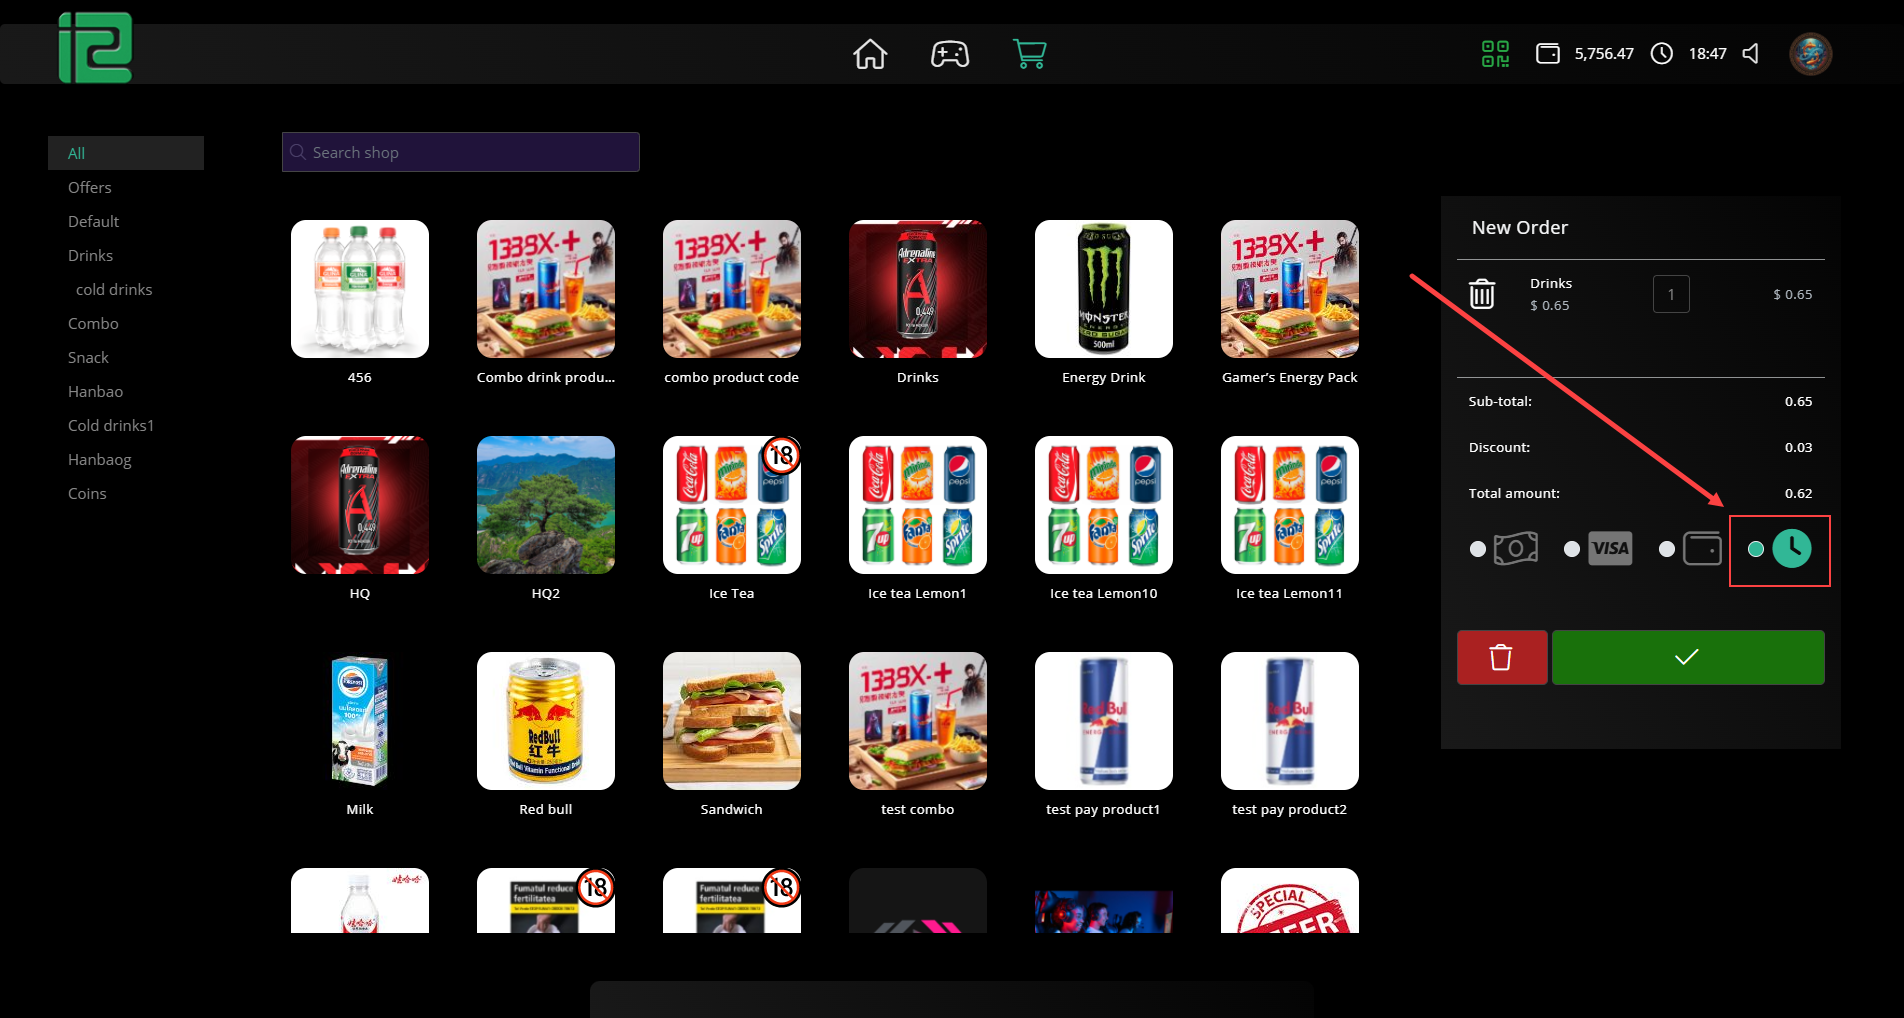
Figure 6
- Once completed, you can navigate to the game page and check the Loan Amount (shown in red) along with the Price to Pay.(Figure 7)
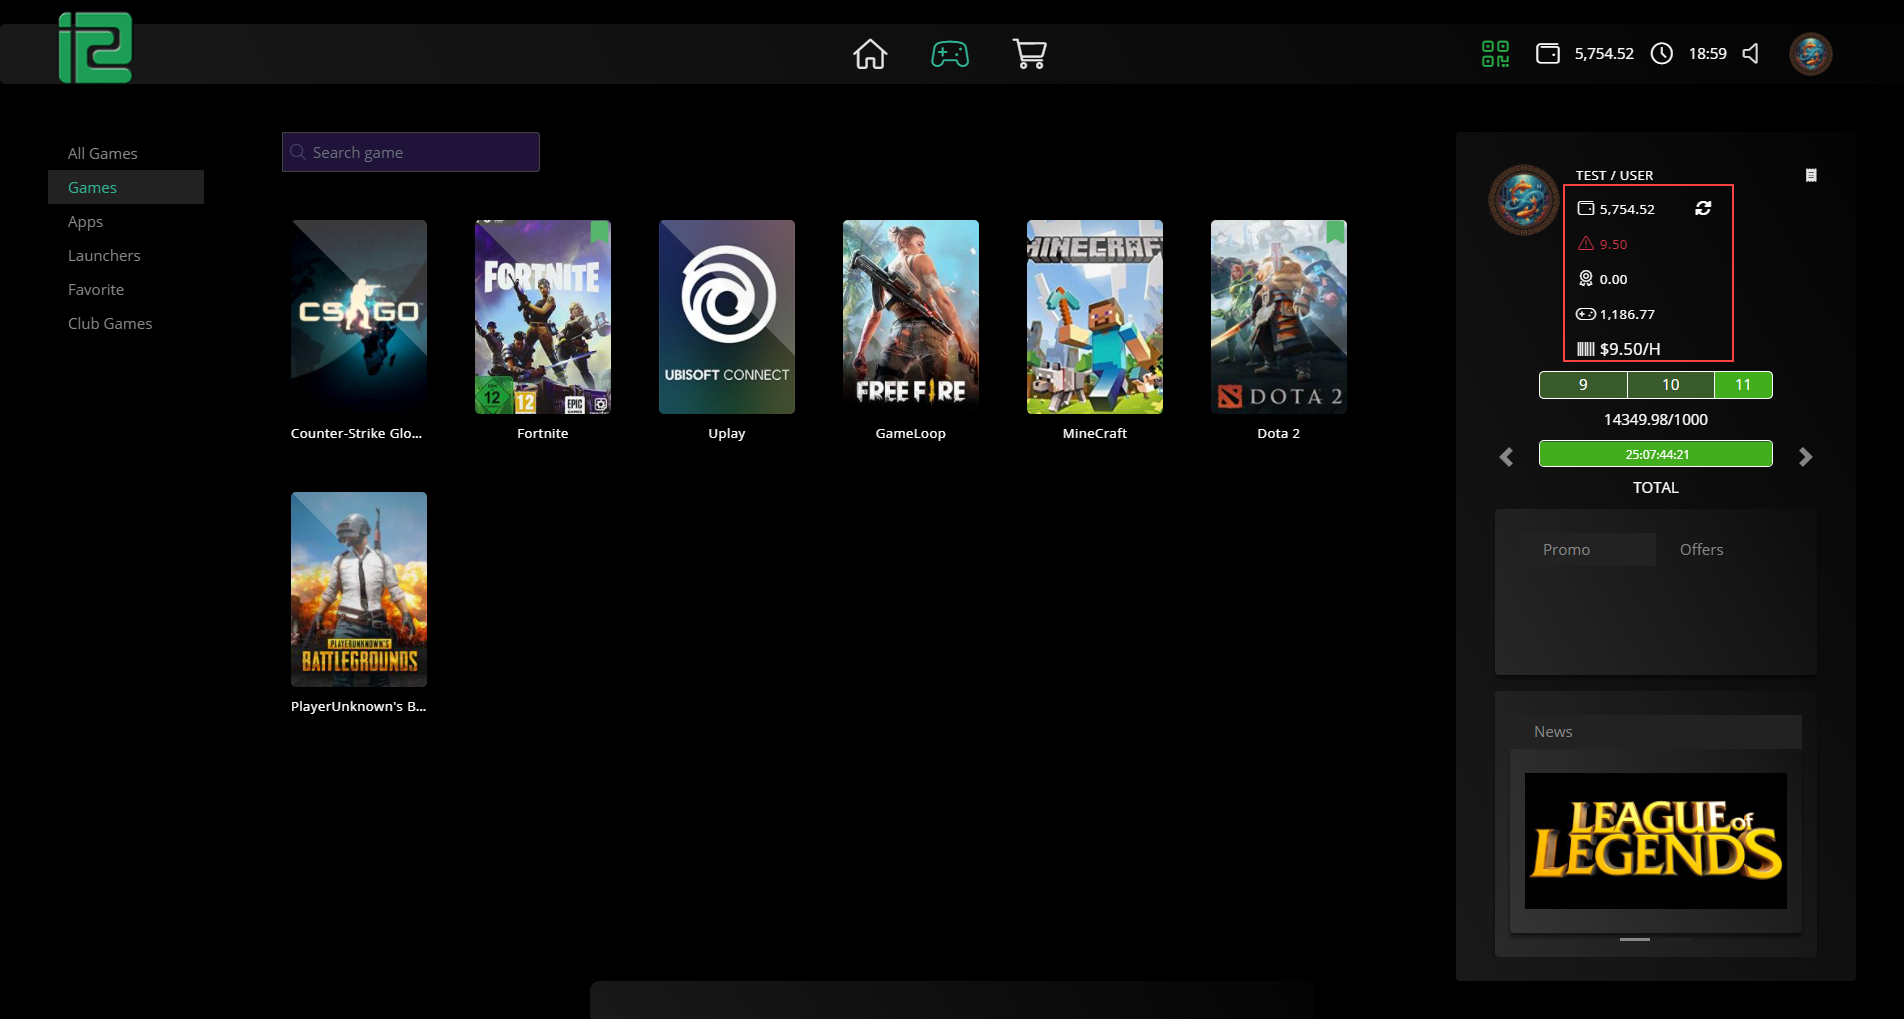
Figure 7
- Once you check out, the login screen will display a notification to pay your bill along with the amount due.(Figure 8)
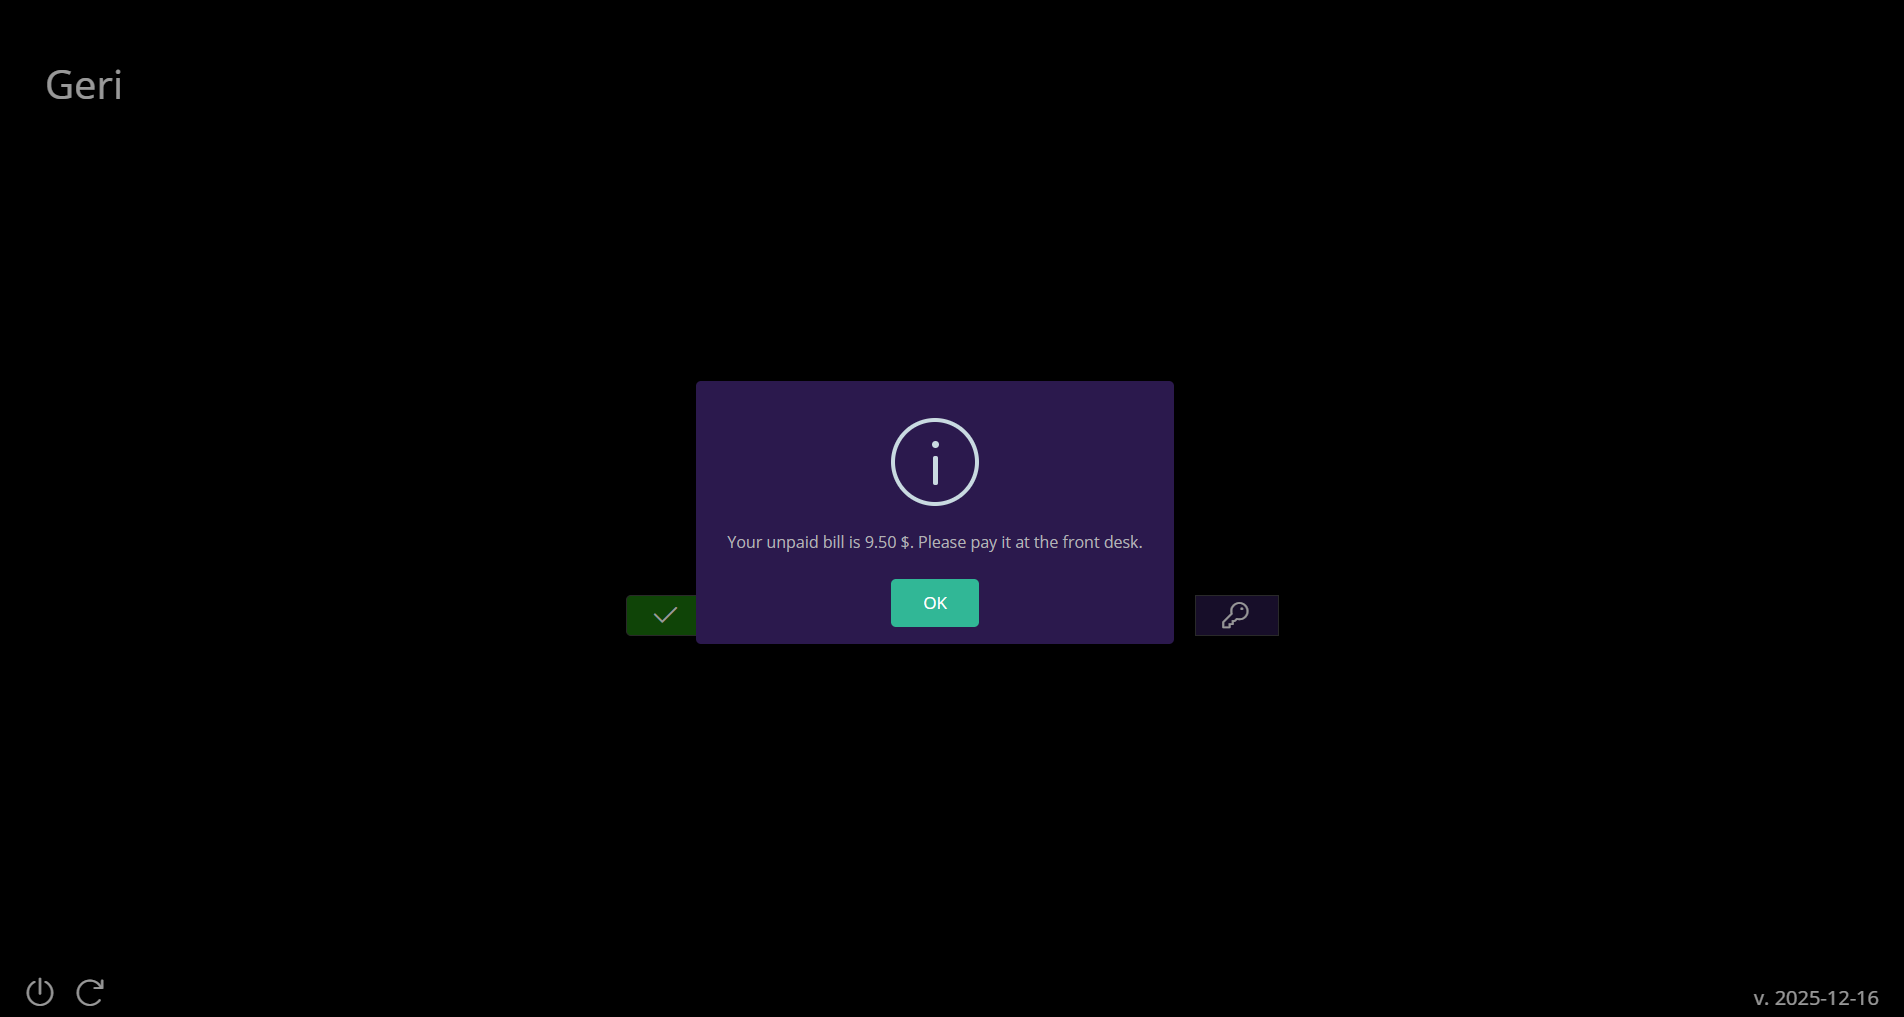
Figure 8