2025-09-04
client, print
The following explains how to configure and use the printer from a client PC so that orders are automatically submitted.
- In the latest iCafeCloud Server, click at Options, next to the Printer click on the list, and select the printer that is connected to your PC. (Figure 1)
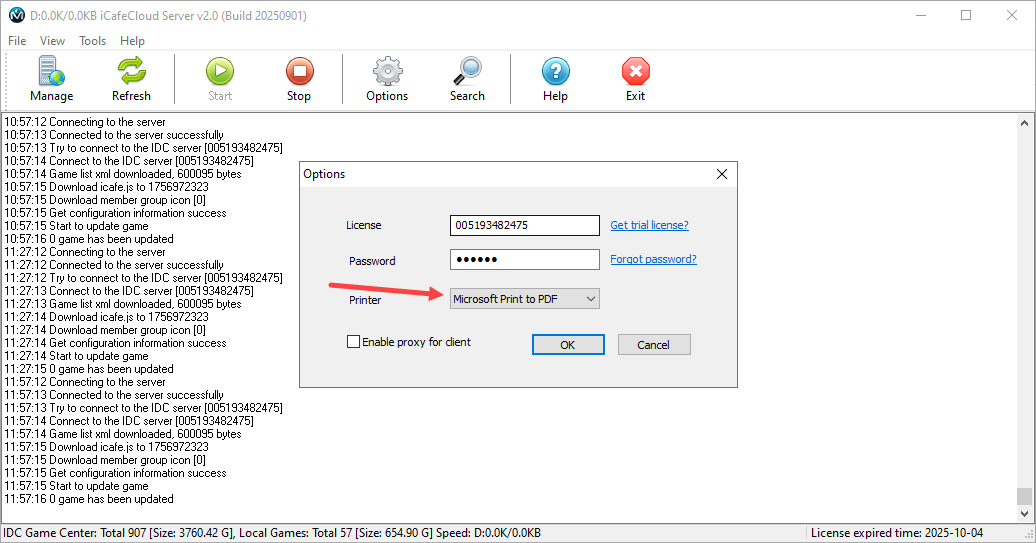
Figure 1
- In the Admin Panel, go to Settings → Shop Settings, click on Client Printer, change it to Enable, and then click Save. (Figure 2)

Figure 2
- Once this function is enabled, two new products Black & White Print and Color Print will automatically appear on the product page in Settings. You can edit them to adjust the price and other details as needed. (Figure 3)
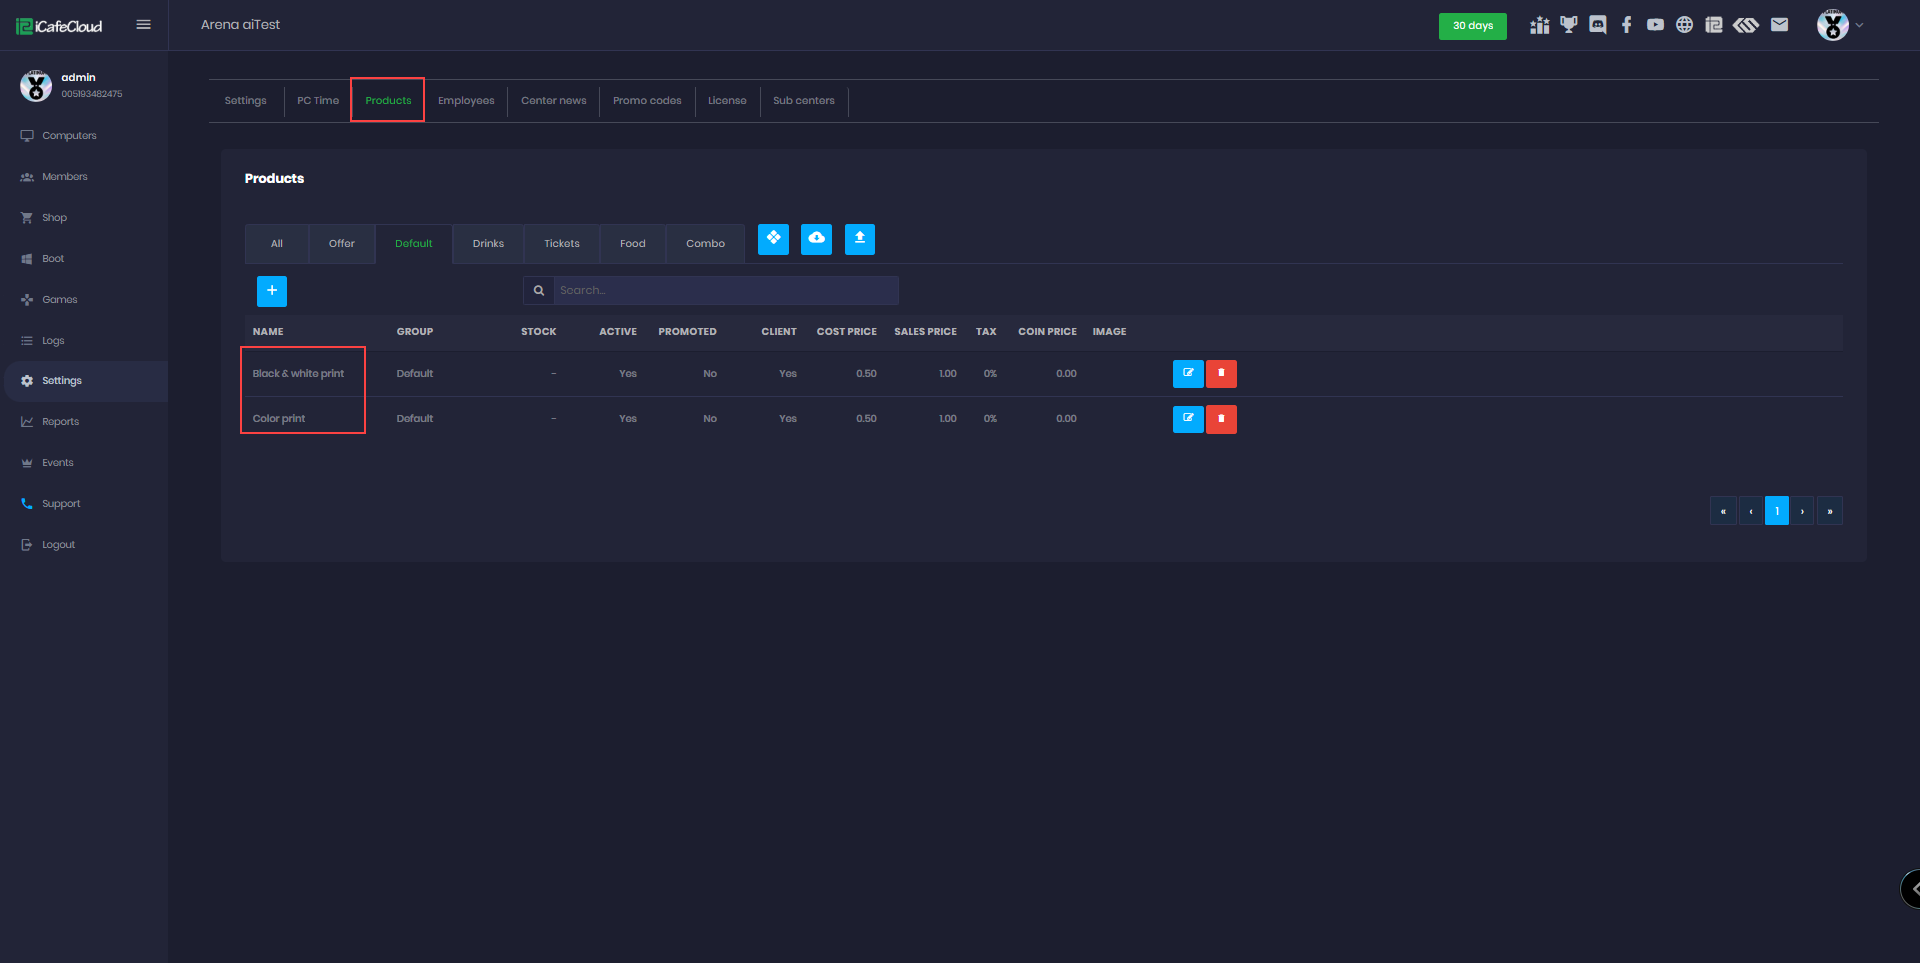
Figure 3
- On the client side, when you print any file, the printer list will display iCafeCloud Printer.(Figure 4)

Figure 4
- Once printing is confirmed, the purchase menu will automatically appear in iCafeMenu, allowing you to choose whether it is a black-and-white or color print, as well as select the payment method. (Figure 5)
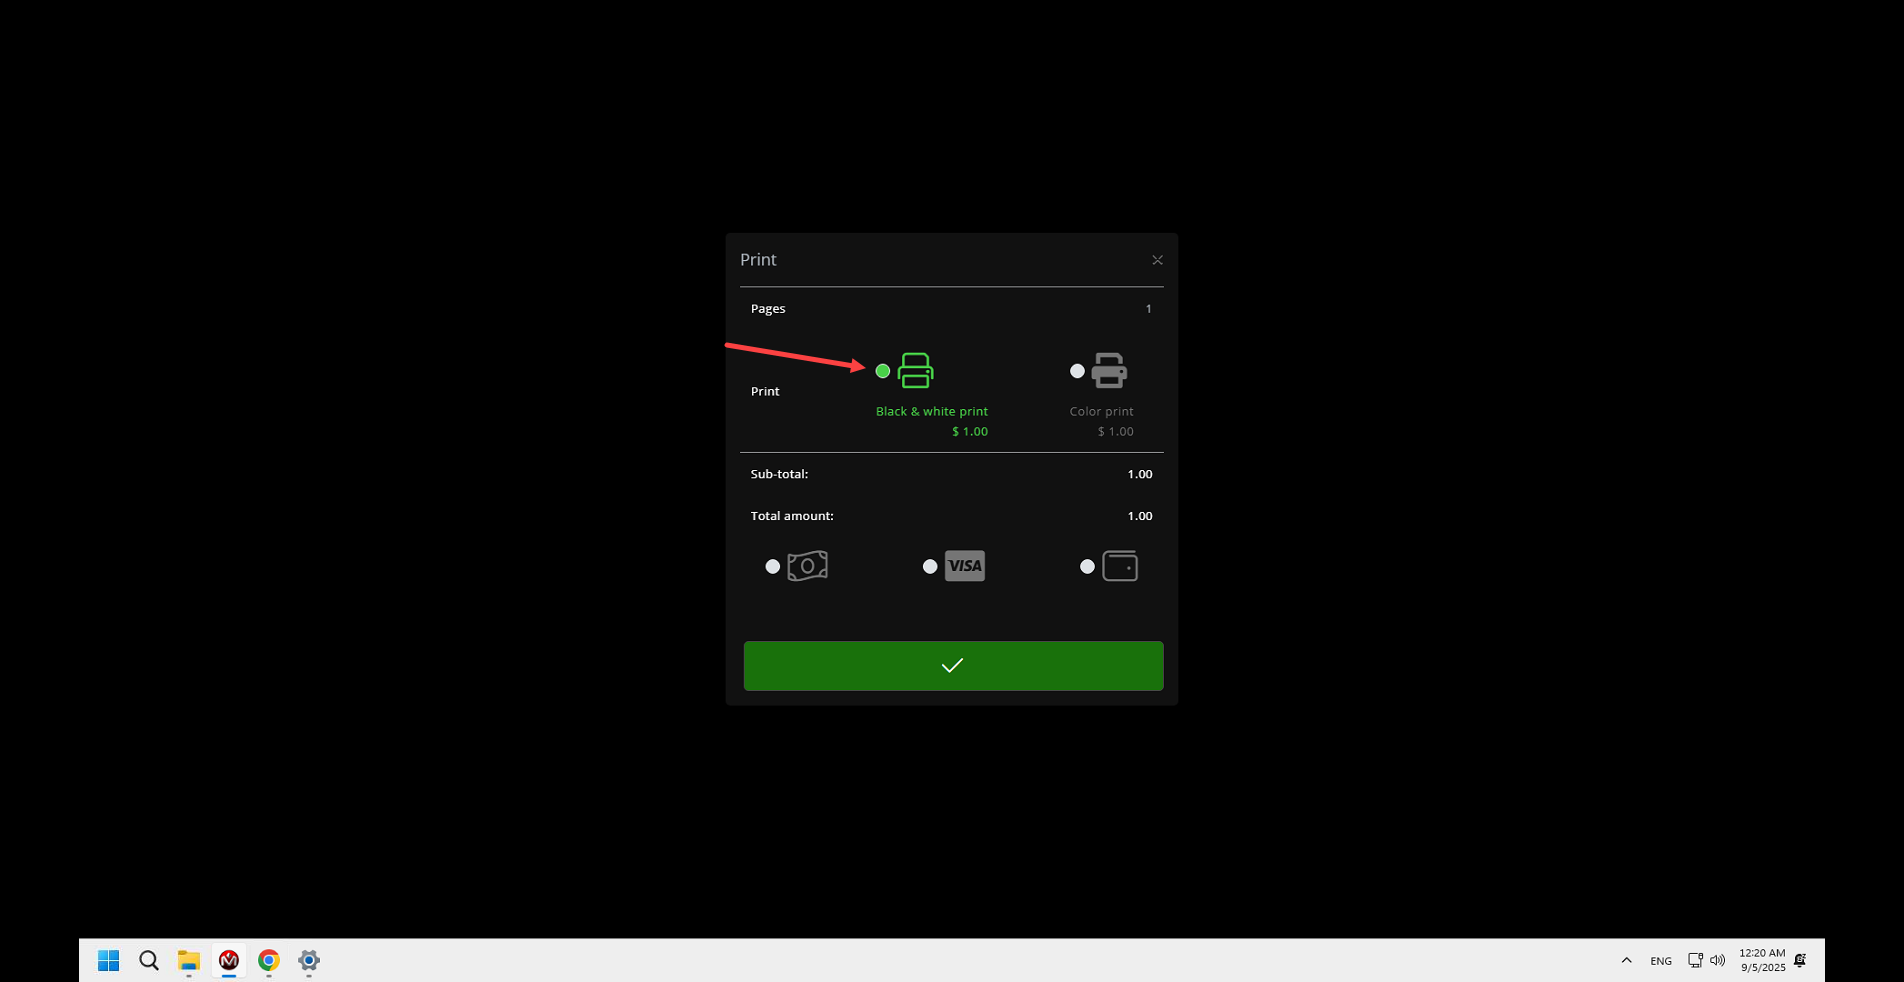
Figure 5
- After confirming the purchase on the admin panel a pending request will appear, where you can manually approve it and verify the print mode and quantity. (Figure 6)
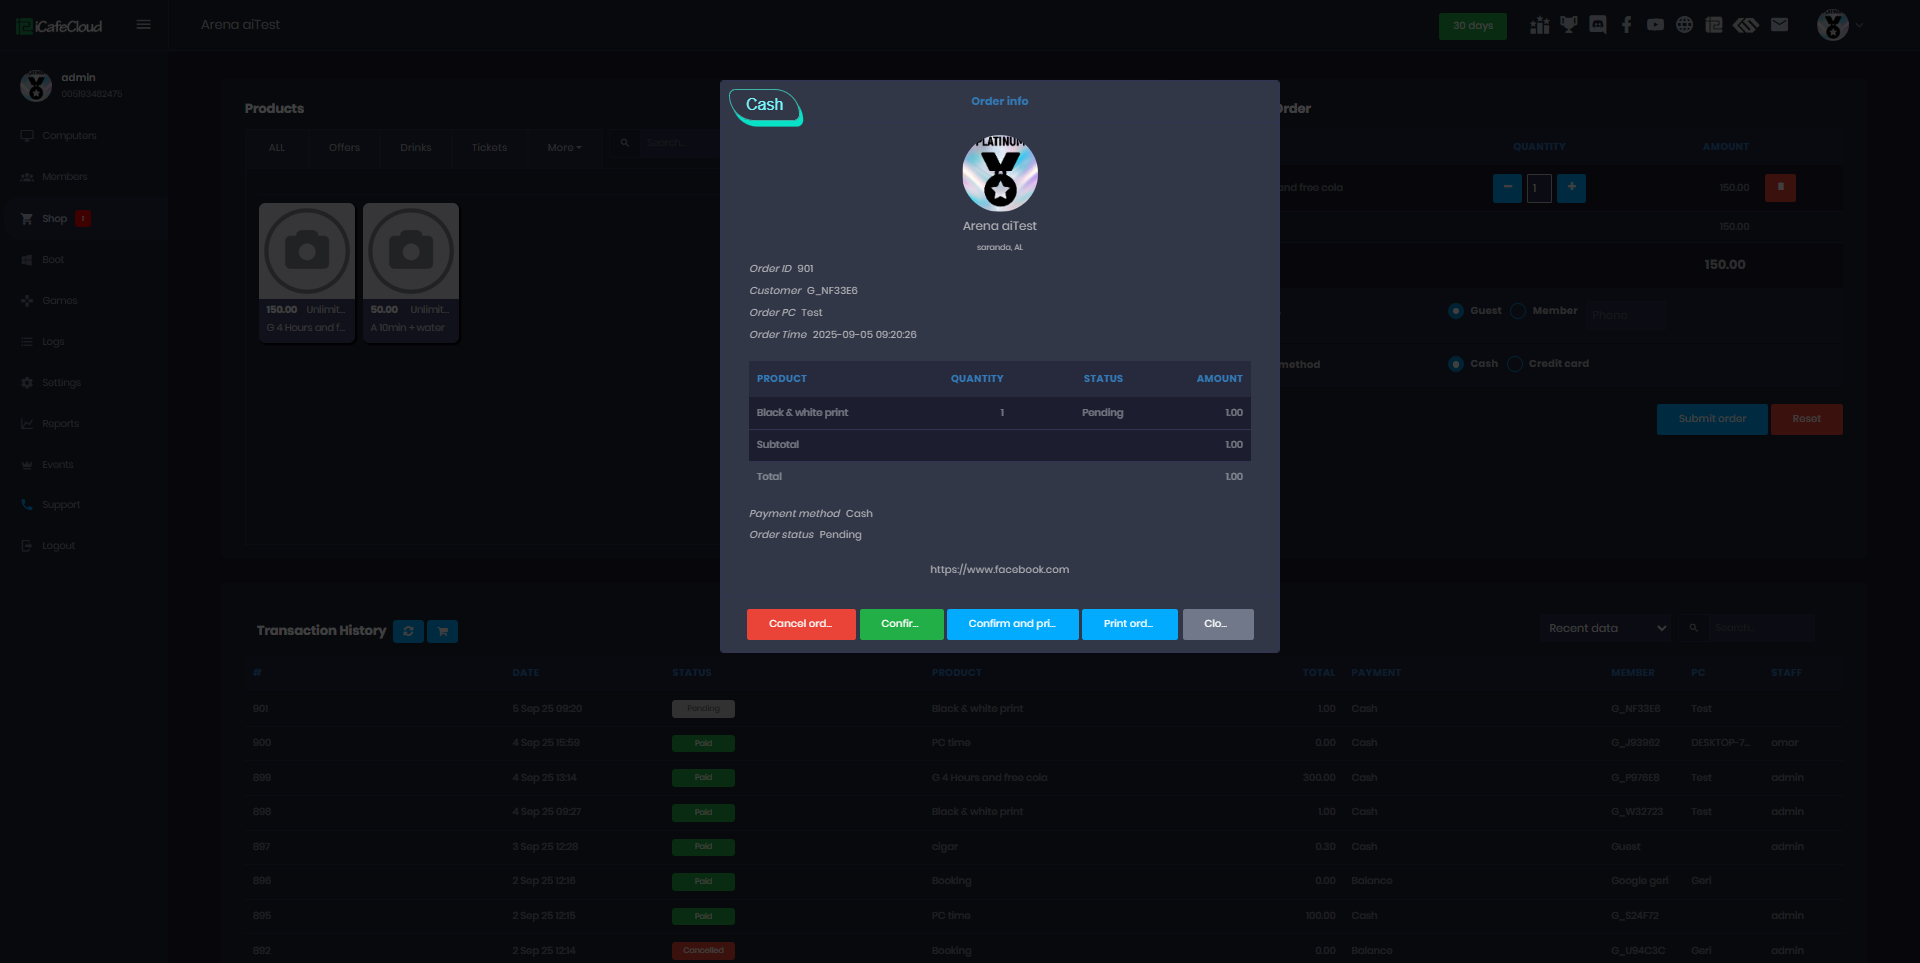
Figure 6