2026-05-22
square, credit card, POS
The following explains how to use Square POS for sales and integrate it with iCafeCloud for credit card payments.
- Create a Square account or log in if you already have one at: https://developer.squareup.com/us/en
- Once your account is ready, open iCafeCloud, navigate to POS - Settings, and select Square as Credit Card Terminal. (Figure 1)
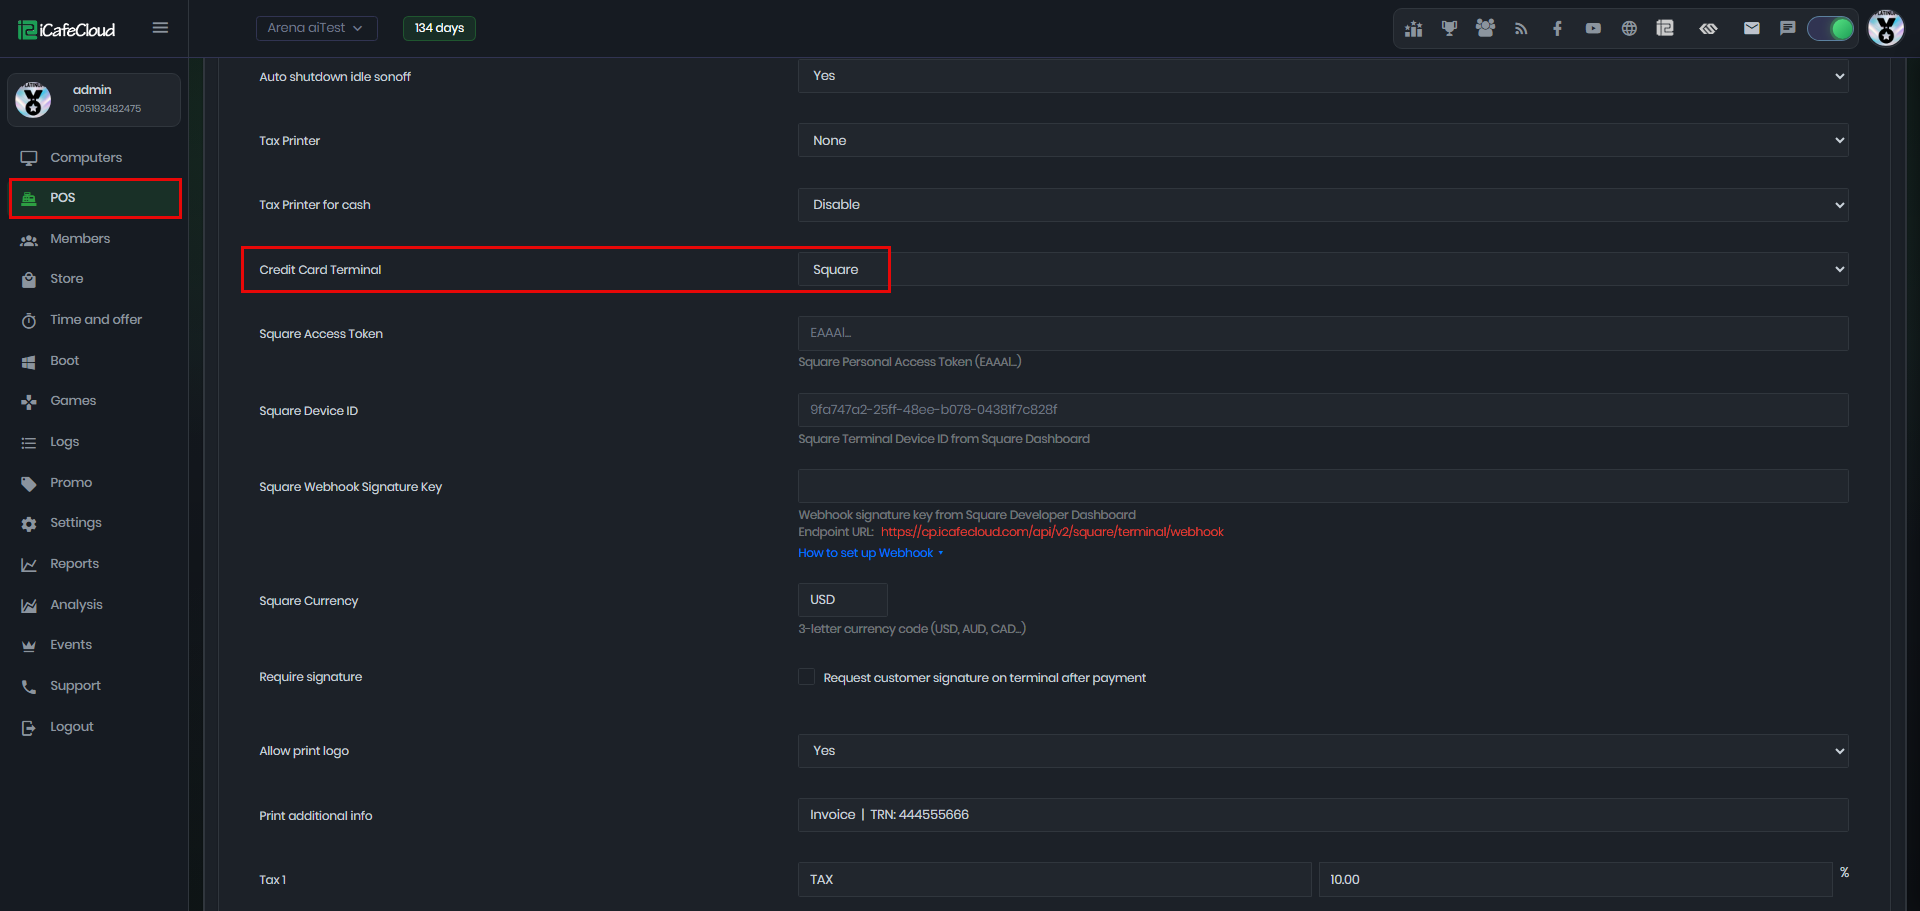
Figure 1
- To get the Square access token, log in to your Square Developer account.(Figure 2).
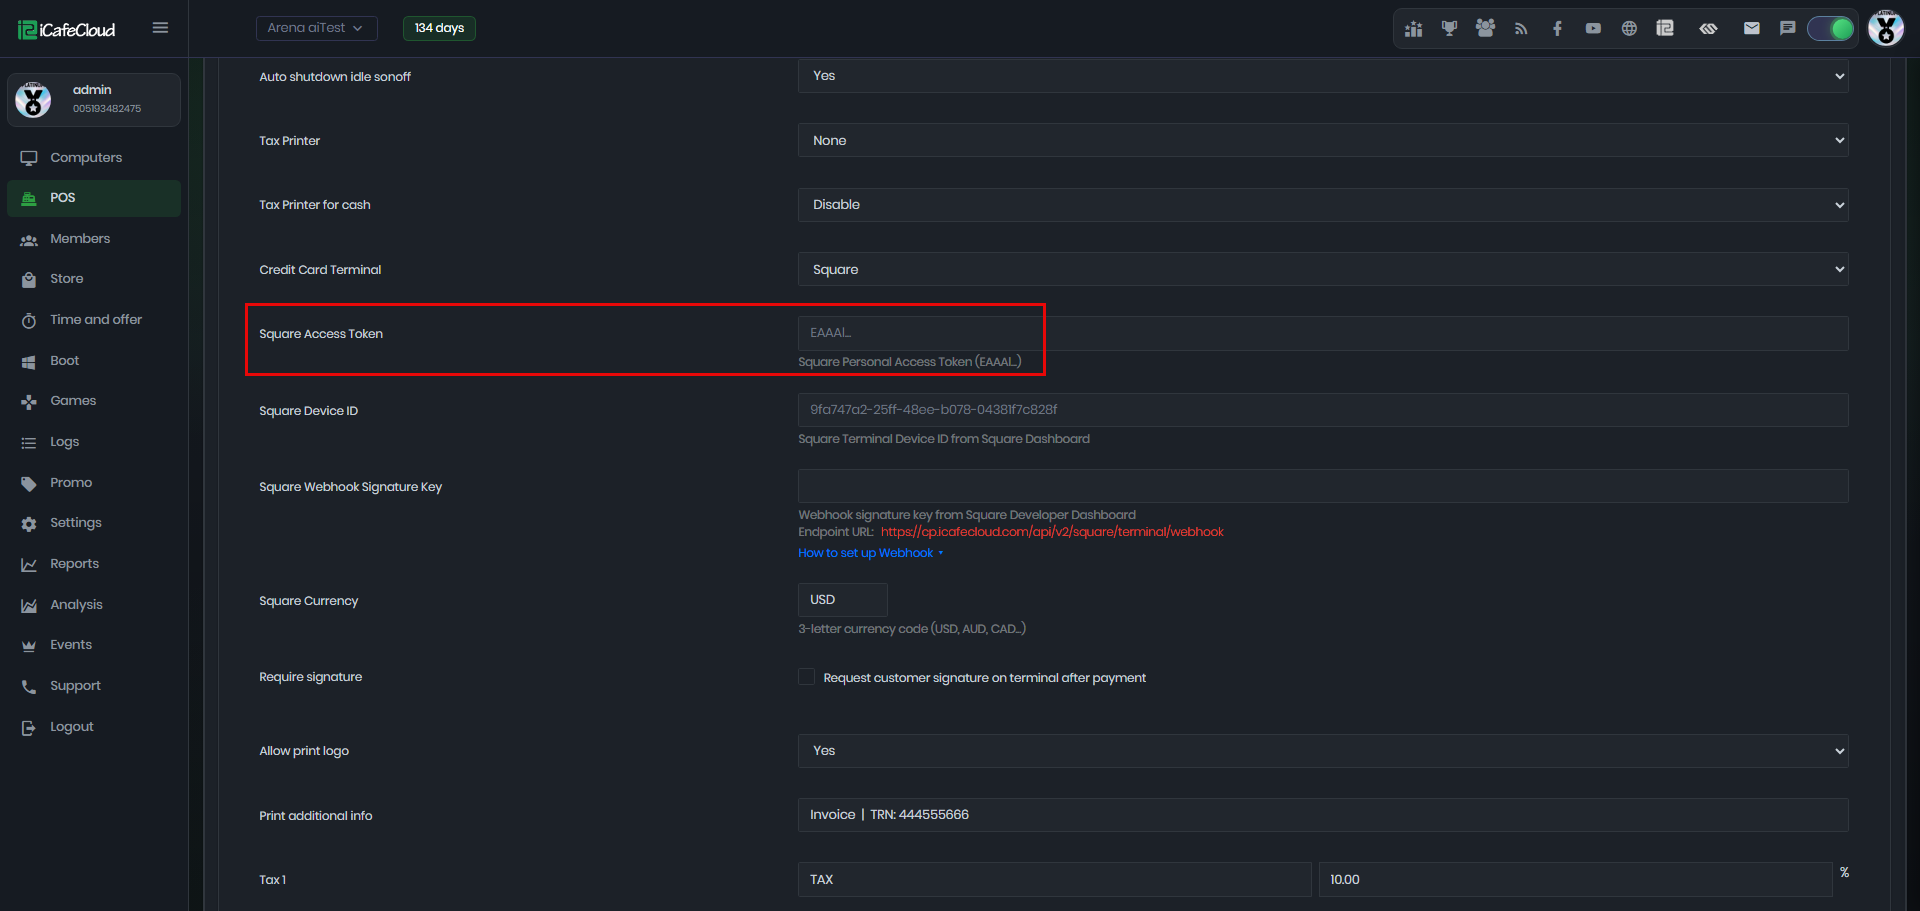
Figure 2
- Create an application in your Square account under Applications, then click the plus (+) button. (Figure 3)
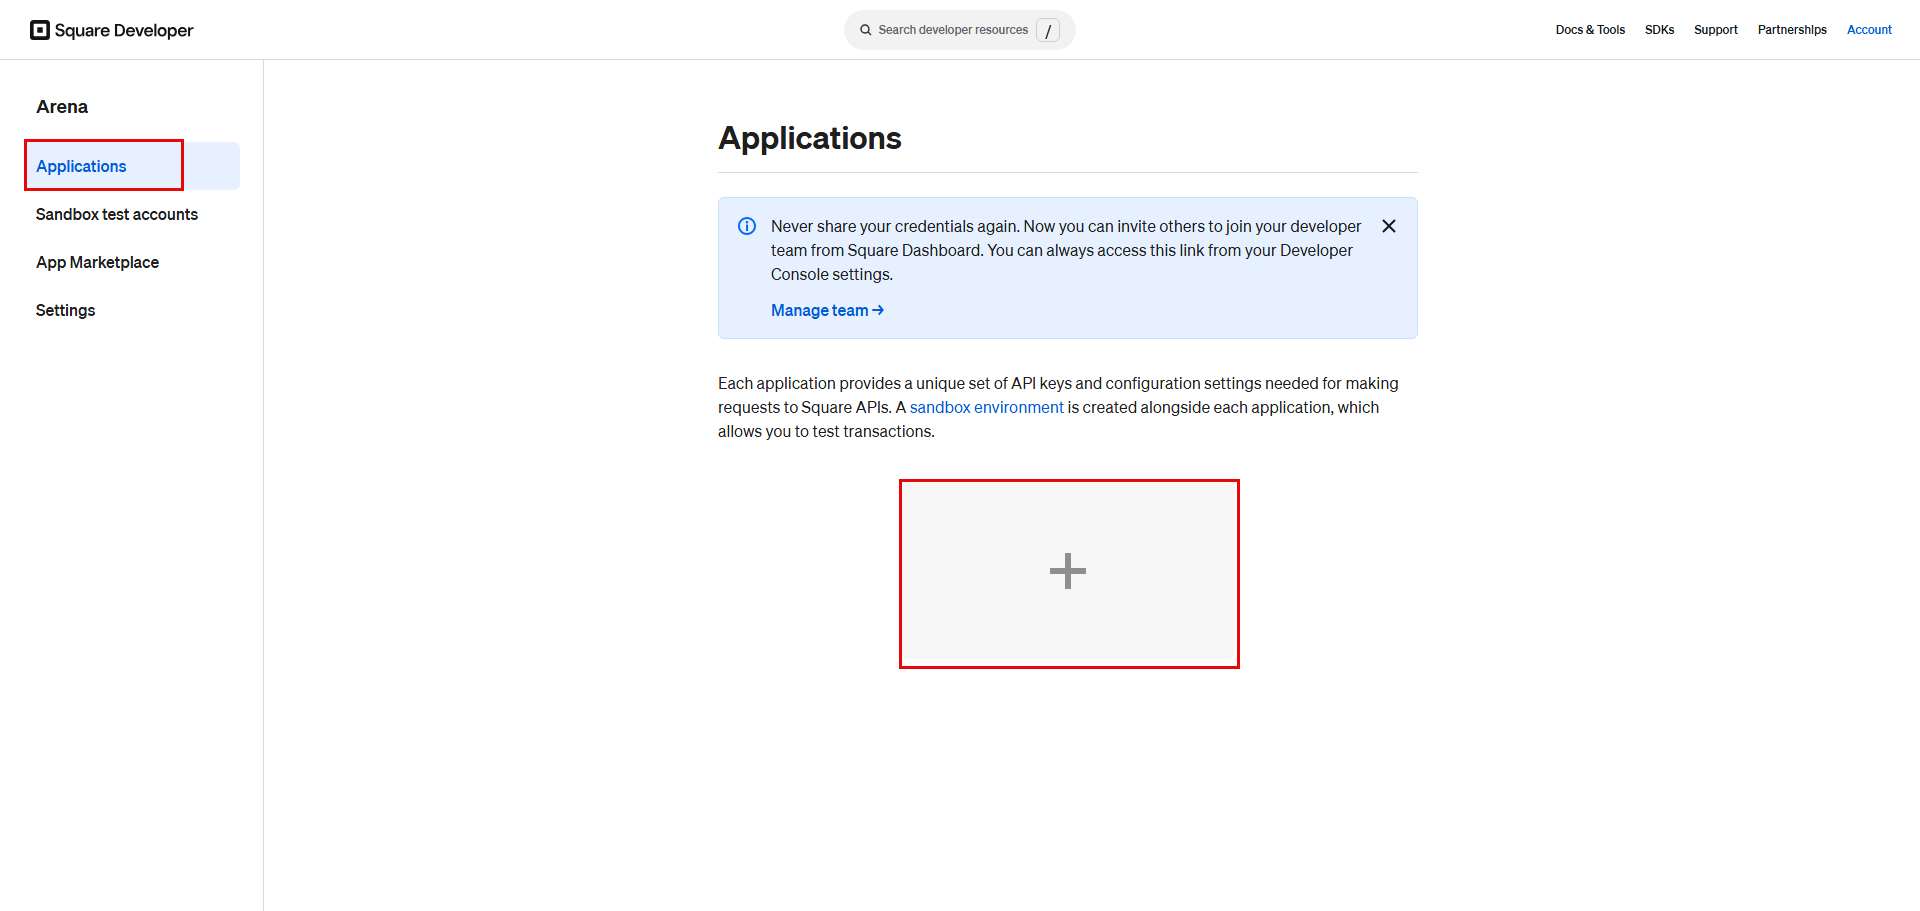
Figure 3
- Name the application based on your preference, then click ‘Next’ (Figure 4).
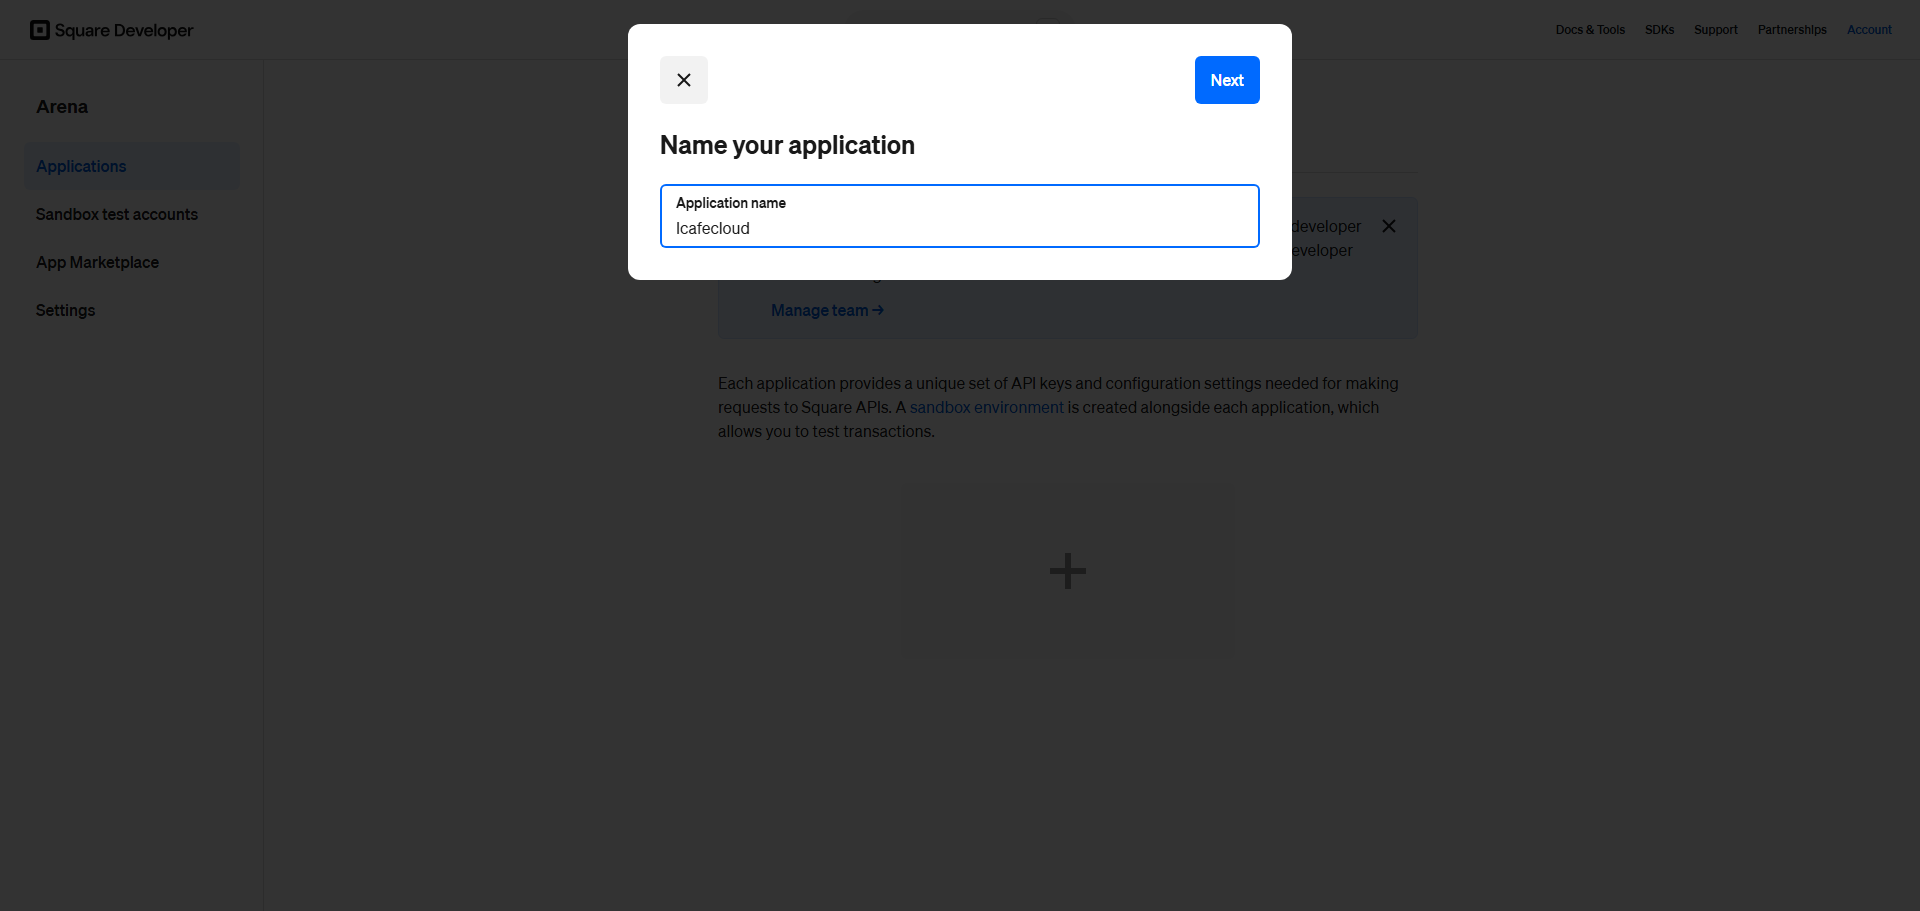
Figure 4
- Once the application is created, the Credentials page will be displayed. At the top, you will see ‘Sandbox’ and ‘Production’. Sandbox is used for testing, while Production is used for real transactions. Select ‘Production’, then you can copy Production Access Token.(Figure 5)
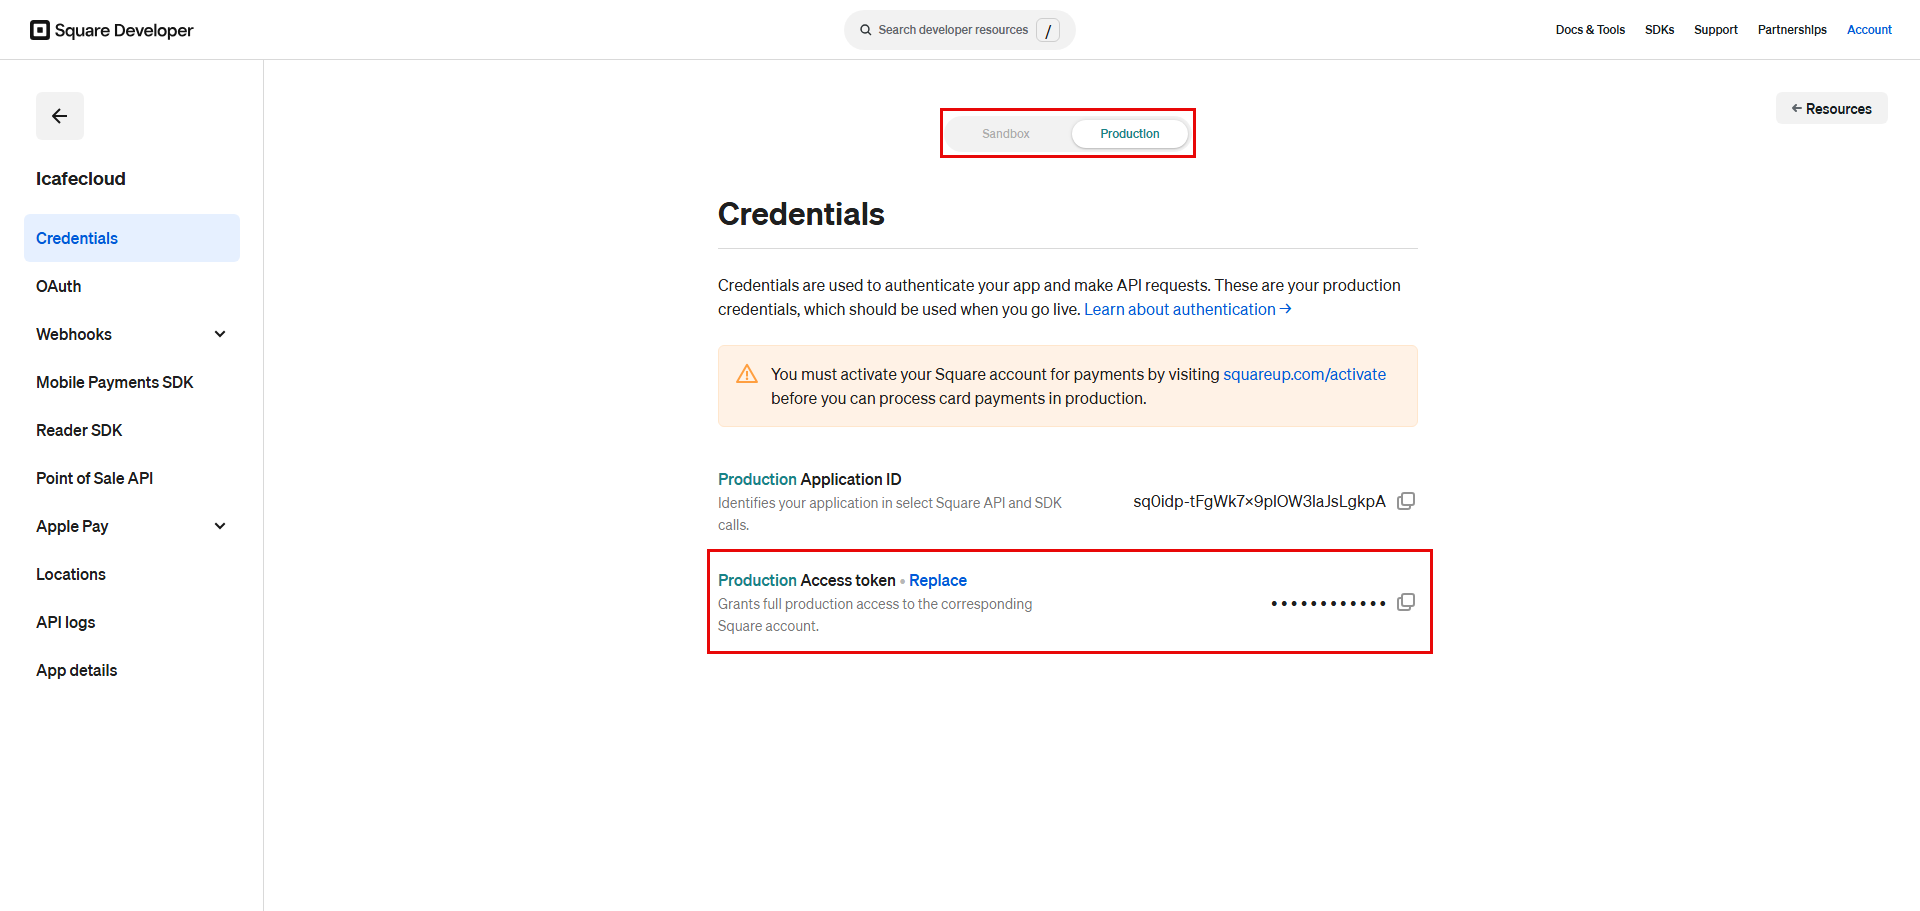
Figure 5
- Paste access token into the "Square Access Token" field in iCafeCloud.
- The Device ID is found in the Square Dashboard, available once a terminal has been paired to the Square account. (Figure 6).
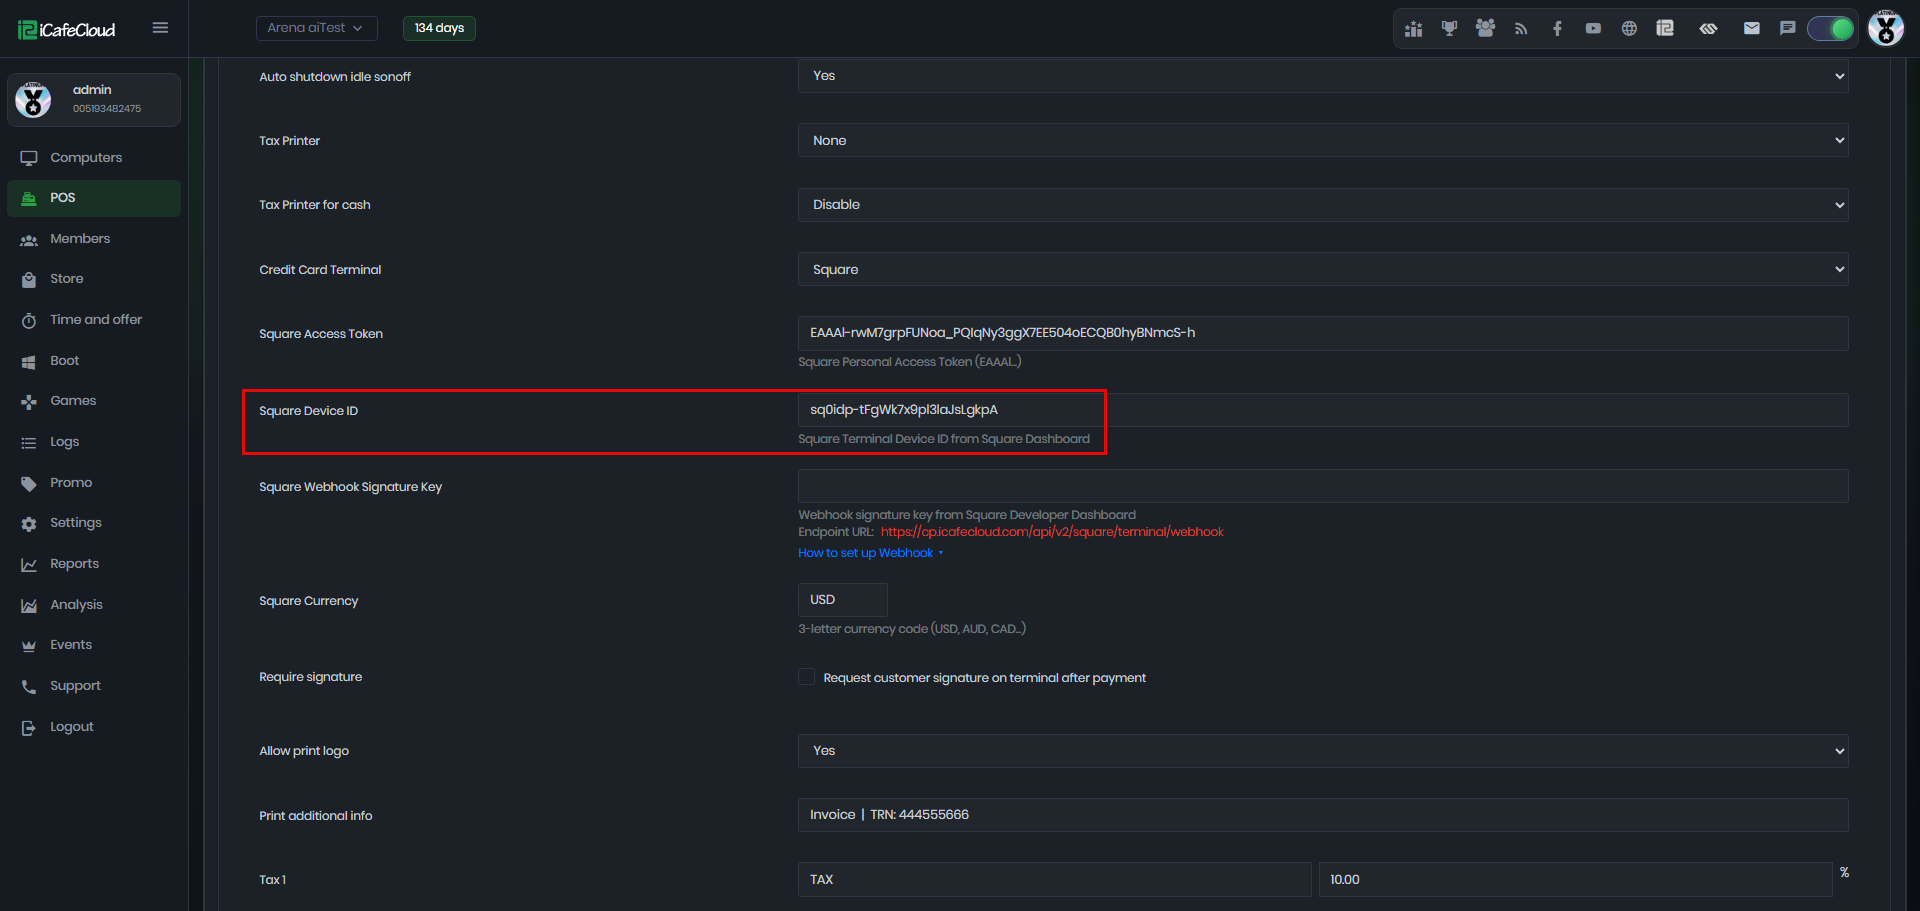
Figure 6
- For the Square Webhook Signature, click "How to Set Up Webhook" to display the steps.(Figure 7)
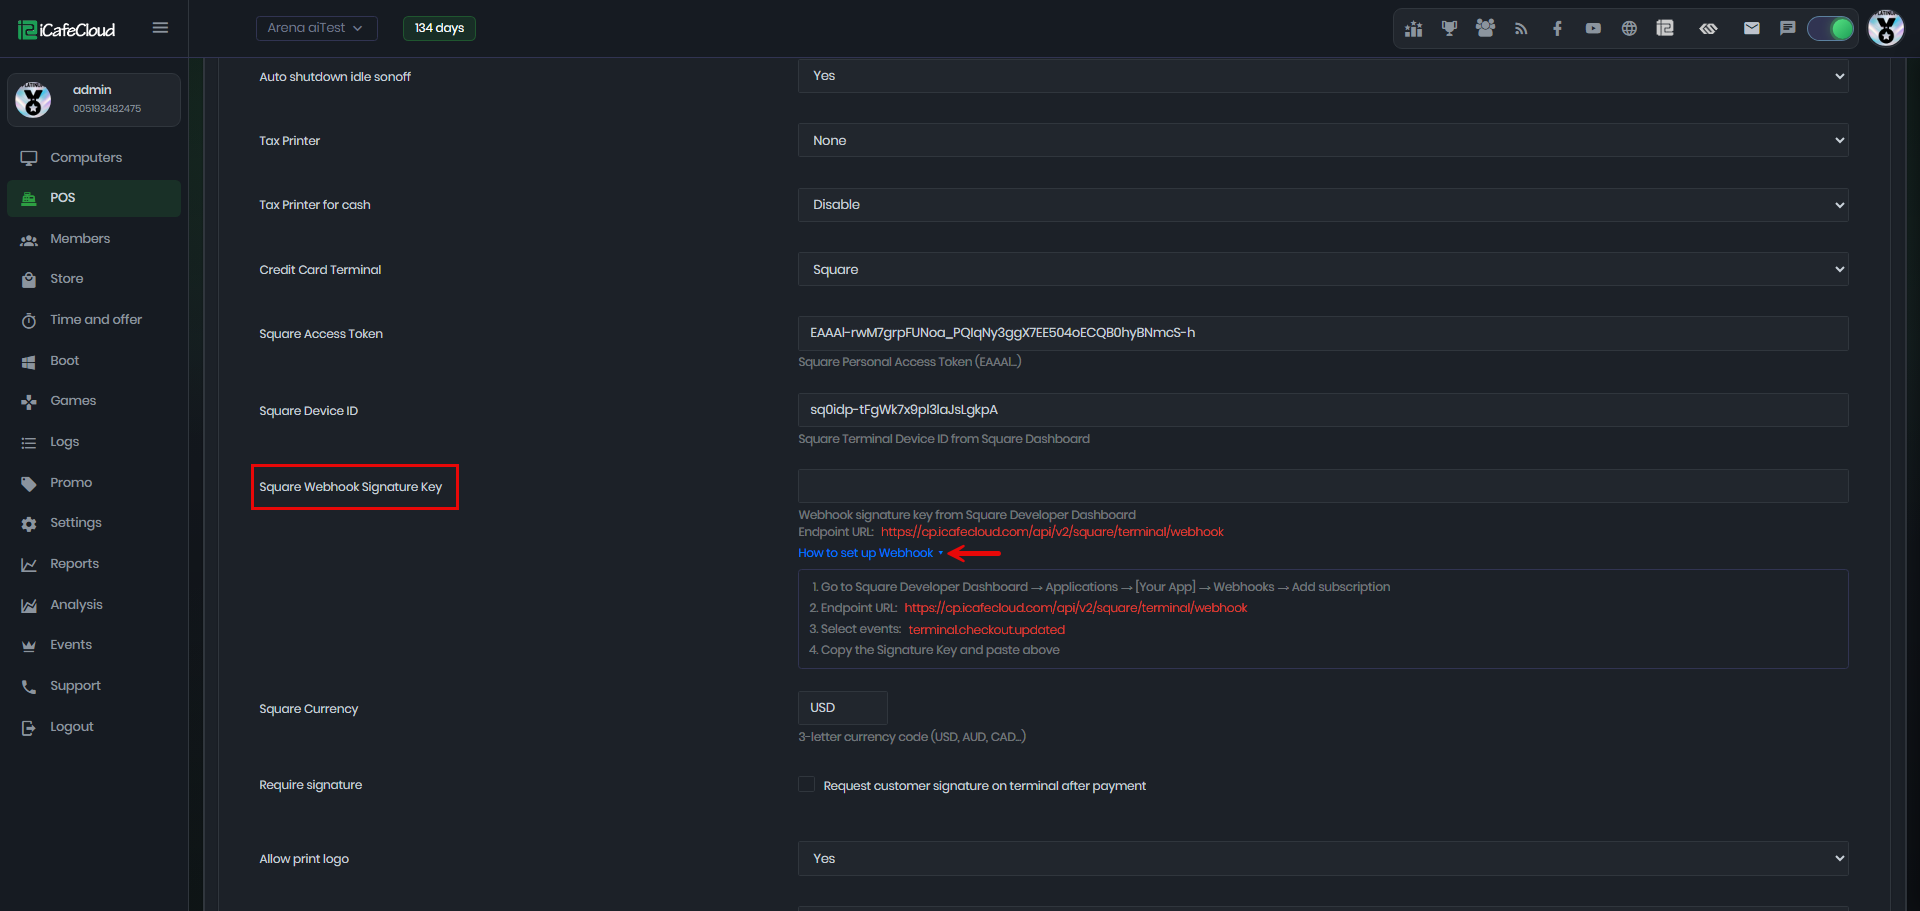
Figure 7
- Go to the Square developer dashboard at Webhooks and click "Subscriptions," then select "Production" for real transactions and click "Add Subscription." (Figure 8)
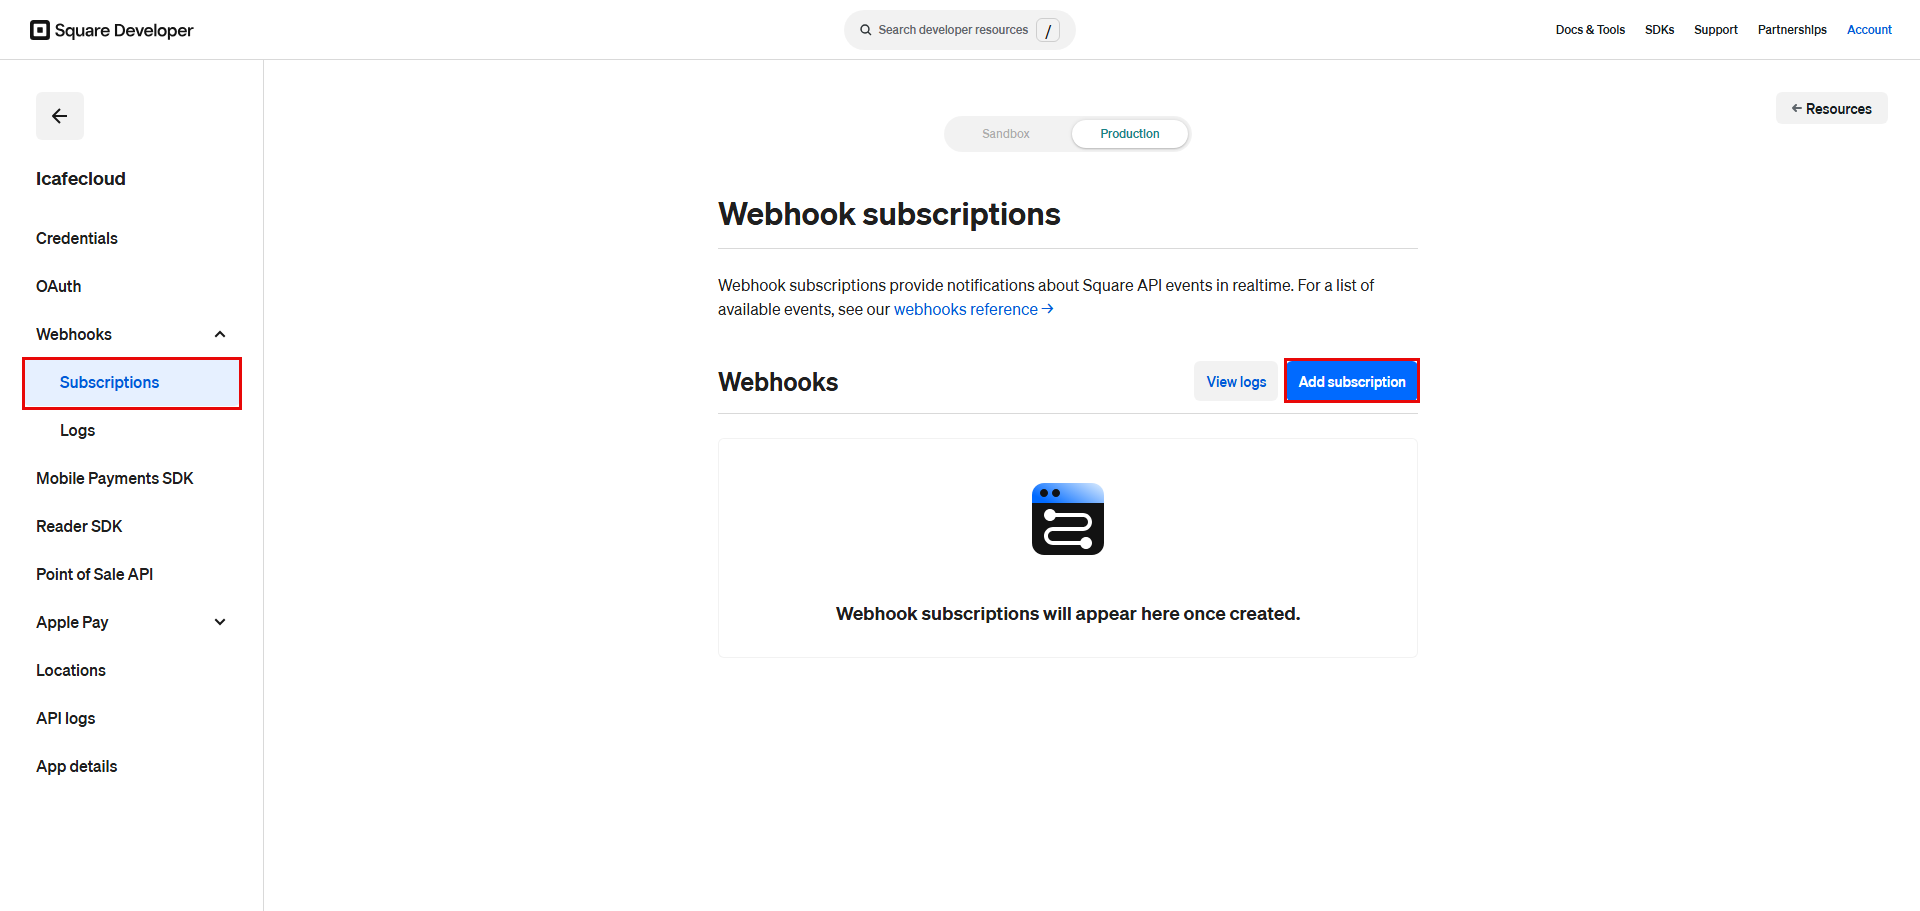
Figure 8
- Adding a subscription name is optional, but here we use "CC" since it will be used for Credit card payment. For the Notification URL, copy it from the "How to Set Up Webhook" page in iCafeCloud and paste it here.(Figure 9).
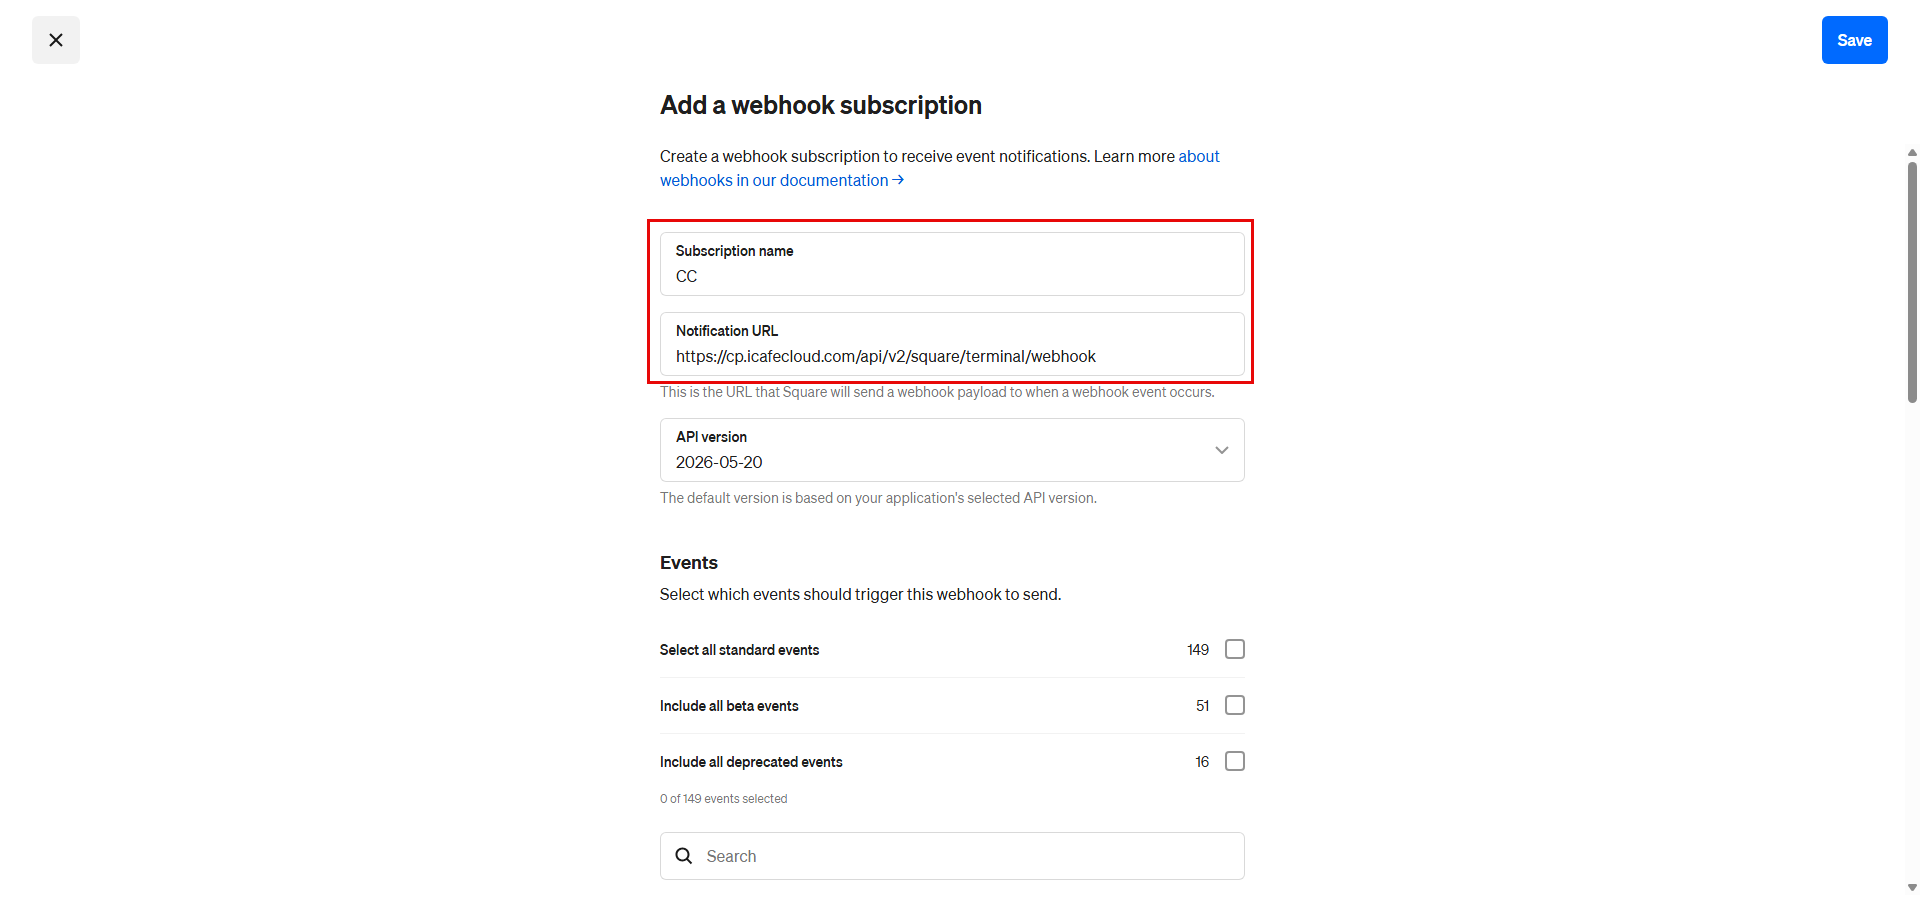
Figure 9
- Under Events, scroll down and find "terminal.checkout.updated," select it, then click "Save." (Figure 10)
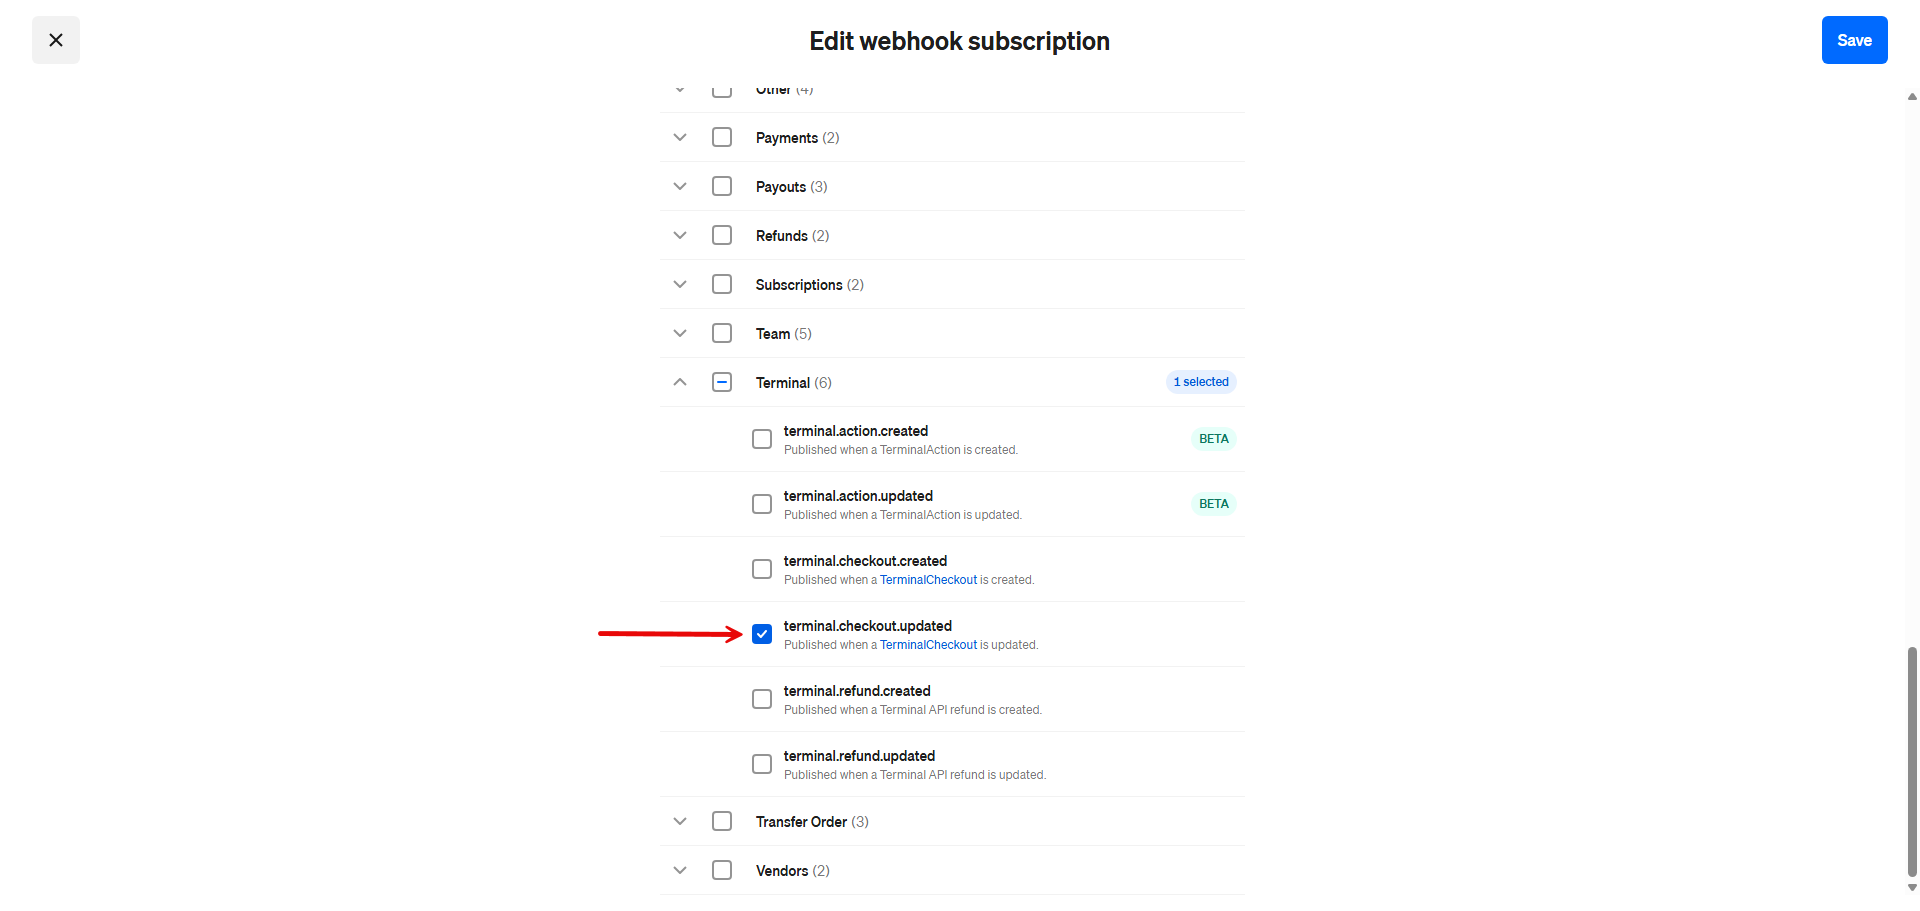
Figure 10
- In the Webhook Subscriptions list, click the subscription name (e.g., "CC") to open a side panel with its options. Find the Signature Key, copy it, and paste it into iCafeCloud.(Figure 11)
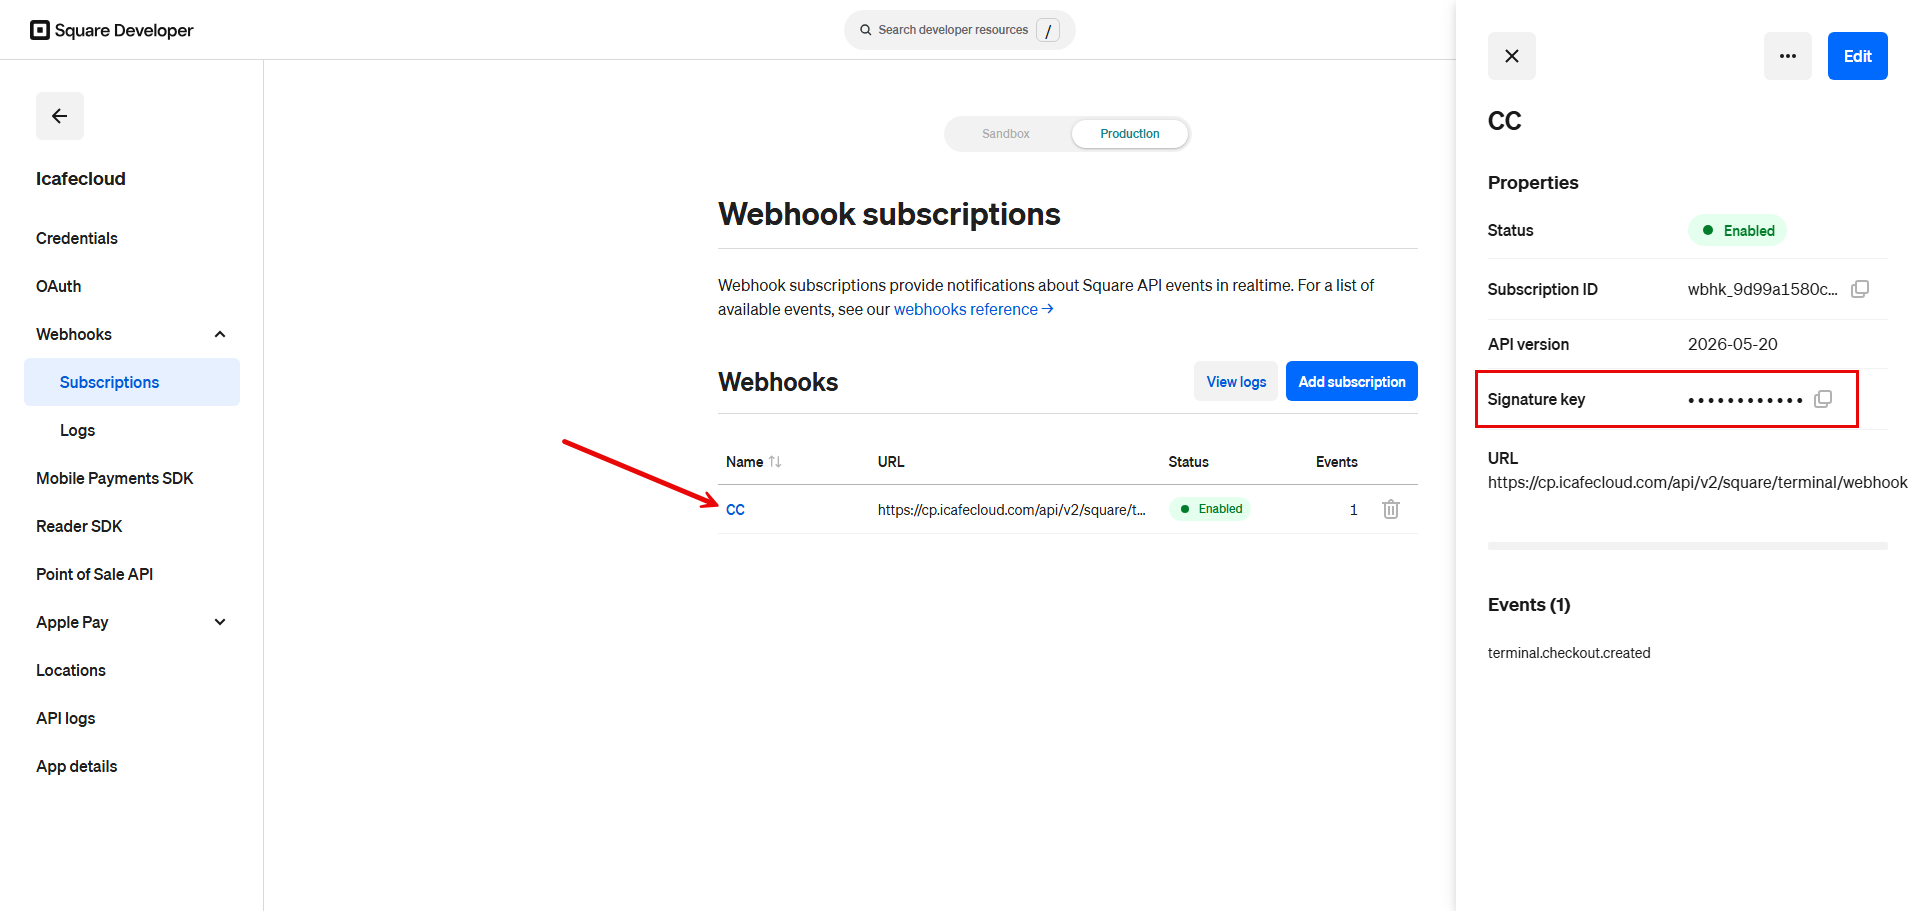
Figure 11
- For the Square currency, select USD or any other currency supported by Square. (Figure 12)
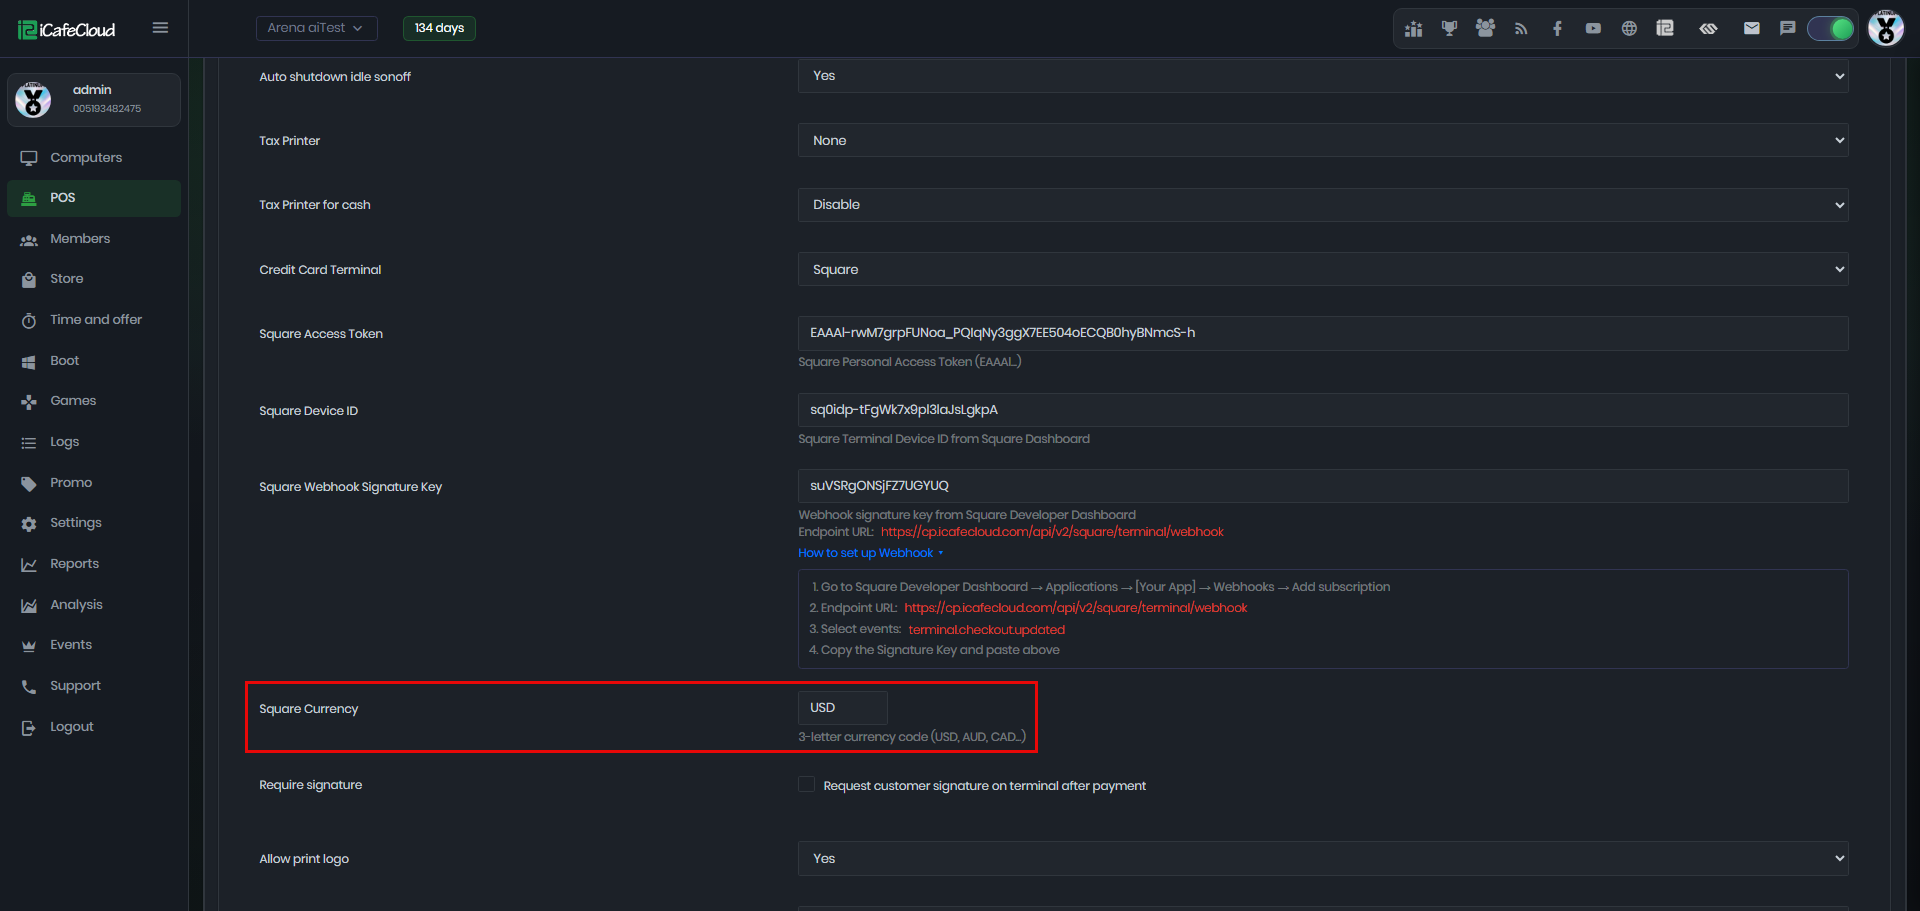
Figure 12
- You can enable or disable the "Require Signature" setting for Square credit card payments, depending on your preference. (Figure 13)
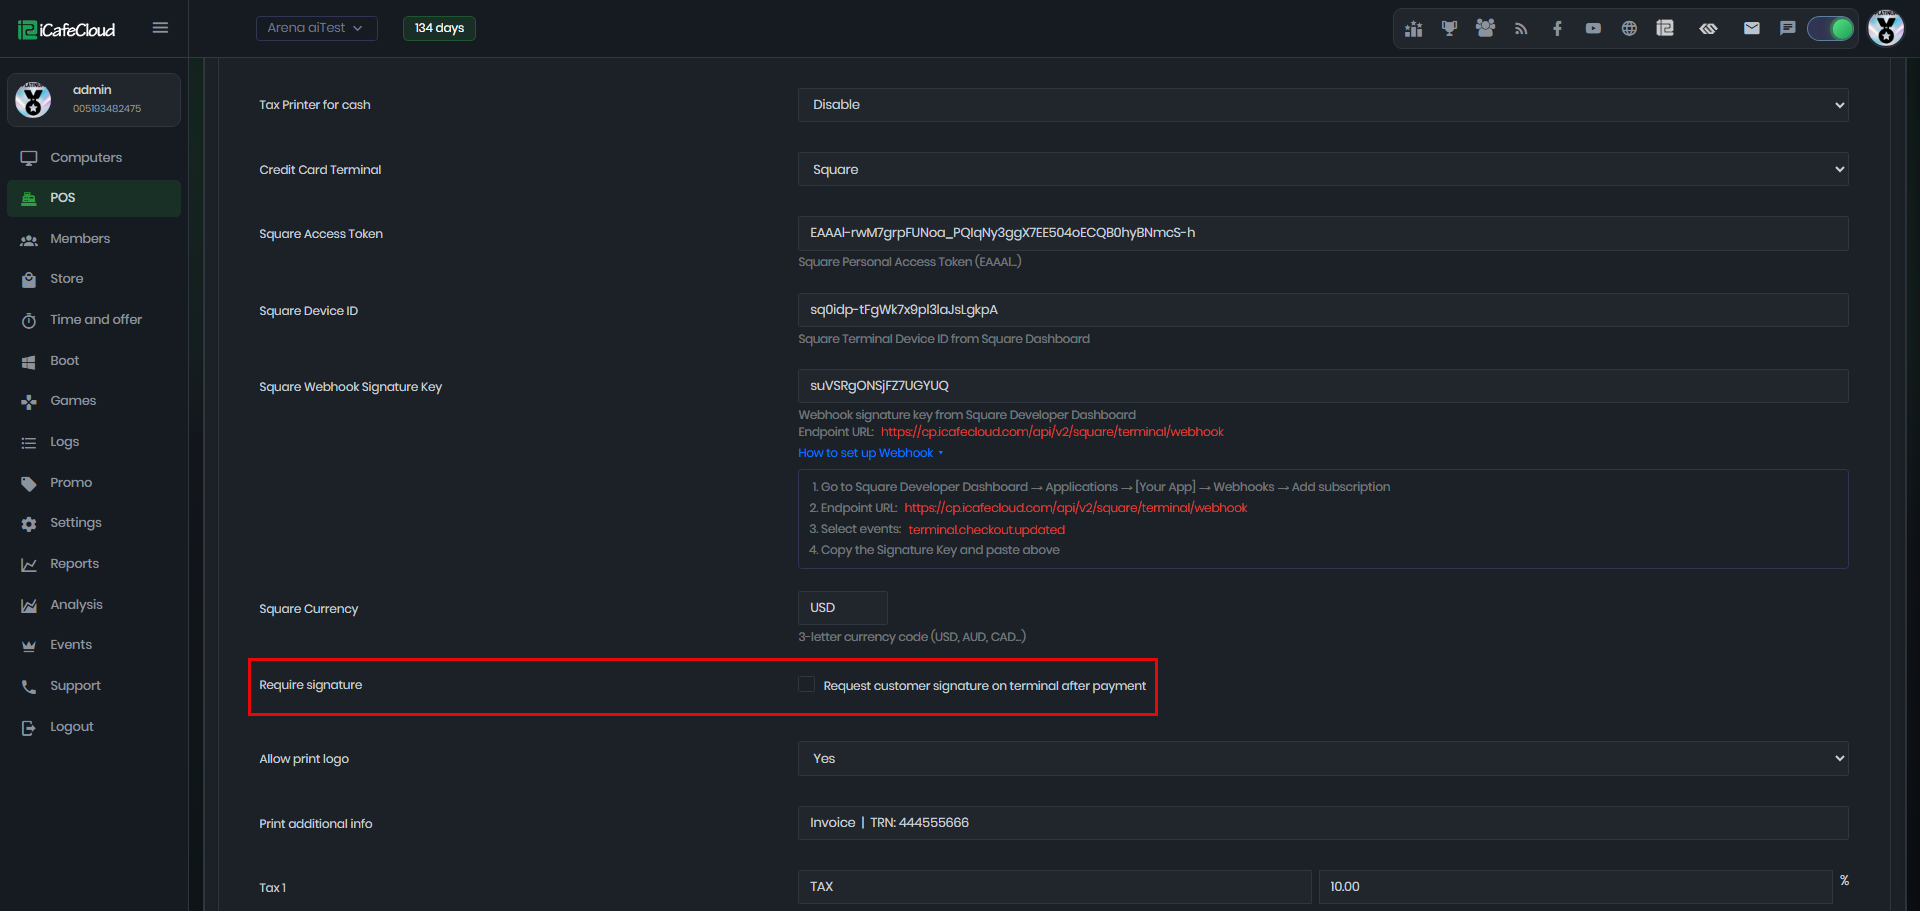
Figure 13
- Once you've filled in all the details, click "Save" to complete the integration successfully.