

The follwoing explains how to configure KKM Web to communicate directly with iCafeCloud. This setup allows KKM Web to receive commands and print tickets successfully without needing to be installed on the same physical PC as the iCafeCloud server.
- Download and install KKM server
- Navigate to POS → Settings, select KKM Web as the tax printer, and enter the local server URL in the KKM Server URL field. (Figure 1)
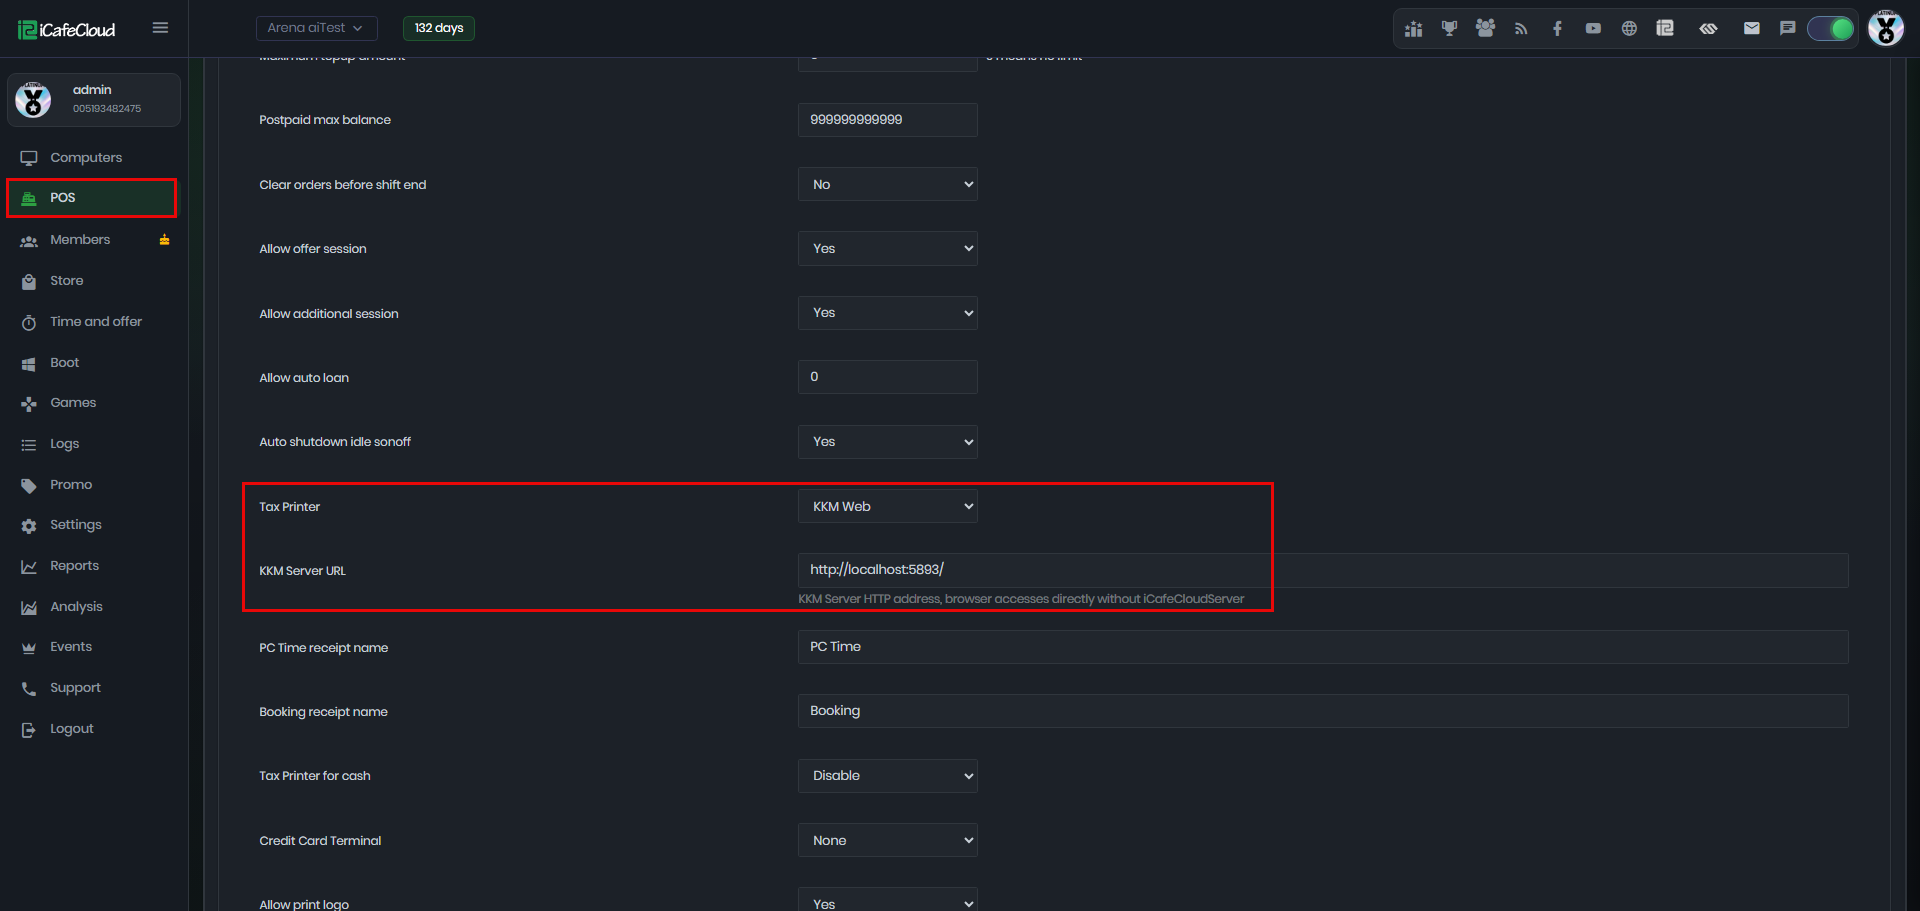
Figure 1
- You can find the KKM Server URL on the localhost page after running the KKM Web Server application. (Figure 2)
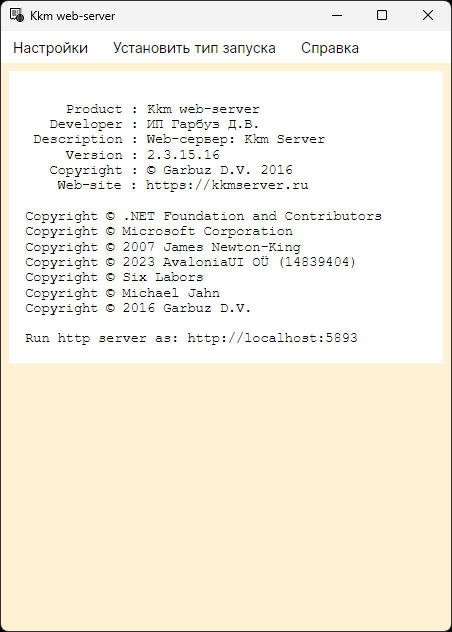
Figure 2
- Access the localhost URL http://localhost:5893/ and add a device. (Figure 3)
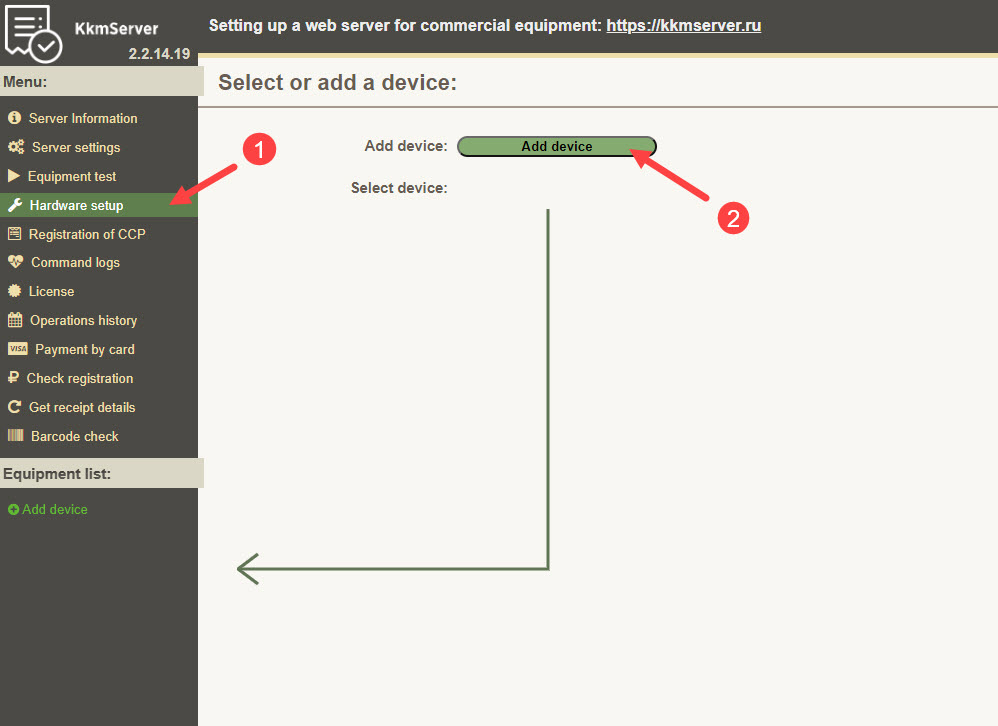
Figure 3
- Select from the option in the list as below and click “Add device” to finish the setup (Figure 4).
a) device type = fiscal register
b) device protocol = Atol , shtrih , evotor etc.
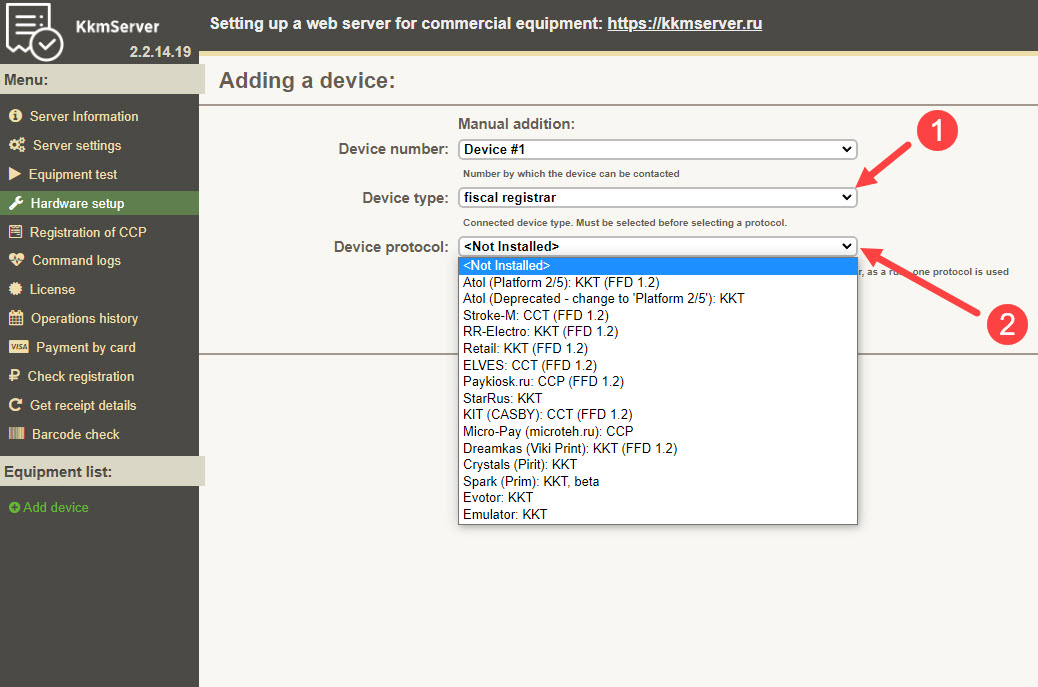
Figure 4
- Now, you will be able to see the hardware connected to the KkmServer in the “status”. If the connection is not successful, you can change the connection type based on your connection from the hardware to the KkmServer PC (Figure 5).
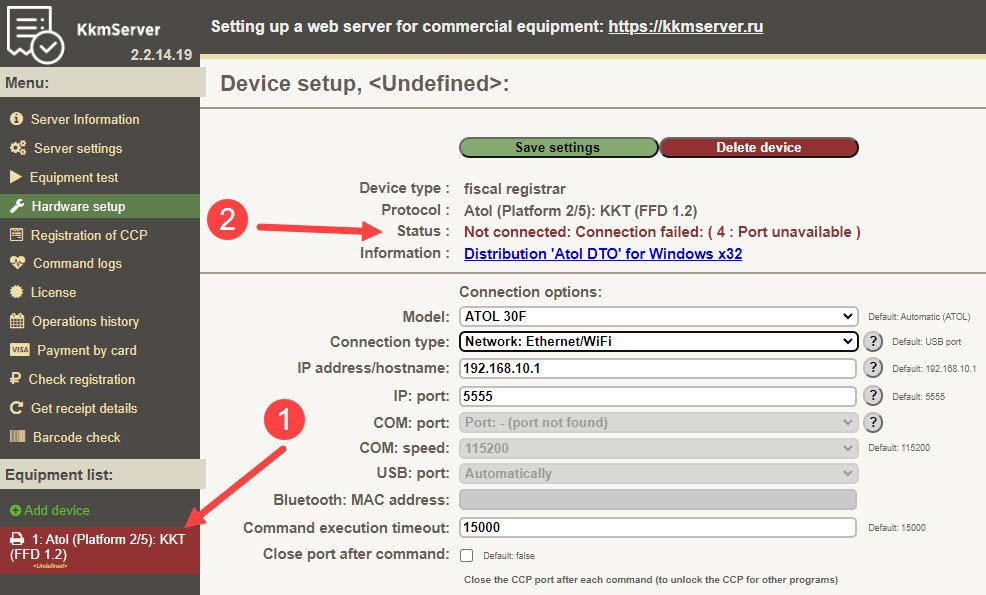
Figure 5
- KKM web works even if its not installed on same server as iCafeCloud
- Once an order is completed in the POS, it is automatically sent to the KKM for printing if the connection fails, the print will not be executed and the order will not be processed. (Figure 6)
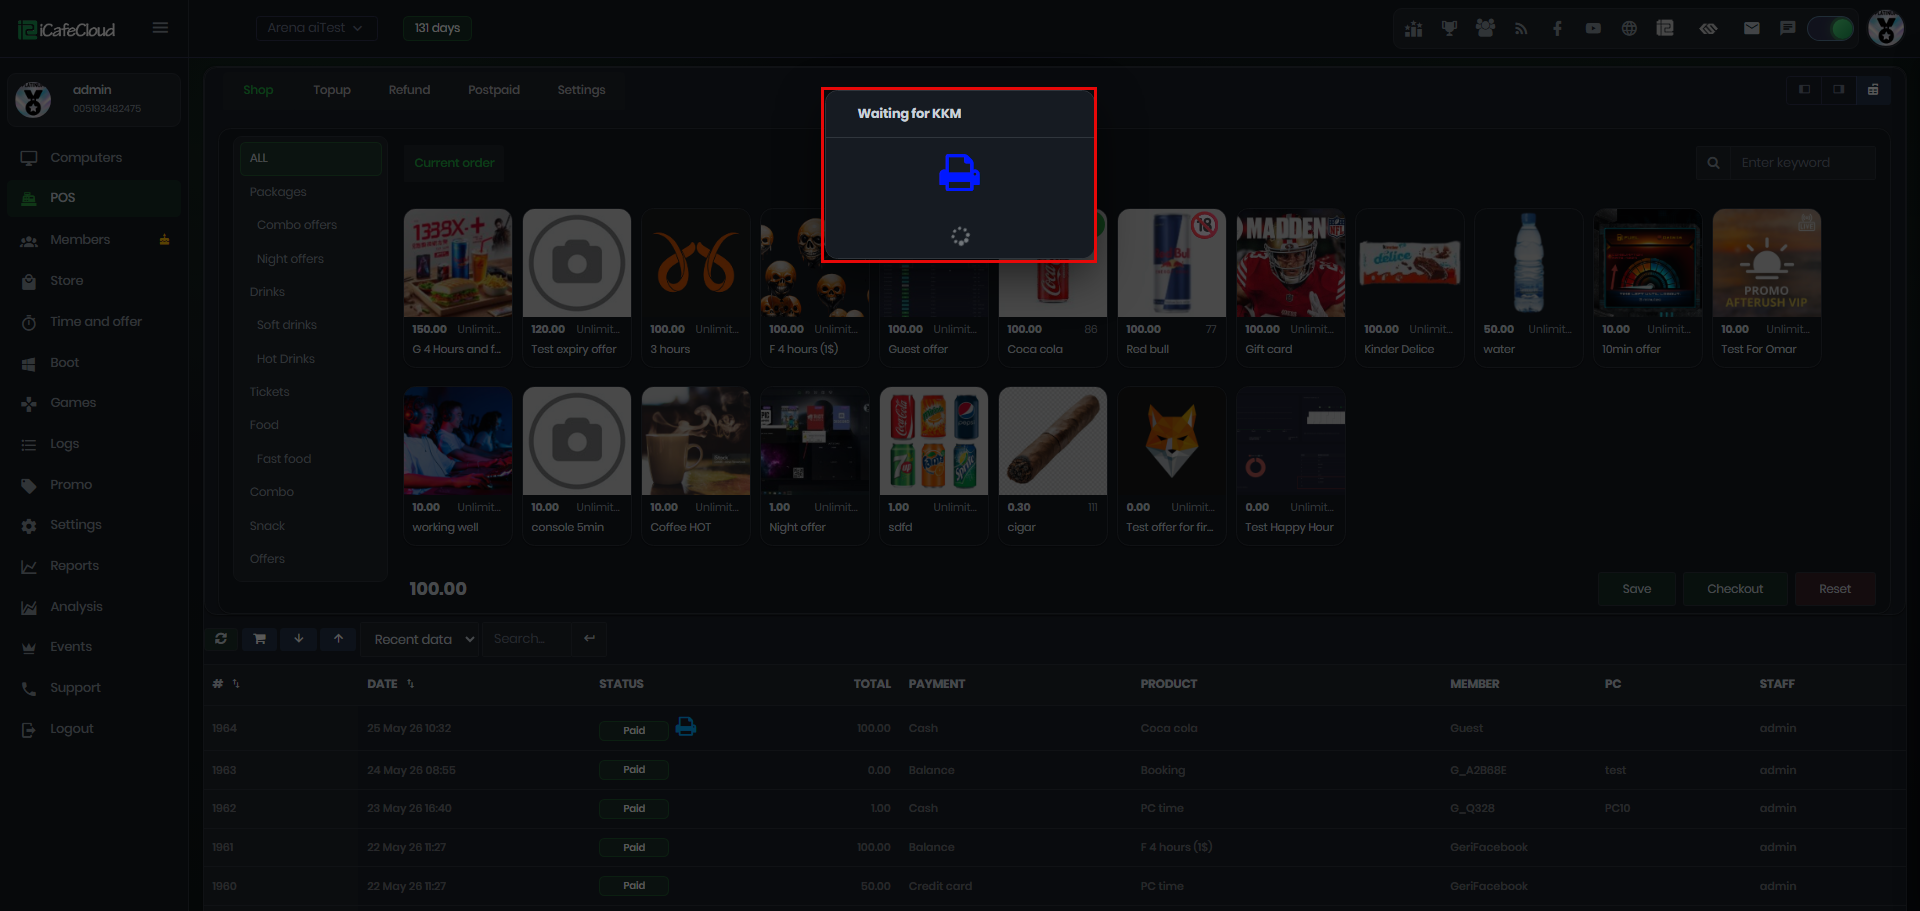
Figure 6
- Top-ups are also printed on the KKM receipt. However, adding bonus or points does not generate a KKM receipt.
- If the connection to KKM is successful, the system will automatically print a ticket. (Figure 7)
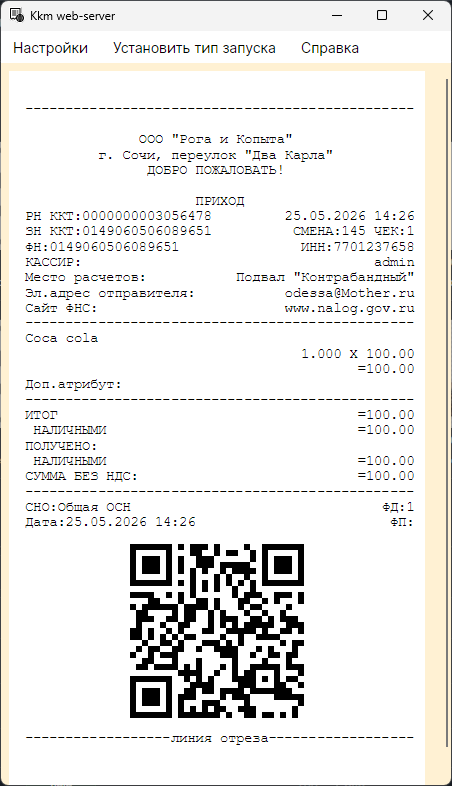
Figure 7
- Promo code discounts are also displayed on the printed KKM receipt, allowing customers to see the discount applied to their purchase.
- Orders sent from KKM will display a printer icon next to the “Paid” status. (Figure 8)
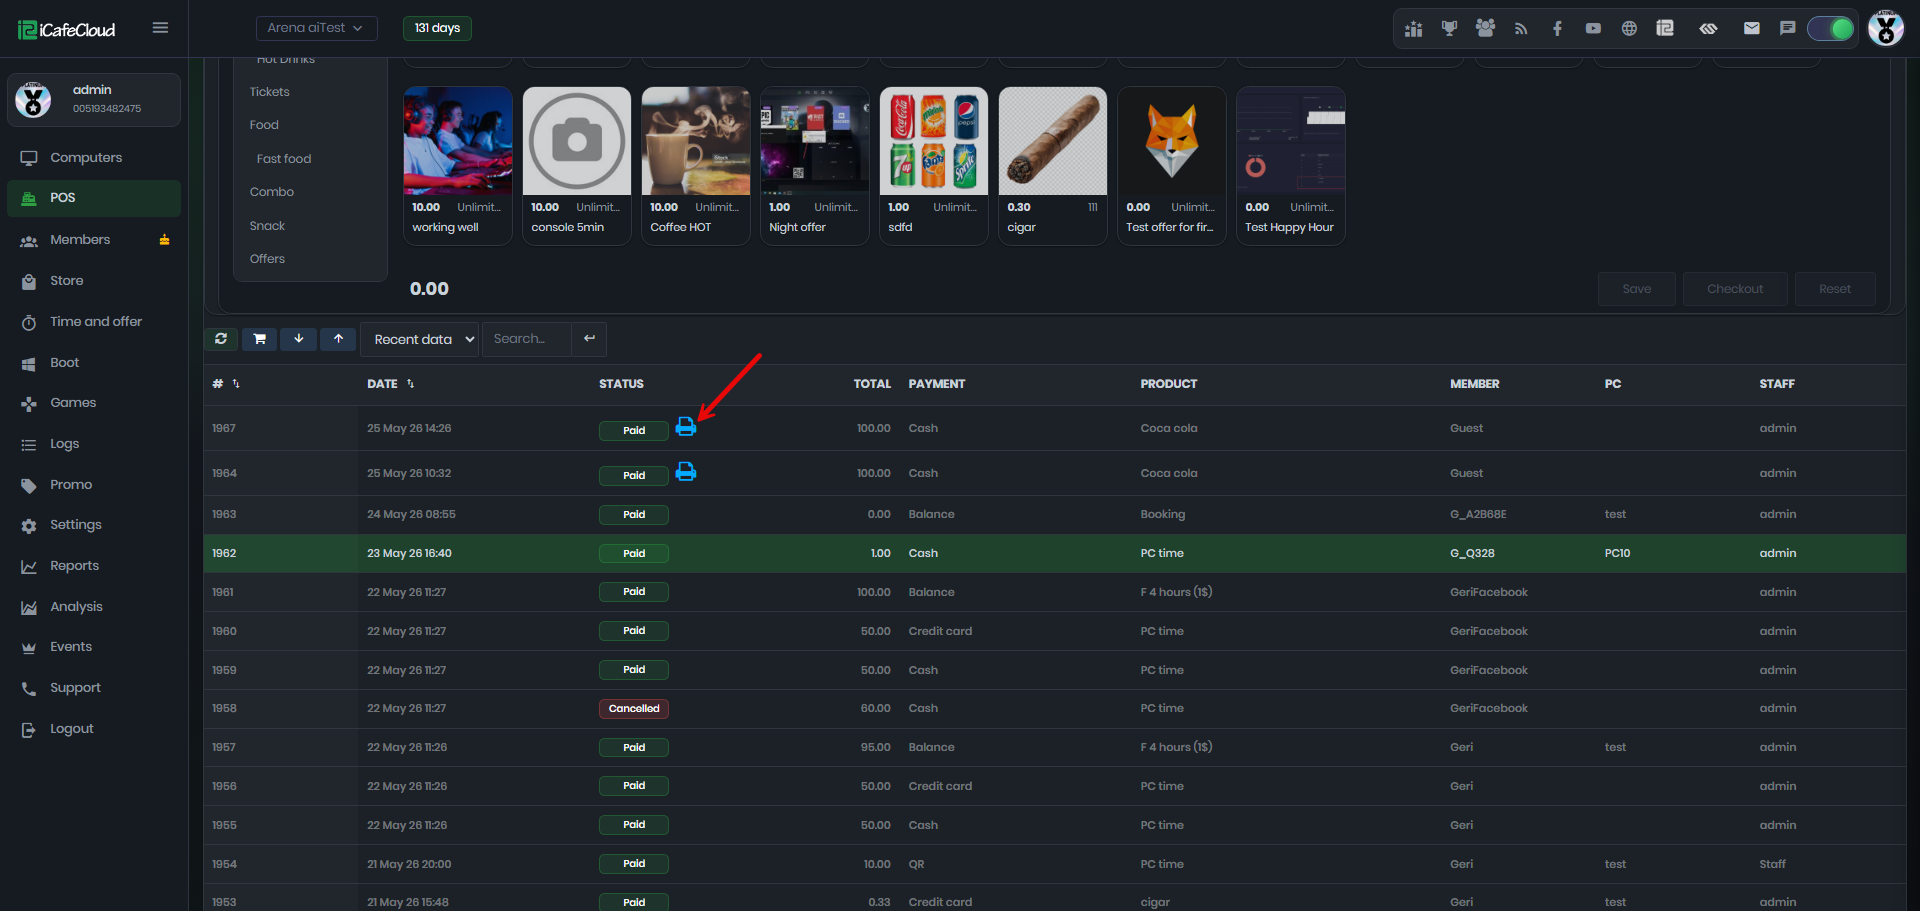
Figure 8
- "X reports" are accessible on-demand at any time for administrators and staff members to review current performance. (Figure 9)
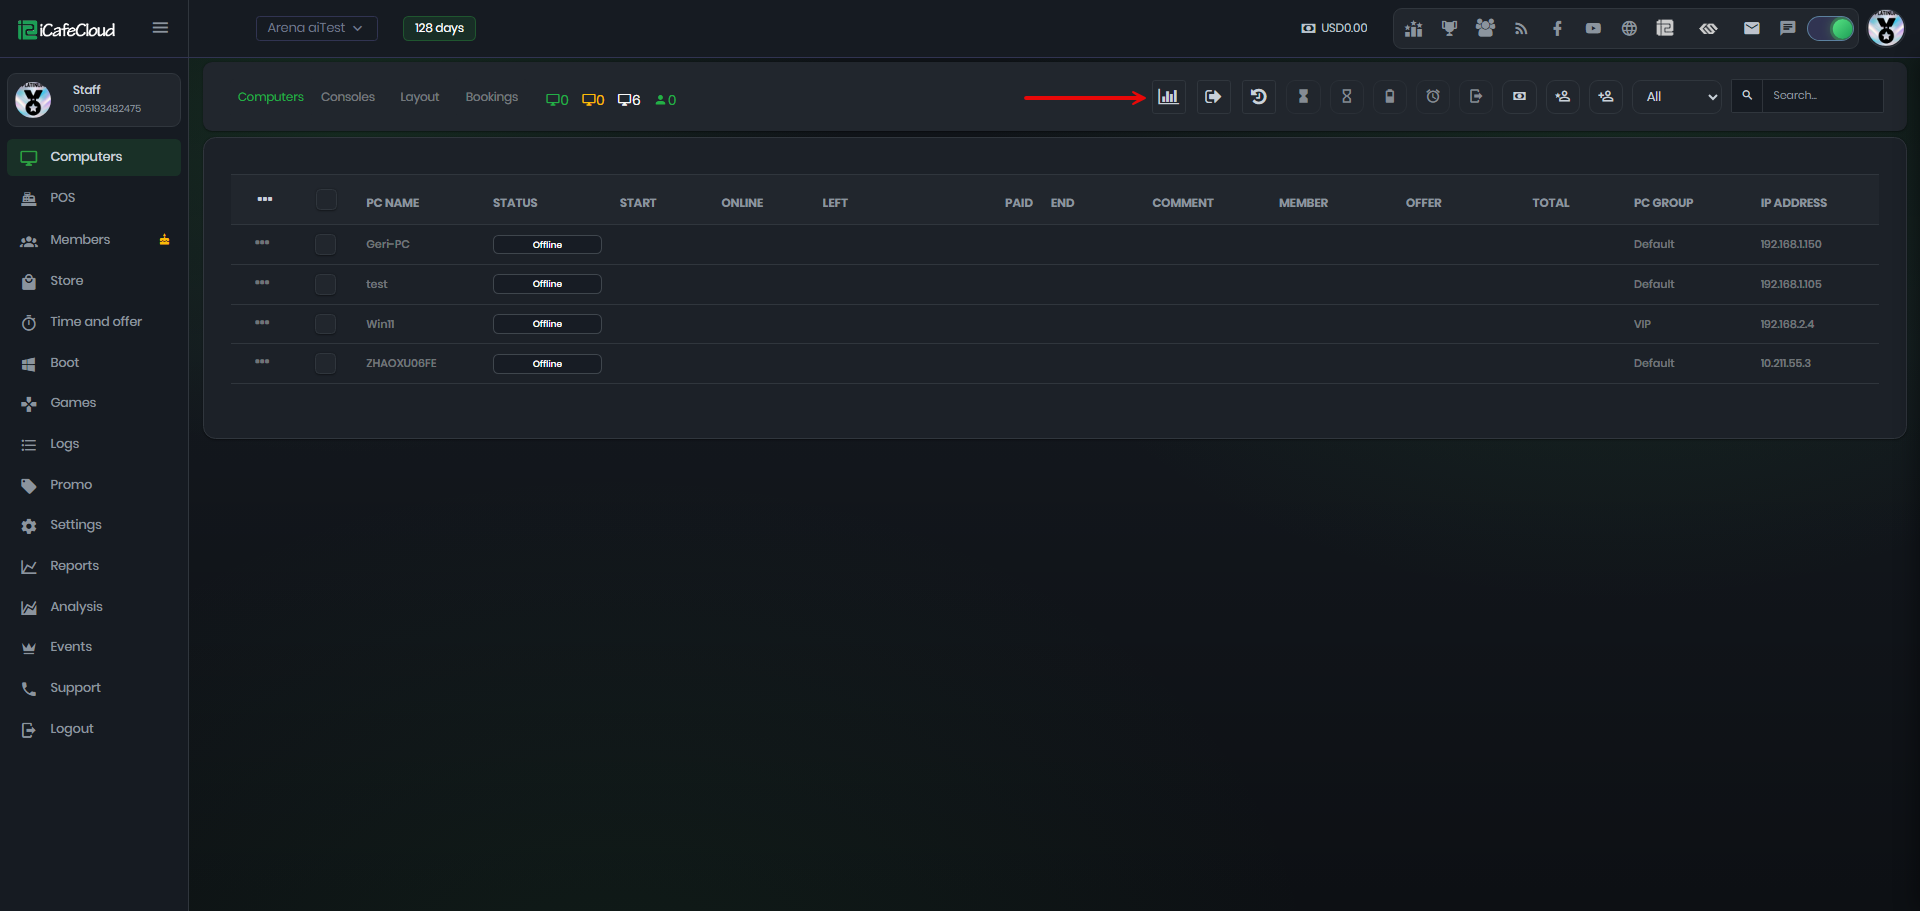
Figure 9
- Clicking the X Report button automatically triggers a print job via the KKM web service and displays the report on-screen as shown below (Figure 10)
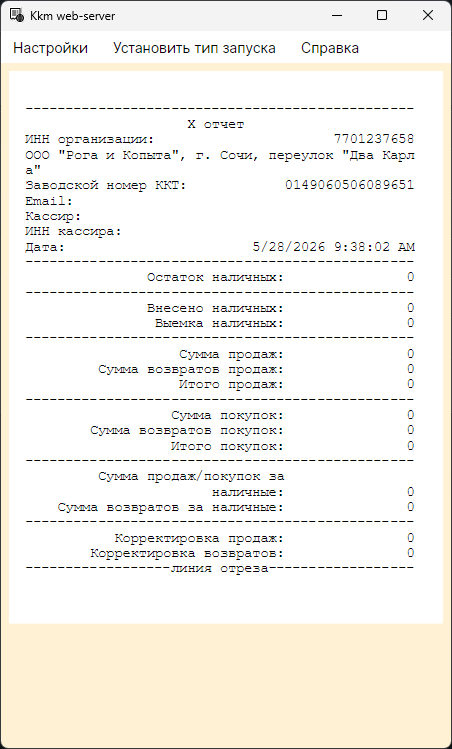
Figure 10