

The following explains how to set up email verification codes in iCafeCloud. Once enabled, iCafeCloud can send verification codes by email, for example when members reset their password. You will turn on the feature, choose your email provider, enter your SMTP details, create an app password in your Google account, and send a test email to confirm that everything works.
- Go to Settings > QR and SMS, then set Email verification code to Yes (Figure 1).
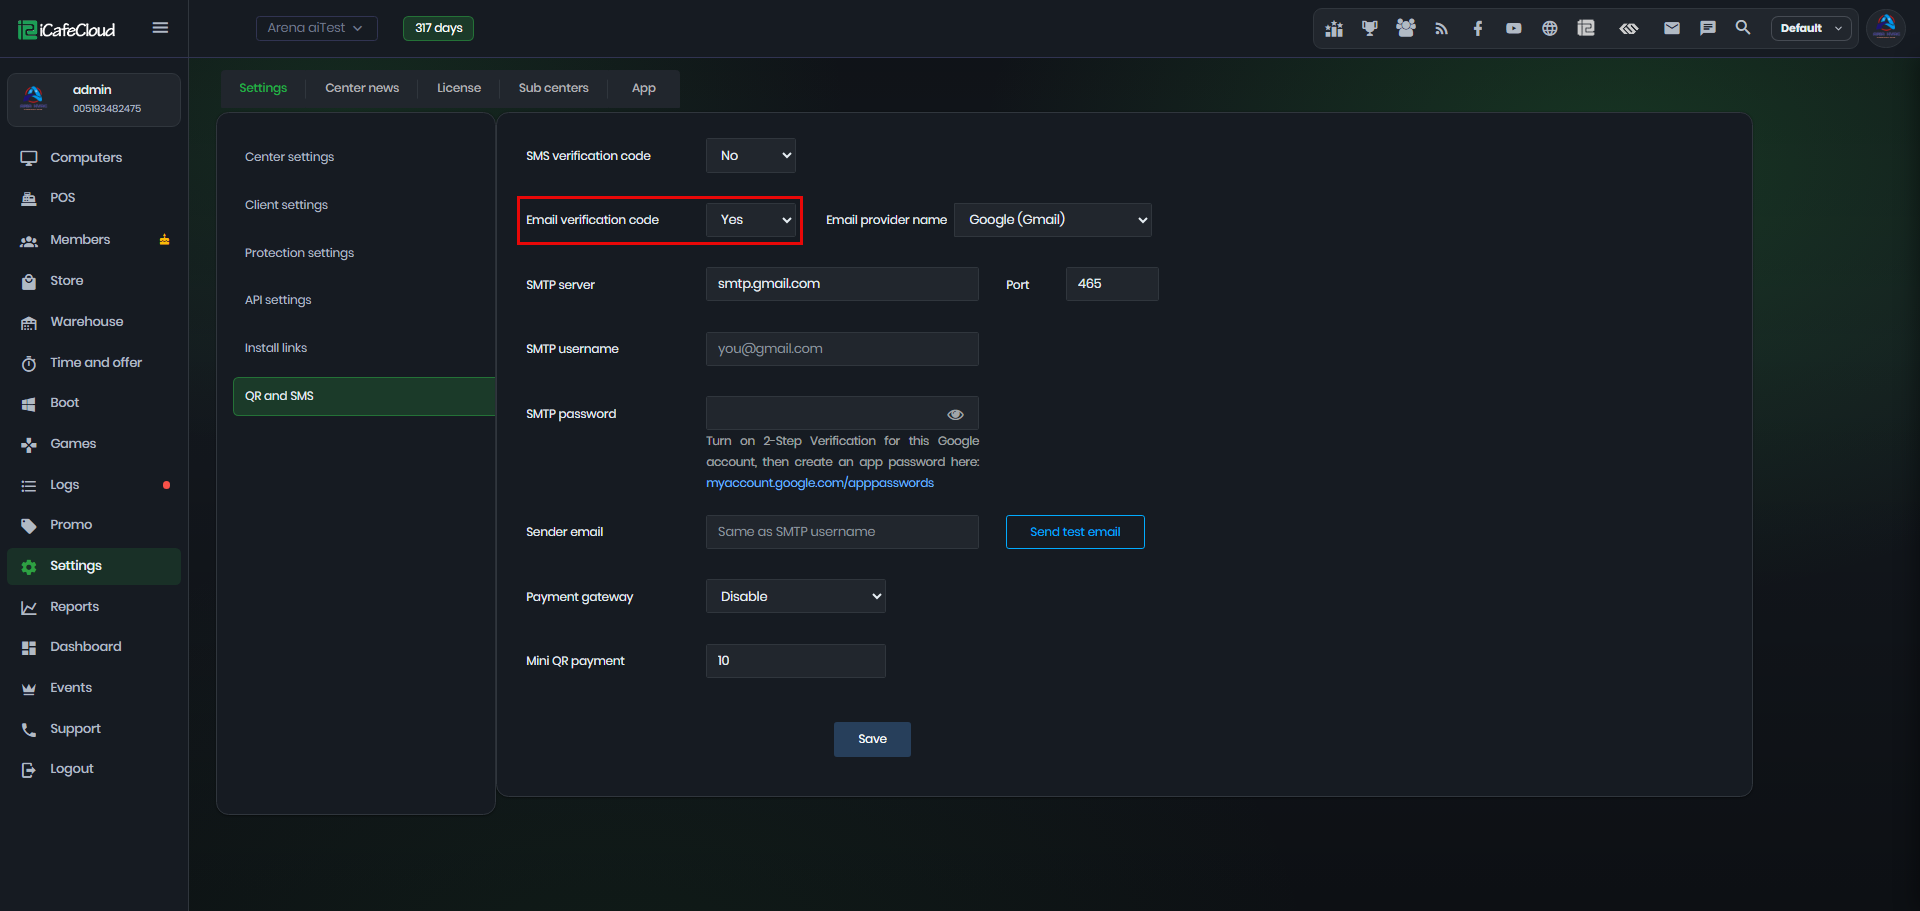
Figure 1
- In the Email provider name drop-down list, select your email provider, for example Google (Gmail) (Figure 2).
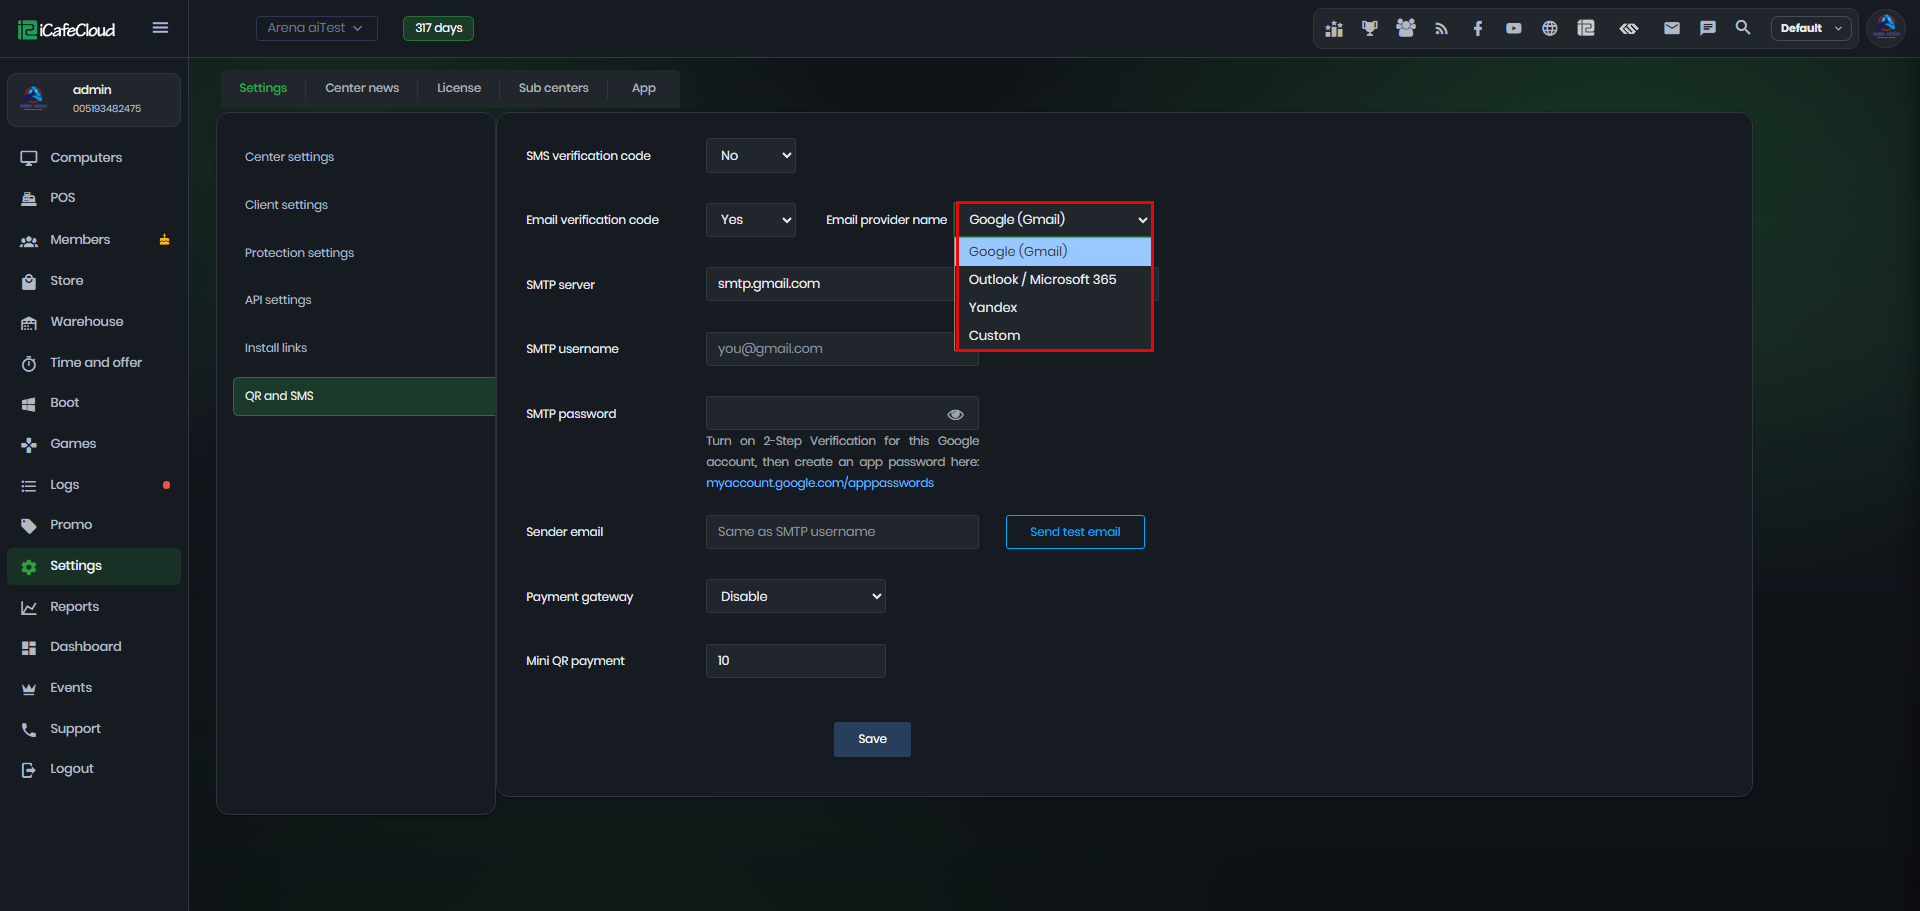
Figure 2
- The SMTP server and Port fill in automatically for the listed providers, so leave them unchanged. For a different provider, select Custom and enter your own SMTP server and port (Figure 3).
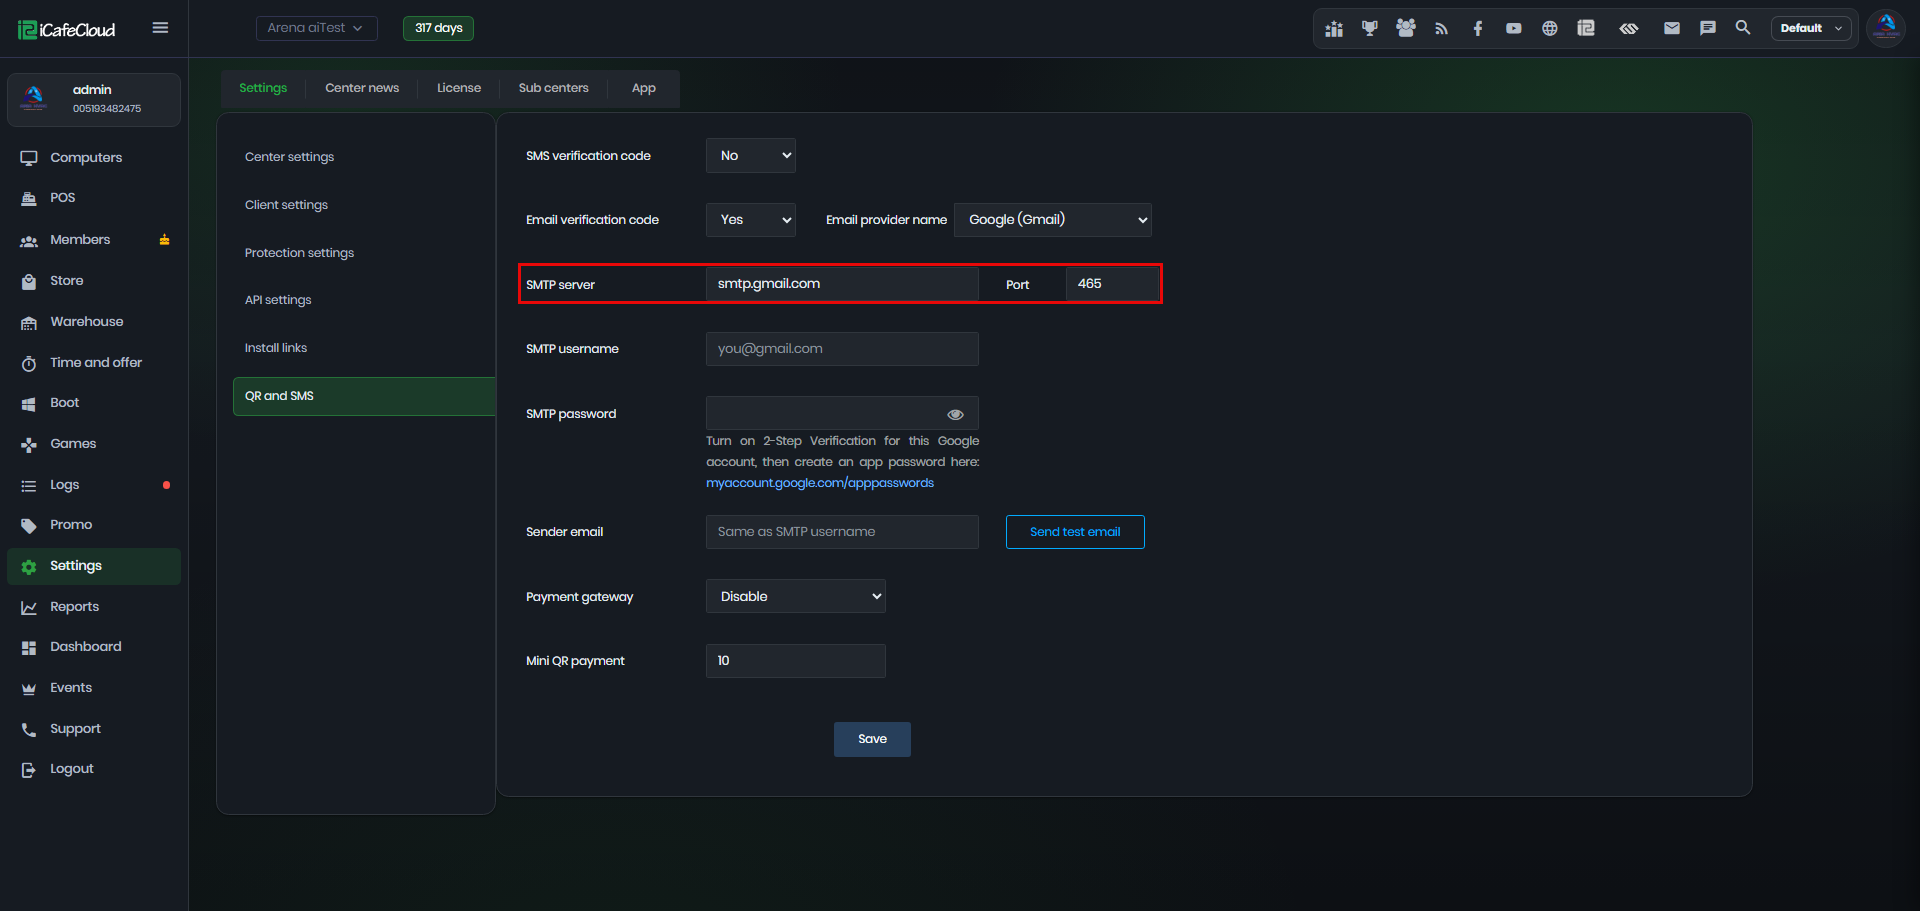
Figure 3
- In the SMTP username field, enter the email address that iCafeCloud will use to send verification codes (Figure 4).
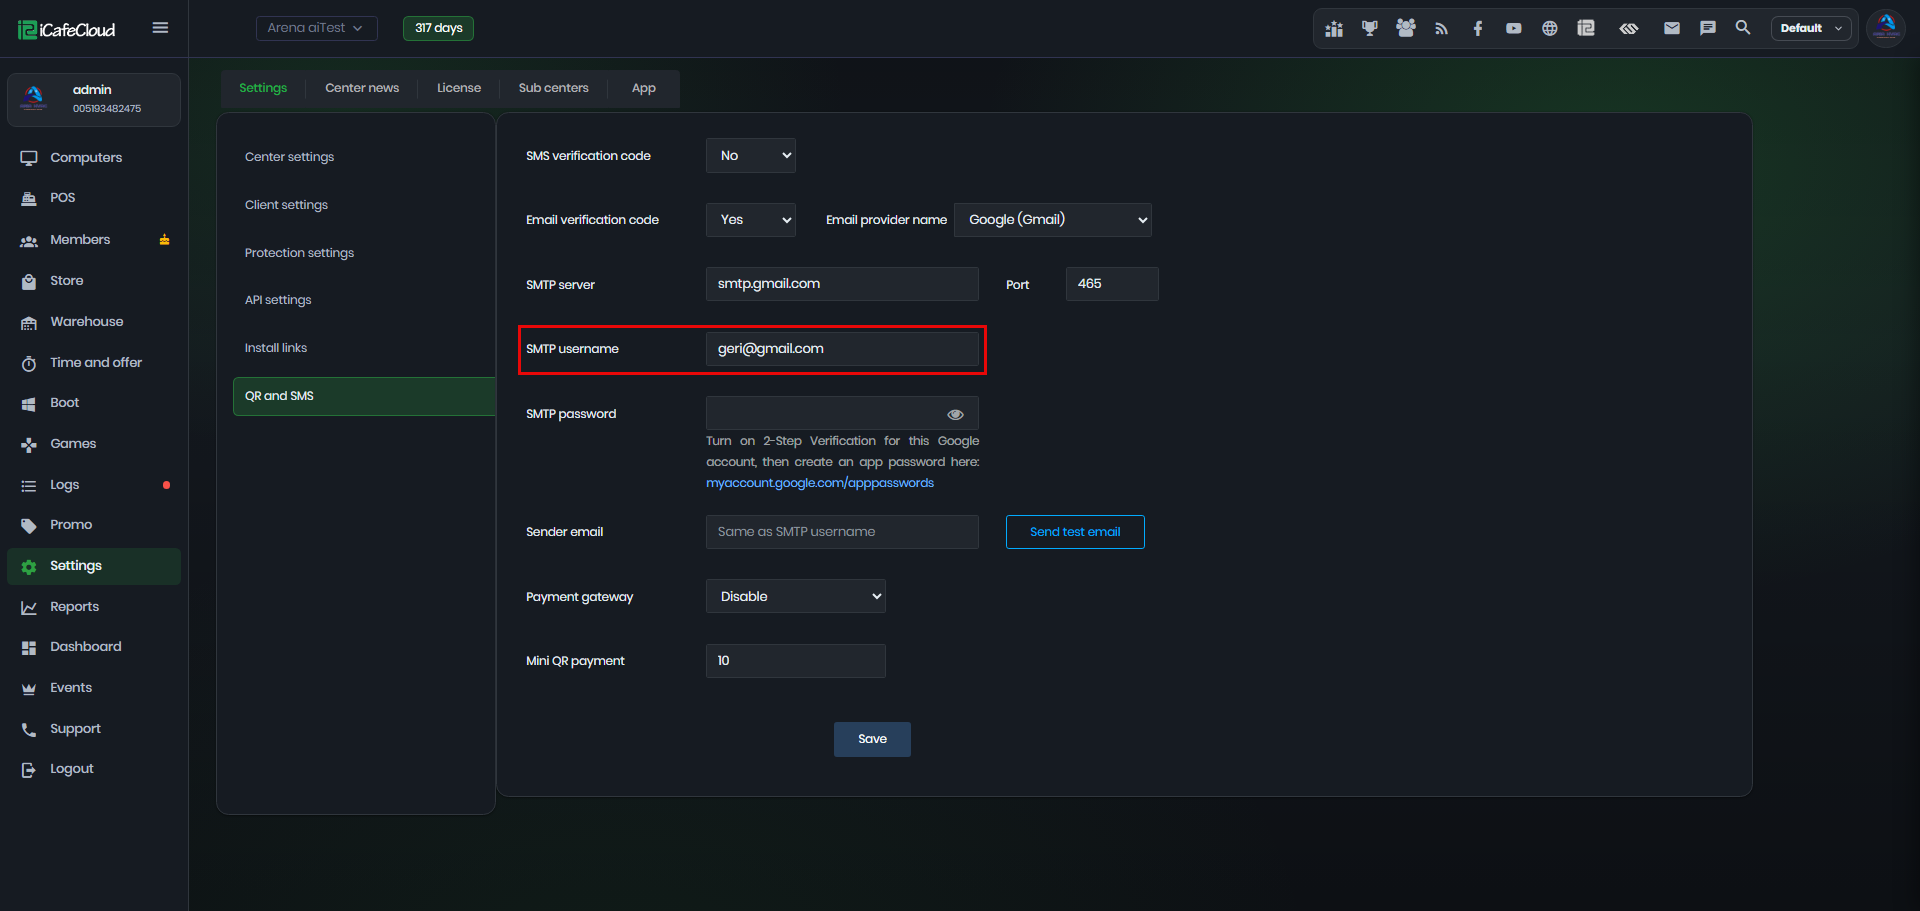
Figure 4
- Before entering the password, open myaccount.google.com/apppasswords and sign in to your Google account to create an app password (Figure 5).
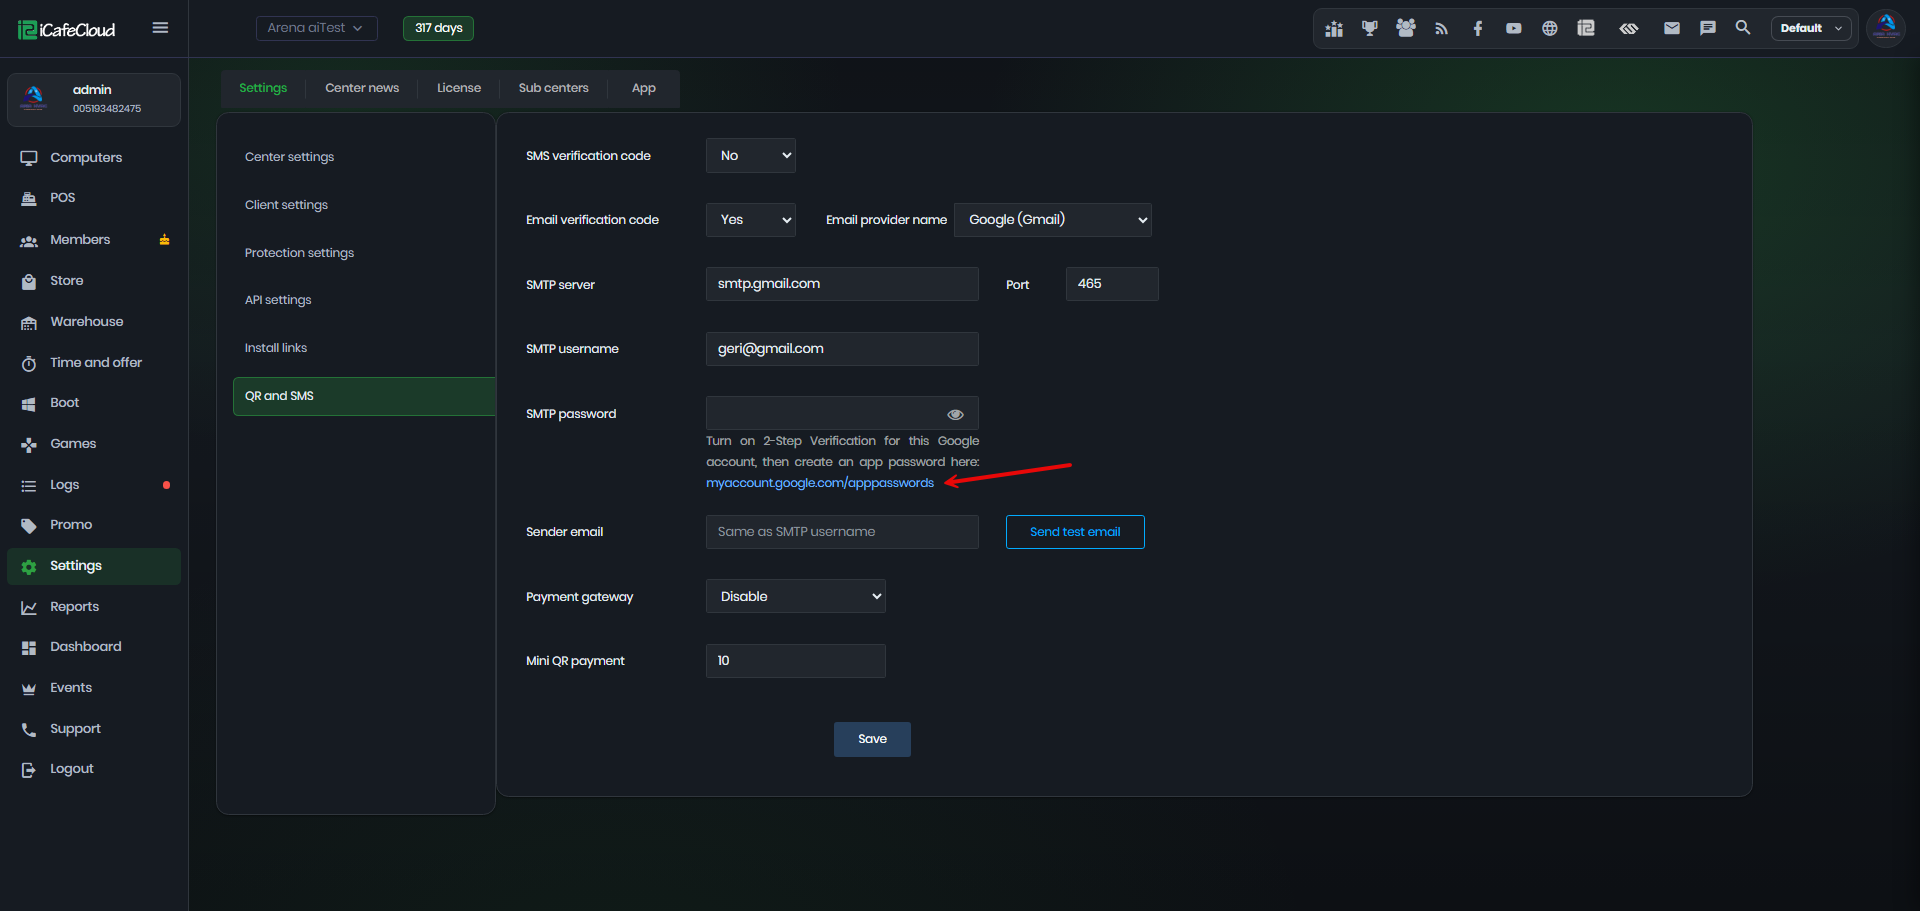
Figure 5
- Once you’re signed in, type a name for the app (for example, iCafeCloud) in the App name field, then click Create (Figure 6).
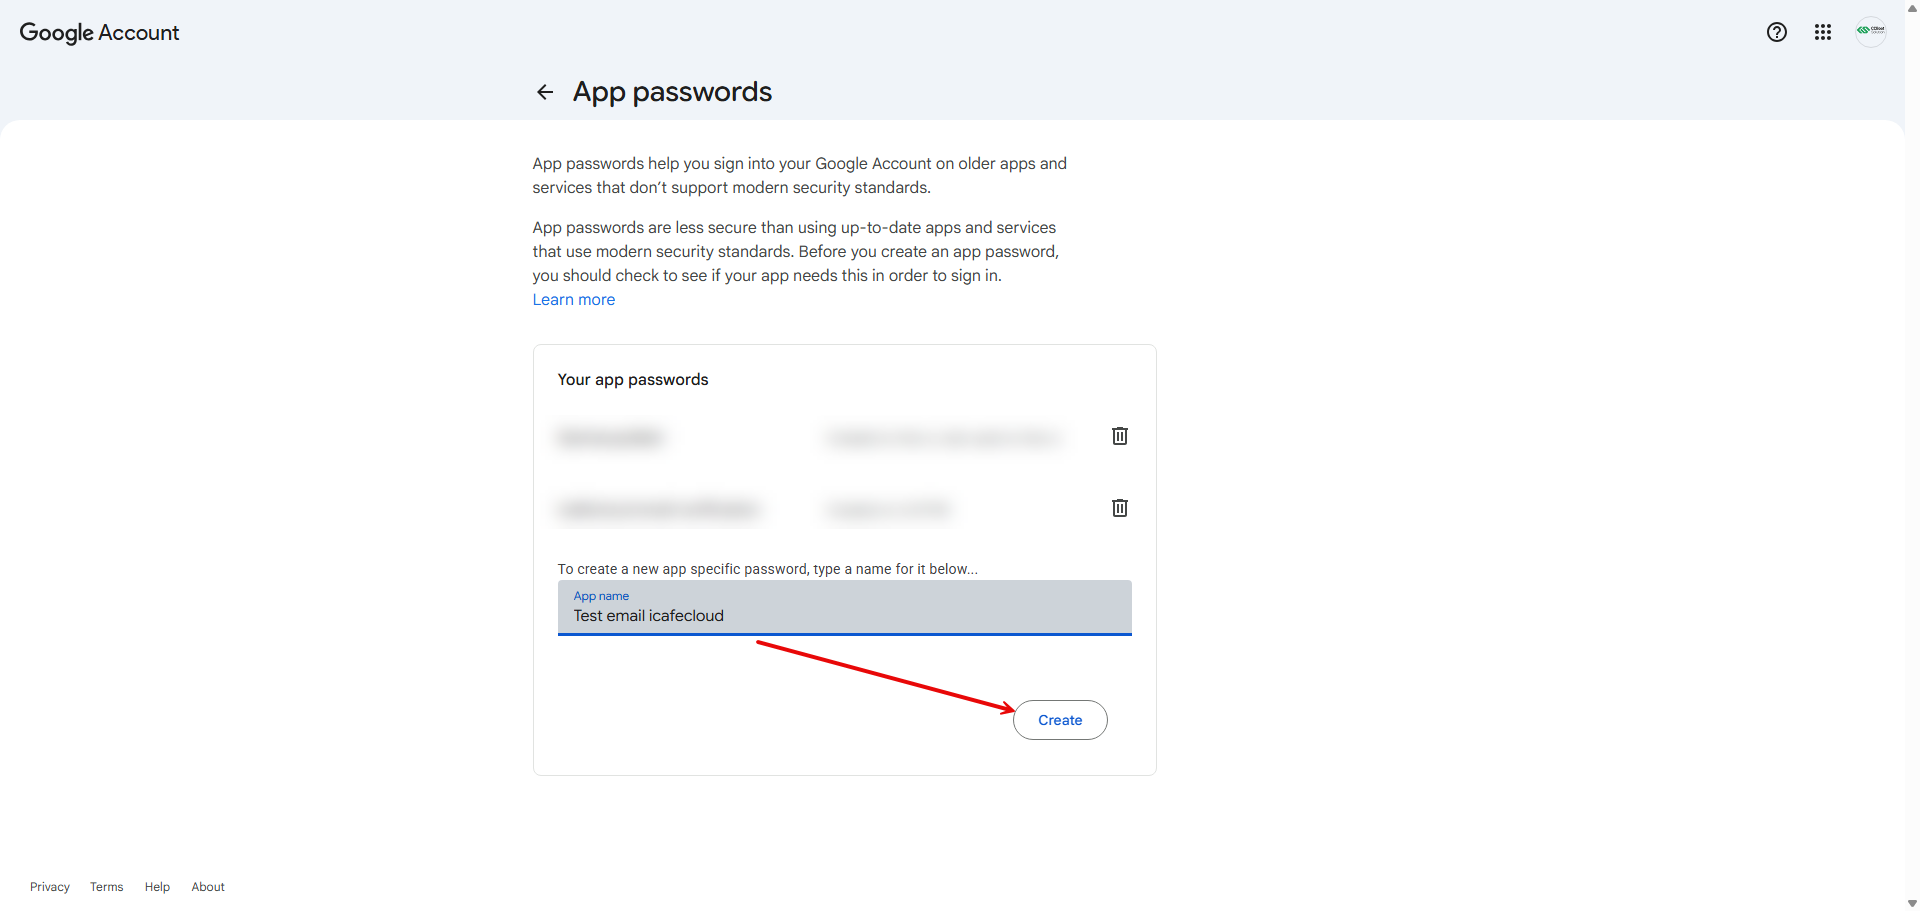
Figure 6
- A pop-up window will appear with a 16-character app password. Copy it and paste it into the SMTP password field in iCafeCloud (Figure 7).
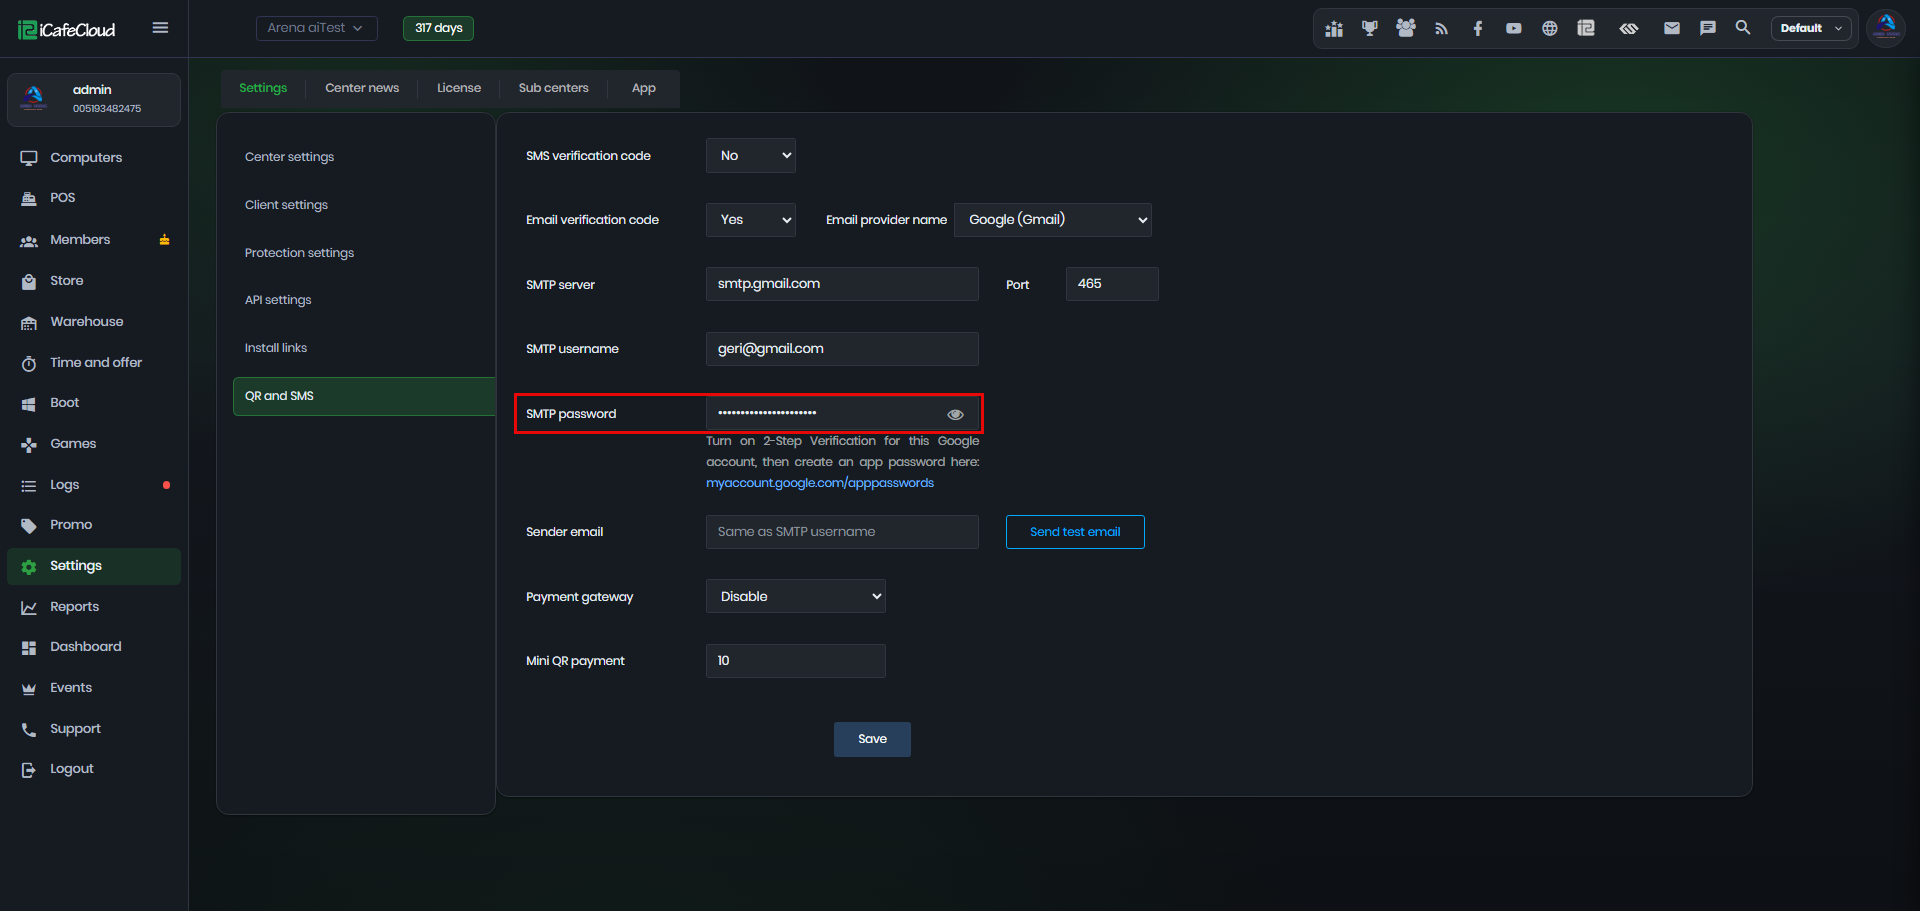
Figure 7
- Finally, enter the Sender email address and click Send test email to confirm the setup works (Figure 8).
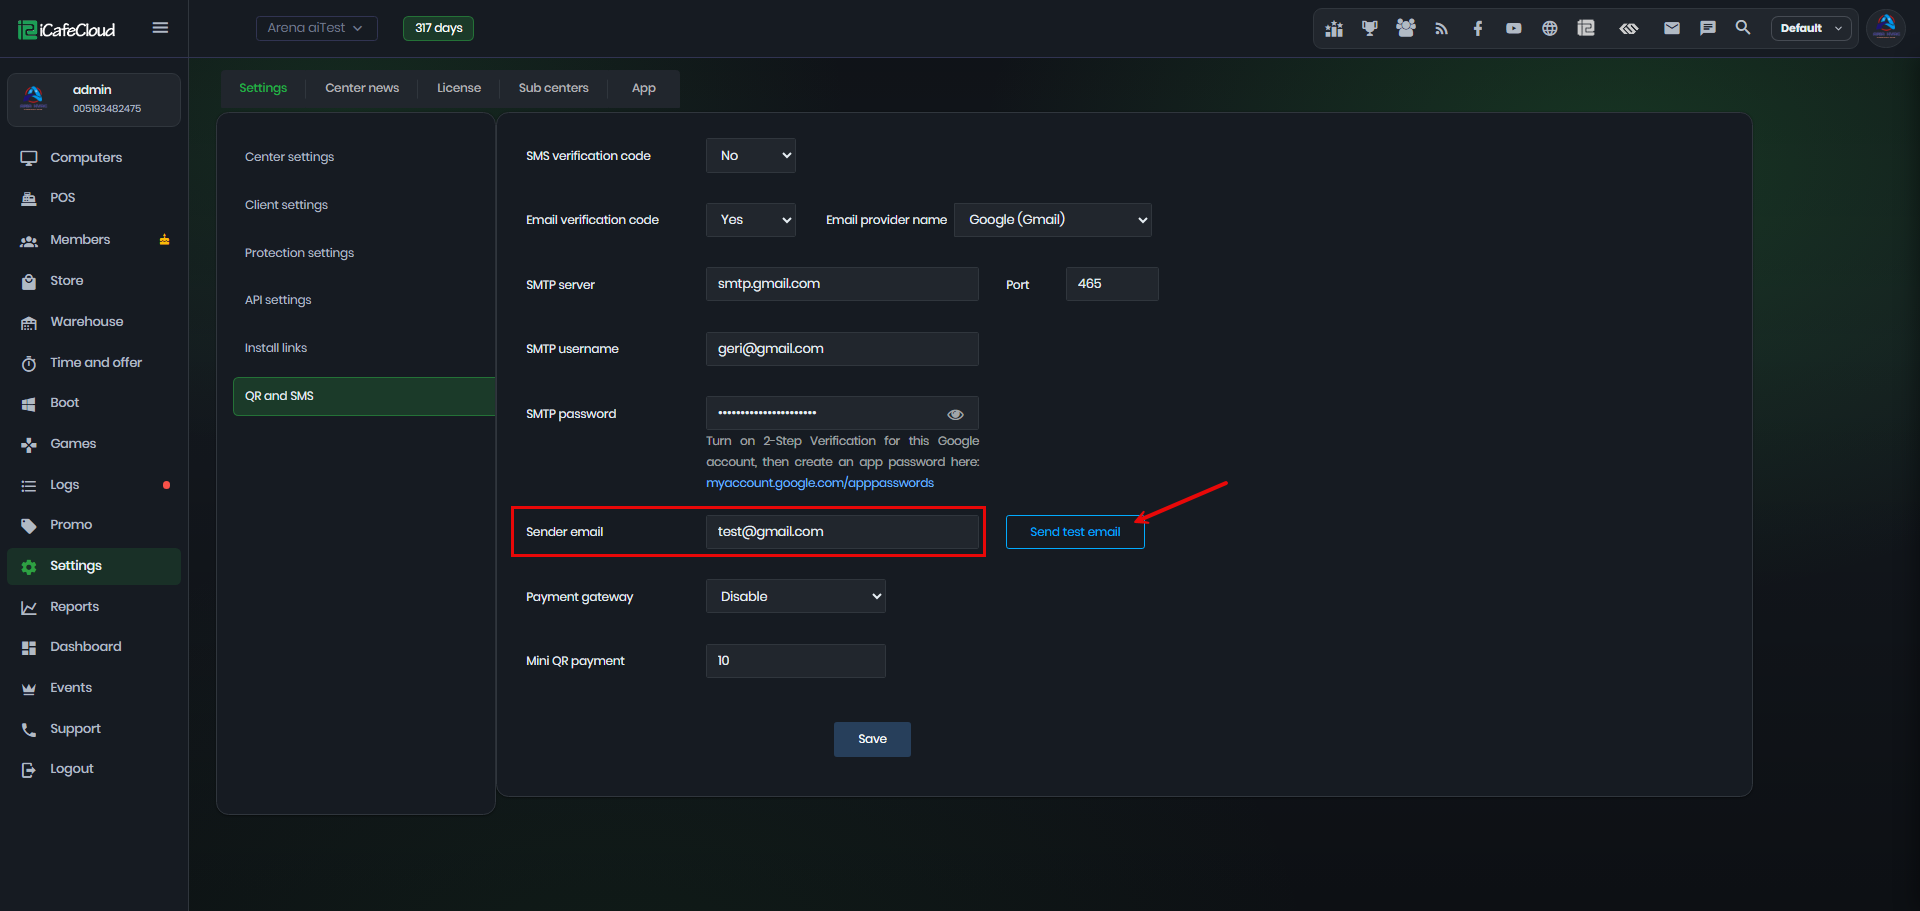
Figure 8
- A test email will be sent to the address you entered. Check that it arrives in your inbox. (Figure 9)
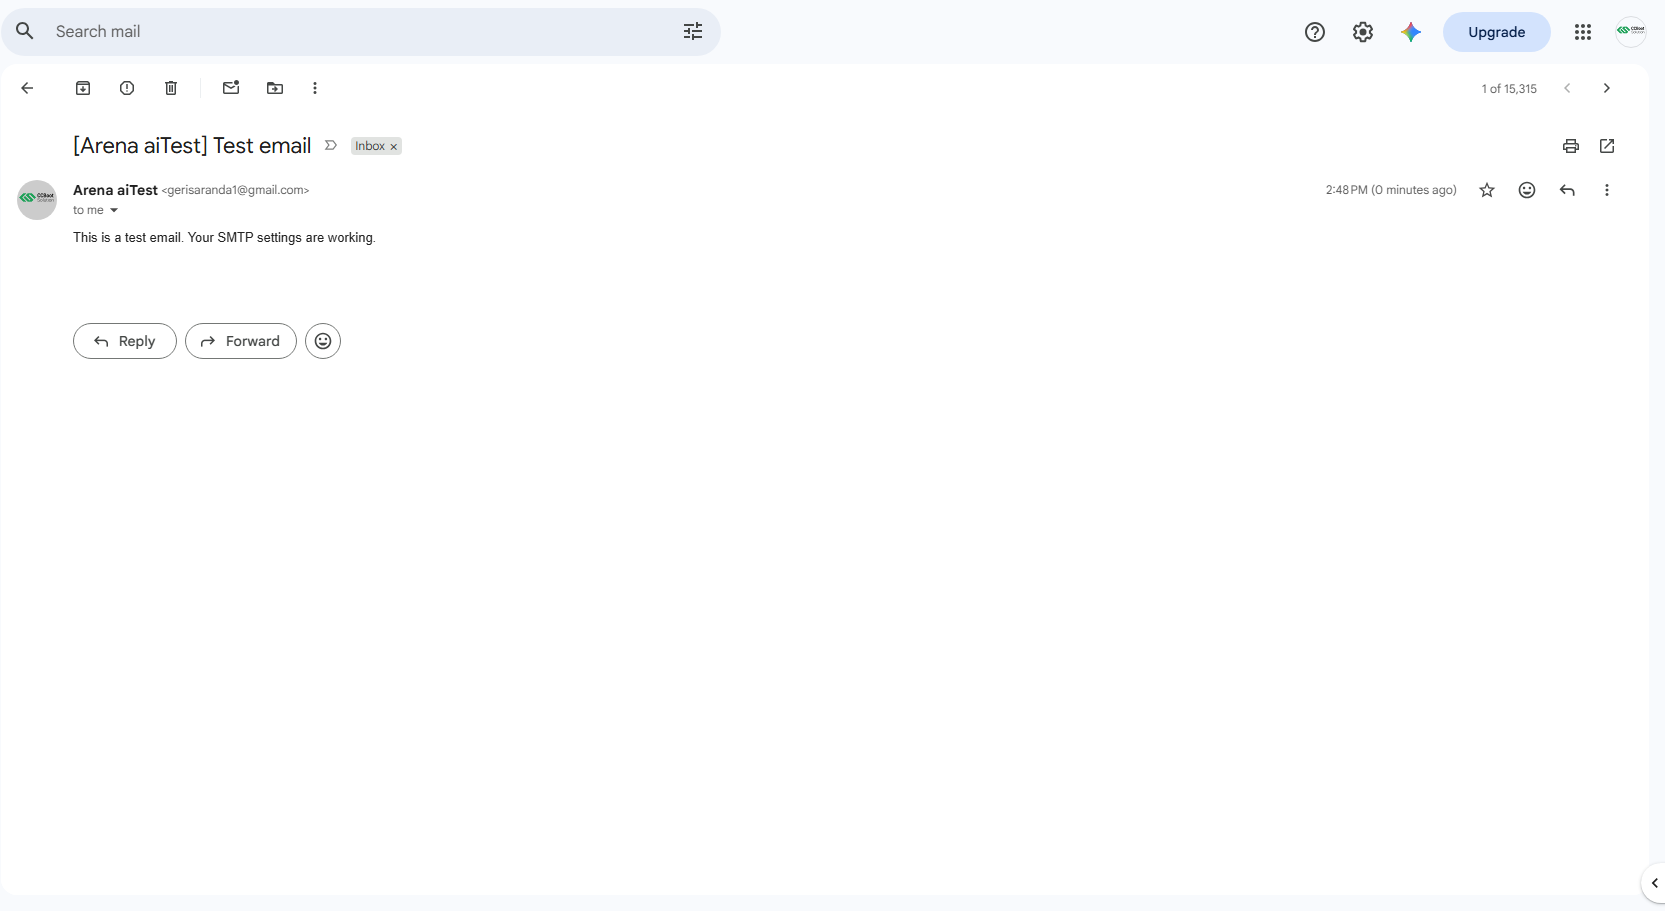
Figure 9